
Holo-Setup-Deploy-Console
Holodeck Pod Deployment
Overview
This section details the deployment of the Holo-Console VM.
Prerequisites
The previous tasks must have been completed successfully.
Task 1: Deploy Holo-Console
The following steps are performed to bring up a unique instance of Holo-Console. These instructions show the deployment of a Holo-Console called Holo-Console-A. As other Holo-Consoles may need to be deployed to support additional Holodeck pods, the names for the Holo-Console VMs will vary.
[Step 1] Deploy Holo-Console
- On the vSphere Client, click Virtual Machines Create/Register VM

- Select Create a new virtual machine
- Click Next
- Set VM Name. This example uses the name Holo-A-Console
- Set the Guest OS Family to Windows and the Guest OS Version to Microsoft Windows Server 2019 (64-bit)
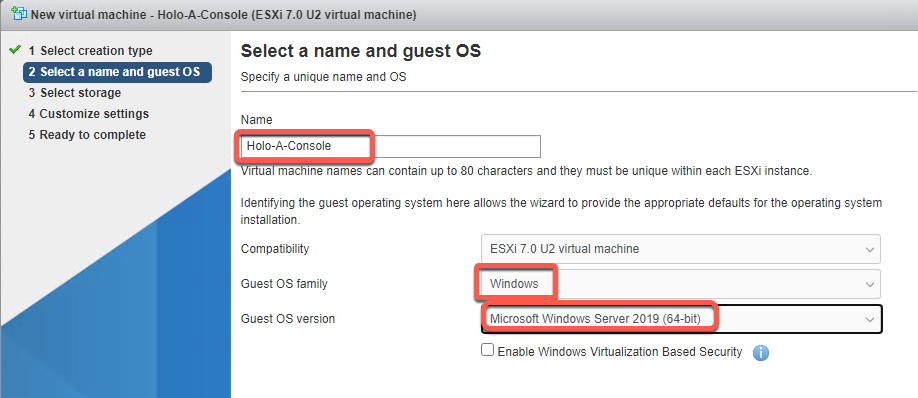
- Click Next
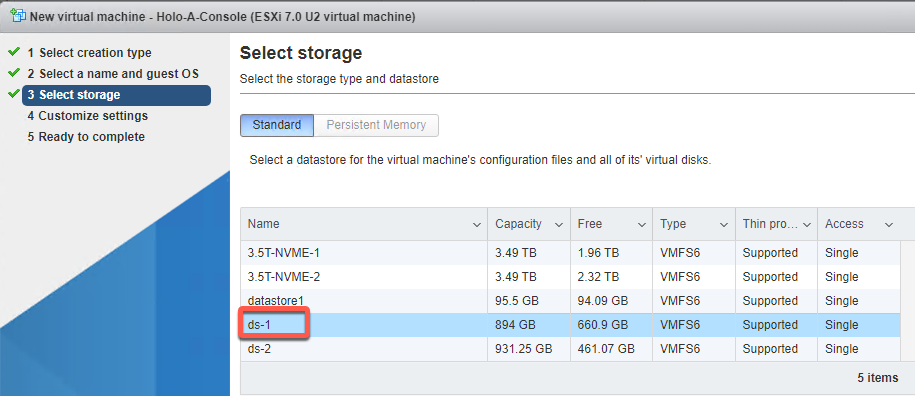
- Select a datastore with sufficient free space to host approximately 200GB available and click Next
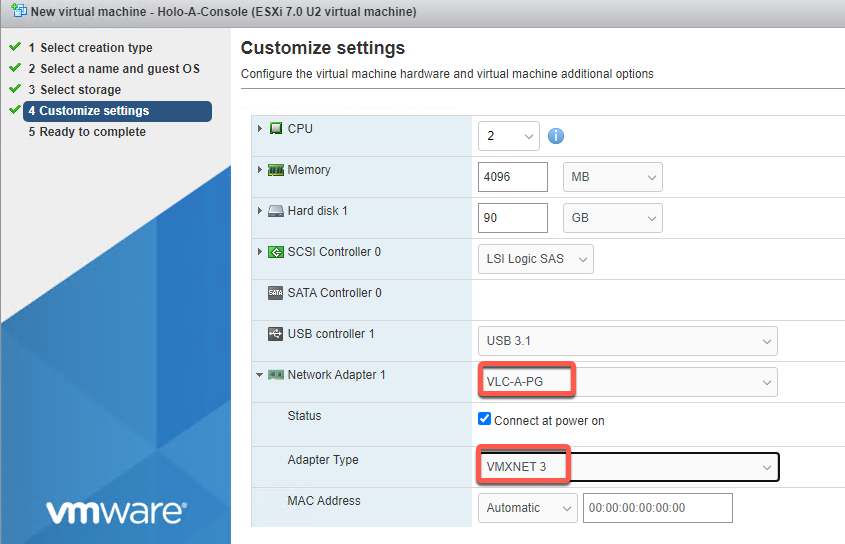
- For the Network Adapter 1 object, select the port group created earlier for the Holodeck pod. Each Holodeck pod would leverage a different port group and there is only one Holo-Console deployed in each pod.
This example shows the port group configured to use the VLC-A-PG port group.
- Expand the settings for the Network Adapter 1 object.
- Put a checkmark for the Status to Connect at power on
- Set the Adapter Type to VMXNET3
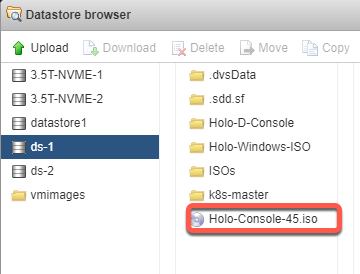
- Select the dropdown selection for the CD/DVD Drive 1 object and select Datastore ISO file
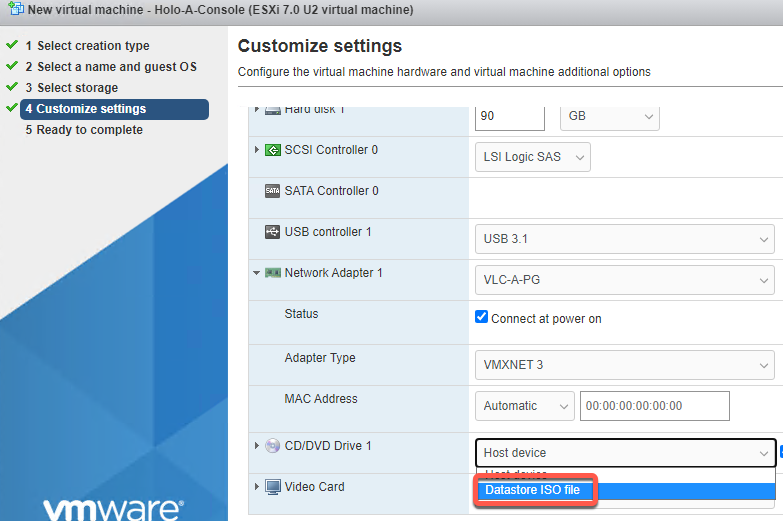
- Select the Holo-Console-45.iso file uploaded earlier
- Put a checkmark for the Status to Connect at power on
- Click Next to go to the Ready to Complete page
- Click Finish
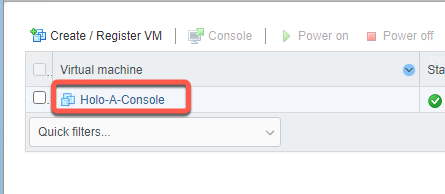
- Click on the newly created VM
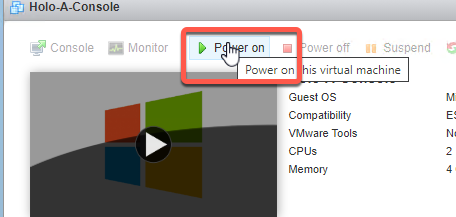
- Click Power on
- Click Console then Open console in new window
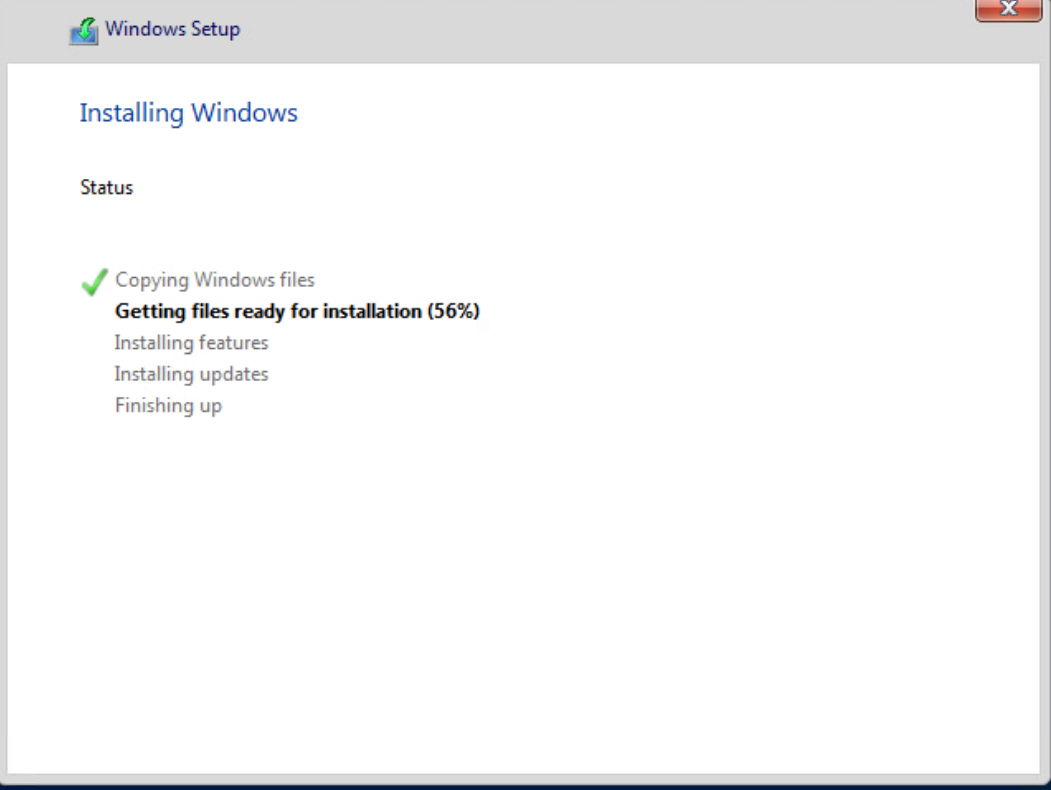
- The Holo-Console will be deployed and configured automatically. This takes about 30 minutes to complete. The console will reboot several times during setup.
- When finished, the Holo-Console desktop will look like this
- Close the Holo-Console VM console window