
Holo-Tanzu-Env-Overview
Module 2 – vSphere Namespace Overview
This module provides an overview of the Holodeck VCF environment and provides a brief introduction to the vSphere Namespace. In this module we will enable developer access to the pre-existing ‘ns01’ vSphere namespace. Pertinent information about the lab environment will be highlighted to facilitate understanding and provide knowledge beneficial for completing future labs.
Step 1: vSphere Inventory Overview
We begin with a review of the VCF Management Domain.
From the Holo Console, connect to the vSphere client and expand the vSphere inventory:
- Navigate to Menu -> Inventory
- Expand vcenter-mgmt.vcf.sddc.lab
- Expand mgmt-datacenter-01
- Expand mgmt-cluster-01
- Expand Namespaces
There are four ESXi hosts configured in the vSphere cluster named "mgmt-cluster-01". In the cluster an NSX Edge Cluster has been deployed, as represented by the two NSX Edge transport nodes (edge01-mgmt, edge02-mgmt), and we see that Kubernetes has been enabled as is evident by the presence of the three "SupervisorControlPlane (#)" VMs.

Note the following:
- The term "supervisor cluster" is used to denote a vSphere cluster on which Kubernetes has been enabled. This name is derived from the presence of the three supervisor control plane VMs.
- The three supervisor control plane VMs instantiate a Kubernetes control plane. The four ESXi hosts are configured as Kubernetes worker nodes. The ESXi hosts in the vSphere cluster take on a dual role where they can host both virtual machines (VMs) and container-based workloads, or vSphere Pods.
- An NSX Edge Cluster is a prerequisite for enabling Kubernetes (i.e., Workload Management) on a vSphere cluster that is part of a VCF workload domain. The Kubernetes networking for the supervisor cluster is tightly integrated with NSX. This integration comes through the NSX Container Plug-in (NCP).
Step 2: vSphere Namespace Overview
On the Supervisor Cluster, vSphere Pods and Tanzu Kubernetes Clusters (TKCs) get deployed inside vSphere Namespaces. vSphere Namespaces control developer access and limit resource utilization. Namespaces are isolated from each other, enabling a degree of multi-tenancy.
Note, don’t confuse a vSphere Namespace with a Kubernetes Namespace. While they provide a similar capability (in terms of authentication and resource control), the vSphere Namespace is a vCenter server object that is managed from the vSphere client.
In the Holodeck Toolkit, a vSphere Namespace named ‘ns01’ was created as part of the lab deployment. We will enable access to this namespace for the members of the ‘devteam’ SSO group.
From the vSphere client:
- Click the vSphere Namespace ns01
- Click the Summary tab
The “ns01” namespace has been created, however, it has not been configured for developer access. To enable access for members of the “devteam” group in the vsphere.local SSO domain:
- Click ADD PERMISSIONS
- In the Identity source dropdown, select vsphere.local
- In the User/Group Search field type “devteam”, and select devteam
- In the Role dropdown, select “can edit”
- Click OK

Along with granting user access, the vSphere namespace also controls access to the available storage resources in the cluster. Select the checkbox next to ‘vSAN Default Storage Policy’ to grant the “ns01” vSphere Namespace access to all storage that is available through that policy.
- Click EDIT STORAGE
- Click OK

The vSphere Namespace is also used to set limits on the amount of CPU, Memory, and Storage that can be used by the workloads running in the namespace.
- Click EDIT LIMITS
You can optionally assign CPU, memory, and storage limits based on your requirements. For example, if you have multiple namespaces running on a shared vSphere cluster you could set limits on each namespace to ensure the cluster resources are shared equally.
By default, there are no CPU or Memory limits set when a namespace is created. However, in the lab there is a default storage limit for the vSAN Default Storage Policy, which is set to zero. To remove this storage limit:
- Click the icon to expand Storage
- Delete the number ‘0’ (the vSAN Storage Policy limit field should be empty)

With no limits set, the ‘ns01’ vSphere Namespace will have access to all the available CPU, memory, and storage resources in the vSphere cluster.
- Click OK
Observe that with the current settings the ‘devteam’ group, in the vsphere.local SSO domain, has edit access to the “ns01” vSphere namespace. Storage access is allowed to the vSAN default Storage Policy. There are currently no resource limits set.
Step 3: Content Library Overview
In addition to enabling developer access and setting resource limits, the vSphere namespaces also controls access to the OVA templates stored in vSphere content libraries, and to virtual machine classes that have been defined on the vSphere cluster.
In the Tanzu Kubernetes Grid Service tile note that the ‘ns01’ vSphere namespace has been granted access to the vSphere content library named ‘TanzuContent’.
To view details about the TanzuContent content library, from the Tanzu Kubernetes Grid Service tile:
- Click the TanzuContent Link
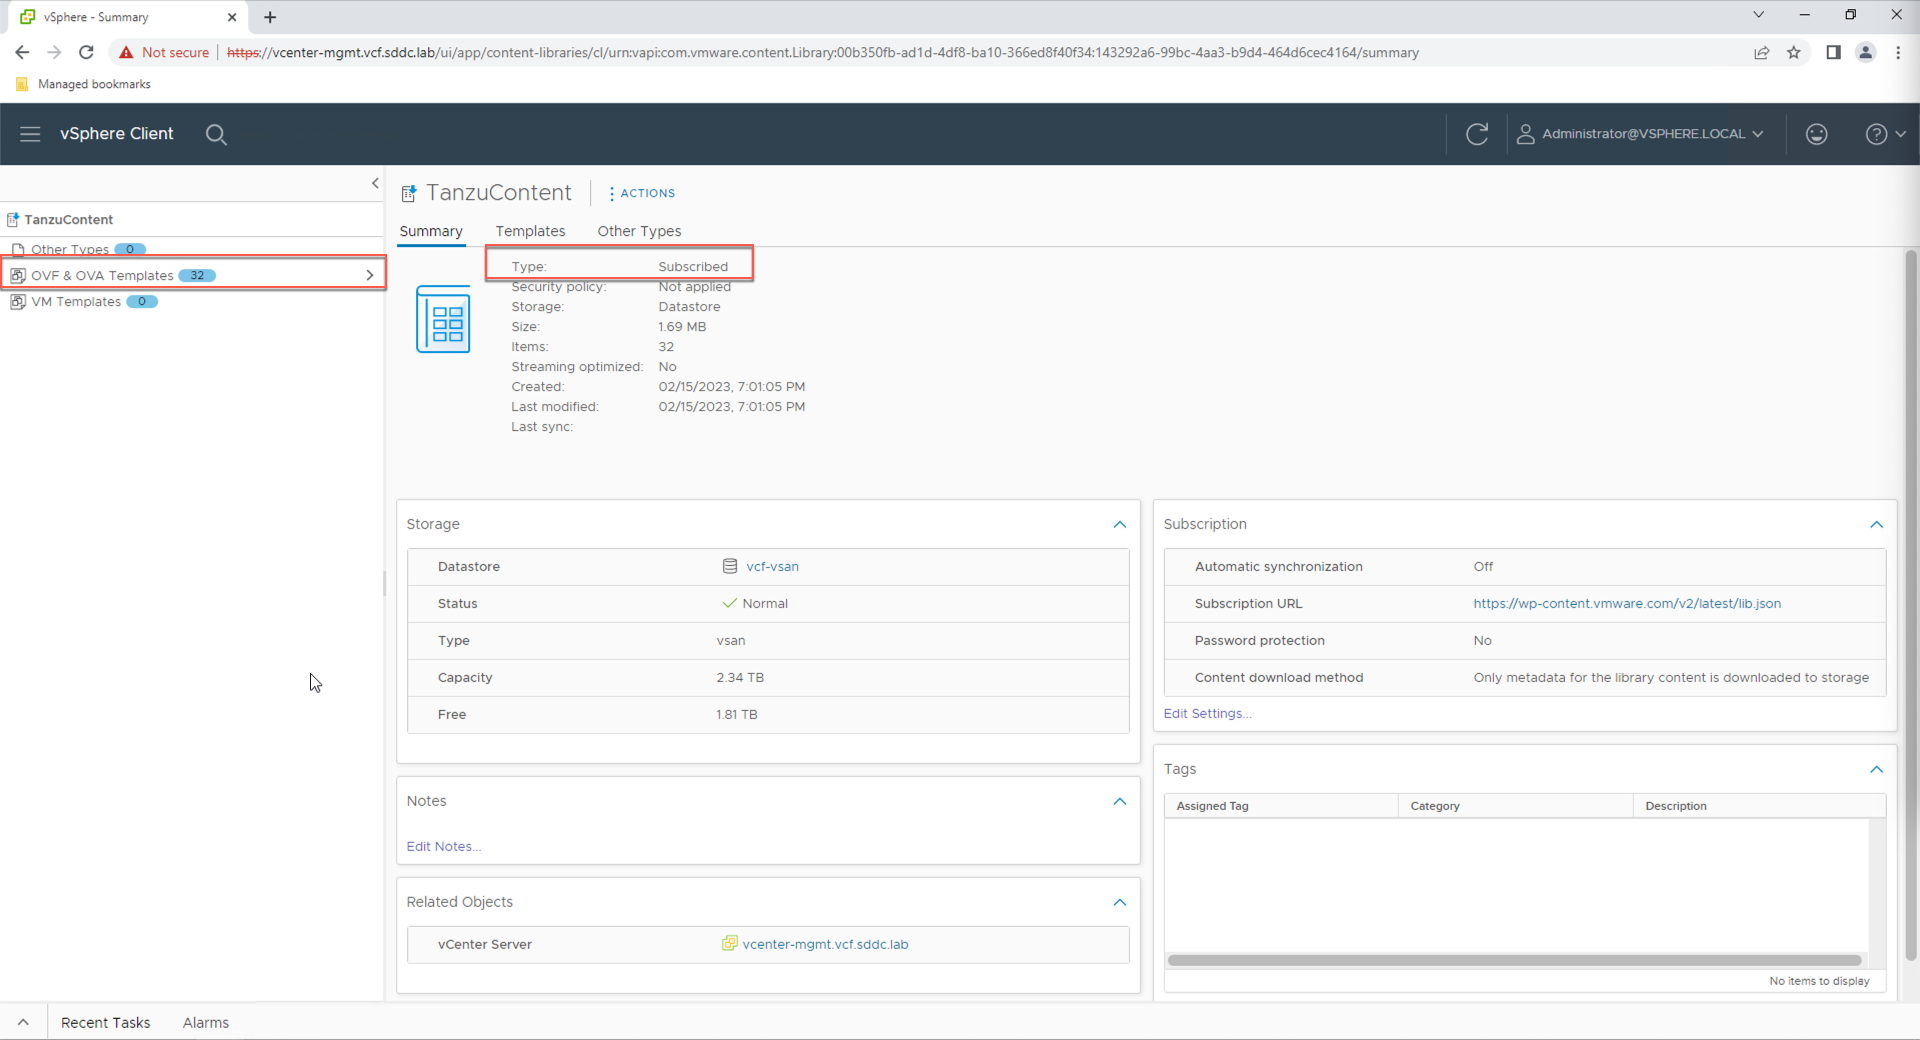
The TanzuContent library is configured as a ‘subscribed’ content library. This means the library has been subscribed to a VMware hosted public library. As such, anytime VMware publishes a new OVA image to the public library, the template automatically become available to the vSphere namesapace via the subscribed content library.
- Click OVF & OVA Templates link
Here we see a list of the OVA images that are currently being shared with the TanzuContent subscribed library.
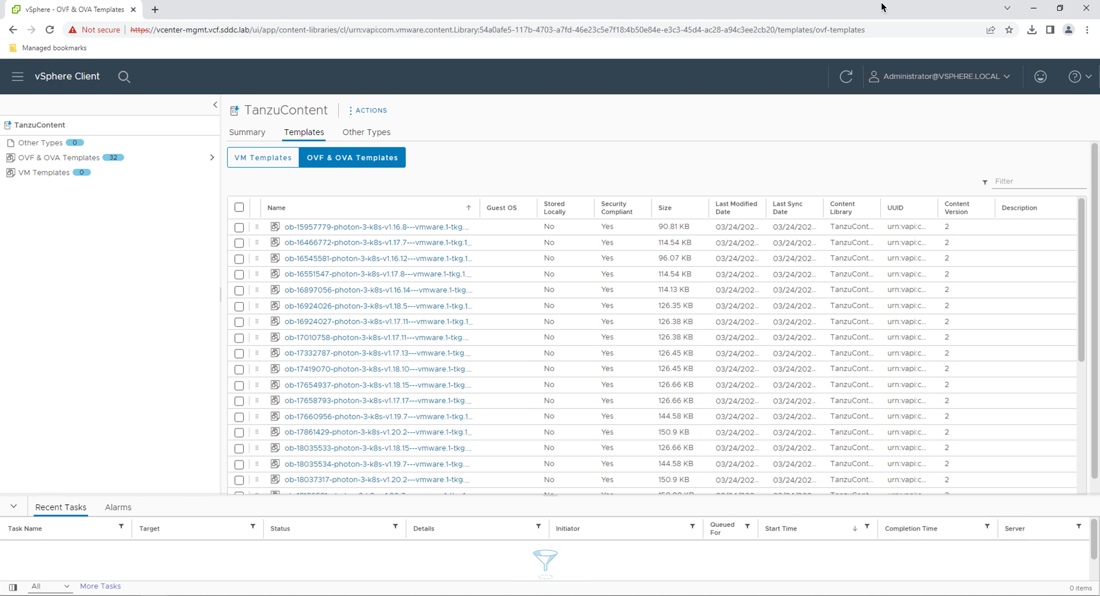
Note: To save space in the lab, the library has been configured to only download the images when they are used.
Return to the vSphere Namespace summary:
- Click the Home icon
- Click Inventory
- Click ns01
- Click the Summary tab
Step 4: Virtual Machine Classes Overview
The ‘VM class’ controls the size of the virtual machines (VMs) that get deployed as part of a Tanzu Kubernetes Clusters (TKCs).
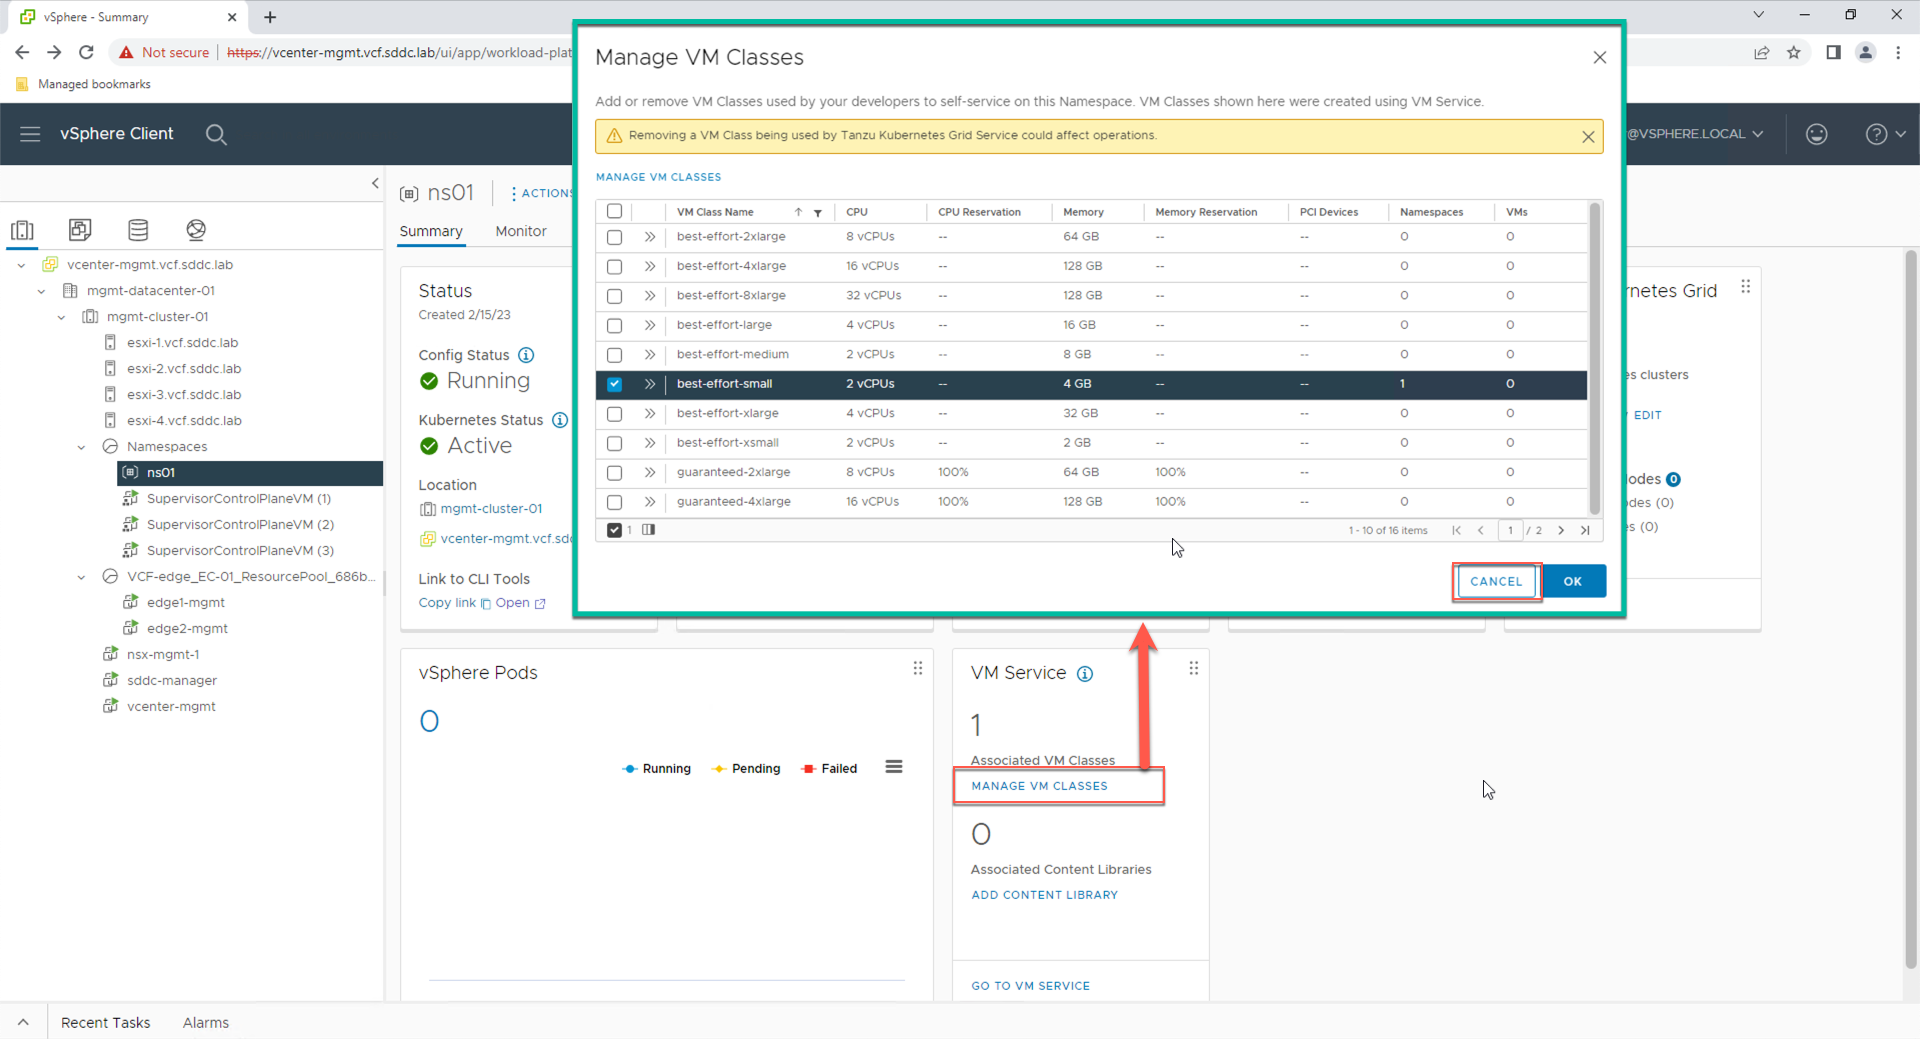
In the VM Service tile, note that there is currently one VM class associated with the ‘ns01’ namespace
- Click MANAGE VM CLASSES
While there are many VM classes available, in the lab we have only assigned the ‘best-effort-small’ class. To assign additional classes, simply select the desired class and click OK. To create a custom VM class, click the “MANAGE VM CLASSES” link.
For now, leave the ‘best-effort-small’ class as the only enabled VM Class.
- Click CANCEL
Observe that with the current settings the “ns01” vSphere Namespace will pull VM templates from the TanzuContent content library. In addition, any VMs that are deployed as part of a TKC will need to use the “best-effort-small” VM class.
Module Summary
This module provided an overview of the VCF lab environment along with an introduction to the vSphere Namespace. We configured access for the existing ‘ns01’ vSphere namespace for members of the SSO “devteam” group. We reviewed the storage, Content Library, and VM class settings for the vSphere namespace. Pertinent information about the lab environment was highlighted to facilitate understanding and provide knowledge beneficial for completing future labs.