Holo Toolkit 2.0 Deploy VCF VLC CLI
Deploy VCF with VLC CLI
Overview
This section demonstrates the deployment of the VLC-Holo-Site-1 nested lab using VLC CLI.
Prerequisites
- IP address for your ESXi host or vCenter Server instance managing your ESXi host. DNS services are not available inside the Holodeck environment until VLC deploys an instance of Cloud Builder.
Note: This task can only be performed from the Holo-Console deployed inside the environment. They can be carried out by directly accessing the Holo-Console via the ESXi console option, or via RDP to the Holo-Router IP address.
Deploy VCF using VLC CLI method
Configure VLC configuration file
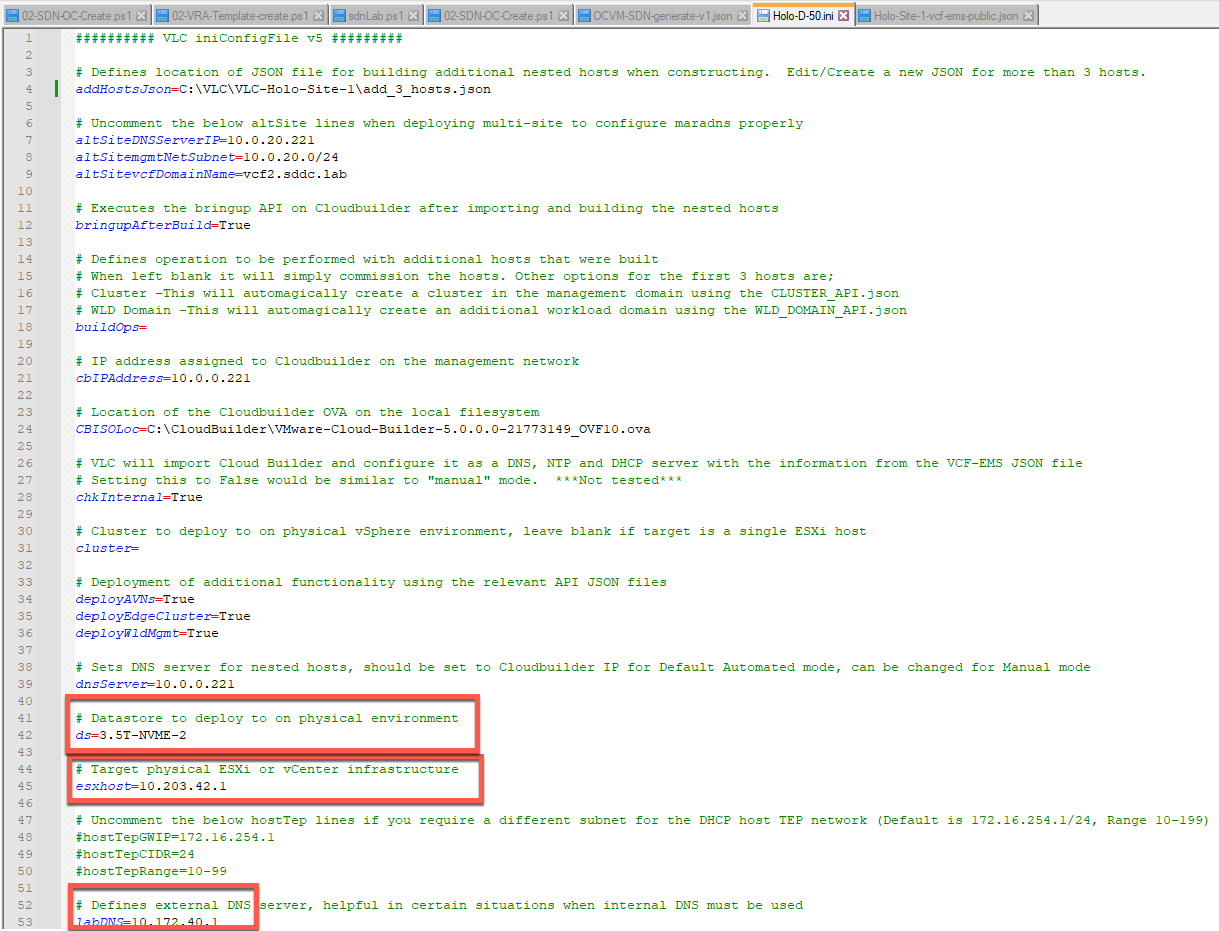
This step configures the VLC INI file used for command line (headless) mode. This example assumes deploying a pod named “Holo-D” which runs on port group VLC-D-PG.
- On the Holo-Console, use the Windows File Manager to navigate to C:\VLC\VLC-Holo-Site-1
- Open Holo-D-50.ini for editing
- Note the configuration specifies the use of the add_3_hosts.json file which provides the information for VLC to deploy an additional three hosts into the nested VCF environment. Delete the filename and path if no extra hosts are needed.
- Change the values for the following attributes as needed:
- ds: Datastore for this pod
- esxhost: IP of ESXi host
- labDNS: Provide IP of DNS server if 8.8.8.8 is not accessible.
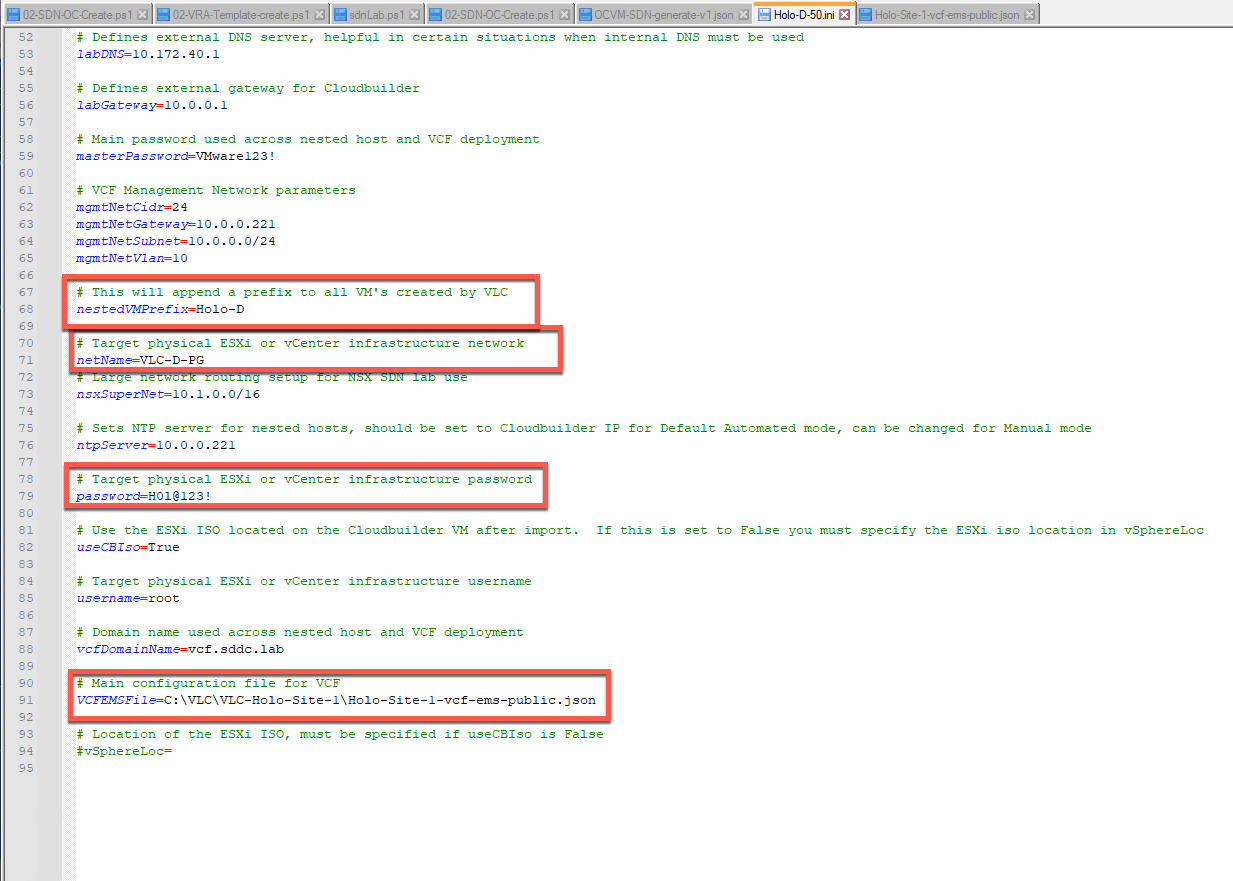
- nestedVMPrefix: This defines the prefix to be used for all the VMs deployed by VLC.
- netName: This specifies the name of the port group to be used
- password: This specifies the password for the ESXi host to deploy to
- VCFEMSFile: Config file location
- Save the file with a name representing the pod configuration. The name used in this example is Holo-D-50.ini
Update VLC configuration file for VCF 4.5 deployment (Optional)
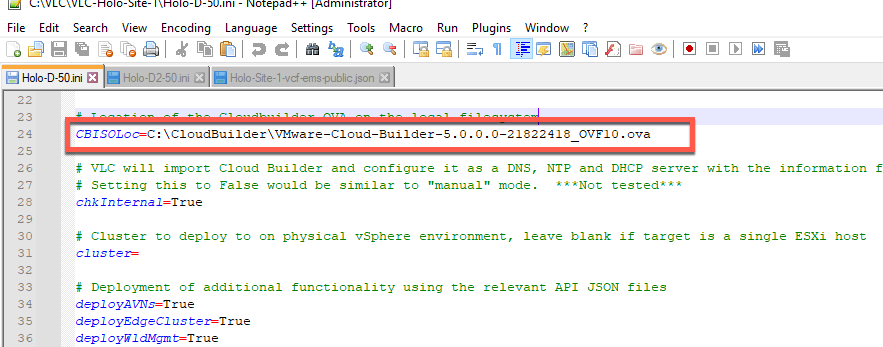
This step configures the VLC INI file to use Cloud Builder 4.5. This assumes the user has made VCF 4.5 Cloud Builder available in C:\CloudBuilder during initial Holo-Console ISO creation or loaded from VMware at a later time.
- On the Holo-Console, use the Windows File Manager to navigate to C:\VLC\VLC-Holo-Site-1
- Open Holo-D-50.ini for editing
- Update CBISOLoc field for VCF 4.5 Cloud Builder by uncommenting the appropriate lines and save the file
Update VCF configuration file for VCF 4.5 deployment (Optional)
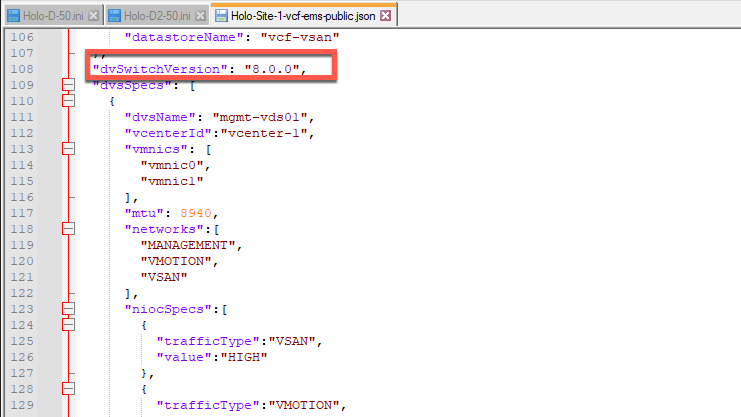
This step configures the VCF main json to support VCF 4.5.
- On the Holo-Console, use the Windows File Manager to navigate to C:\VLC\VLC-Holo-Site-1
- Open Holo-Site-1-vcf-ems-public.json for editing
- Update dvSwitchVersion to “7.0.0” and save the file
Deploy using VLC command line mode
- From within the Holo-Console, click on Windows Start Menu->Windows PowerShell->Windows PowerShell
- Type the following command at the prompt:
cd C:\VLC\VLC-Holo-Site-1
- Enter the following command:
.\VLCGui.ps1 -iniConfigFile .\Holo-D-50.ini -isCLI $true
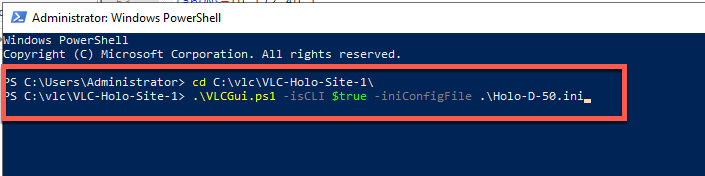
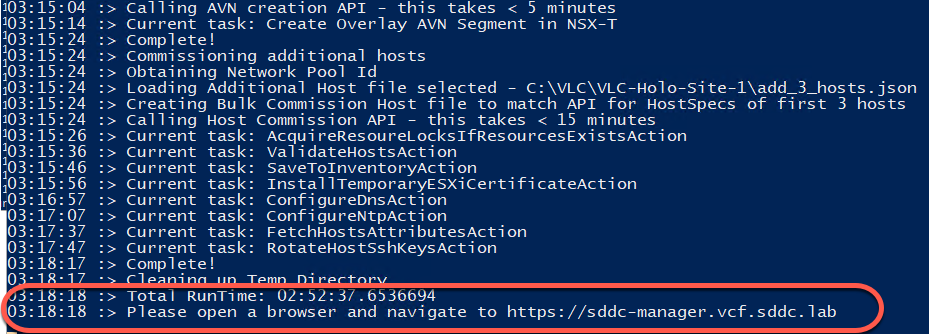
- This starts the VCF deployment with VLC in headless mode. The VCF deployment takes approximately three hours to complete

- Wait until the process successfully completes and the message for accessing the SDDC Manager is displayed
Test VLC Deployment
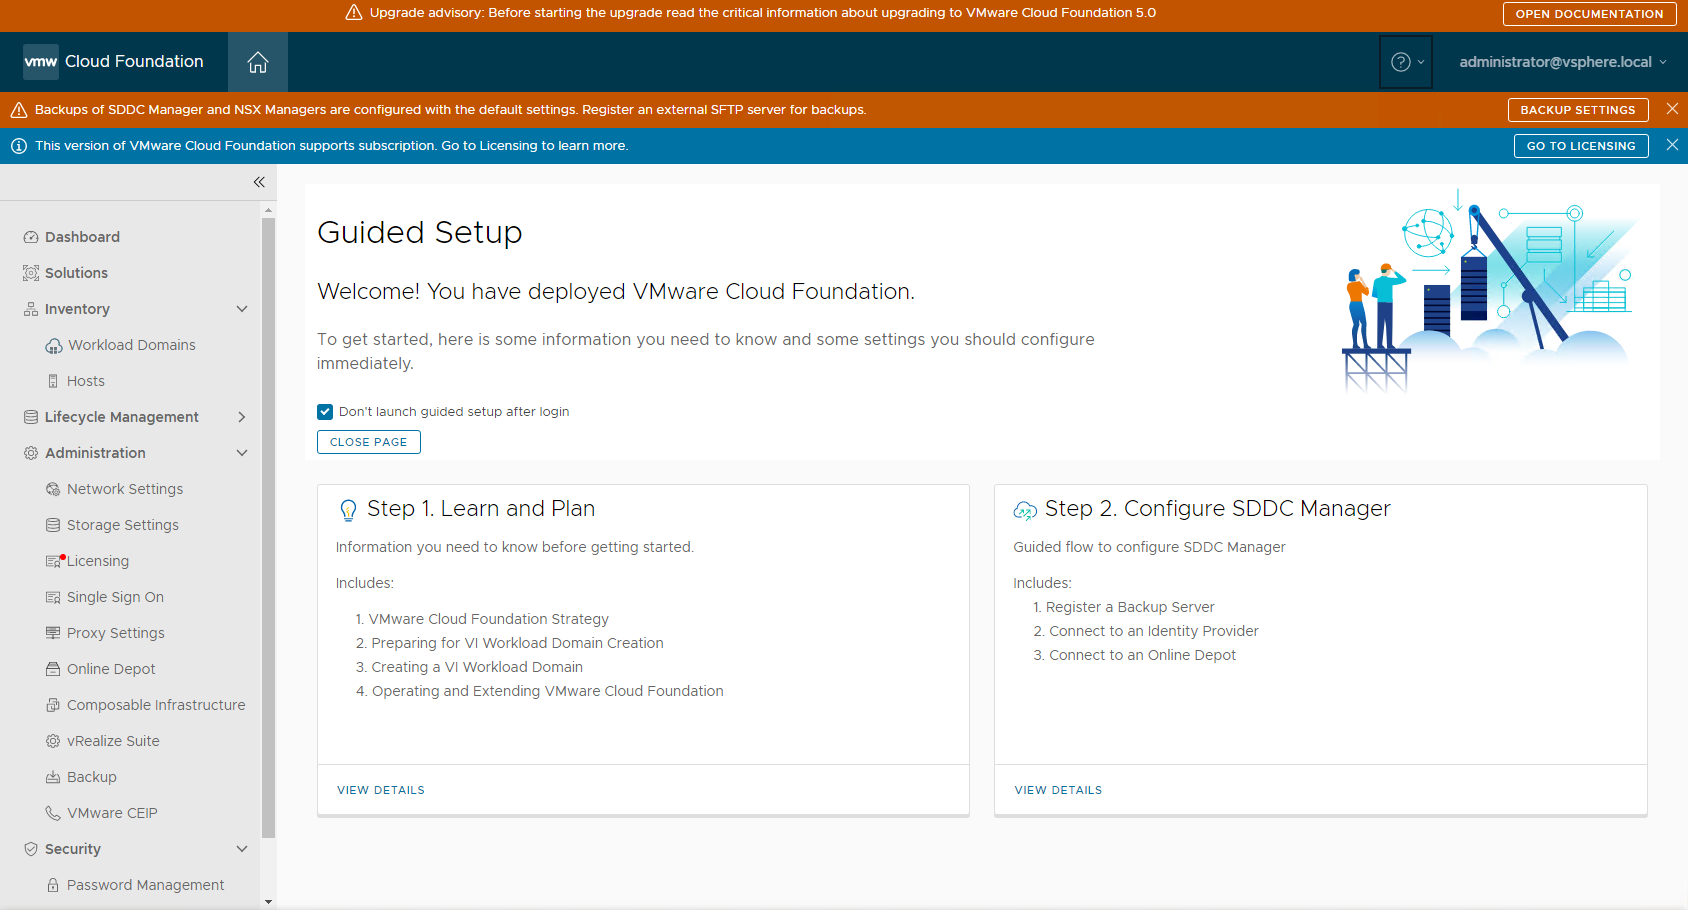
- From the Holo-Console, open Chrome and click on the Managed bookmarks and select the SDDC Manager
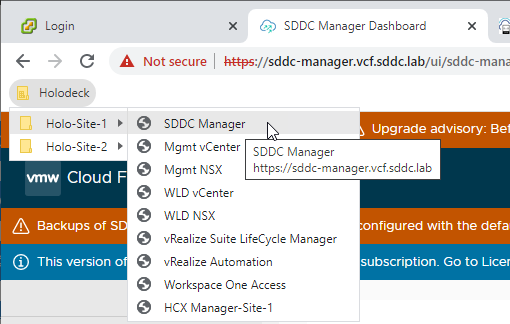
- Acknowledge the security warning by clicking on Advanced followed by Proceed to sddc-manager.vcf.sddc.lab (unsafe)
- Acknowledge the second security warning by clicking on Advanced followed by Proceed to vcenter-mgmt.vcf.sddc.lab (unsafe)
- Login as the user adminstrator@vsphere.local with the password VMware123!
- Uncheck the VMware CEIP box
- Verify the page displayed resembles the following
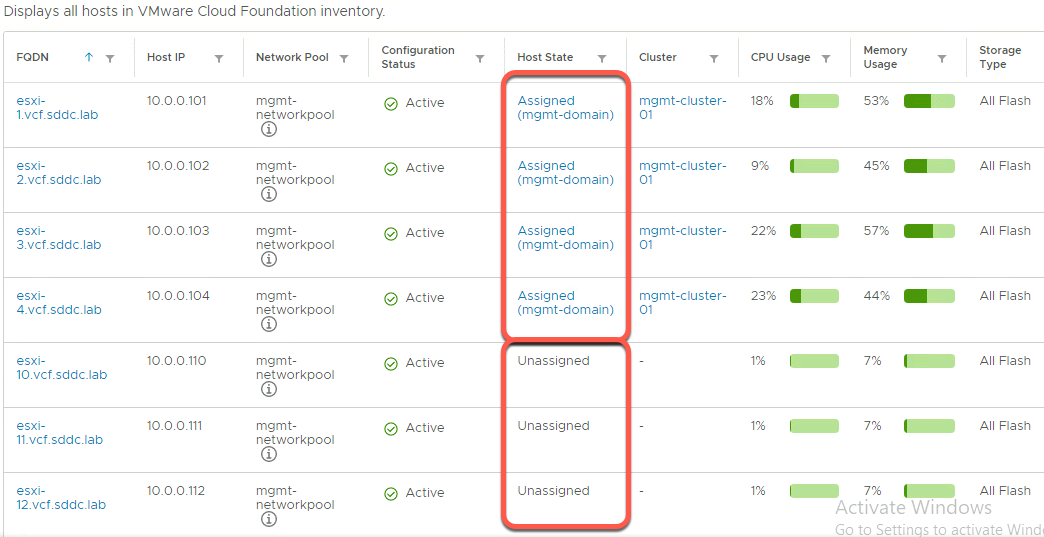
- Click on hosts
- Close the Tasks pane

- Notice the four host VCF Management domain and the three additional unassigned hosts
Set FTT=0 on Nested VSAN datastore. (Optional)
The following step is recommended to reduce out of space issues on the nested environment. As this is a lab environment, and running on underlying SSD, it is typically acceptable to reduce redundancy in the nested environment
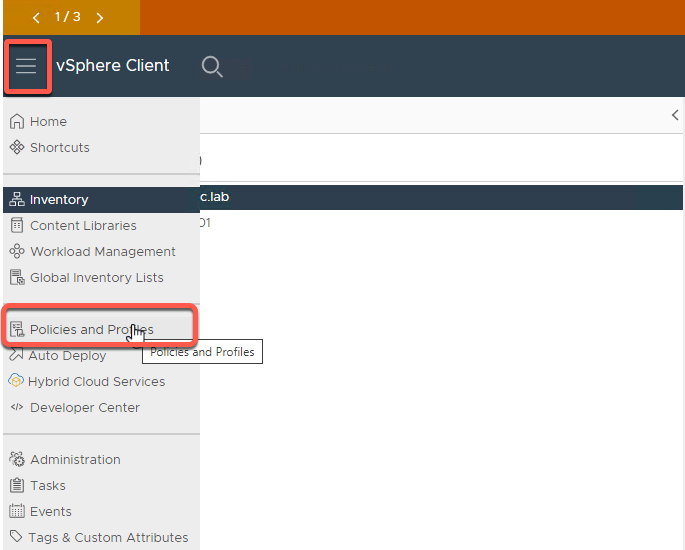
- Using the vSphere Web Client, click to expand the menu, then click Policies and Profiles
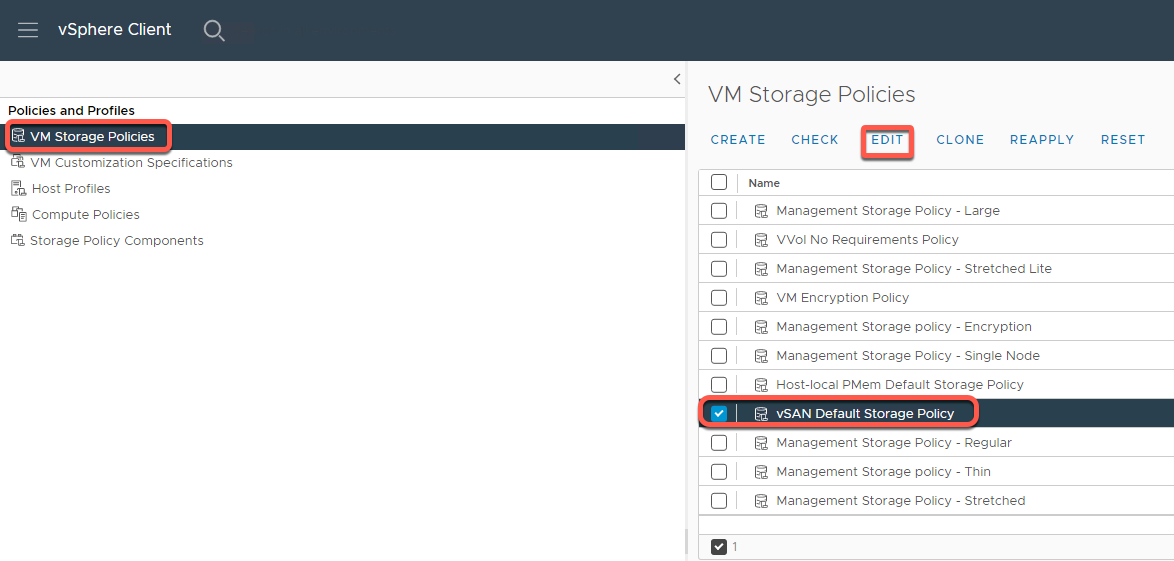
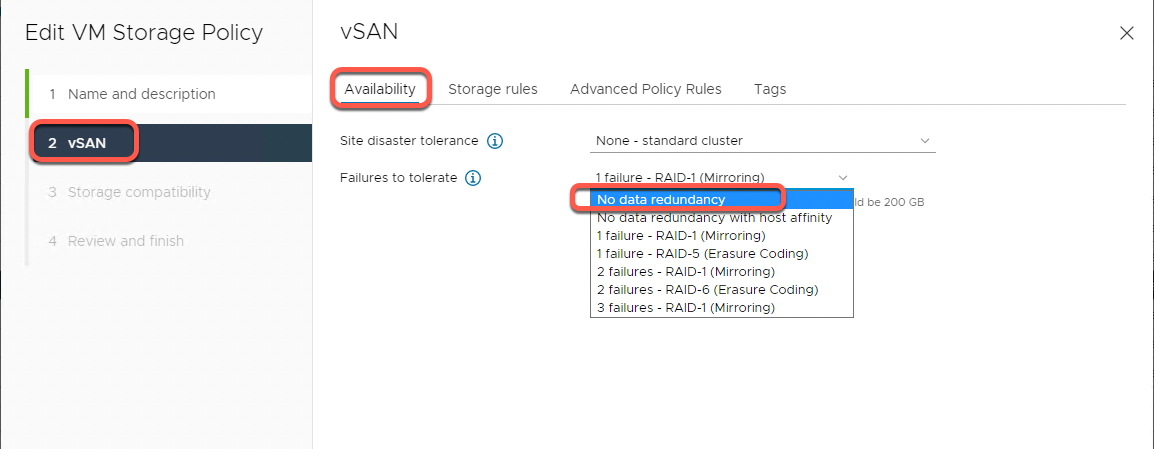
- Select VM Storage Policies -> vSAN Default Storage Policy -> Edit
- Leave Name and Description as is and click Next
- On the vSAN Availability tab, set Failures to Tolerate to No Data Redundancy then click Next
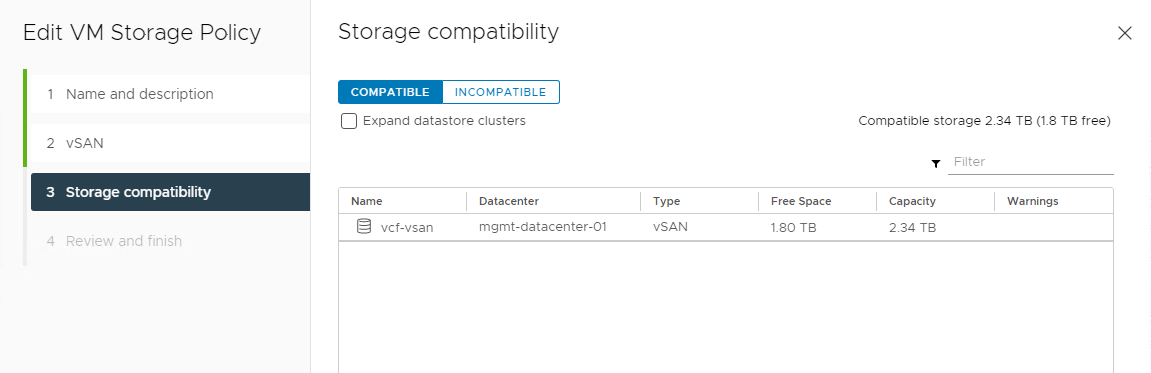
- Click next on Storage Compatibility
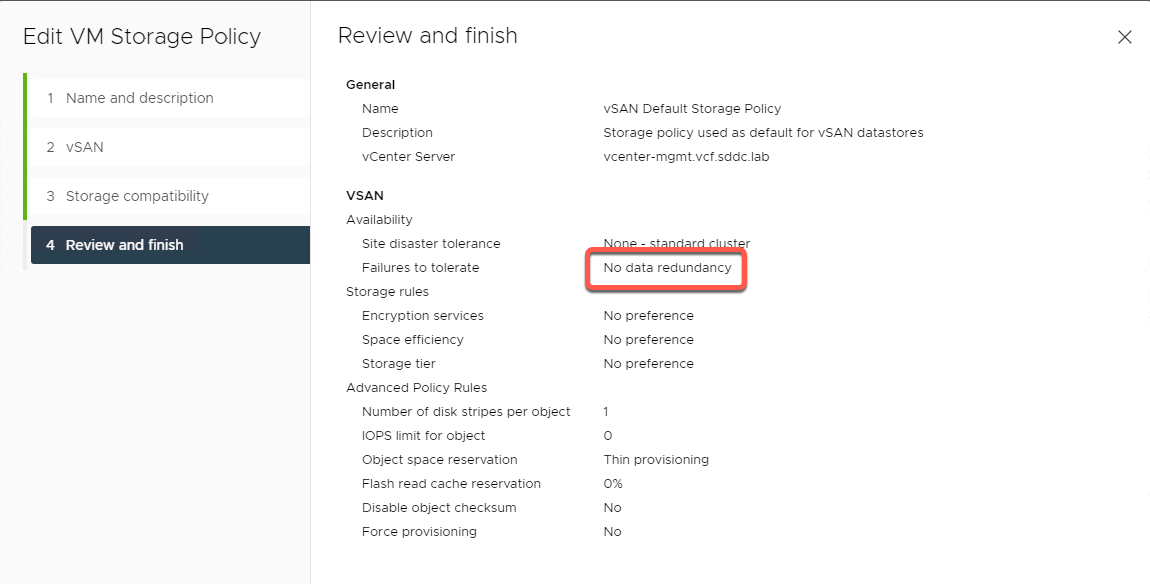
- Review setting and click Finish
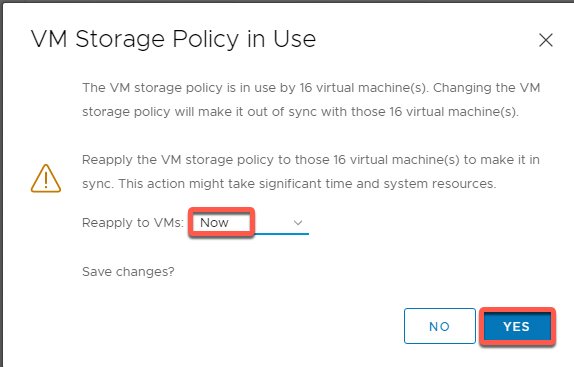
- Select Now when prompted on Reapply to VM’s, then Yes
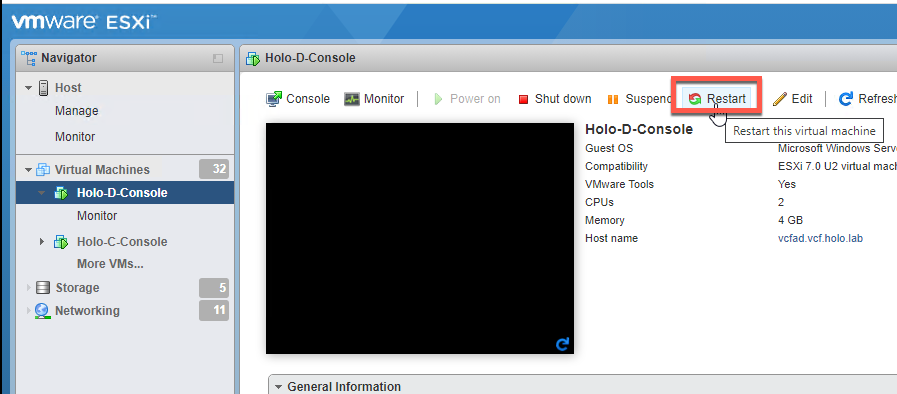
Reboot Holo-Console VM
- Using the vSphere Web Client, select the Holo-D-Console and click Restart to reboot the VM. NOTE: This step is required to clear temporary Holo-Console network routing. After reboot Holo-Console receives routing, DNS, NTP, etc from Cloud Builder within the pod.