
Holo Toolkit 2.0 Isolated Domains
Isolated Workload Domains
About Isolated Workload Domains
Isolated workload domains are a new feature introduced with Cloud Foundation 5.0. They enable multi-tenancy in Cloud Foundation by assigning a dedicated vSphere Single Sign-on (SSO) domain to a new vCenter Server instance. With isolated workload domains, user authentication and role-based access controls are managed independently, thus providing a degree of isolation from other domains running in the same Cloud Foundation instance.
The following workload domain configurations are supported:
- Deploy workload domains using vCenter Enhanced Linked Mode (ELM). With ELM, multiple vCenter Server instances share a common SSO domain. The benefit of ELM is that it provides a single pane of glass view across all vCenter Server instances along with centralized role-based access control (RBAC). Up to 15 domains can be deployed in ELM.
- Deploy isolated workload domains. With an isolated domain the vCenter Server instance is deployed with separate SSO domain. The benefit of isolated domains, as the name implies, is that they are isolated from other domains thus providing a degree of multi-tenancy. Note that isolated domains do not provide a unified single pane of glass view, nor do they provide centralized RBAC. Up to 24 isolated domains can be deployed.
- Deploy a mixed environment comprised of both ELM and isolated domains. With this configuration some domains share a common SSO domain while other domains run with their own isolated SSO domain. This configuration takes advantage of ELM where beneficial while also allowing domains to run isolated when needed. When running in mixed mode, the total number of domains is limited to 24, however, the maximum number of domains that can be configured in ELM is 15.
Holodeck Isolated Workload Domain Lab Overview
This lab contains seven modules. Interdependencies between modules require that they be completed in order.
- Deploy a Nested VCF Instance
- Deploy Additional ESXi Hosts
- Create a Network Pool
- Commission ESXI Hosts
- Create an Isolated Domain
- View Isolated Domain Details
- View & Manage Passwords for Isolated Domains
Prerequisites:
To complete this lab, you will need:
- Holodeck Toolkit version 2.0 (or higher).
- Valid Cloud Foundation 5.0 License keys (vCenter, vSphere, vSAN and NSX).
- An ESXi server with sufficient capacity for hosting a four-node management domain and three-node virtual infrastructure workload domain.
To learn more about holodeck server requirements, licensing requirements, and how to implement the toolkit refer to the Holodeck website.
Module 1: Deploy a Single-Site Holodeck Instance
Use Holodeck Toolkit 2.0 (or above) to deploy a single-site Cloud Foundation instance.
Isolated domains are a new feature in Cloud Foundation version 5.0, which is available in Holodeck Toolkit versions 2.0 and above.
Procedure:
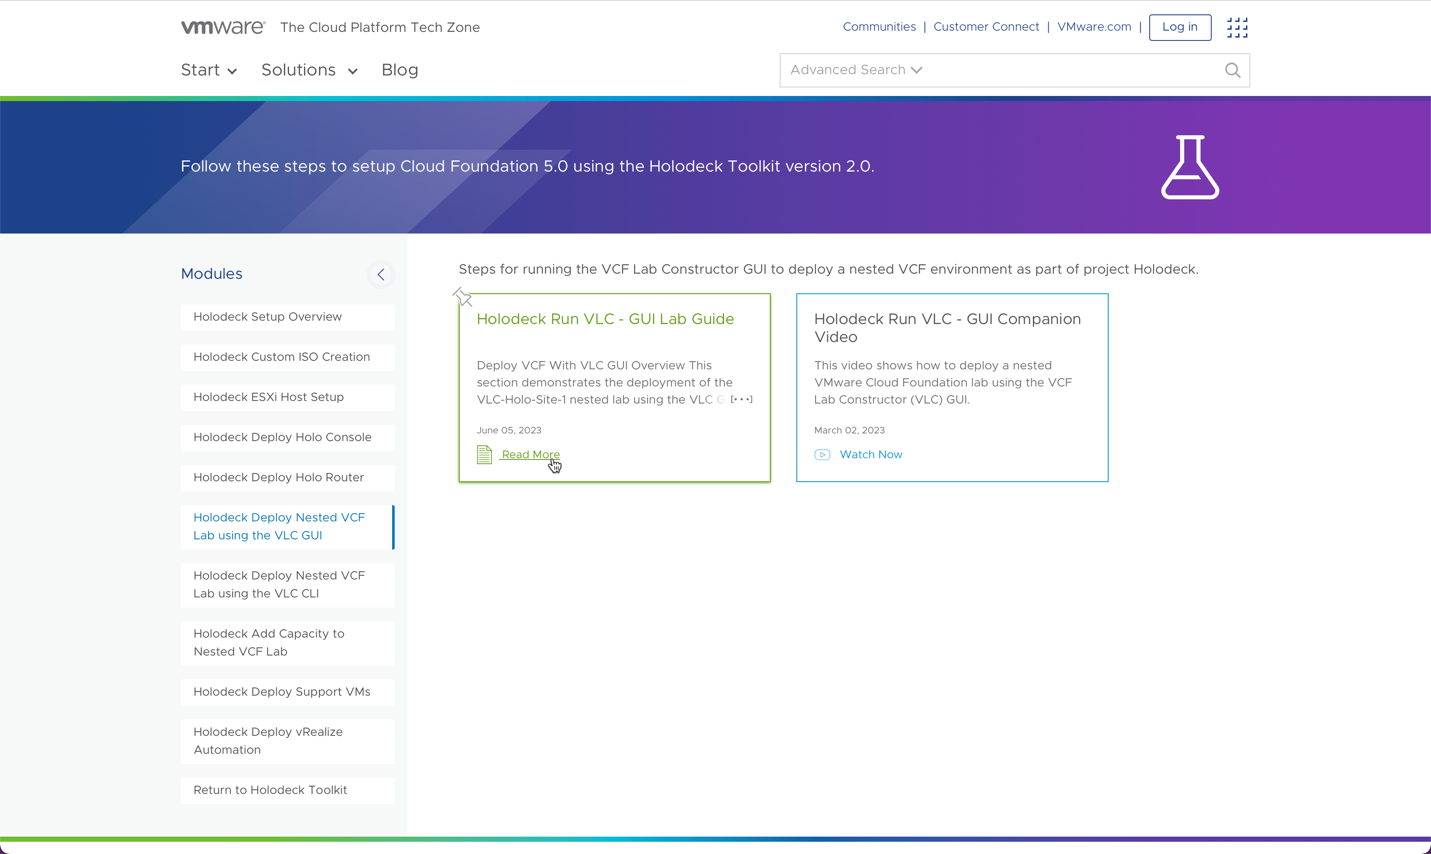
Follow the steps outlined on the Cloud Foundation Resource Center to deploy a single site Holodeck instance.
Make sure you follow the steps for deploying Holodeck v2.0.
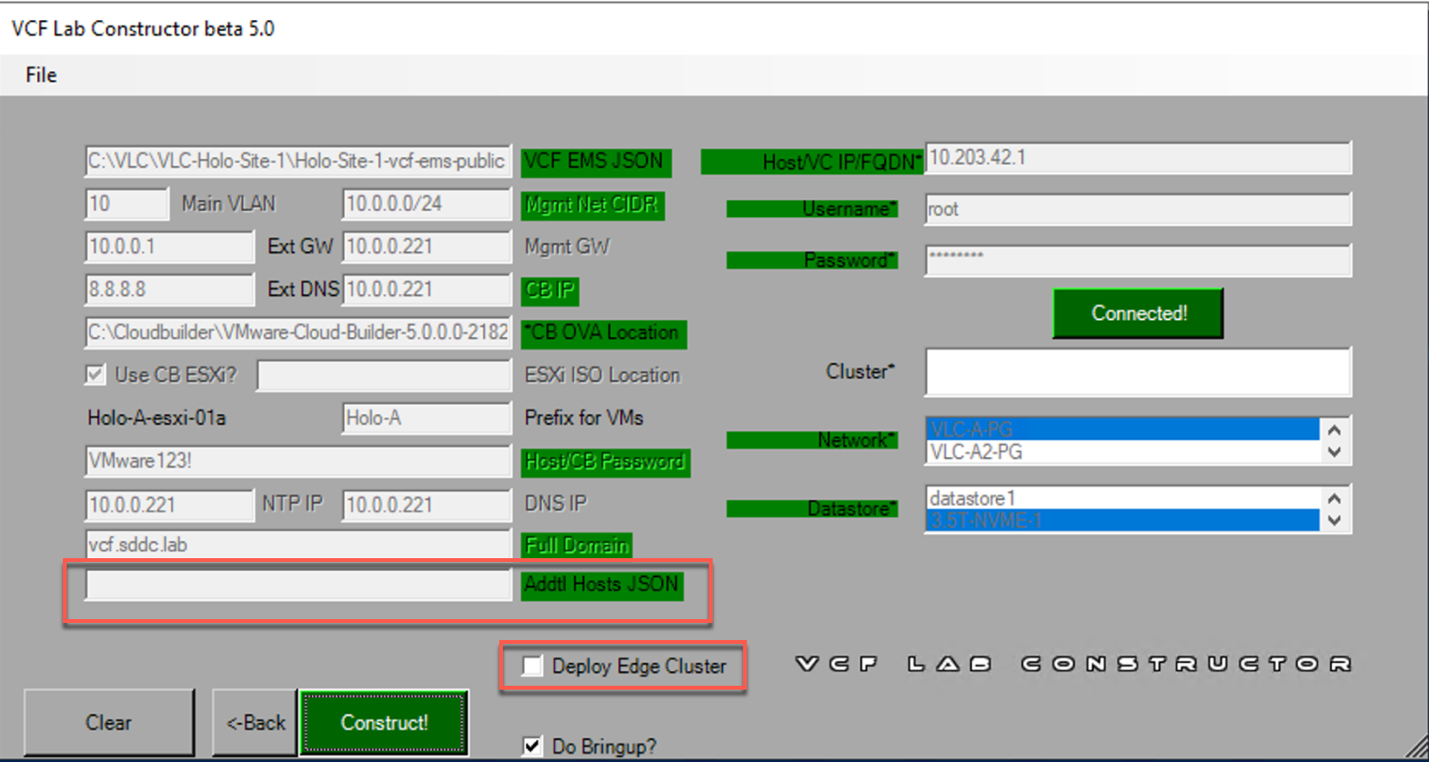
Note that when deploying the lab environment, the Addtl Hosts JSON and Deploy Edge Cluster are not needed. Deploying these components will not adversely impact the lab, but they are not used.
Module 2: Deploy Additional ESXi Hosts
Add four additional ESXi hosts to the holodeck lab.
The Holodeck Toolkit provides a pre-configured JSON file for adding additional hosts to a nested lab. This file is located at C:\VLC\VLC-Holo-Site-1\add_4_hosts_ESXi5-8.json.
Procedure:
From the Windows jump host:
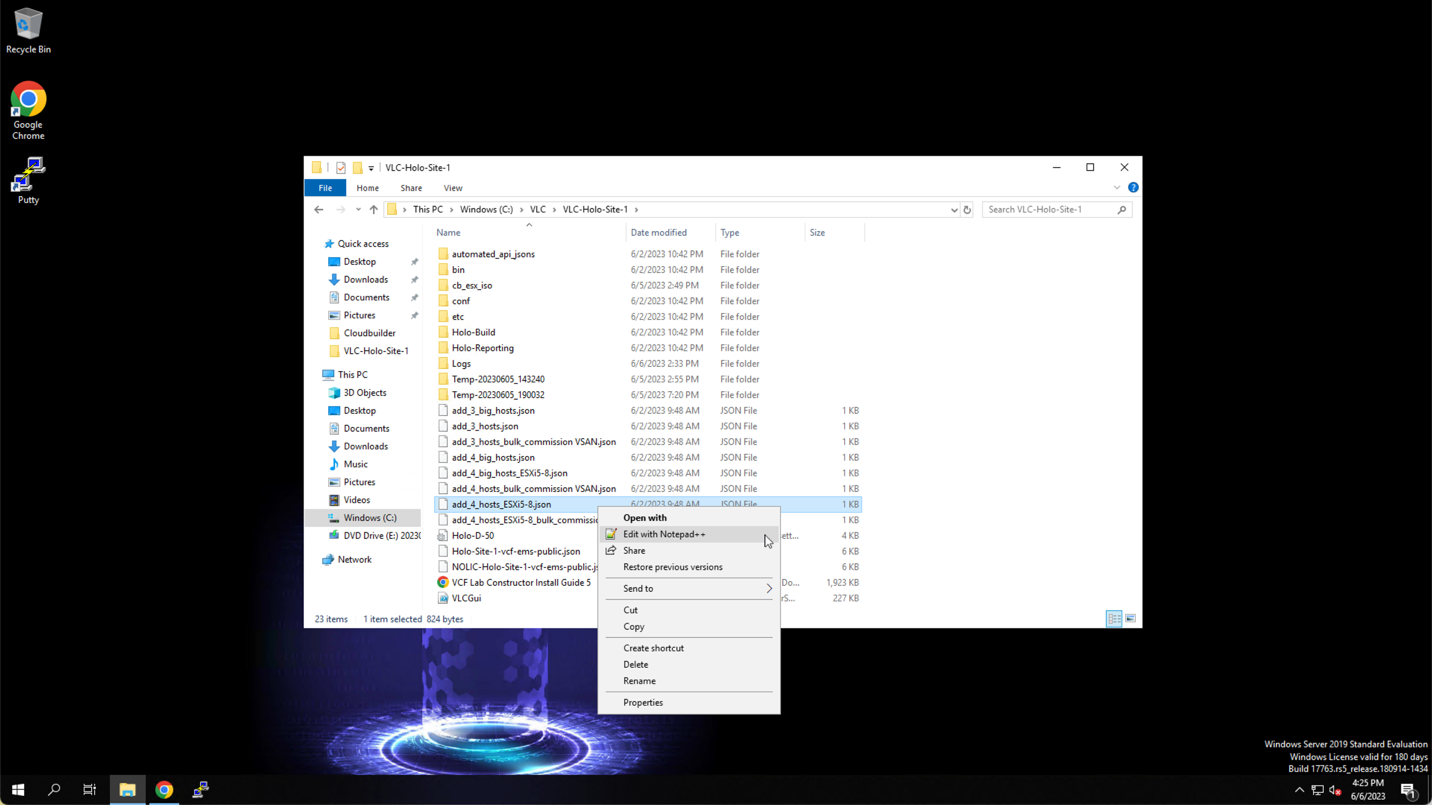
- Open the Windows File Explorer
- Navigate to C:\VLC\VLC-Holo-Site-1
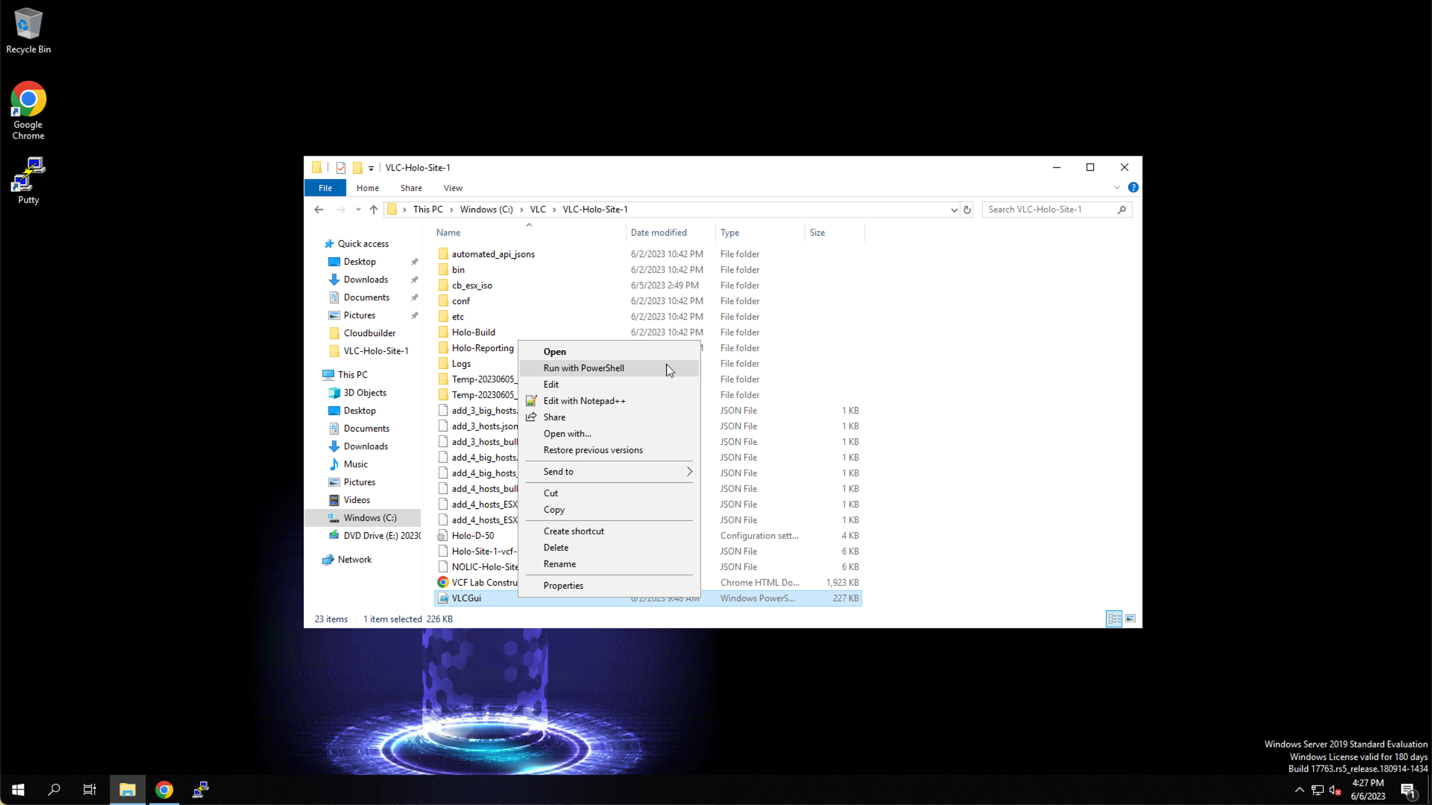
- Right click on add_4_hosts_ESXi5-8.json and select Open with Notepad++
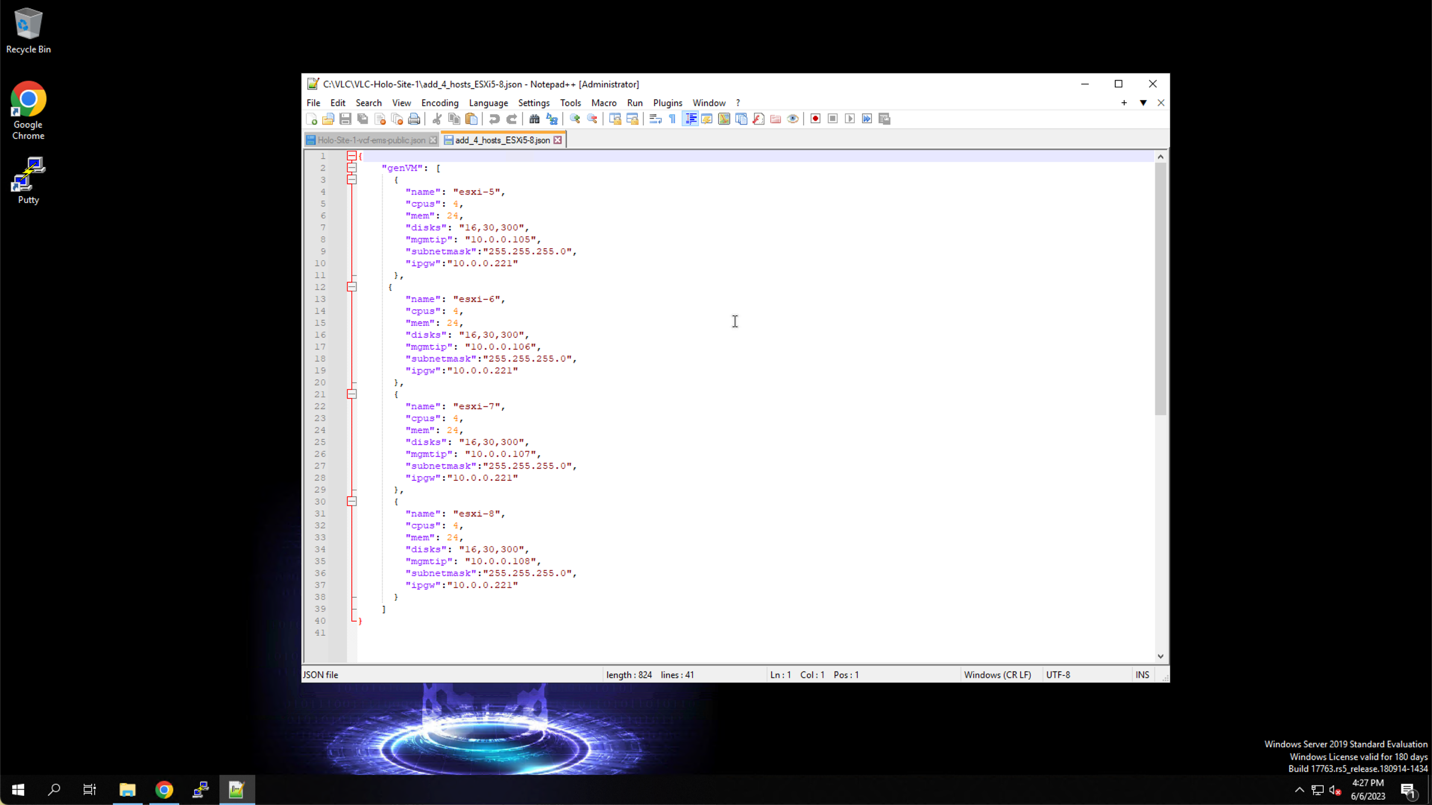
Review the contents of the C:\VLC\VLC-Holo-Site-1\add_4_hosts_ESXi5-8.json file. Confirm that there are four hosts defined with the hostnames 'esxi-5', 'esxi-6', 'esxi-7', and 'esxi-8'. Take note of the host details such as IP address, mask, and gateway.
- Close the Notepad++ Window
- Right click on VLCGui and select Run with PowerShell
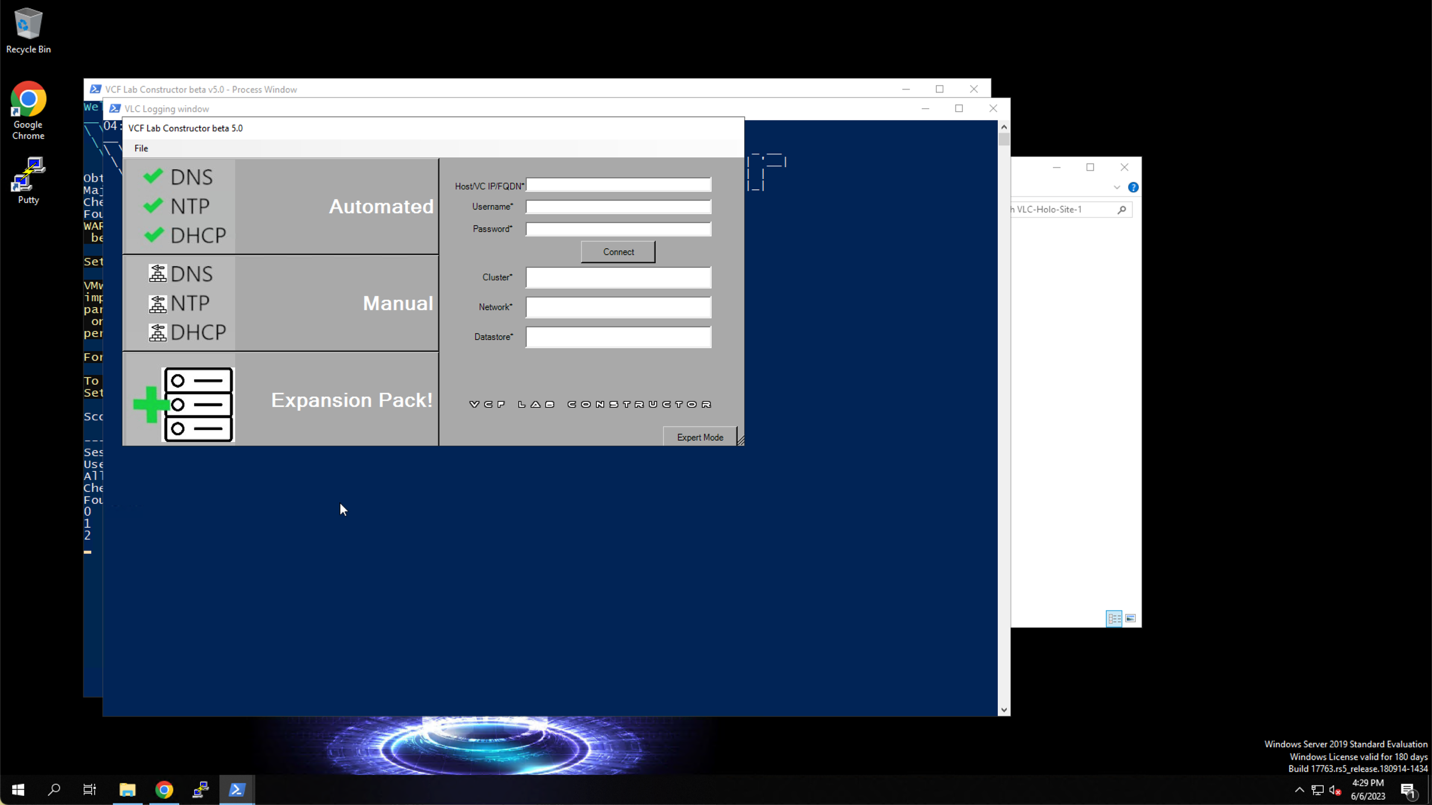
From the VLC UI:
- Click Expansion Pack!
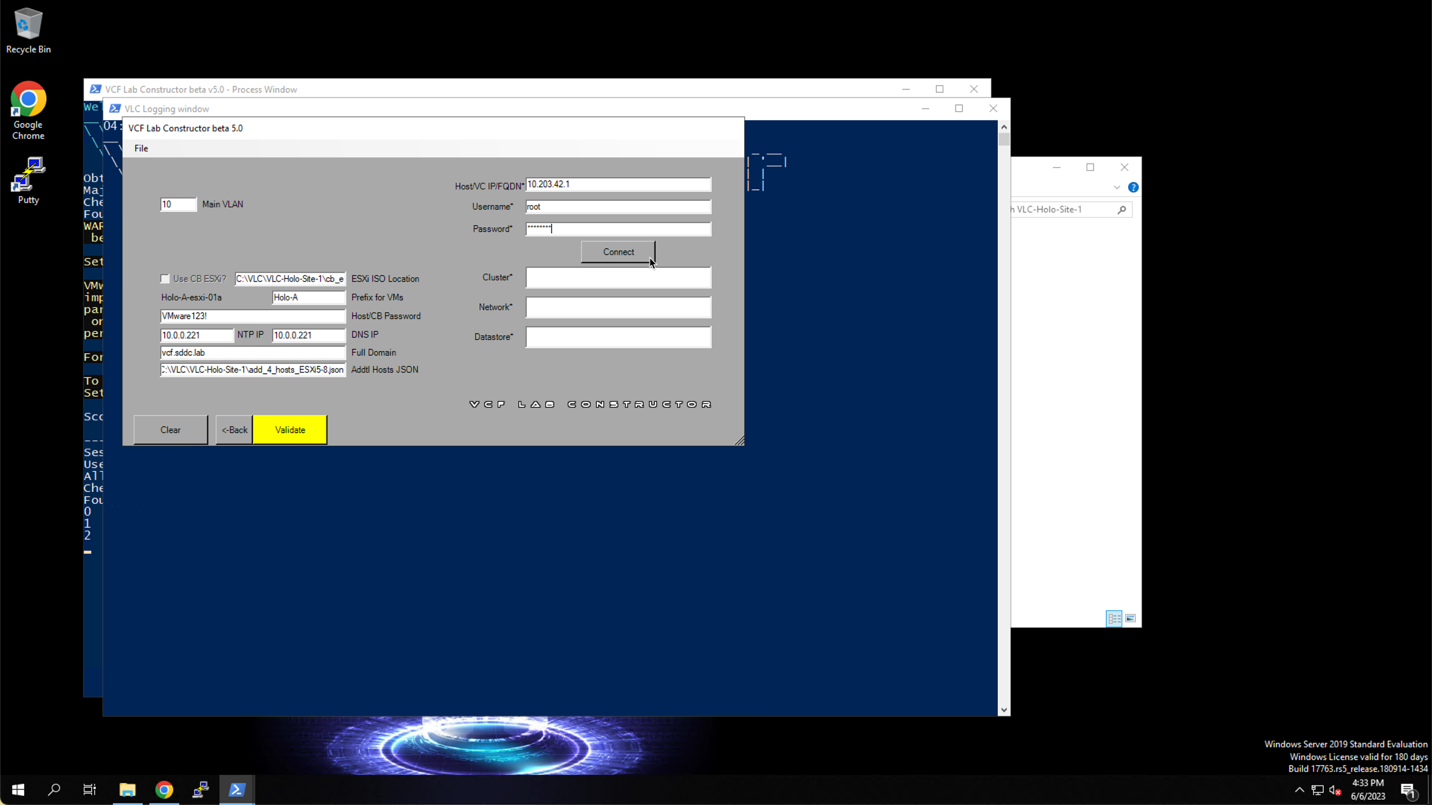
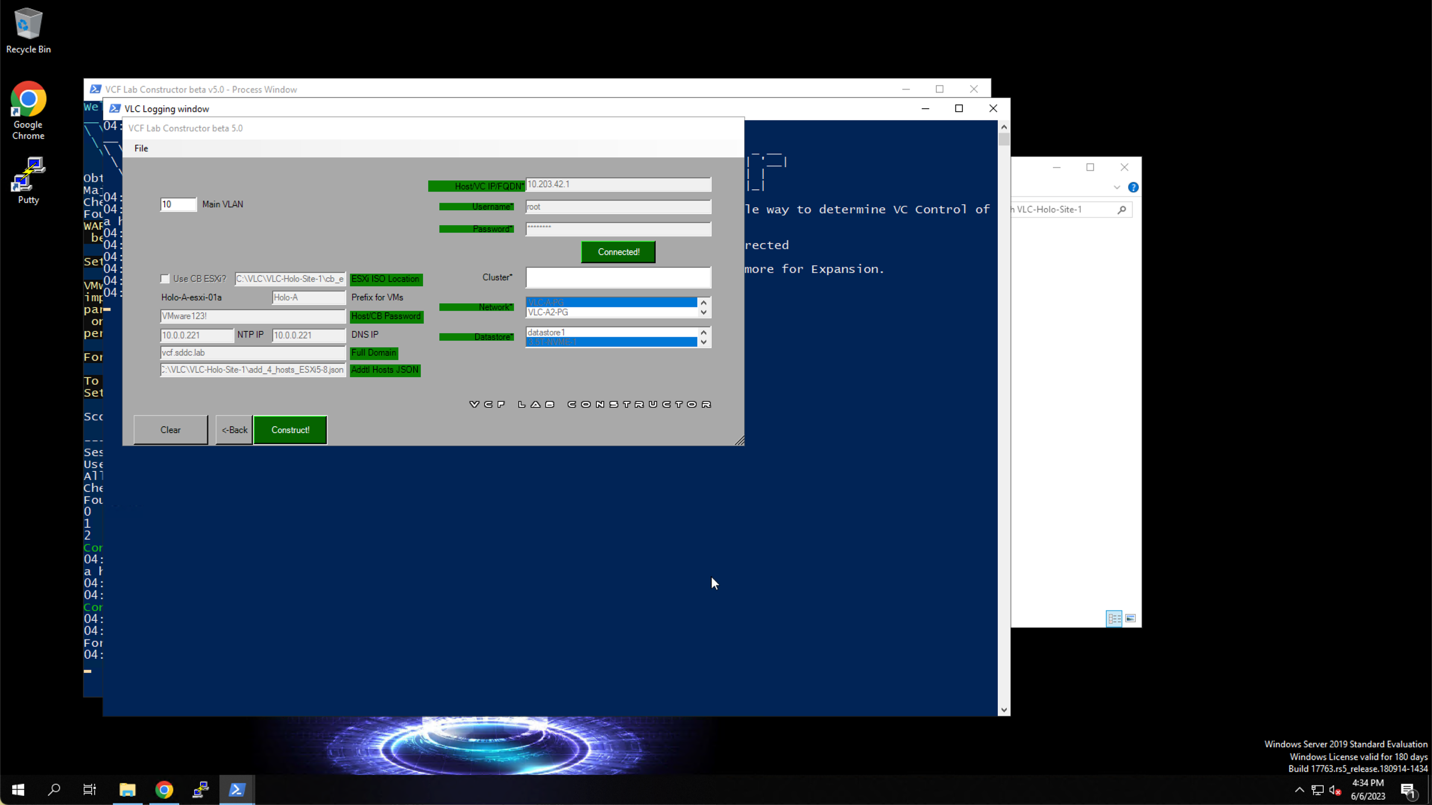
- Enter the following values in the fields on the left:
- Main VLAN: 10
- ESXi ISO Location: C:\VLC\VLC-Holo-Site-1\cb_esx_iso\VMware-VMvisor-Installer-8.0U1-21495797.x86_64
- Prefix for VMs:
- Host/CB Password: VMware123!
- NTP IP: 10.0.0.221
- DNS IP: 10.0.0.221
- Full Domain: vcf.sddc.lab
- Addtl Hosts JSON: C:\VLC\VLC-Holo-Site-1\add_4_hosts_ESXi5-8.json

- Enter the following values to the fields on the right:
- Host/VC IP/FQDN:
- Username: root
- Password:
- Click Connect
The ESXi host configuration is queried and the 'Network' and 'Datastore' fields populated with the available values.
- Select the appropriate network for your environment (e.g. VLC-A-PG)
- Select the appropriate datastore for your environment
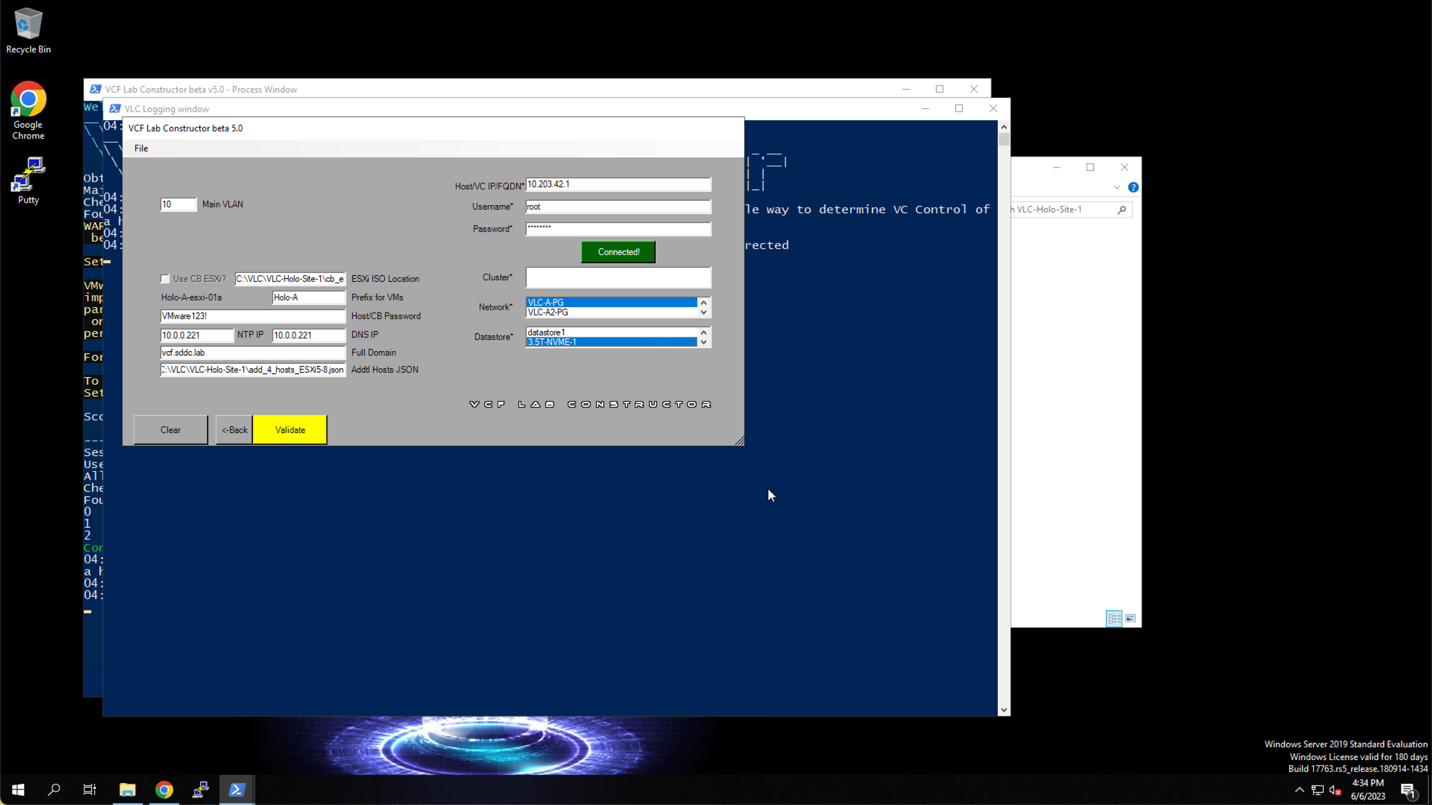
- Click Validate
Verify all fields validate successfully (indicated by the green highlight).
- Click Construct
The PowerShell script proceeds to create four additional ESXi hosts VMs. This will take approximately 10 minutes.
The PowerShell window will notify when the task is complete. After the task is complete, close the PowerShell windows.
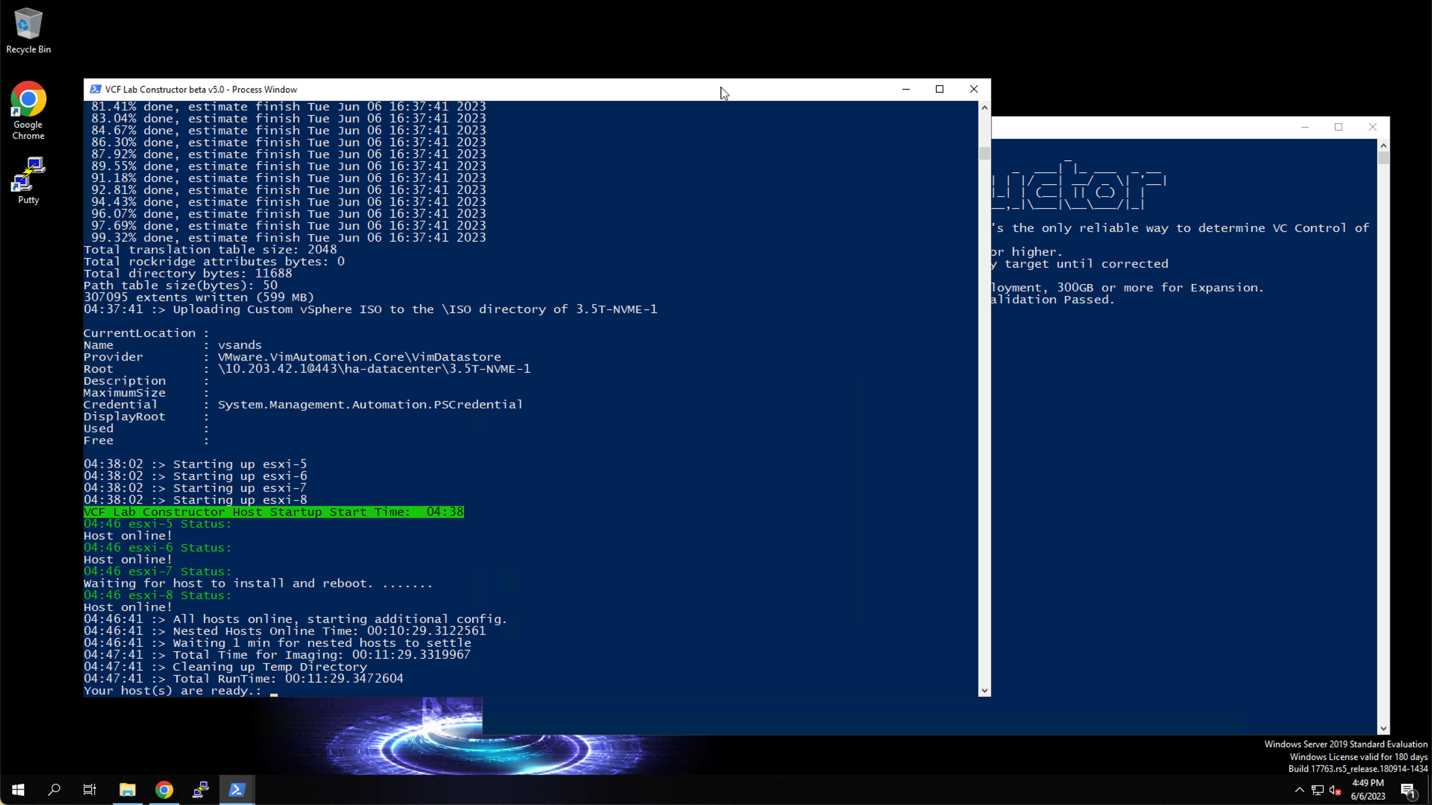
Optional, connect to the ESXi host web console and view the virtual machines inventory to confirm that you see the four VMs representing the four ESXi hosts (esxi-5, esxi-6, esxi-7, and esxi-8).
Module 3: Create a New Network Pool
Use the SDDC manager to create a network pool for the isolated domain.
In Cloud Foundation, when ESXi hosts are added to a workload domain the IP addresses used for the vMotion and vSAN vmkernel adapters are dynamically assigned by the SDDC Manager from a reserved range of addresses specified in a Network Pool.
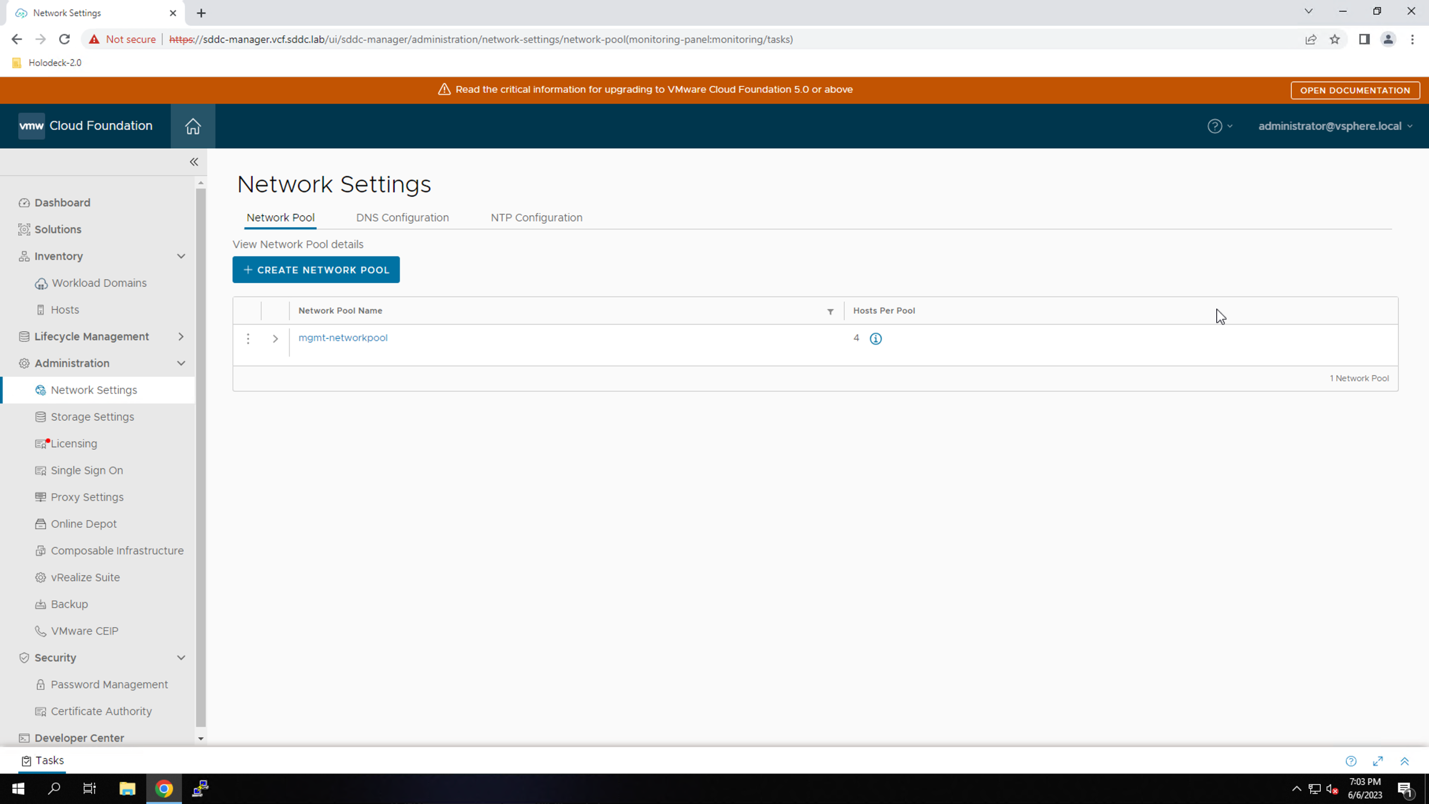
In Holodeck, a default network pool named mgmt-networkpool is created for the management domain. In preparation for adding an isolated domain, create a second network pool named wld-networkpool in order to reserve IP ranges for the vSAN and vMotion networks.
It's not a technical requirement to create a separate network pool for each isolated domain. You could use the default mgmt-networkpool for both the management domain and new isolated domain. However, because the primary use-case for deploying isolated domains is multi-tenancy and a desire to "isolate" the domain, it is considered a best practice to also separate the vSAN and vMotion traffic onto separate network pools.
Procedure:
From the SDDC Manager:
- Navigate to Network Settings
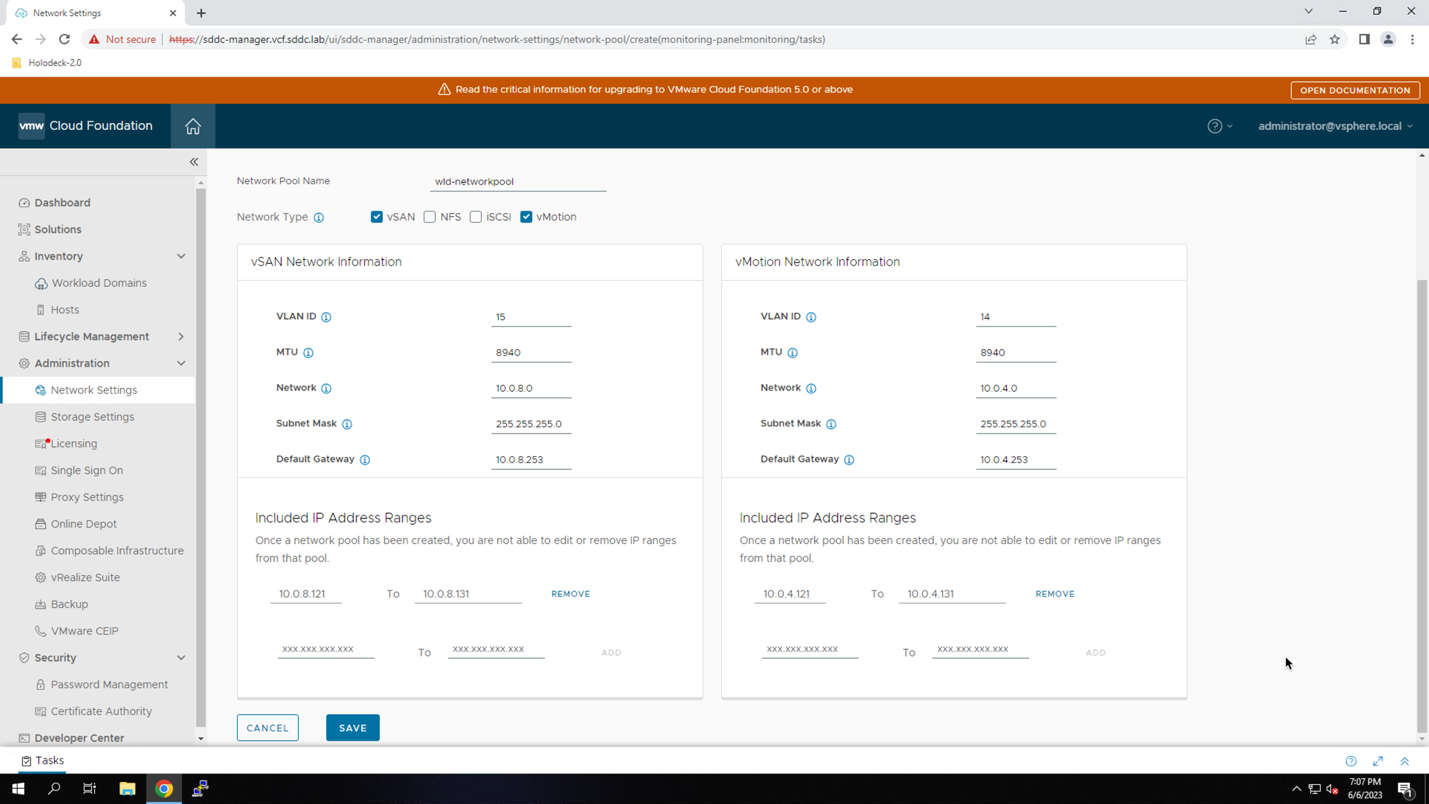
- Click +CREATE NETWORK POOL
- Enter Network Pool Name: wld-networkpool
- Select Network Type: vSAN and vMotion
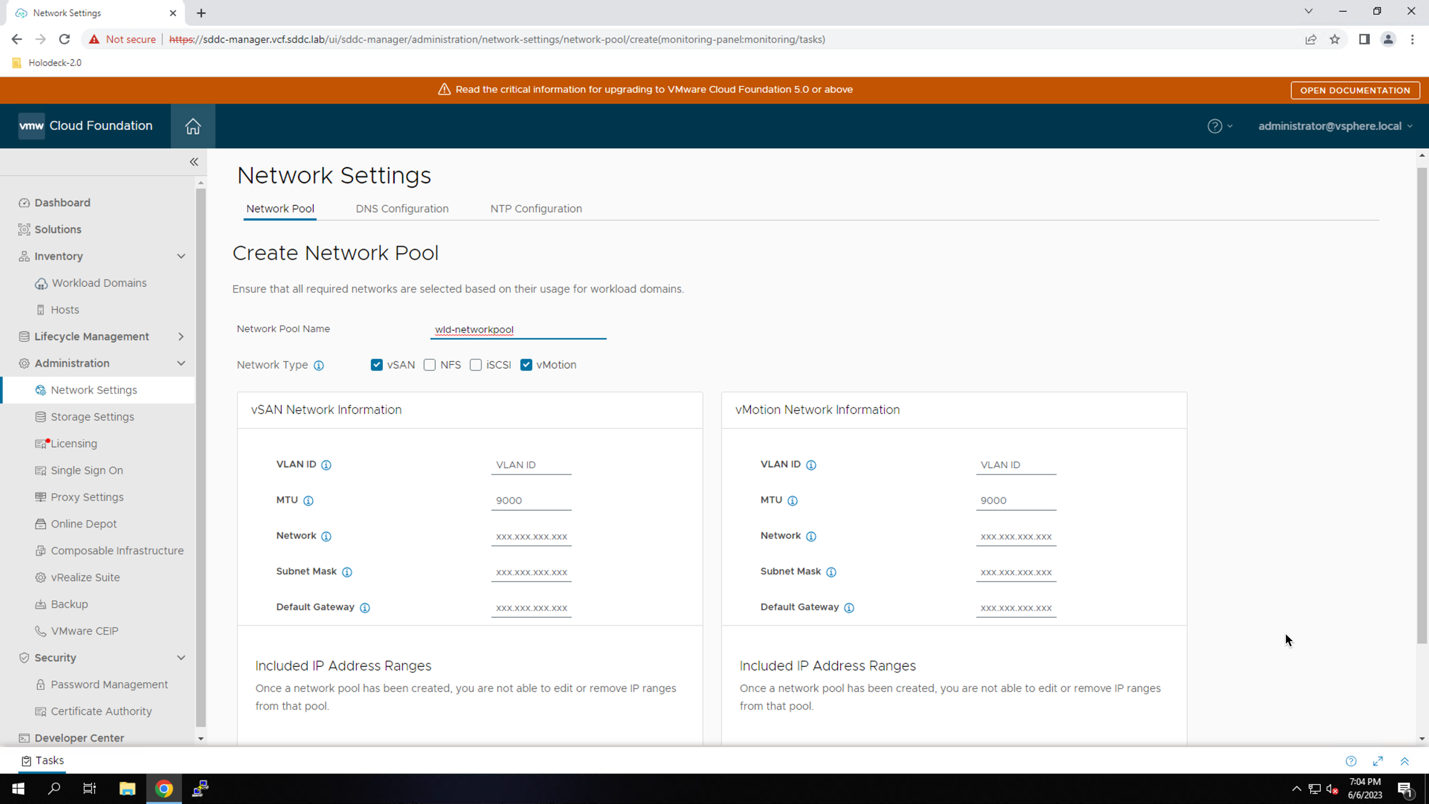
- For the vSAN Network enter:
- VLAN ID: 15
- MTU: 8940
- Network: 10.0.8.0
- Subnet Mask: 255.255.255.0
- Default Gateway: 10.0.8.253
- Include IP Address Range: 10.0.8.121 - 10.0.8.131
- Click ADD
- For the vMotion network enter:
- VLAN ID: 14
- MTU: 8940
- Network: 10.0.4.0
- Subnet Mask: 255.255.255.0
- Default Gateway: 10.0.4.253
- Include IP Address Range: 10.0.4.121 - 10.0.4.131
- Click ADD
- Click Save
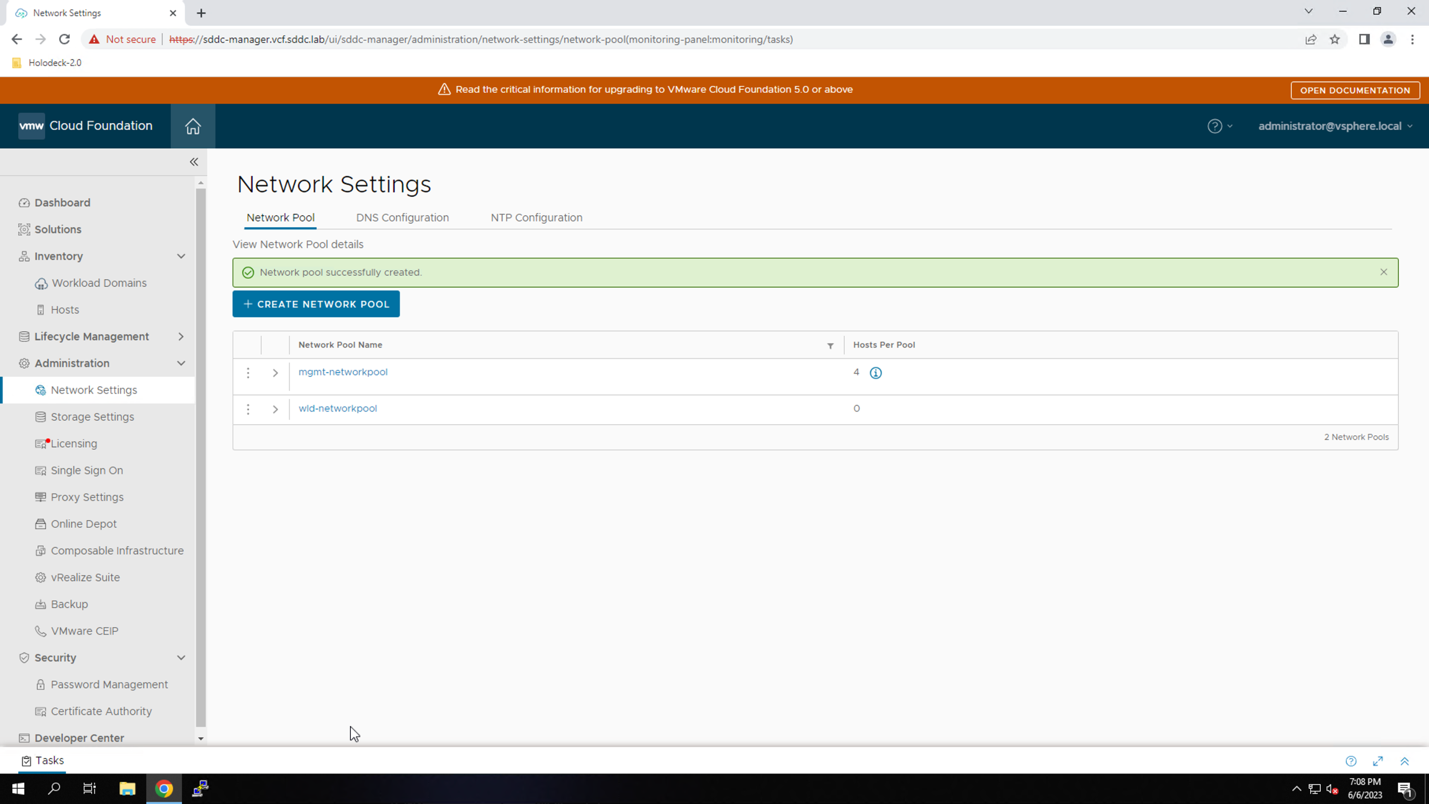
Verify there are two network pools. The mgmt-networkpool that was created for the Management domain during bring-up, and the wld-networkpool that was just created.
Module 4: Commission ESXi hosts esxi-5, esxi-6, esxi-7 and esxi-8
Before creating the isolated workload domain, the four hosts must be commissioned.
When a host is commissioned, it is added to the VCF inventory as an 'unassigned' host. Unassigned hosts are available to be used as part of a domain or cluster creation.
During host commissioning, you must assign a network pool for the new hosts. Be sure to specify the wld-networkpool.
Procedure:
From the SDDC Manager:
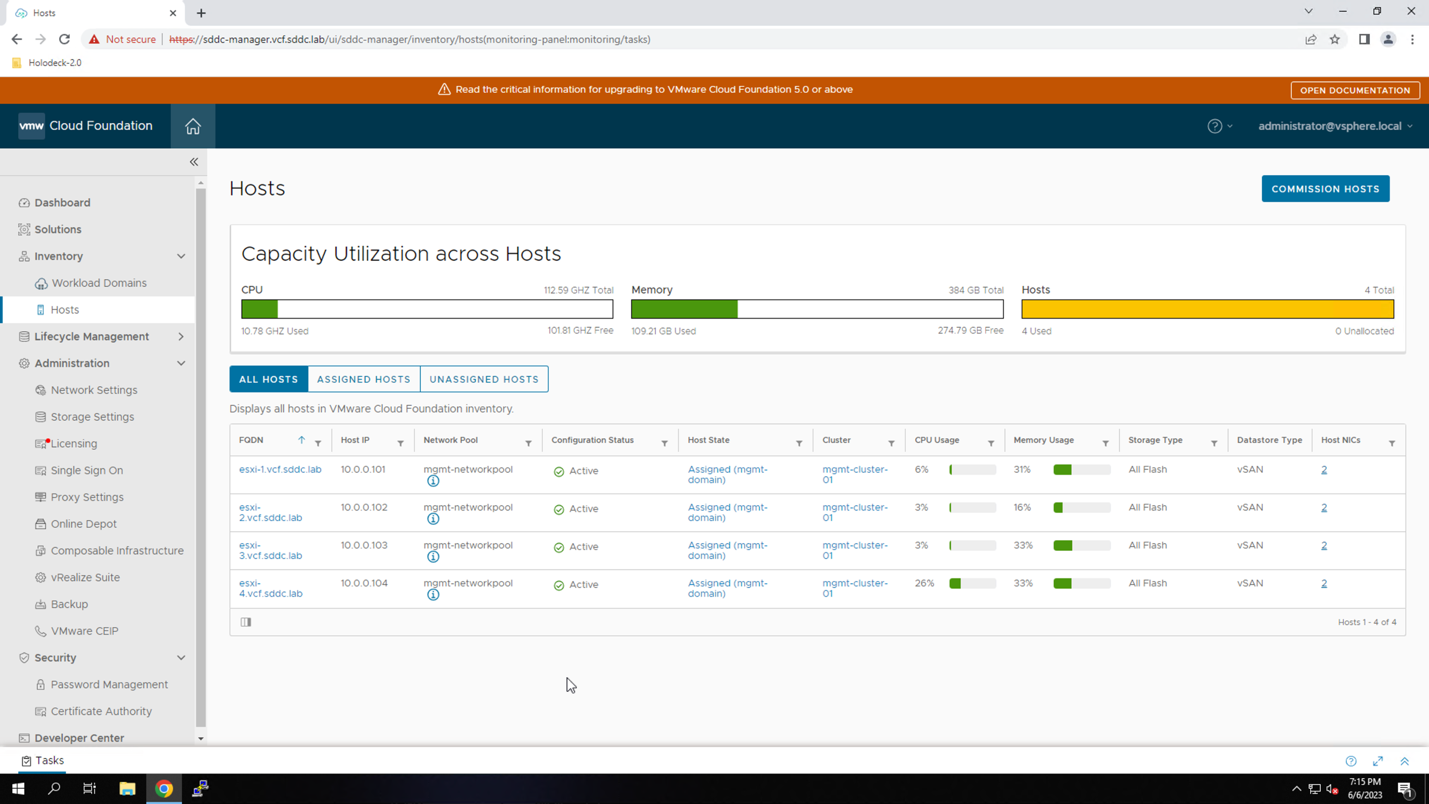
- Navigate to Hosts
- Click COMMISSION HOSTS
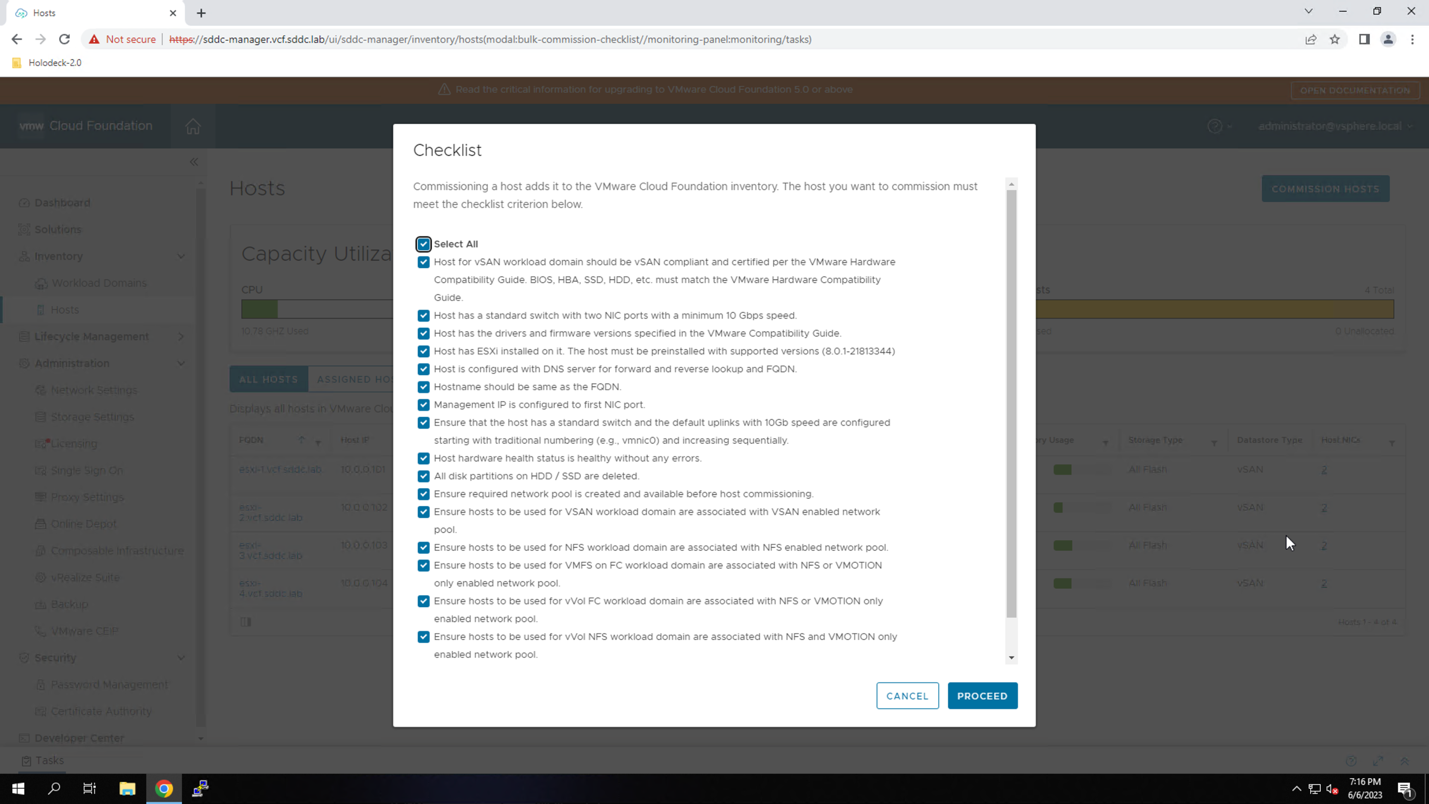
- Click Select All to confirm the prerequisites
- Click PROCEED
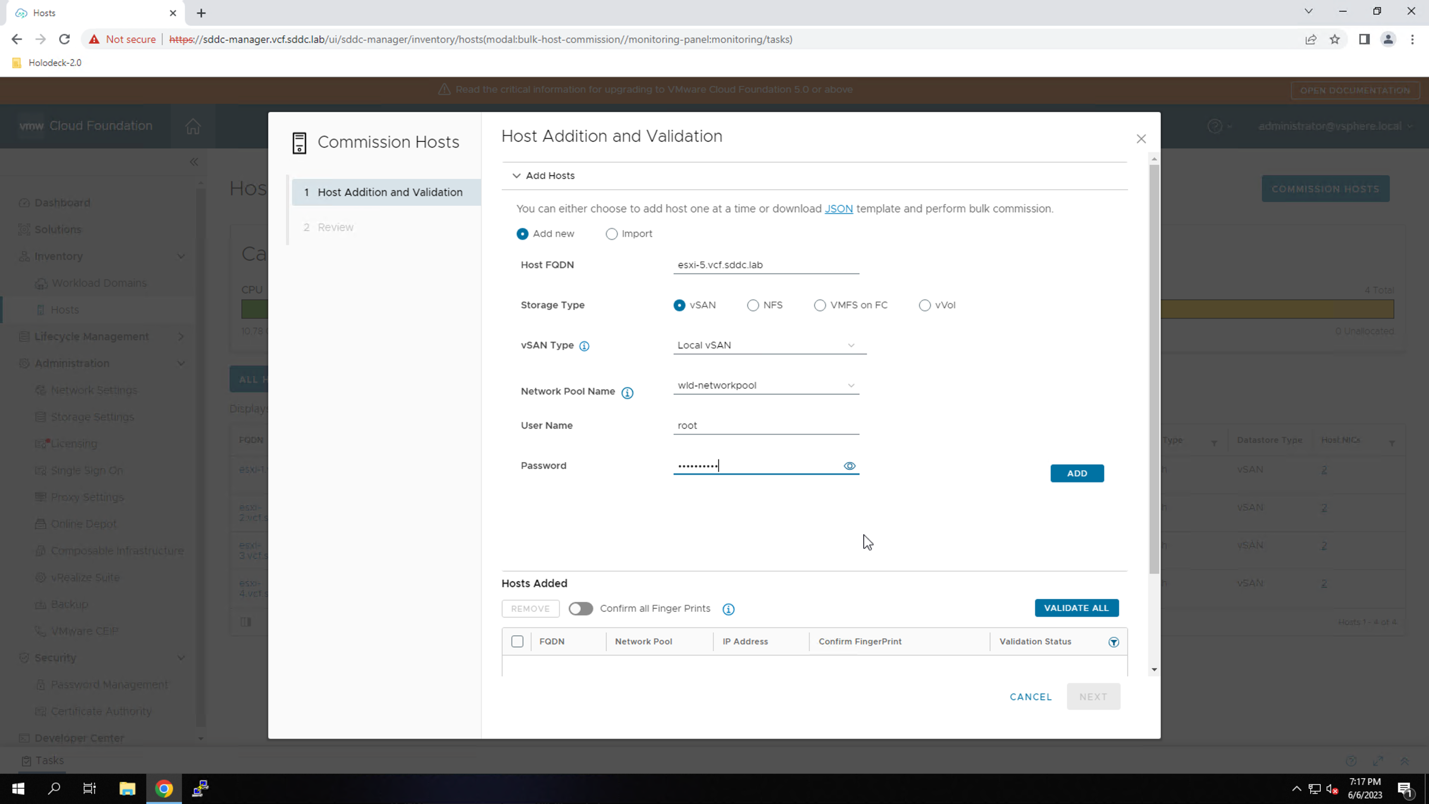
- Verify Add new is selected
- Enter Host FQDN: esxi-5.vcf.sddc.lab
- Select Storage Type: vSAN
- Select Network Pool Name: wld-networkpool
- Enter User Name: root
- Enter Password: VMware123!
- Click ADD
The host is added to the lists of hosts to be commissioned.
Repeat the above steps to add hosts esxi-6.vcf.sddc.lab, esxi-7.vcf.sddc.lab, and esxi-8.vcf.sddc.lab.
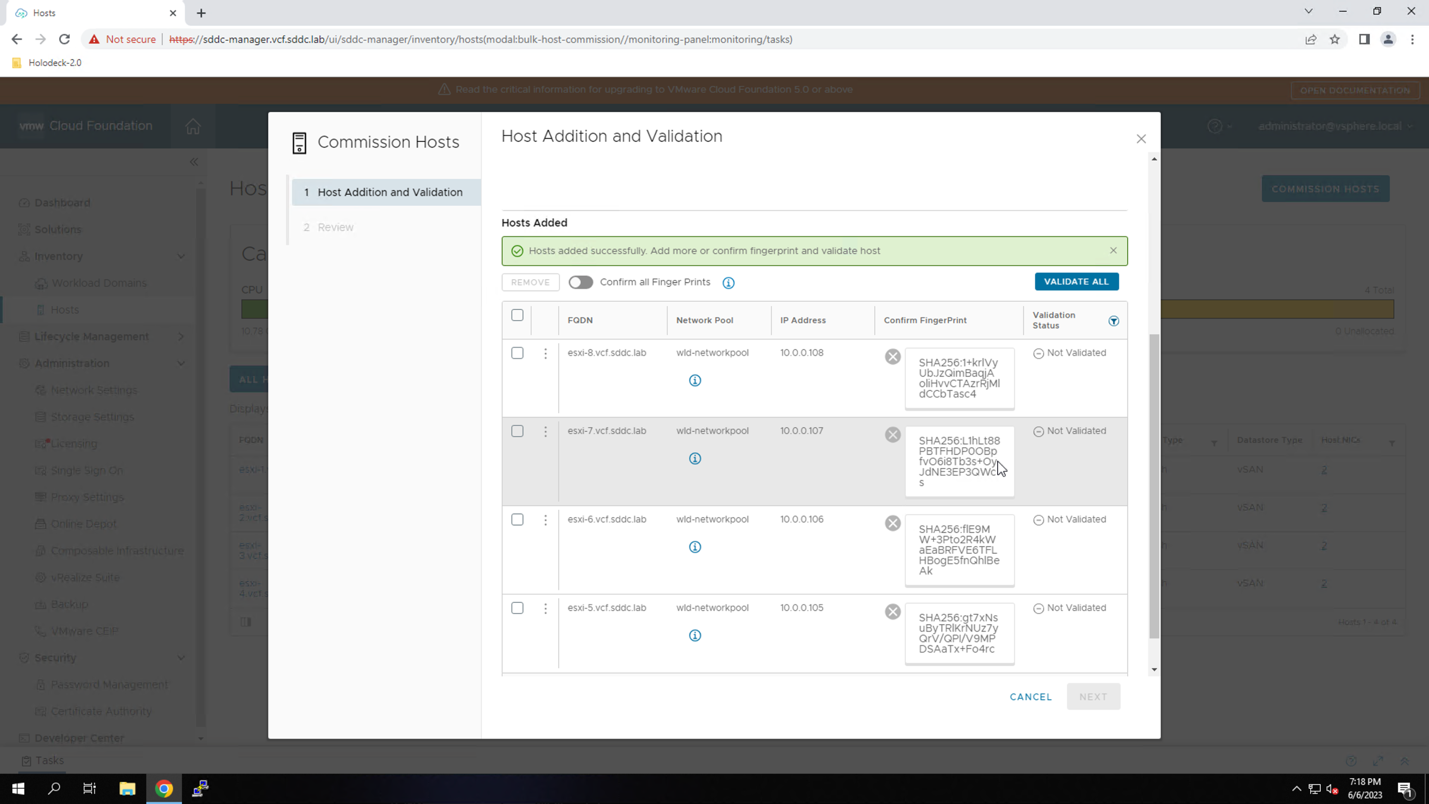
After all four hosts have been added:
- Click VALIDATE ALL
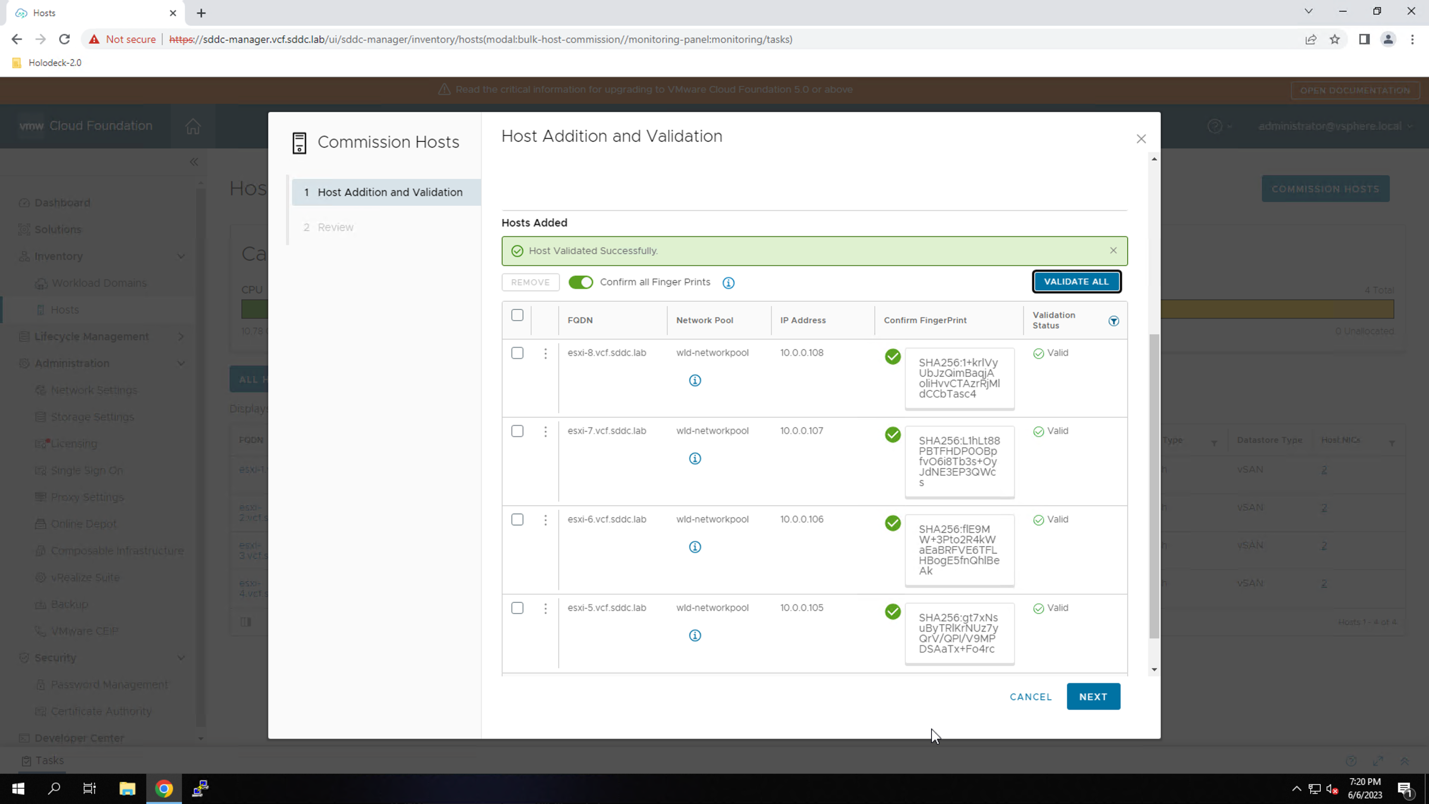
Verify all hosts validate successfully. After hosts validation:
- Click NEXT
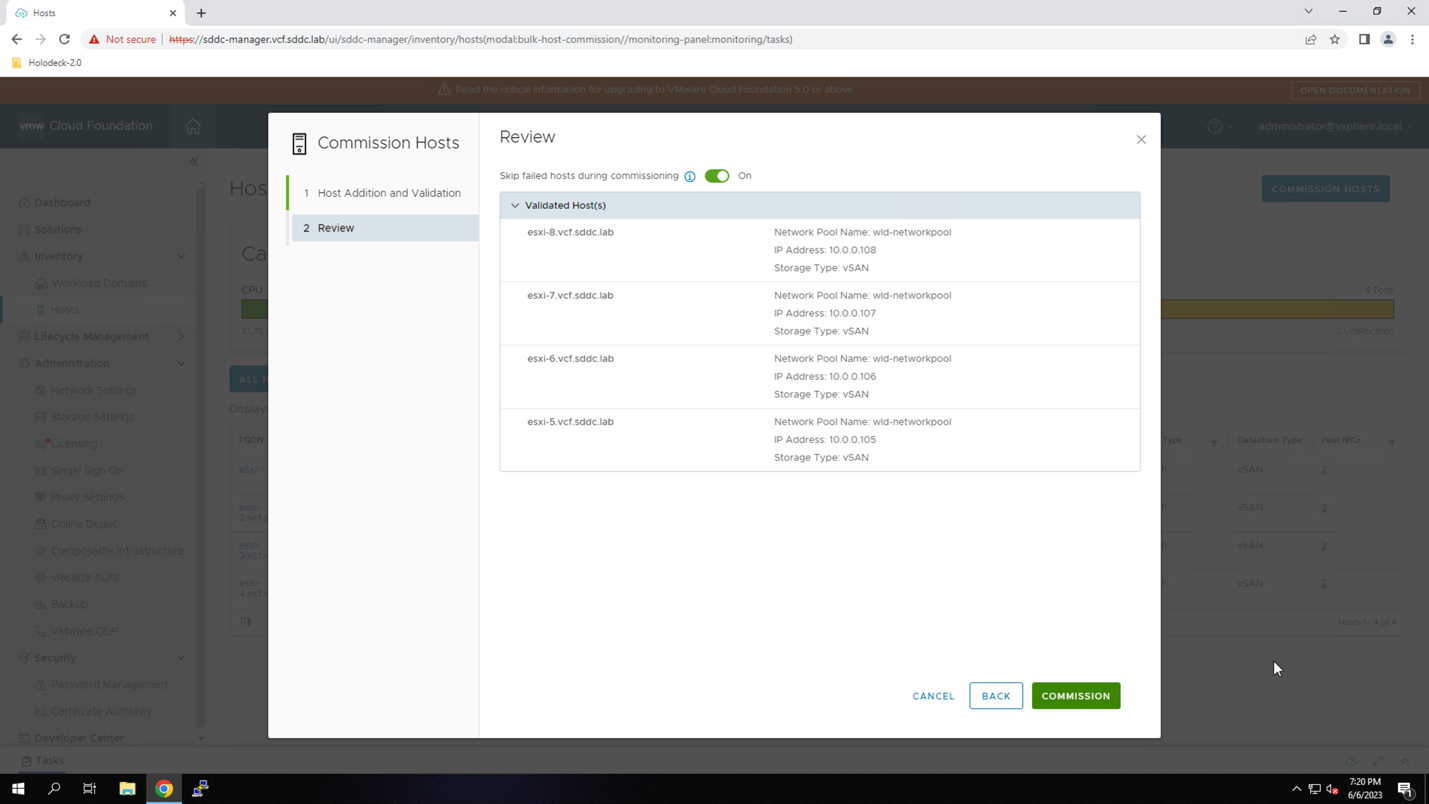
Review the details for the host commissioning.
- Click COMMISSION
The SDDC Manager invokes a workflow to commission the new hosts. It will take approximately 5 minutes for the workflow to complete. Verify the workflow completes successfully.
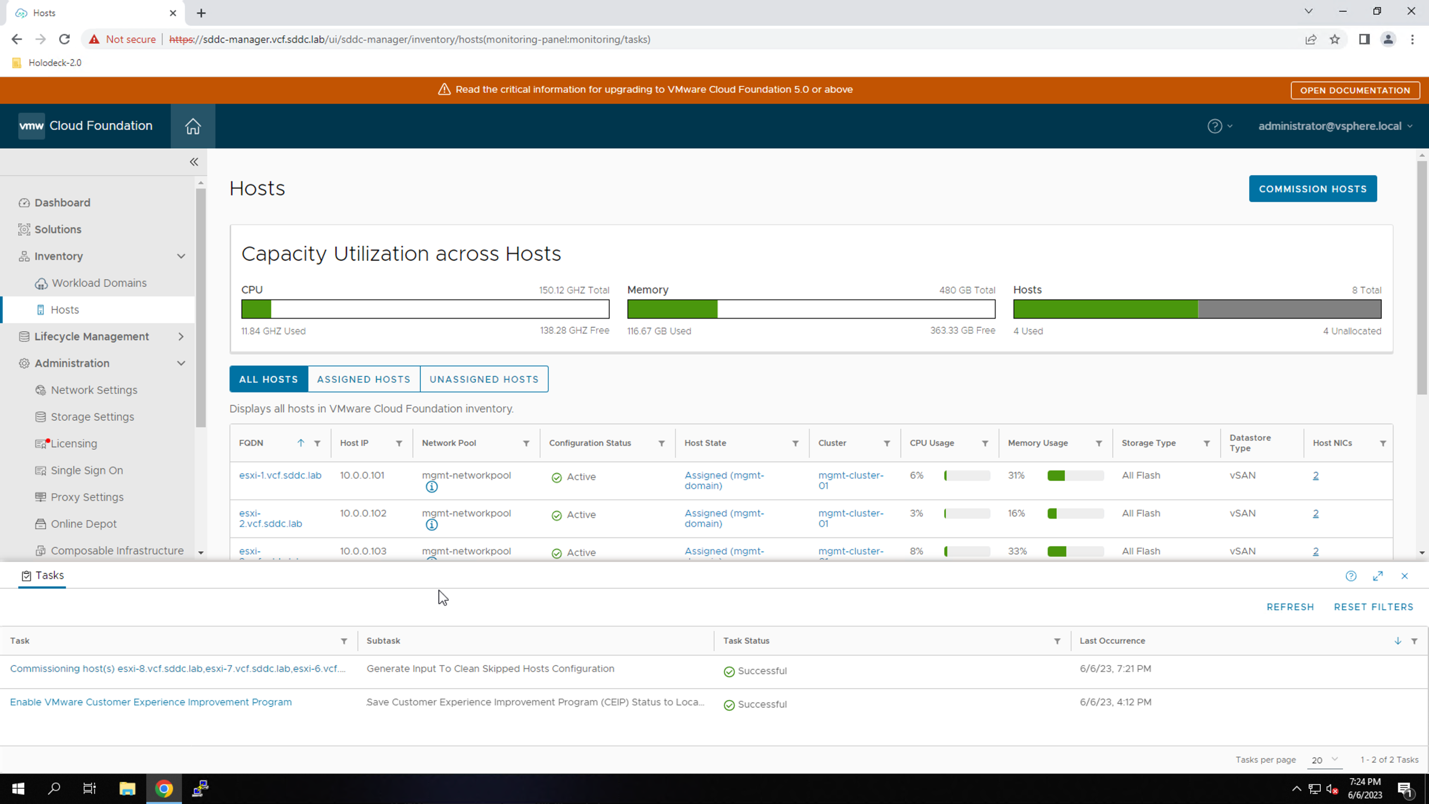
After the hosts have been commissioned, they will show as unassigned hosts in the SDDC manager.
- Click to close the tasks pane
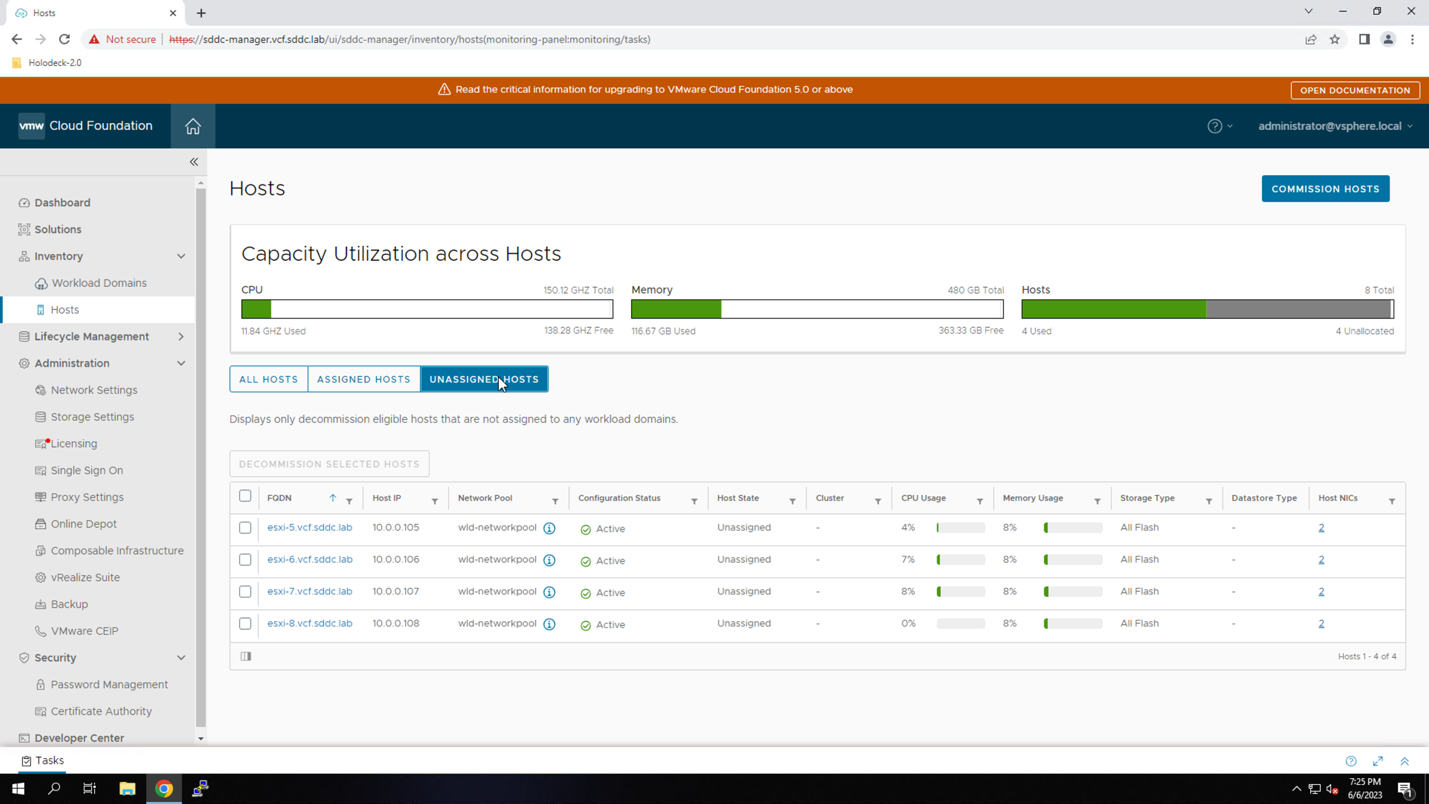
- Click UNASSIGNED HOSTS
Verify all four hosts are listed as unassigned hosts.
Module 5: Create Isolated Workload Domain
With the network pool created and the hosts added to the inventory, you are ready to create an Isolated Workload domain. Follow the procedure below to create an isolated domain.
Procedure:
From the SDDC Manager:
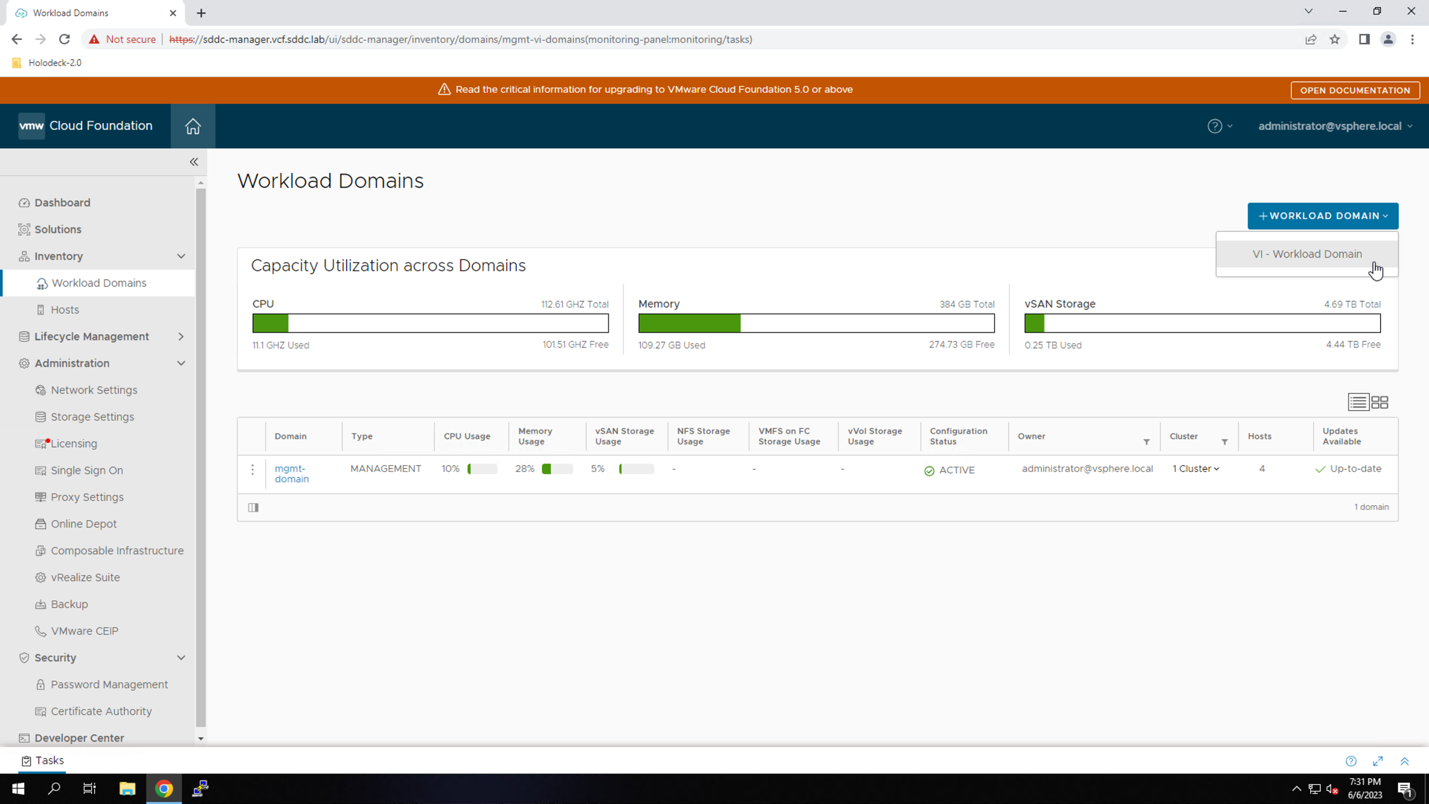
- Navigate to Workload Domains
- Click +WORKLOAD DOMAIN
- Click VI - Workload Domain
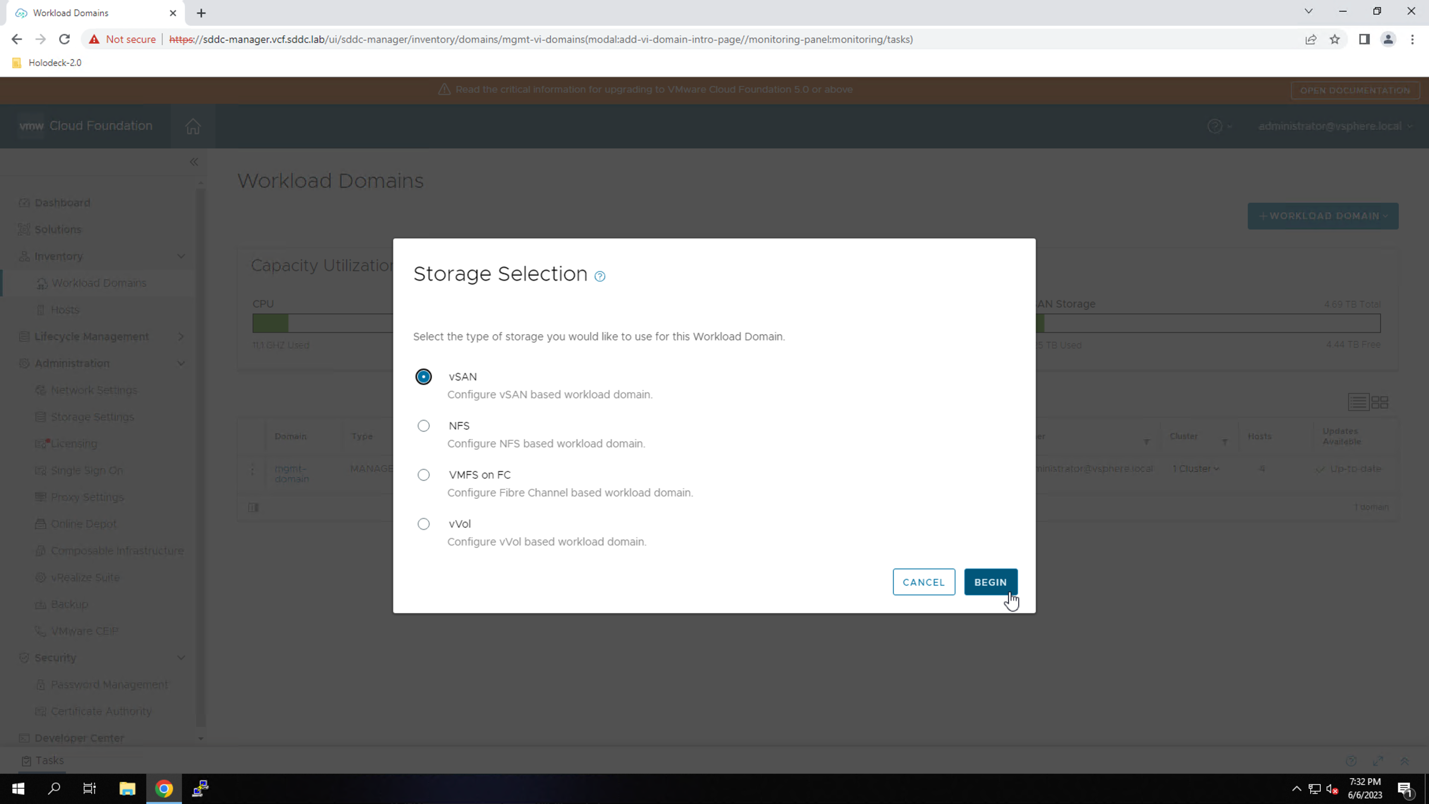
- Select vSAN
- Click BEGIN
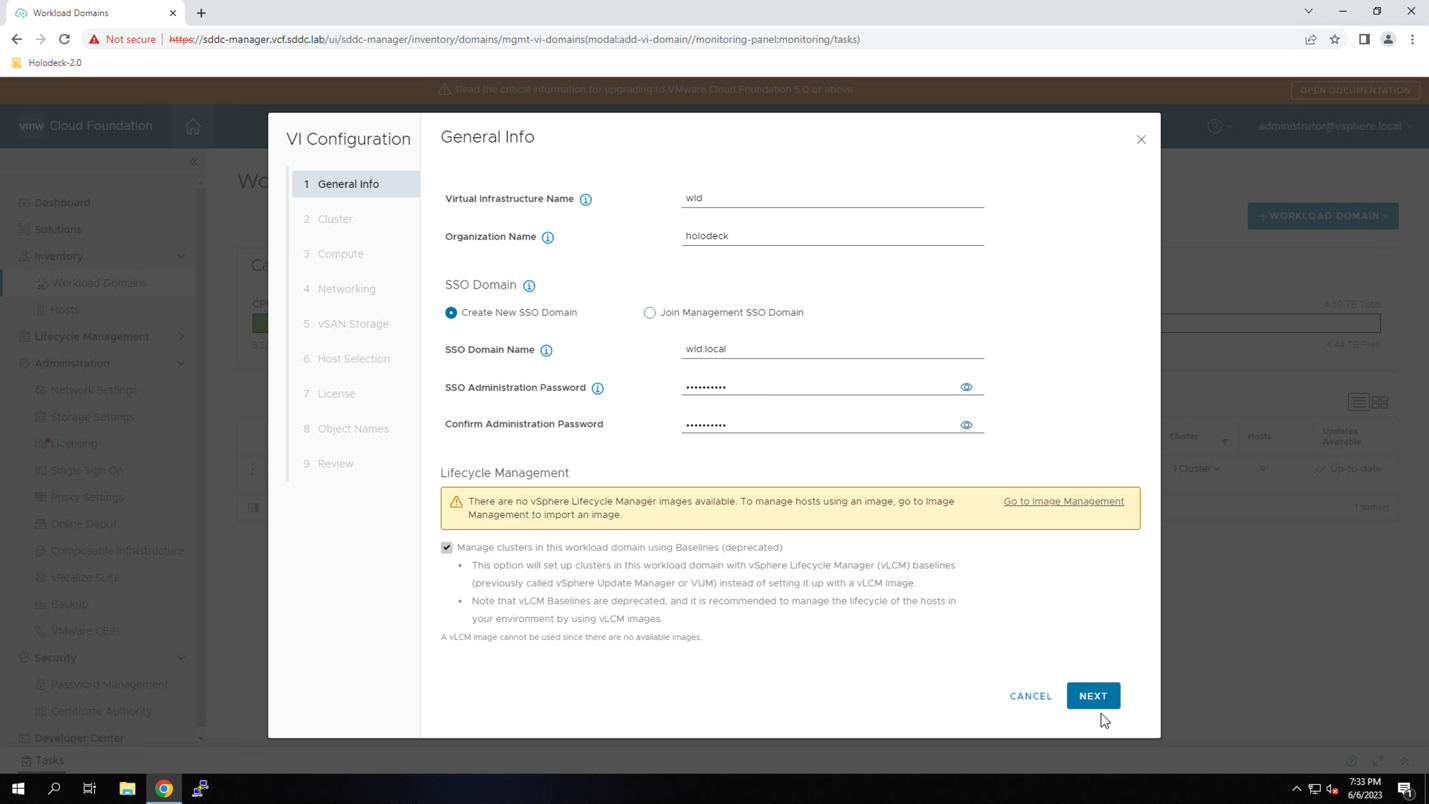
- Enter Virtual Infrastructure Name: wld
- Enter Organization Name: holodeck
- Select Create New SSO Domain
- Enter SSO Domain Name: wld.local
- Enter SSO Administrator Password: VMware123!
- Enter Confirm Administrator Password: VMware123!
- Click NEXT
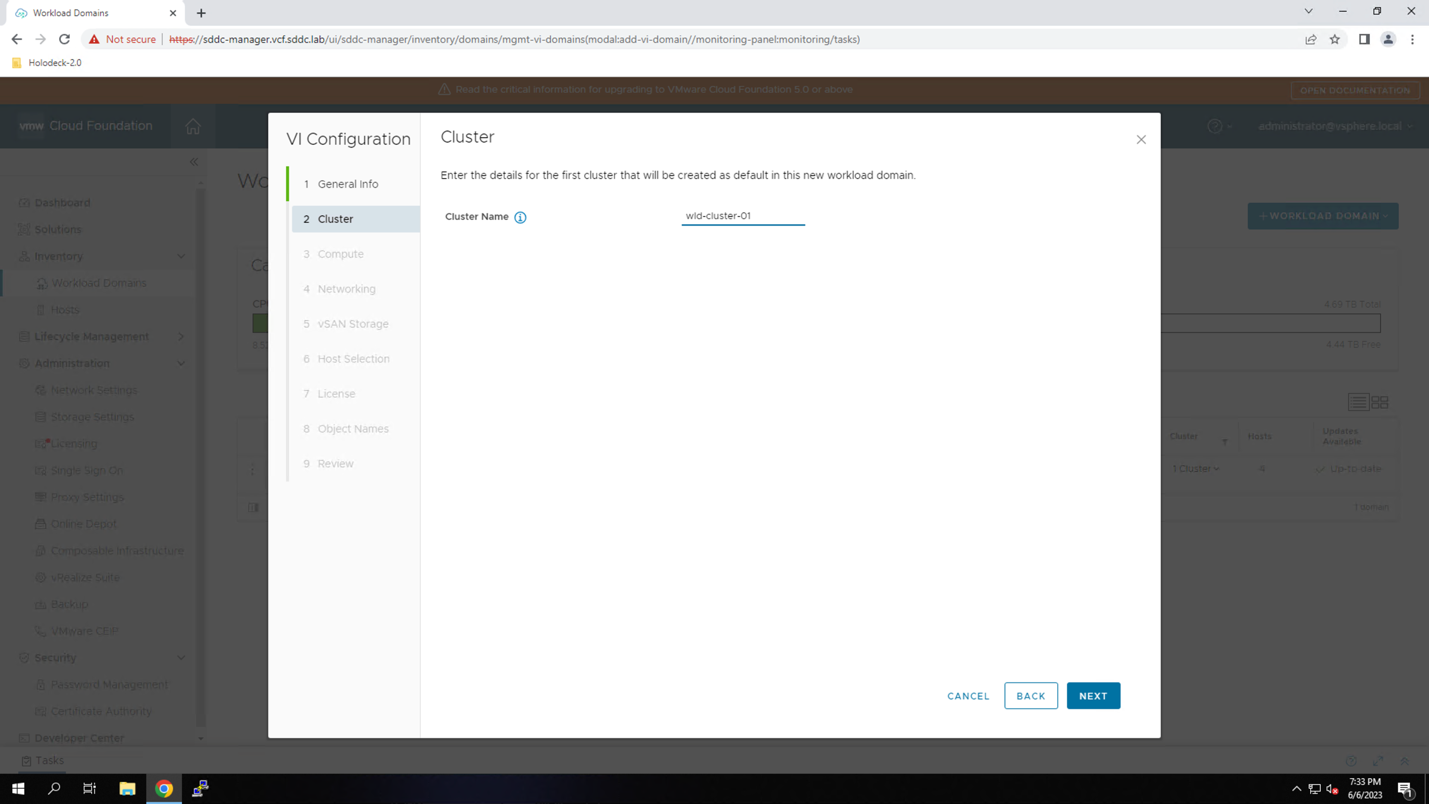
- Enter Cluster Name: wld-cluster-01
- Click NEXT
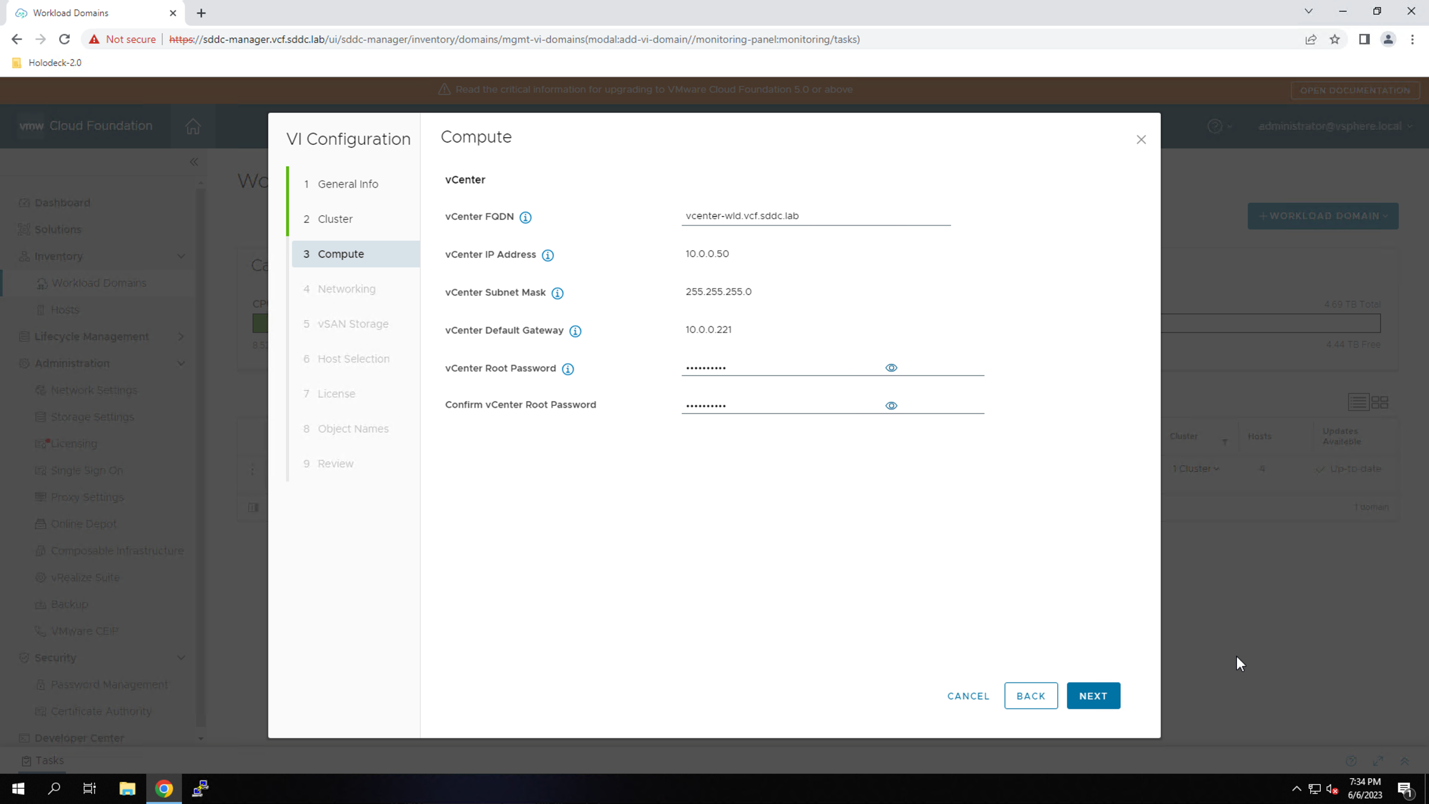
At the Compute screen:
- Enter vCenter FQDN: vcenter-wld.vcf.sddc.lab
- Enter vCenter Root Password: VMware123!
- Enter Confirm vCenter Root Password: VMware123!
- Click NEXT
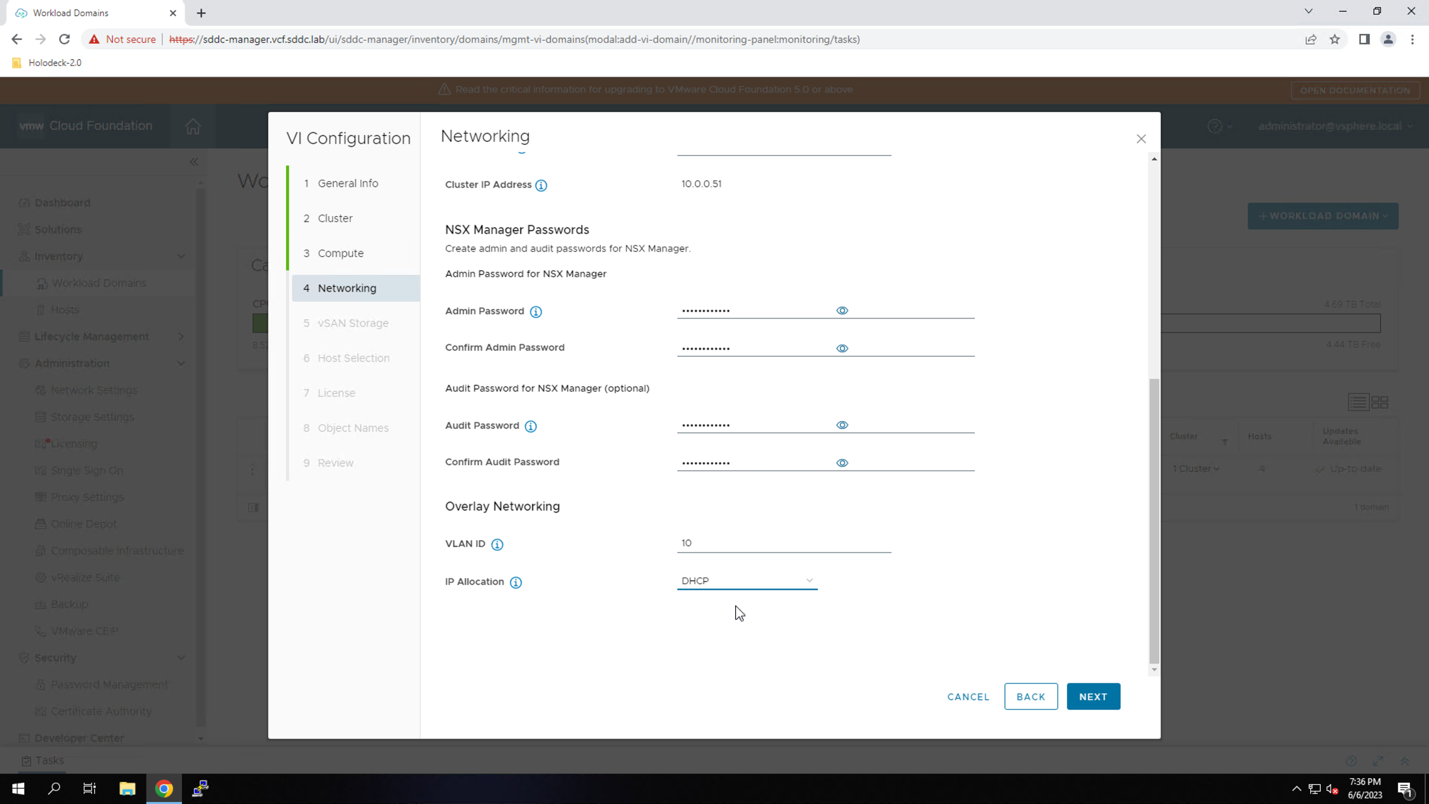
At the Networking screen:
- Enter FQDN 1: nsx1-wld.vcf.sddc.lab
- Enter FQDN 2: nsx2-wld.vcf.sddc.lab
- Enter FQDN 3: nsx3-wld.vcf.sddc.lab
- Enter Cluster FQDN: nsx-wld.vcf.sddc.lab
- Click to scroll down
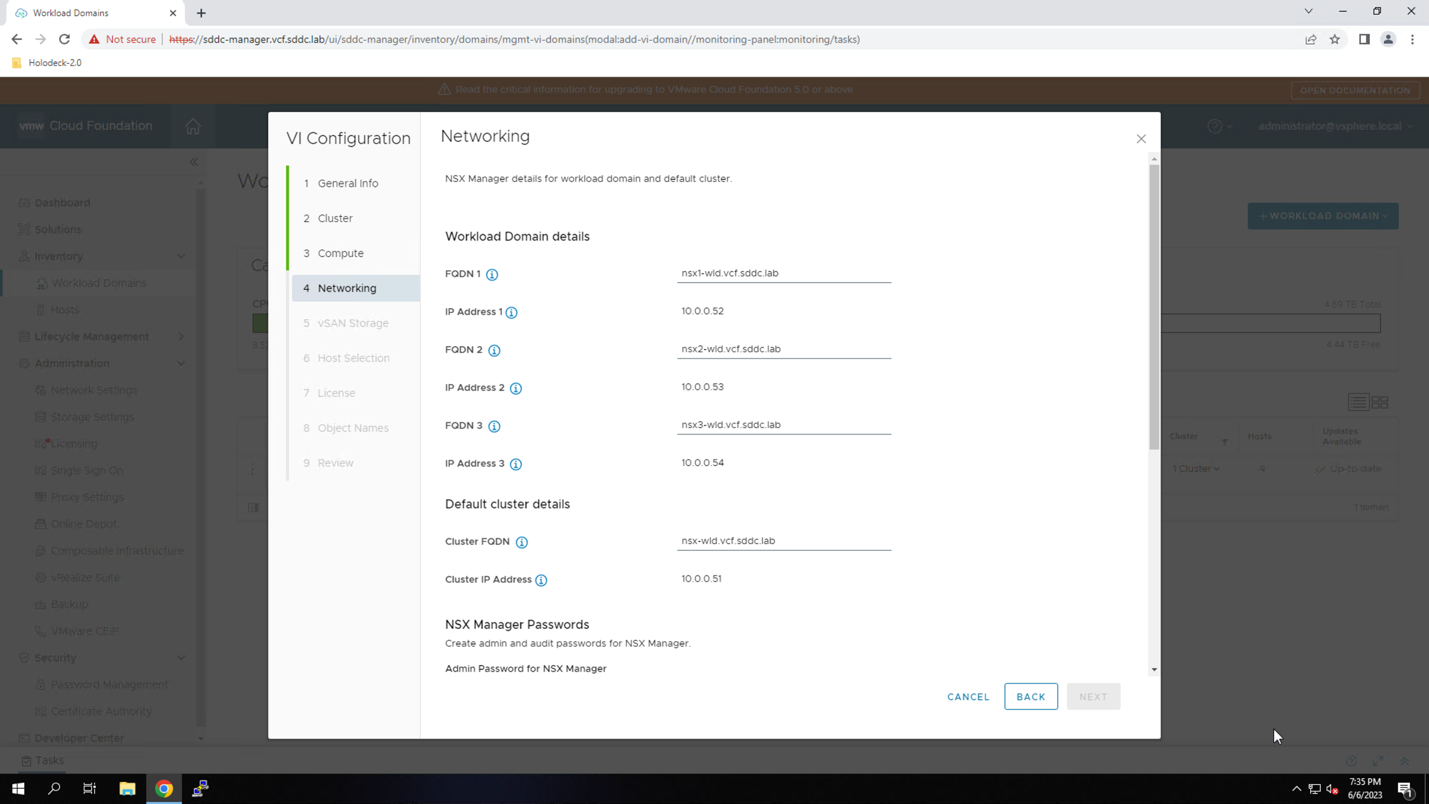
- Enter Admin Password: VMware123!VMware123!
- Enter Confirm Admin Password: VMware123!VMware123!
- Enter Audit Password: VMware123!VMware123!
- Enter Confirm Audit Password: VMware123!VMware123!
- Click to scroll down
- Enter VLAN ID: 10
- Select IP Allocation dropdown: DHCP
- Click NEXT
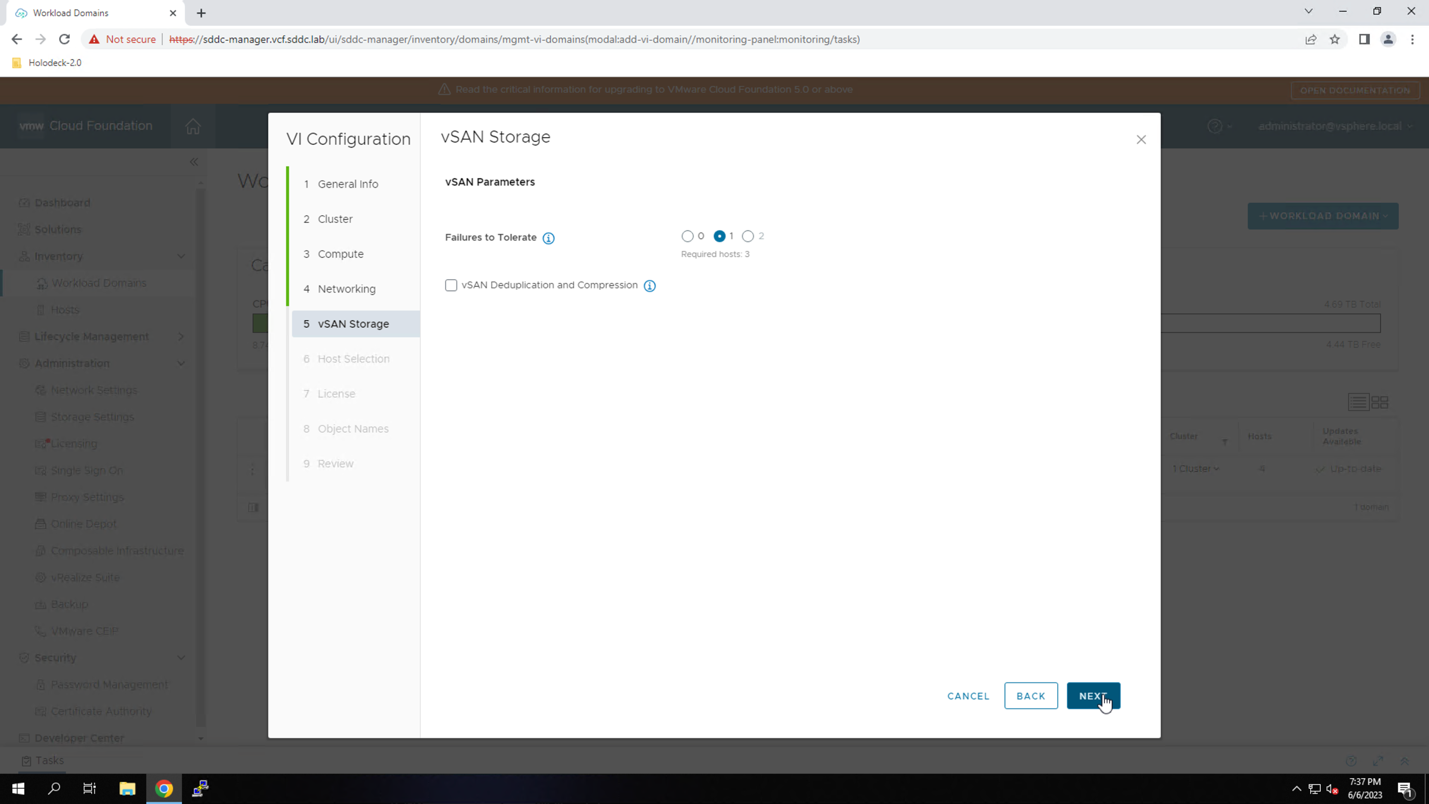
At the vSAN Storage Screen:
- Set Failures to Tolerate: 1
- Click NEXT
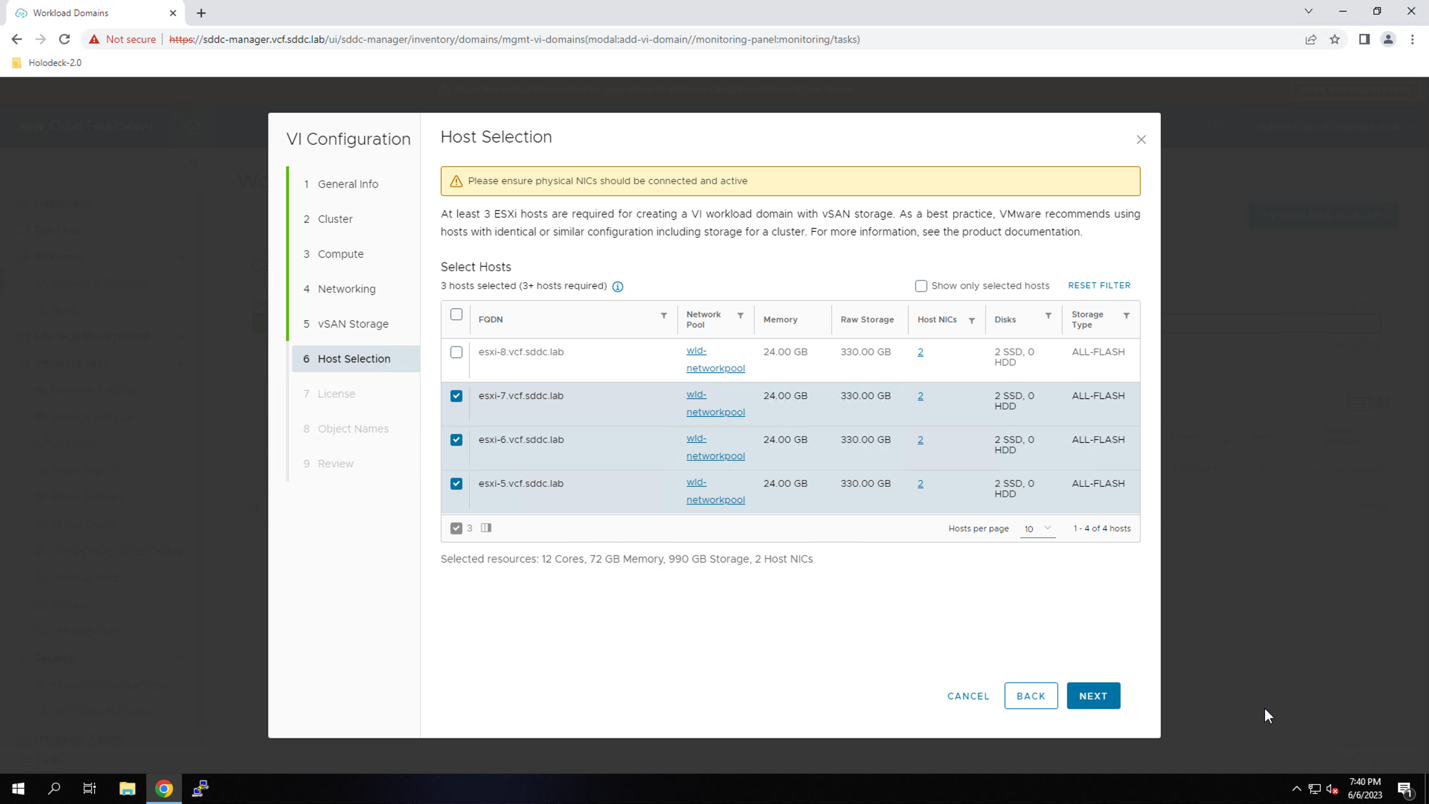
At the Host Select Screen:
- Select hosts: esxi-5.vcf.sddc.lab, esxi-6.vcf.sddc.lab, esxi-7.vcf.sddc.lab
- Click NEXT
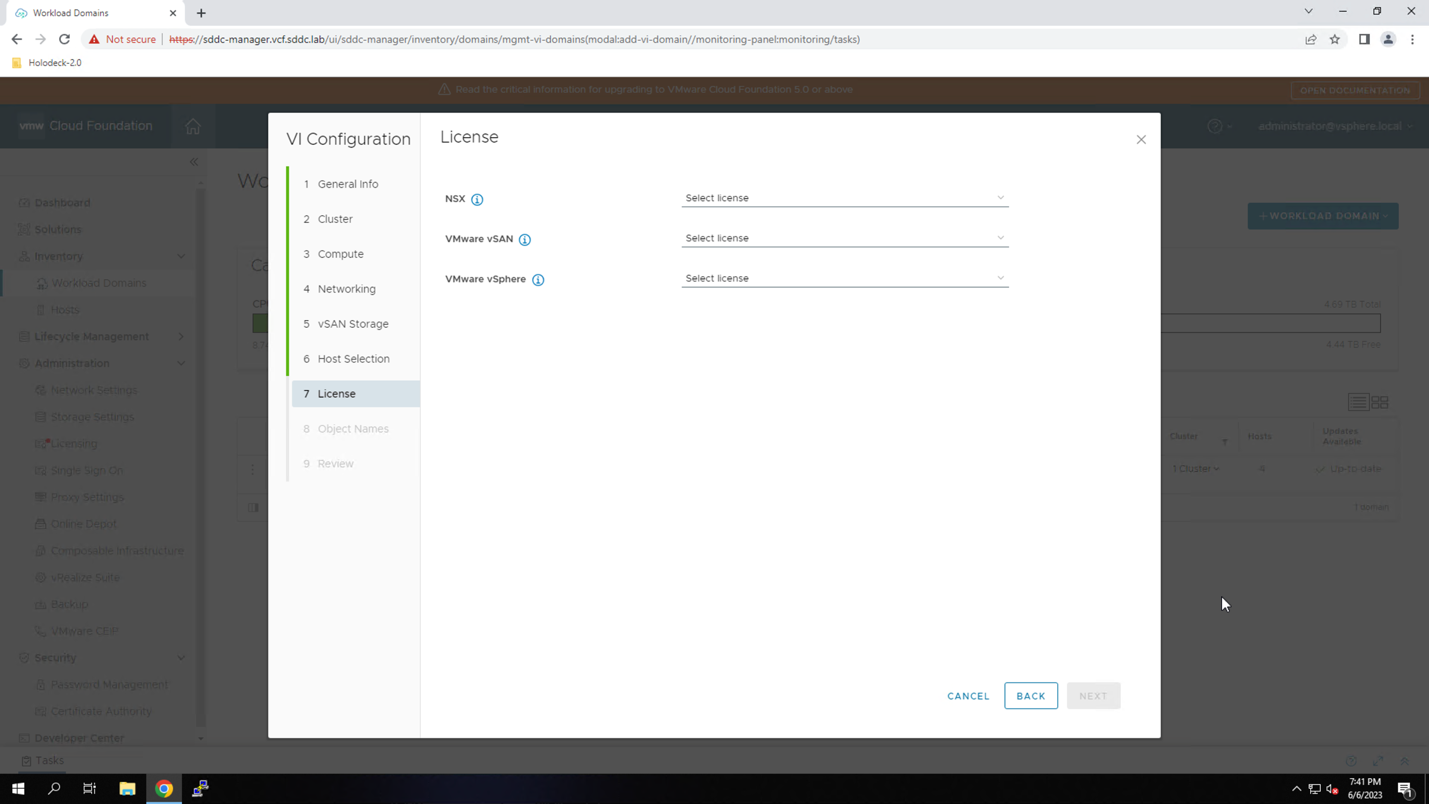
At the License screen:
- Assign License keys for : NSX, vSAN, and vSphere
- Click NEXT
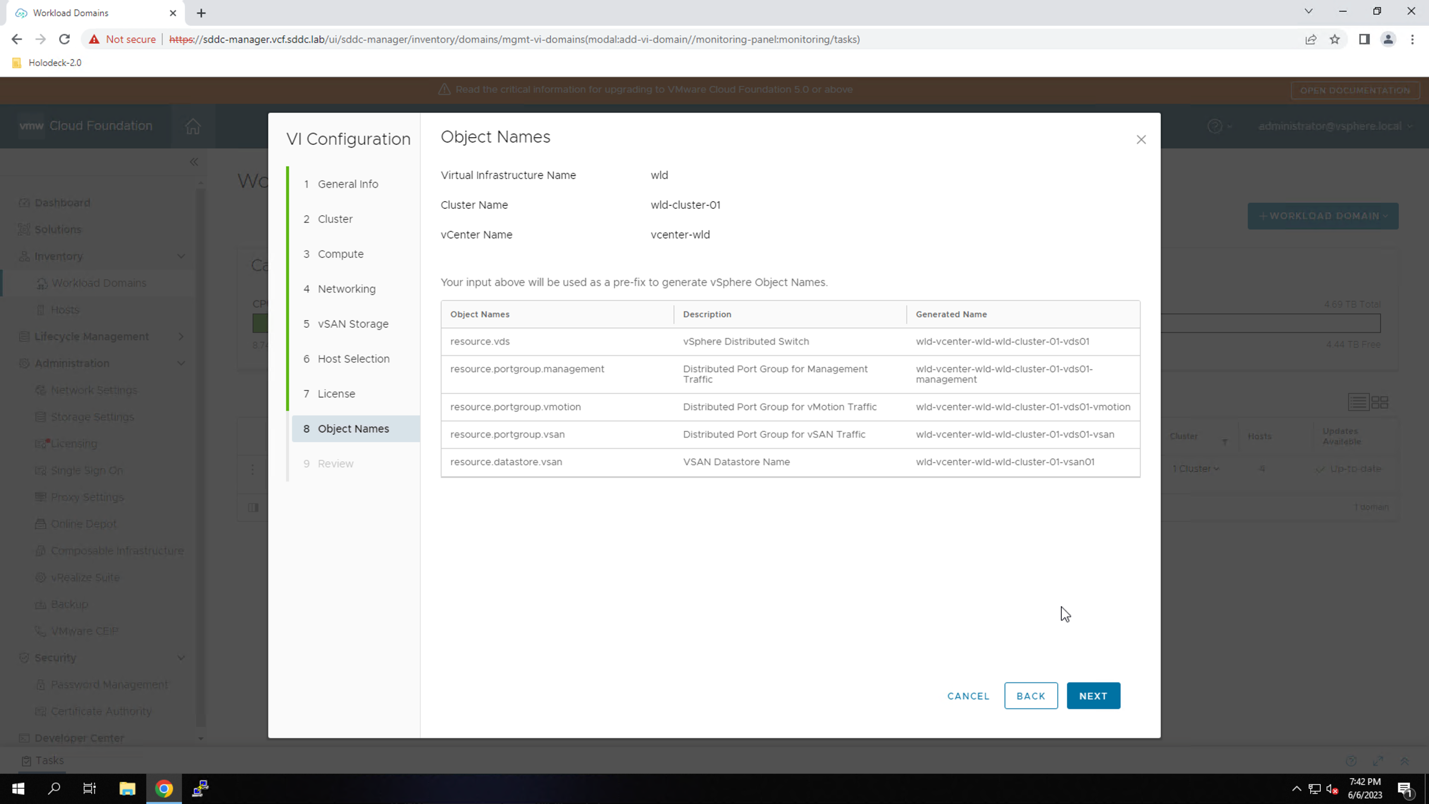
At the Object Names screen:
- Verify the object names
- Click NEXT
At the Review screen
- Click the scroll bar to review the settings
- Click FINISH

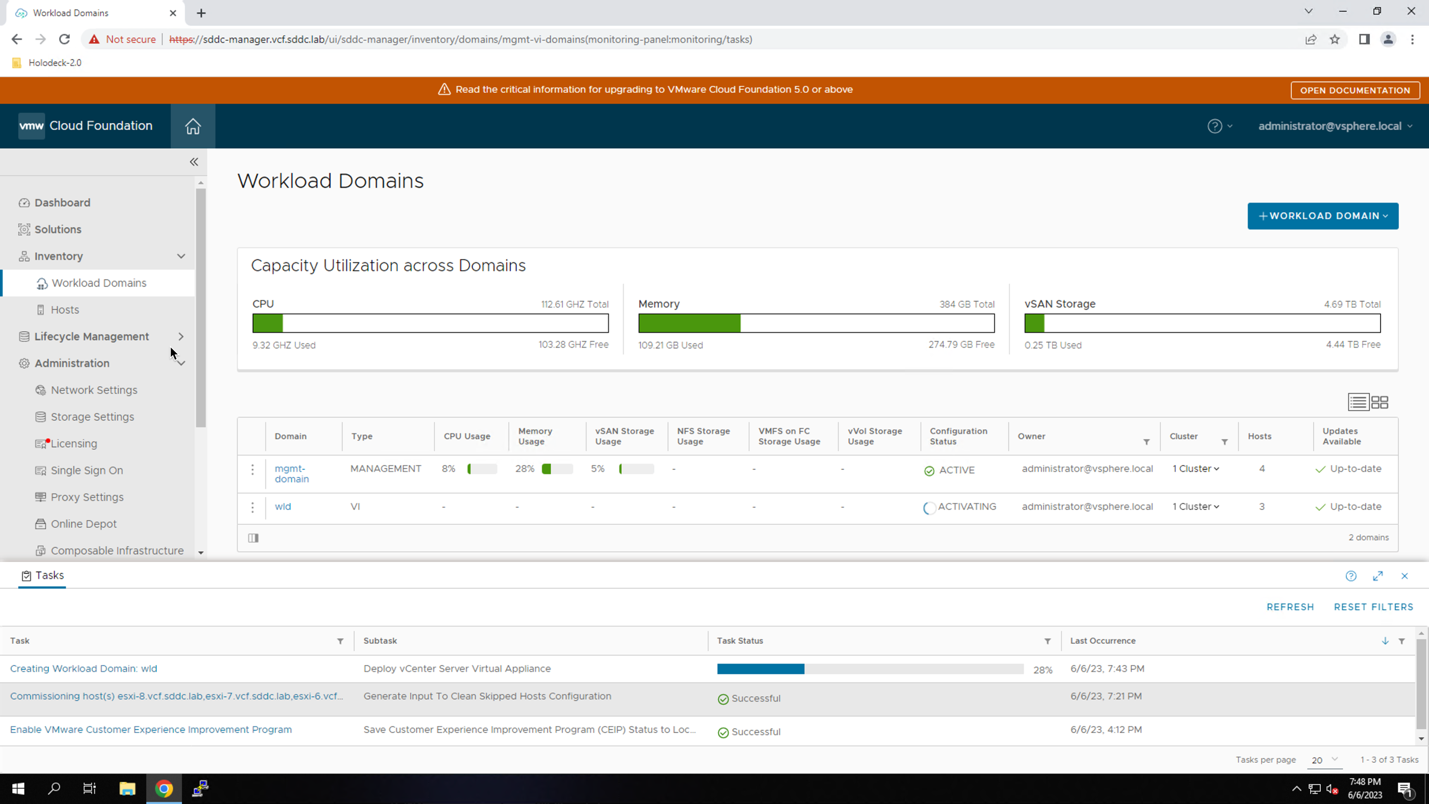
The SDDC Manager launches a workflow to create the isolated workload domain.
The workload domain creation workflow will perform the following high-level tasks:
- Deploying a new vCenter Server Instance
- Instantiating a new SSO Domain
- Creating a vSphere Cluster and adding the assigned ESXi hosts
- Creating vSAN disk groups and configuring a vSAN datastore for the cluster
- Deploying the NSX Managers
- configuring NSX in the cluster
Monitor the workflow progress by expanding the tasks pane and clicking on the workflow name. Note that when viewing the workflow subtasks you will need to manually refresh the page.
Ensure the workflow completes successfully. It will take approximately 90 minutes to complete.
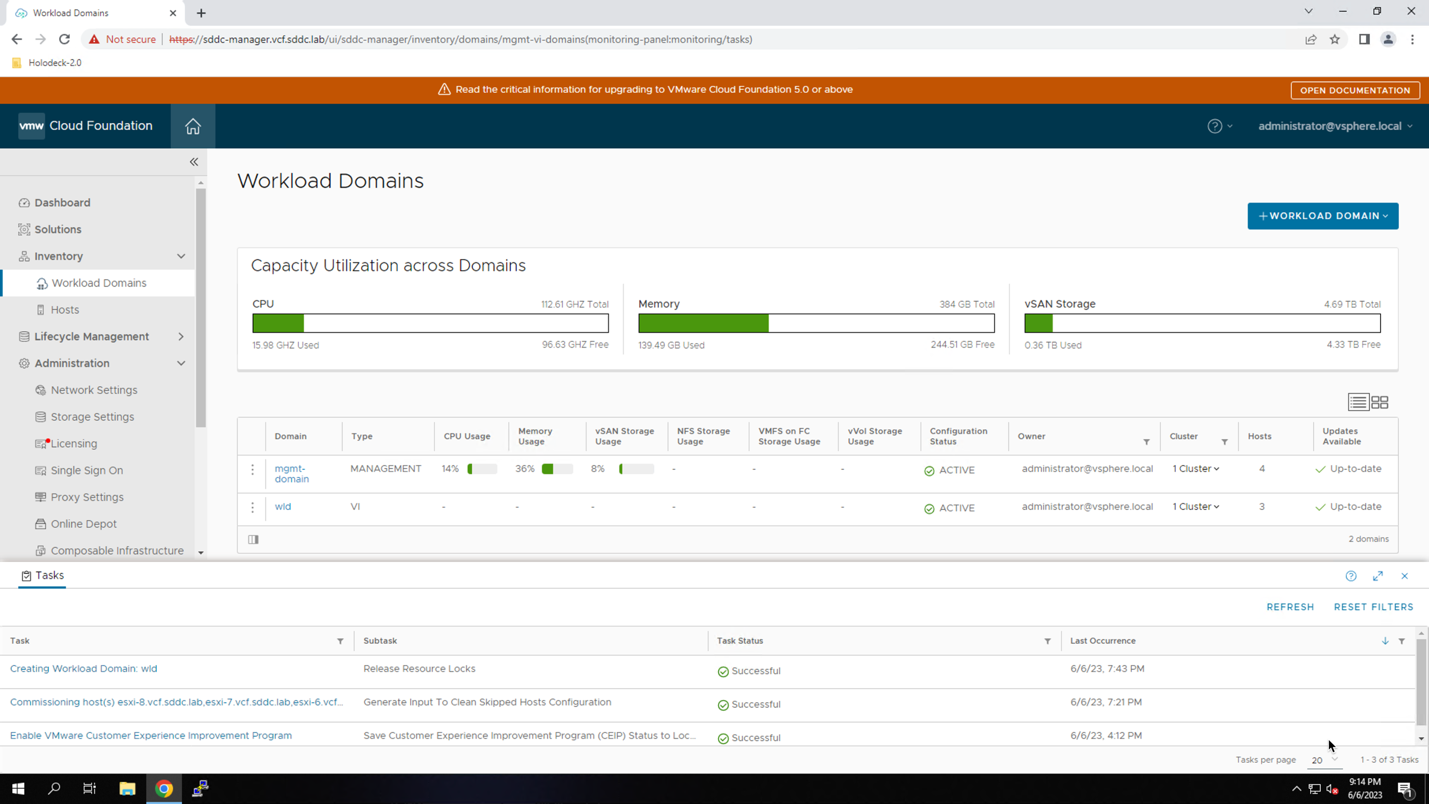
Module 6: View Isolated Domain Details
The new domain is listed in the workload domain summary. Follow the procedure below to view details about the domain. Note that the isolated domain will have its own, dedicated vSphere SSO domain named ‘wld.local’.
Procedure:
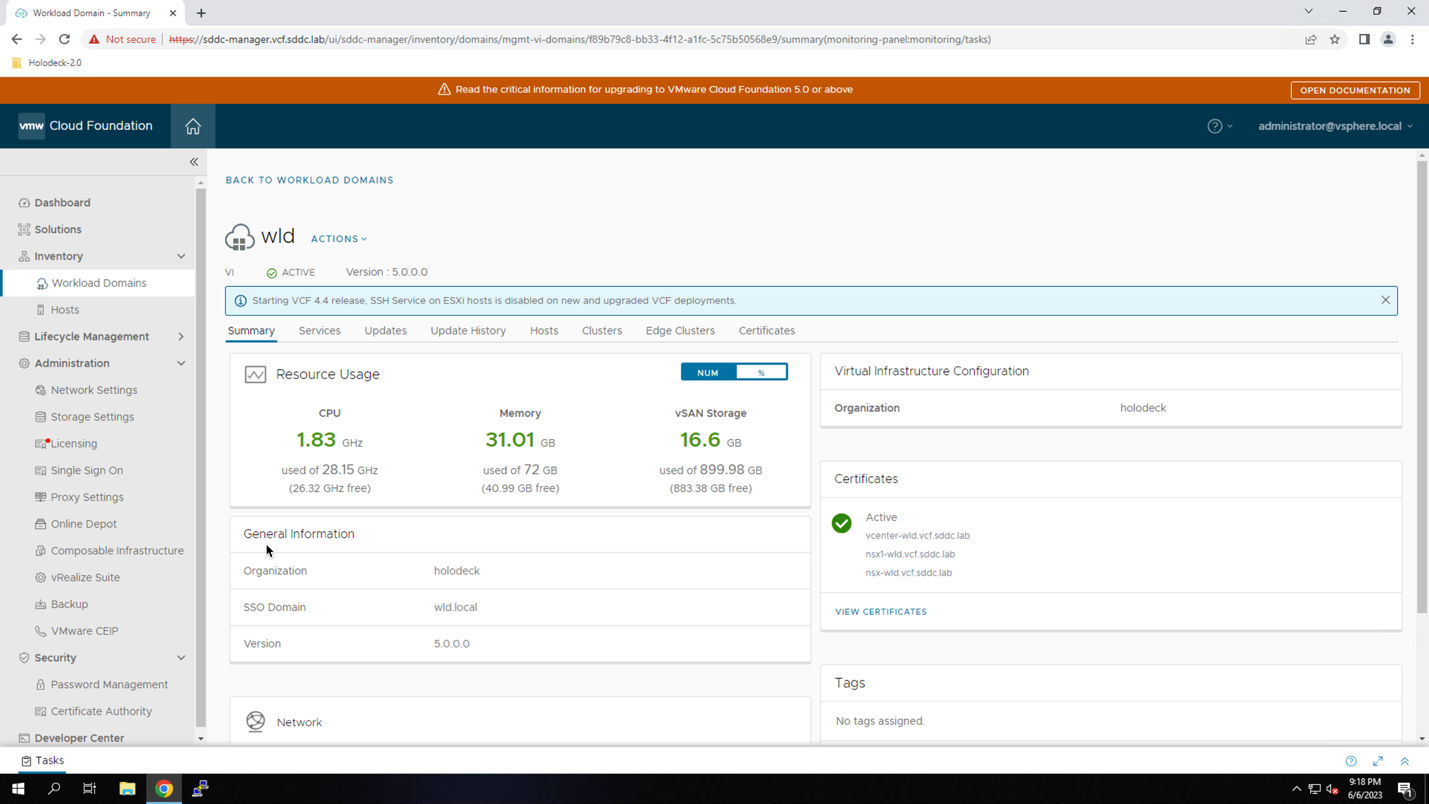
- Click wld
- Click to close the task pane
At the domain summary screen observe that the SSO domain is listed as 'wld.local'. Compare this to the SSO domain for the management domain.
- Click BACK TO WORKLOAD DOMAINS
- Click mgmt-domain
Here you see that the management domain is part of the 'vsphere.local' SSO domain.
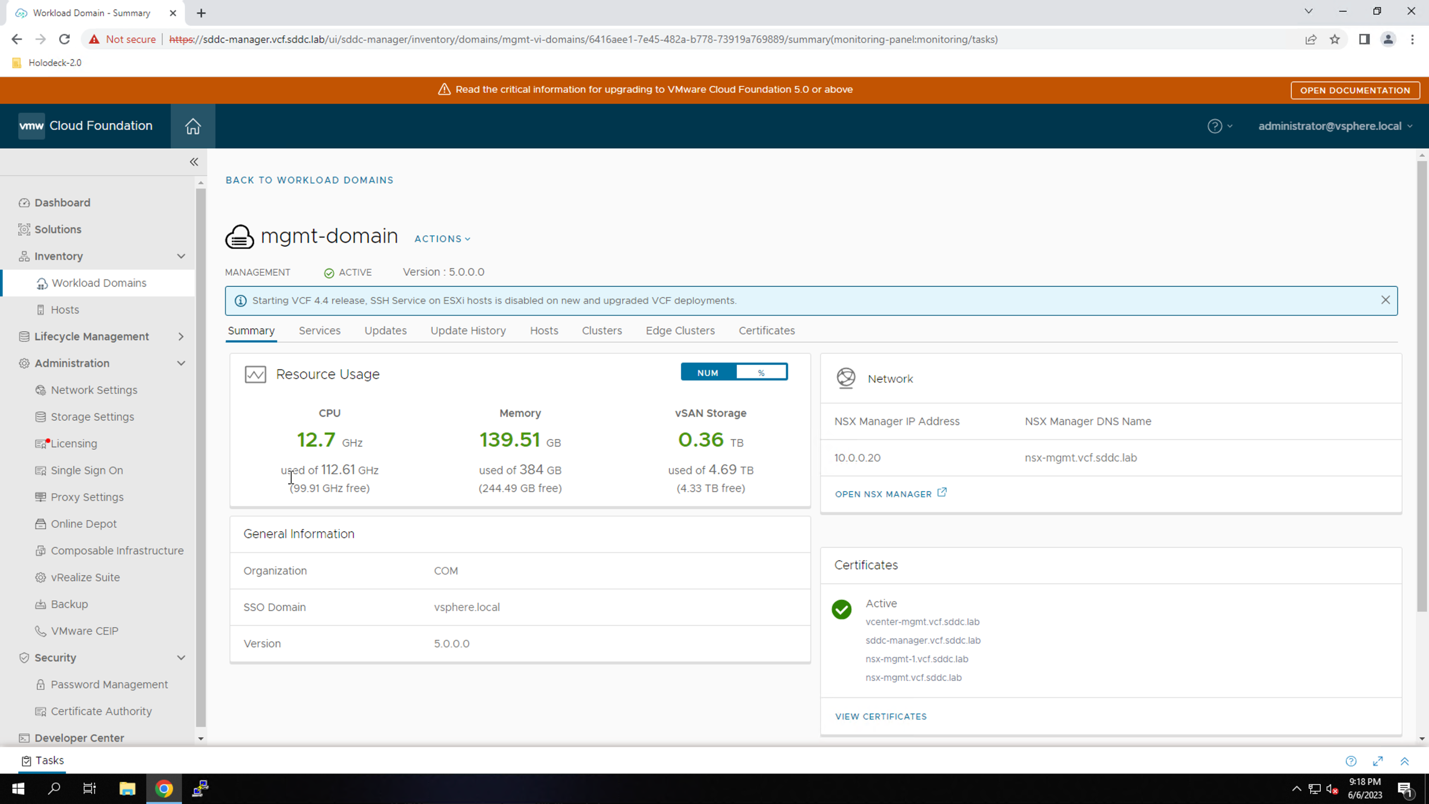
Because the two domains are members of separate SSO domains, they are isolated from each other. This means that an administrator in one domain does not have access to the resources on the other domain. To demonstrate this, we will login to each vCenter server instance.
From the management domain:
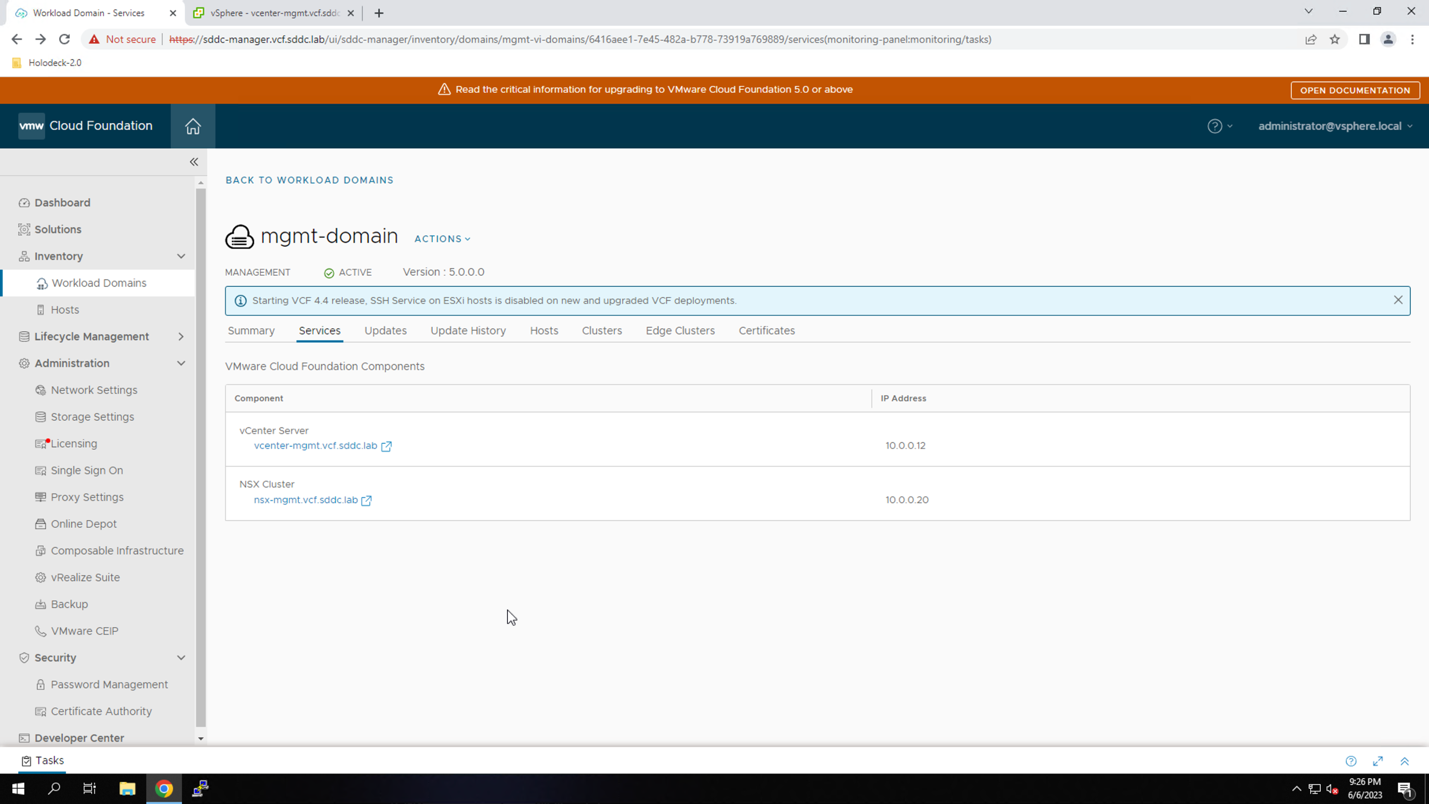
- Click Services
- Click the vcenter-mgmt.vcf.sddc.lab link

Note that the user credentials (administrator@vsphere.local) used to login to the SDDC Manager are the same as the user credentials used to login to the management domain vCenter server. These credentials may be cached in your browser session.
- If the token is still valid, you will be connected to the management domain vCenter instance without having to re-authenticate.
- If the token is not cached, or has expired, you will be prompted to re-authenticate. If prompted to authenticate, login as 'administrator@vsphere.local' with the password 'VMware123!'.
In the vSphere client:
- Click to expand the vSphere inventory
Observe in the management domain vCenter inventory we only have visibility to the management domain. Because the 'wld' domain was deployed with a separate SSO domain, ELM is not used and the 'wld' domain is isolated from the management domain.

- Click the SDDC Manager browser tab
- Click BACK TO WORKLOAD DOMAINS
From the Domain summary page:
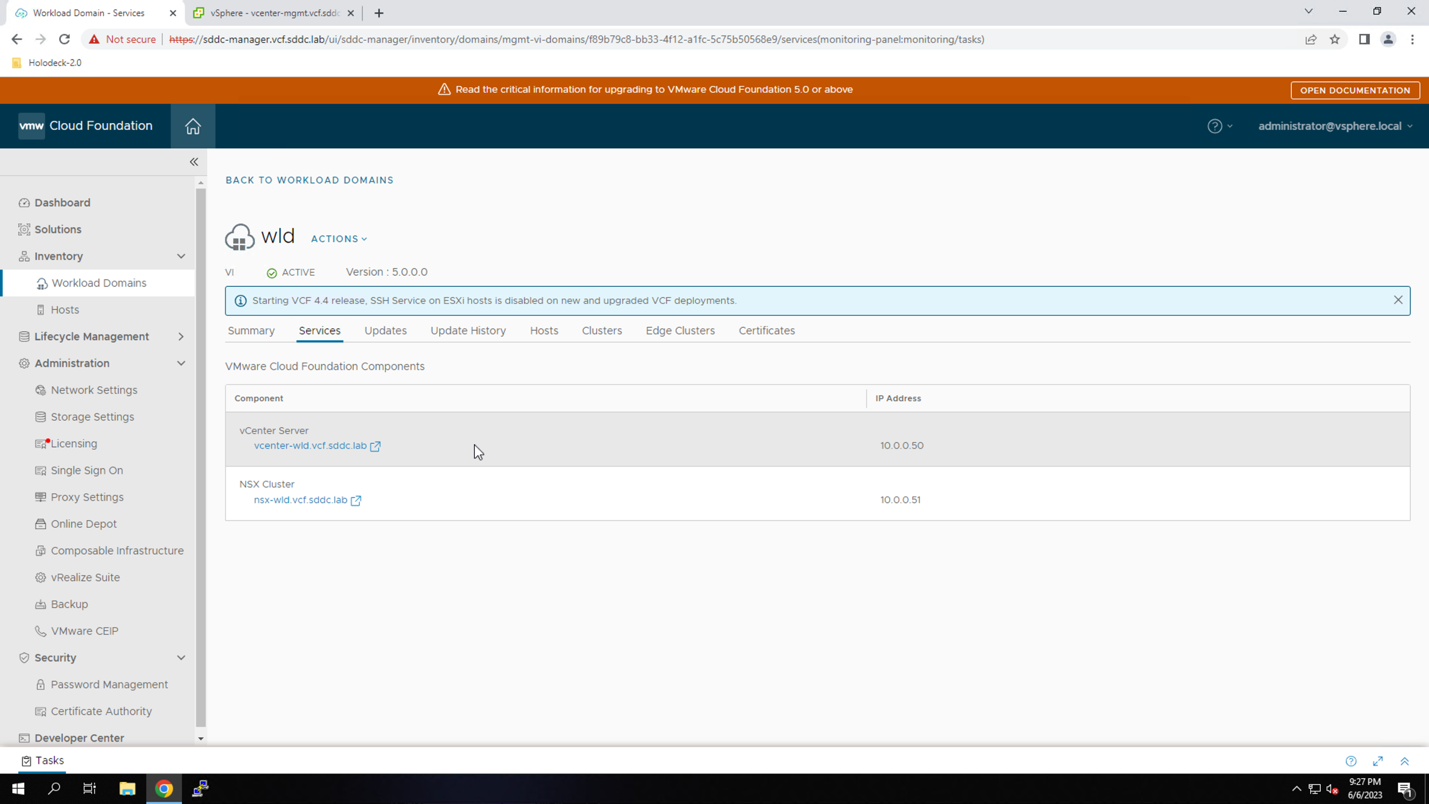
- Click wld
- Click Services
- Click the vcenter-wld.vcf.sddc.lab link
Note: ignore any browser warnings about the connection not being trusted. The lab uses self-signed certificates which can trigger warnings in the browser. You can safely ignore these warnings.
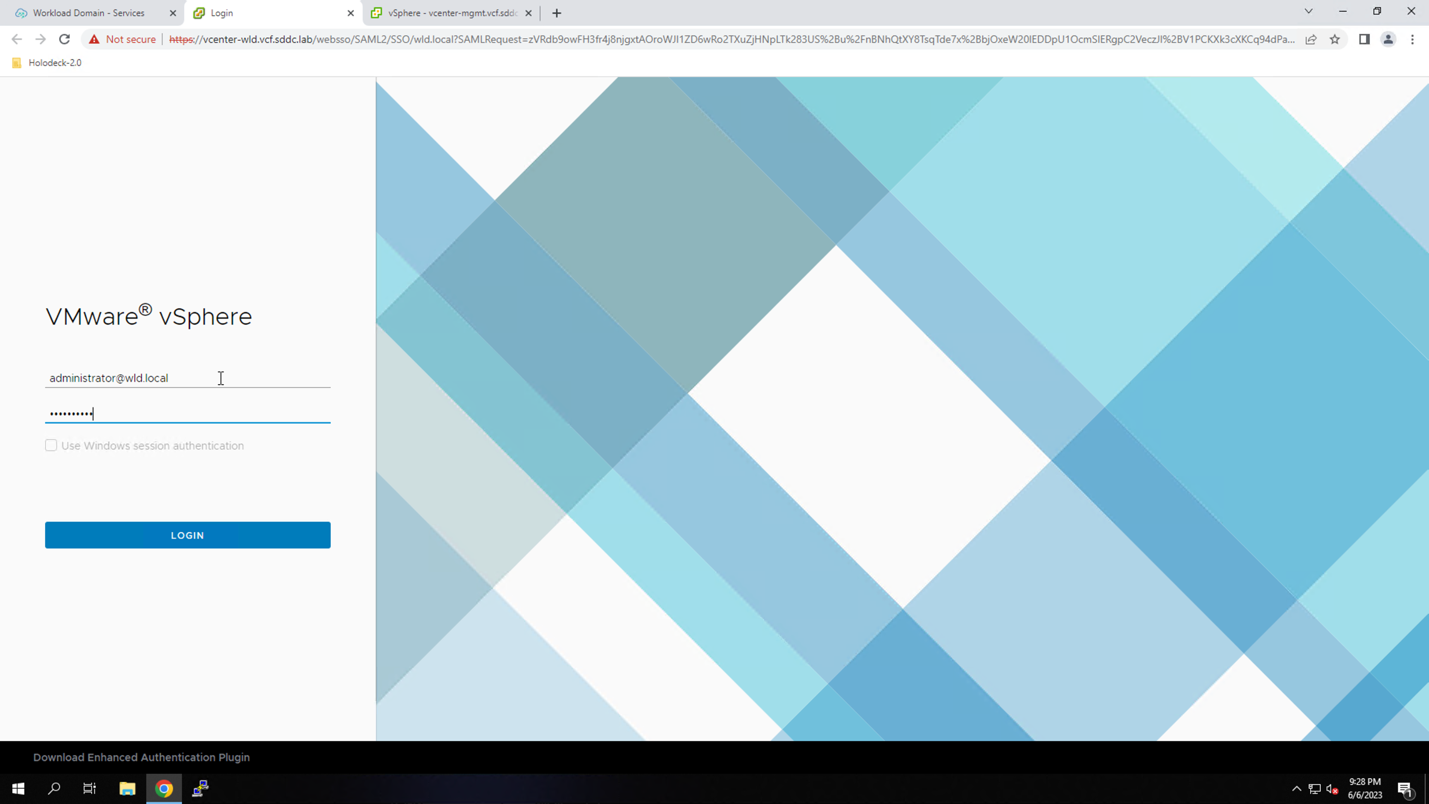
At the vCenter login screen, login as the user 'administrator@wld.local' with the password 'VMware123!'.
- Enter the login: administrator@wld.local
- Enter the password: VMware123!
In the vSphere Client:
- Click to expand the vSphere inventory
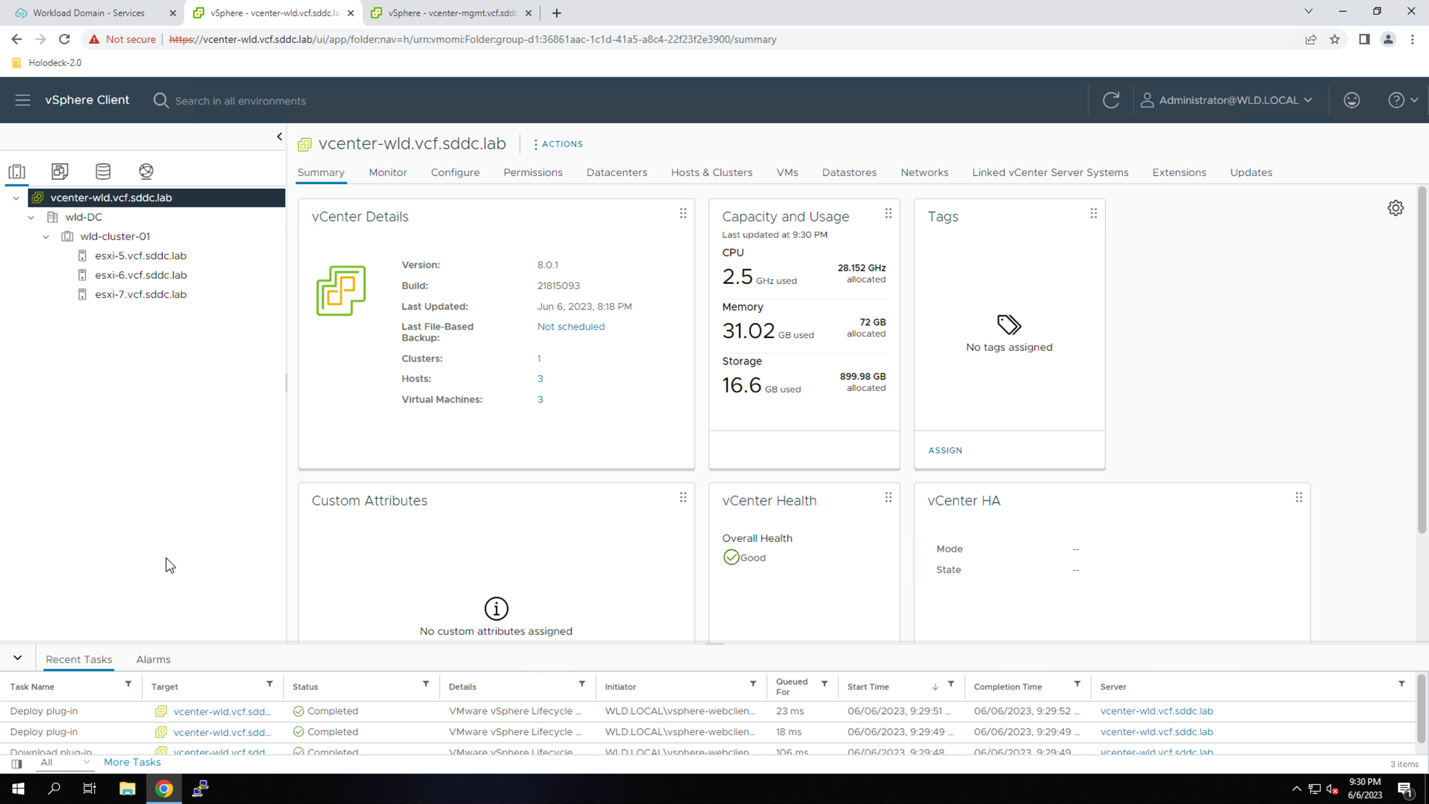
Observe that in the wld domain vCenter server inventory we only have visibility to the wld domain. Again, because the wld domain was deployed with a separate SSO domain, ELM is not used and the domain is isolated from the management domain.
Module 7: View & Manage Passwords for Isolated Workload Domain
Because the two domains have been deployed with separate SSO domains, they have separate administrator accounts. Passwords for these accounts are also managed separately.
Follow the procedure below to see how to manage passwords.
Procedure:
- Click the SDDC Manager browser tab
- Click Password Management
- Click VCENTER
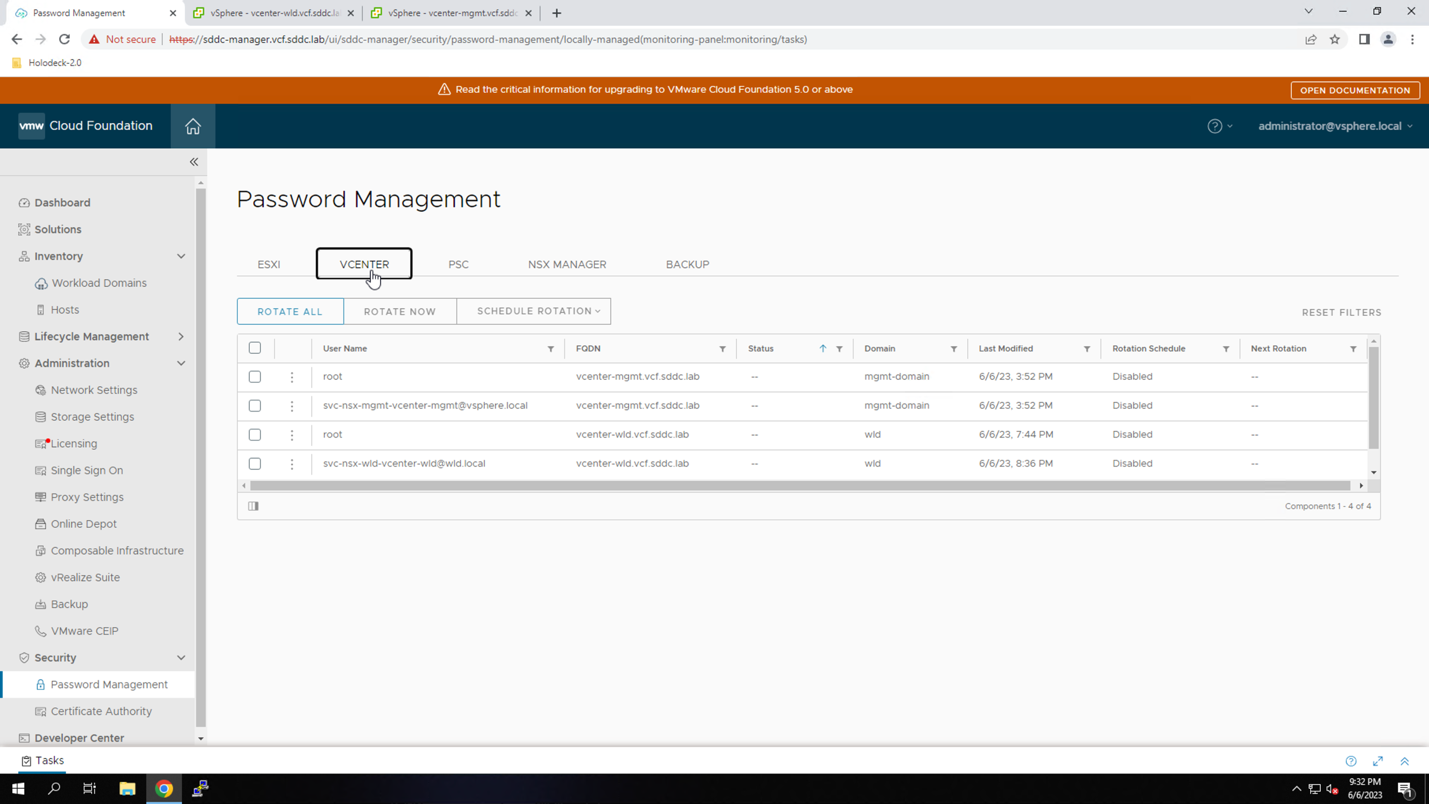
Observe that separate root user accounts are shown for the management domain and the wld domain. Because the vCenter Server instances have been deployed with separate SSO domains, these accounts are fully isolated and the passwords managed separately.
- Click NSX MANAGER
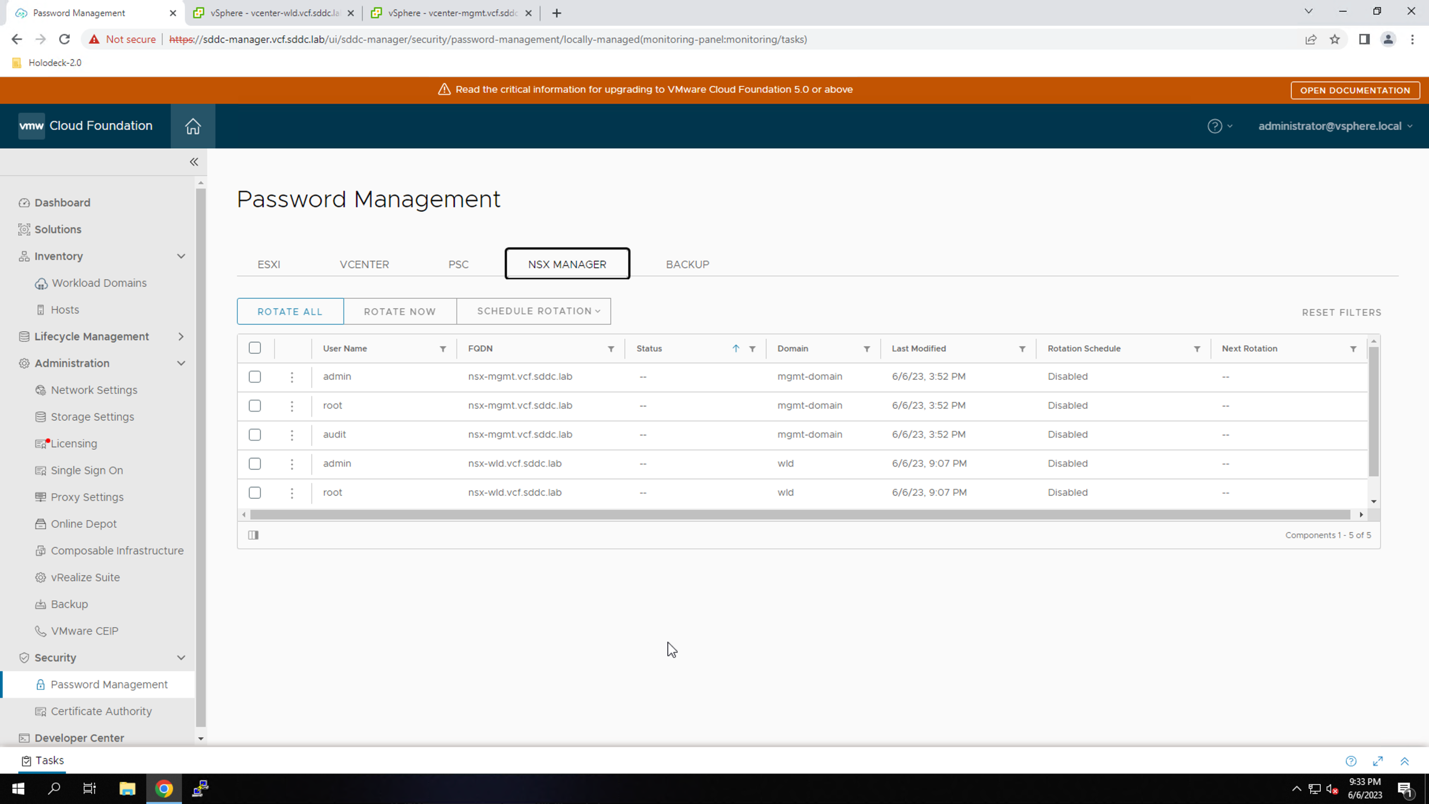
The same is true for the NSX Manager accounts. The NSX instances are isolated from each other and managed by separate user accounts.
Isolated Workload Domain Summary
Isolated workload domains enable multi-tenancy in Cloud Foundation by assigning a separate vSphere Single Sign-on (SSO) domain to a new vCenter Server instance. With isolated workload domains, the vSphere inventory, user authentication, and role-based access are managed independently from other domains.