
Holodeck 5.1.1: Certificate Management
Module 2: Certificate Management
An easy way to increase the security of an environment, and a common practice for most IT organizations, is to replace the self-signed certificates that are generated during installation with a certificate signed by the organizations Certificate Authority (CA). VMware Cloud Foundation simplifies this process allowing customers to easily update and manage these certificates.
You can manage certificates for all external-facing Cloud Foundation component resources, including configuring a certificate authority, generating and downloading CSRs, and installing them. This section provides instructions for using Microsoft certificate authority, however Cloud Foundation also supports the use of 3rd party certificate authorities.
You can manage the certificates for the following components.
- vCenter Server
- NSX Manager
- SDDC Manager
[Step 1] Configure Certificate Authority if needed
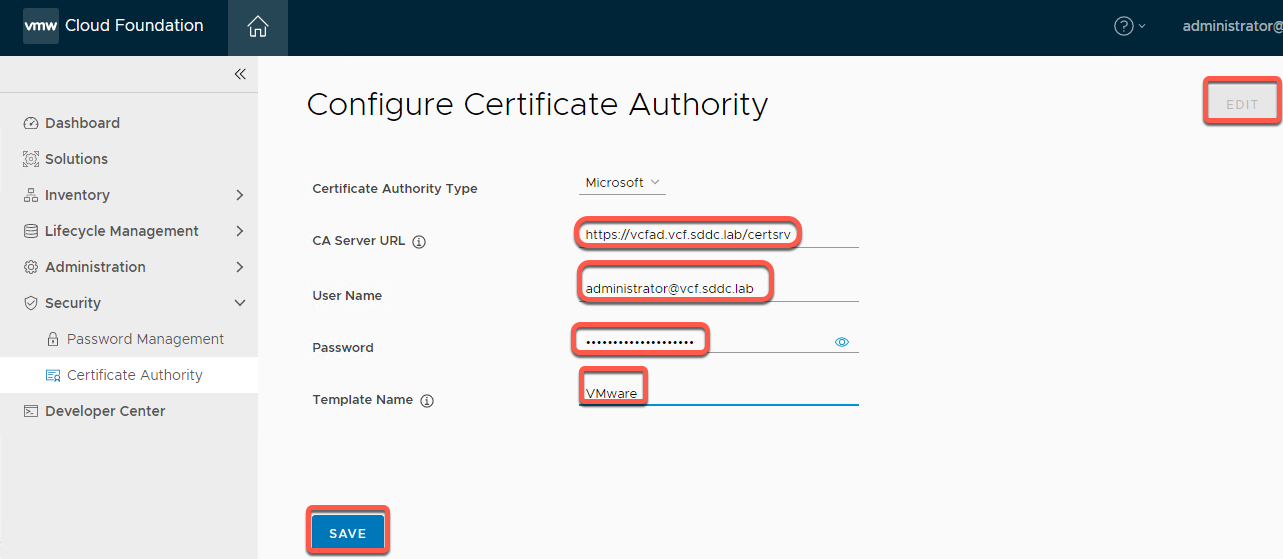
- From the left navigation panel click Security -> Certificate Authority
- Click Edit
- Enter the following data (requires Holo-Console preconfigured as certificate server which should have been completed during initial install)
Certificate Authority Type: Microsoft
CA Server URL: https://vcfad.vcf.holo.lab/certsrv
Username: administrator@vcf.holo.lab
Password: VMware123!
Template: VMware
- Click Save and Accept the certificate
[Step 2] Generate CSR
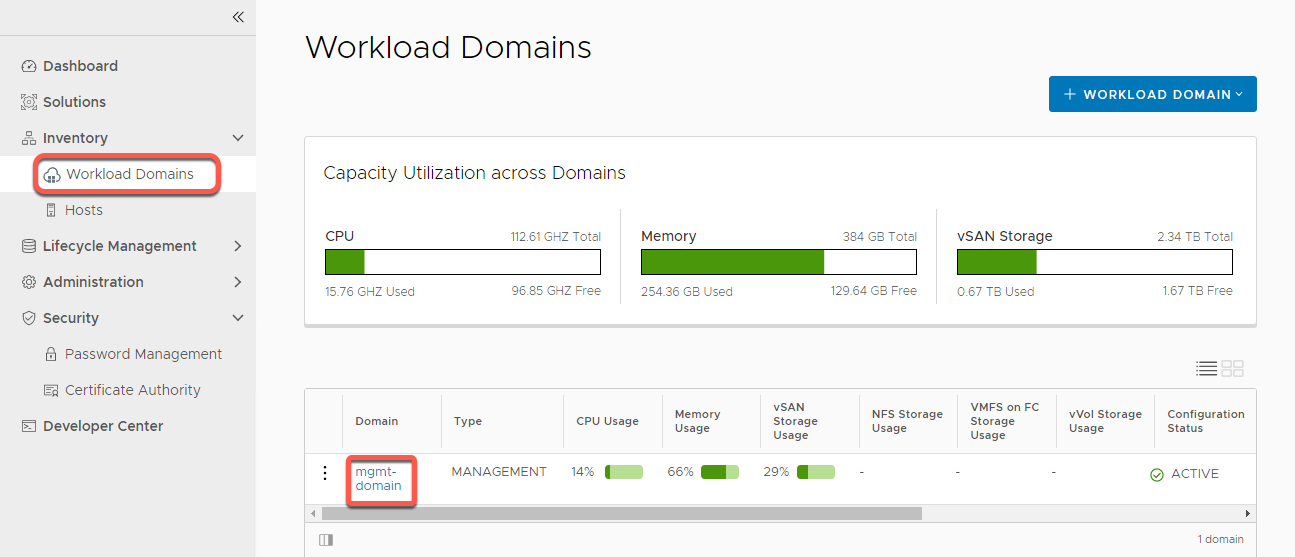
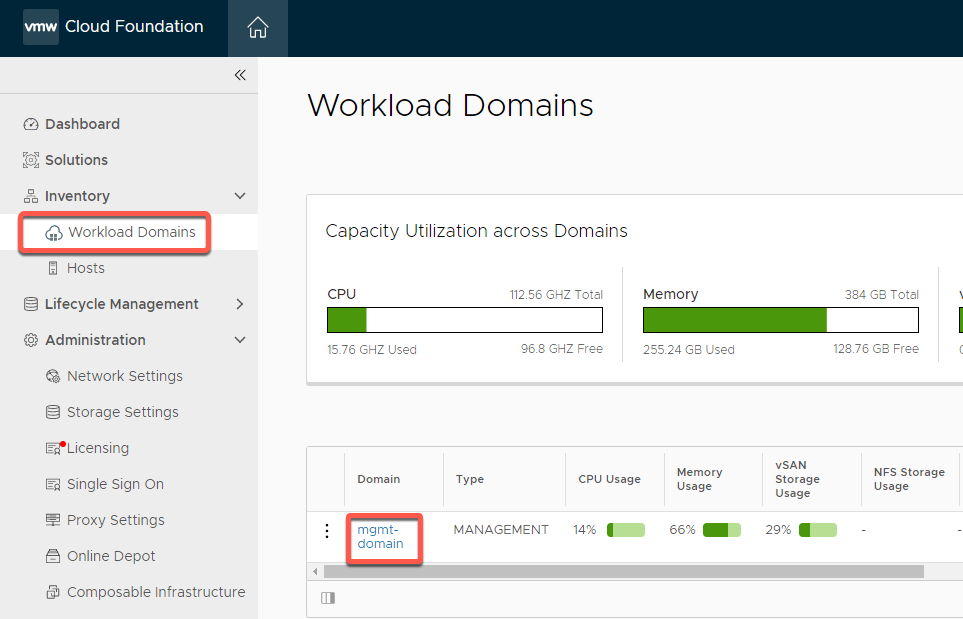
- From the left navigation panel click Inventory -> Workload Domains
- Click on mgmt-domain
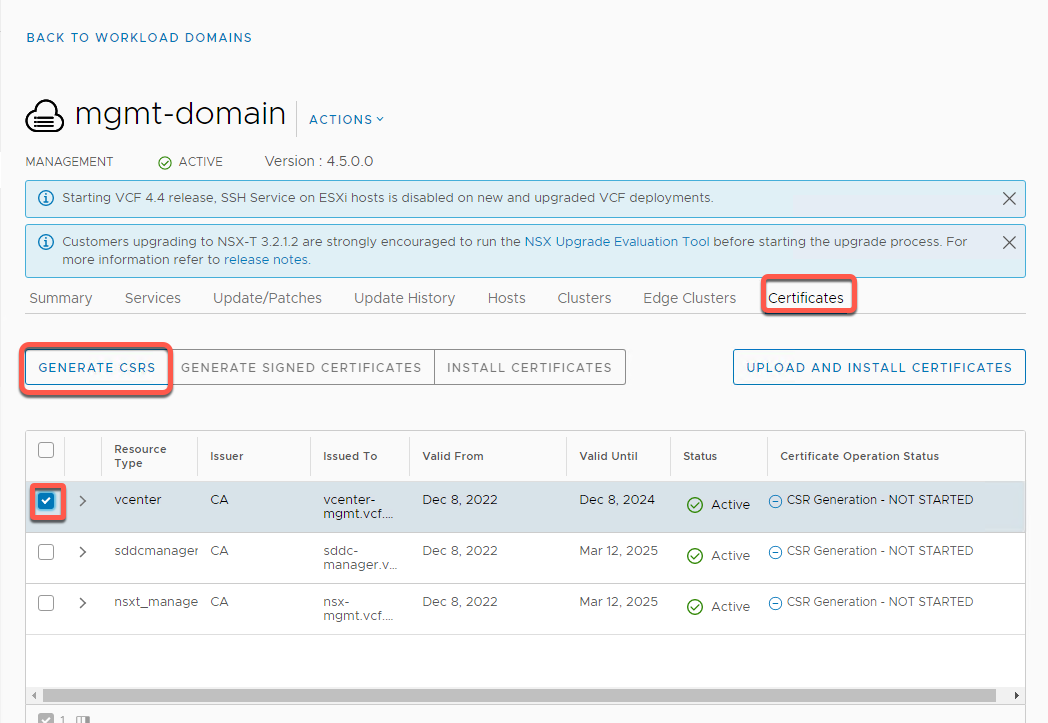
- Click the Certificates tab on menu bar
- Select the checkbox next to the vCenter resource
For the purposes of this lab, we will only do certificates for vCenter Server, but SDDC Manager can be done. The NSX Manager in this lab is running in single server mode versus a 3-node cluster and will error attempting to replace certificates
- Click Generate CSRS
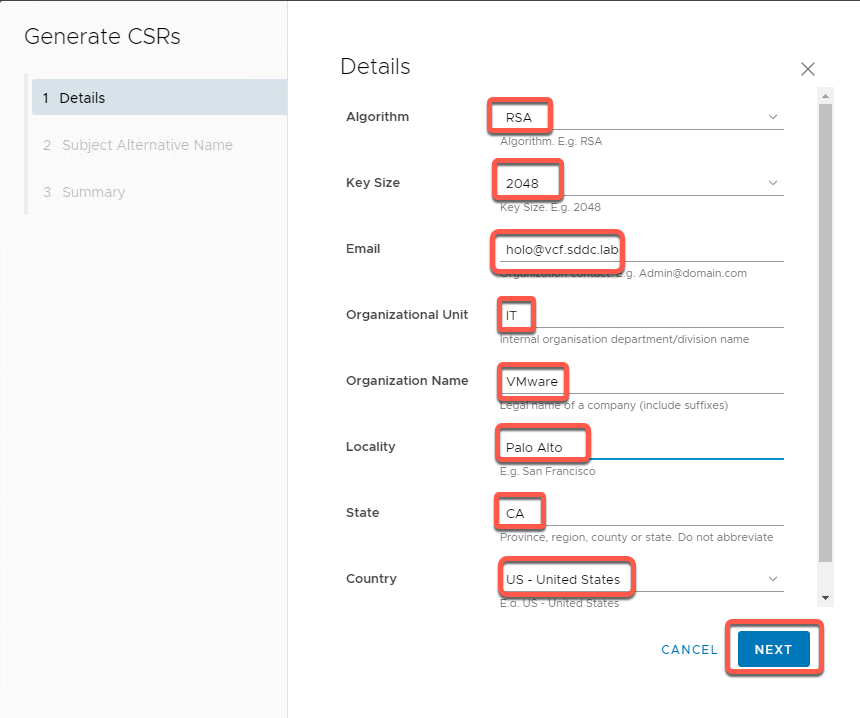
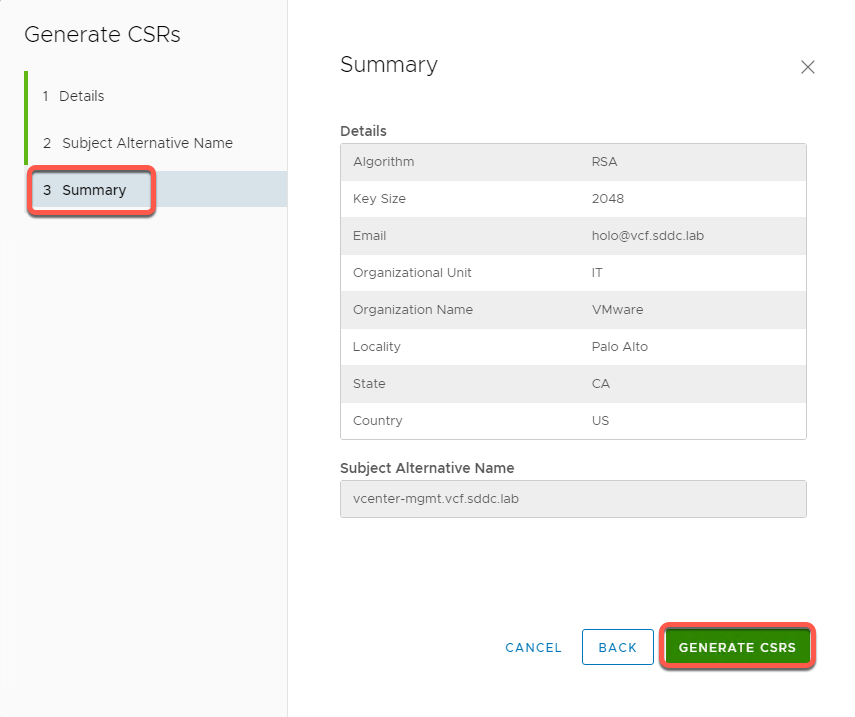
- Populate the Fields in the CSR wizard with the following information:
Algorithm: RSA
Key Size: 2048
Email: holo@vcf.sddc.lab
Organizational Unit: IT
Organization: VMware
Locality: Palo Alto
State: CA
Country: US
- Click Next
- Leave Subject Alternative Name (SAN) at default and click Next
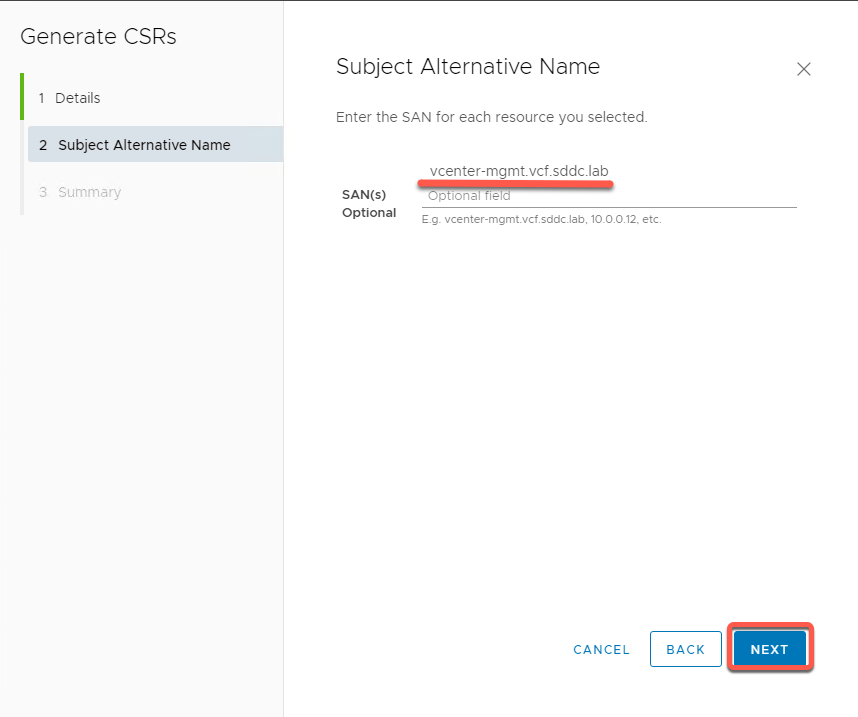
- Review Summary and click Generate CSRS
[Step 3] Generate Signed Certificates
- After receiving CSR Generation Successful banner, click Generate Signed Certificates
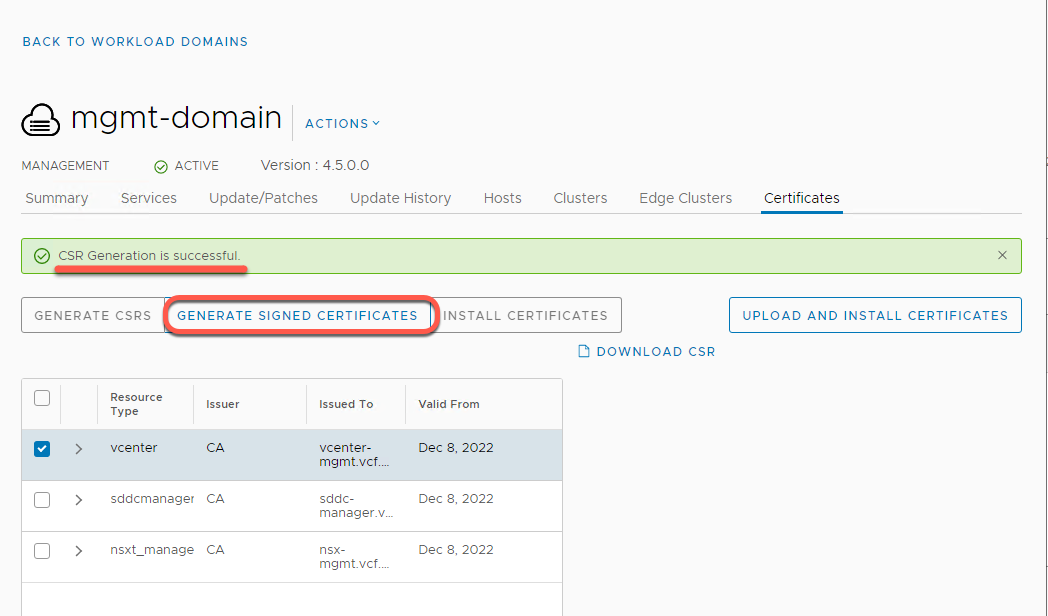
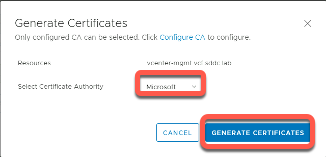
- Select Certificate Authority Microsoft
Click Generate Certificates
[Step 4] Install Certificates
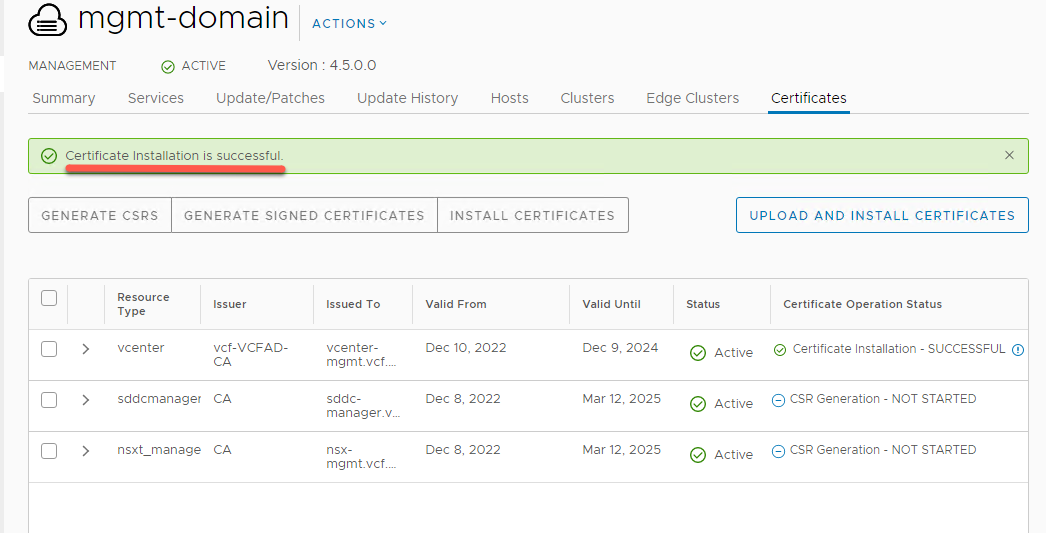
- After receiving Certificate Generation is Successful banner, click Install Certificates
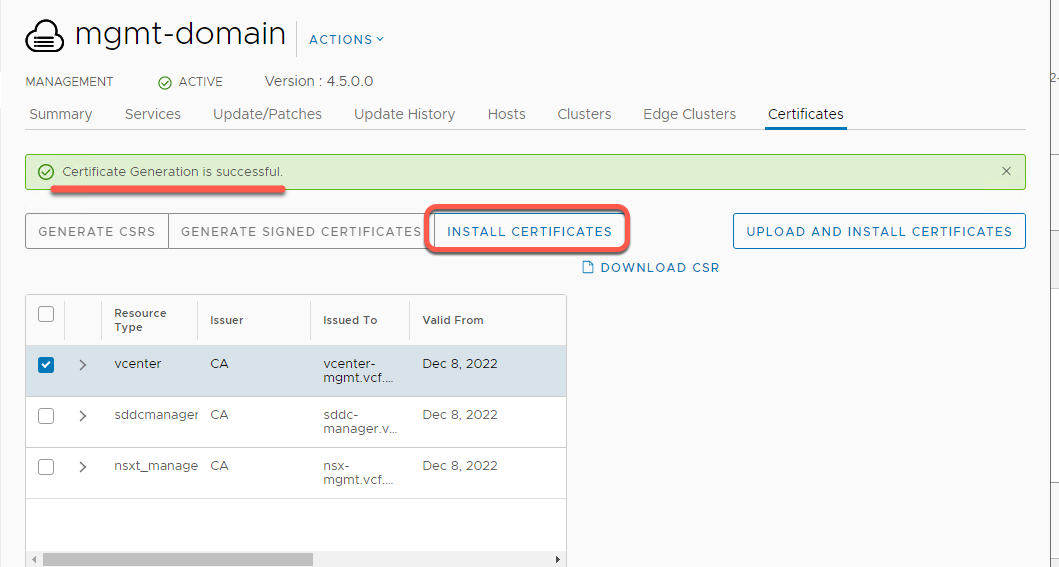
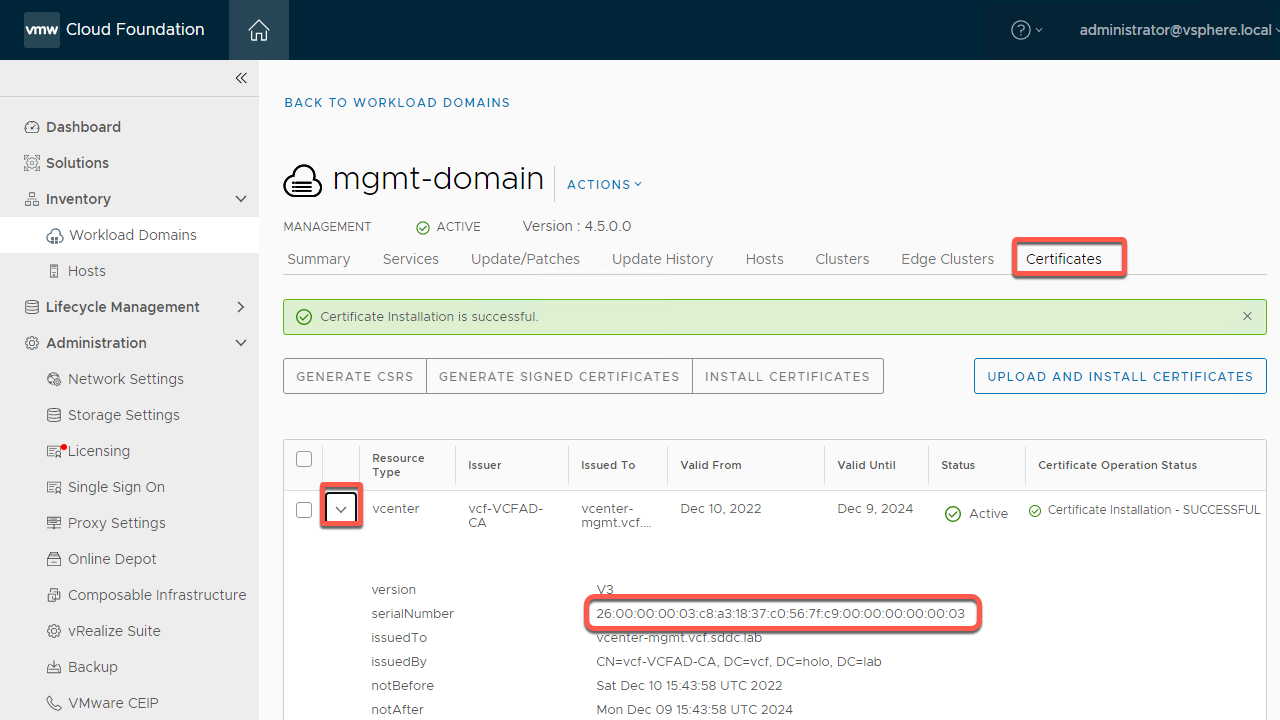
- This process can take up to 20 minutes When complete you should see a “Certificate Installation is Successful” banner and same status for vCenter
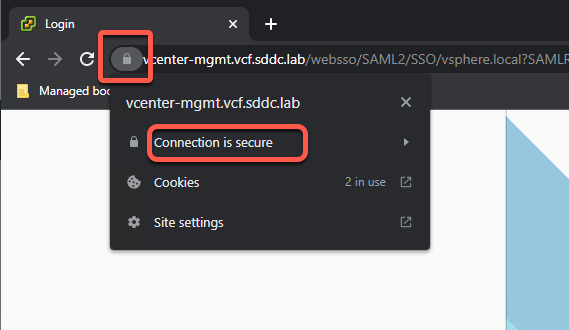
- Open a new incognito window in Chrome
- Click the Managed Bookmarks and navigate to Mgmt Domain -> Mgmt vCenter
- Click the lock Icon on the URL, followed by clicking on Connection is Secure
- Click on Certificate is valid
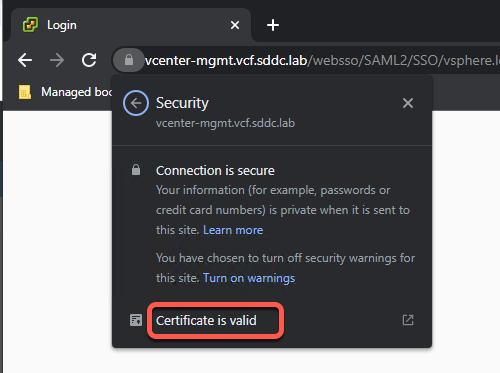
- The certificate viewer will open with the certificate for the server. Note the information that was entered during the CSR process
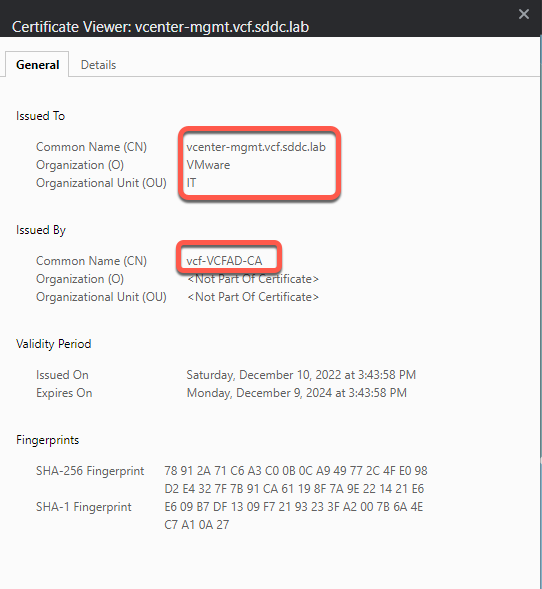
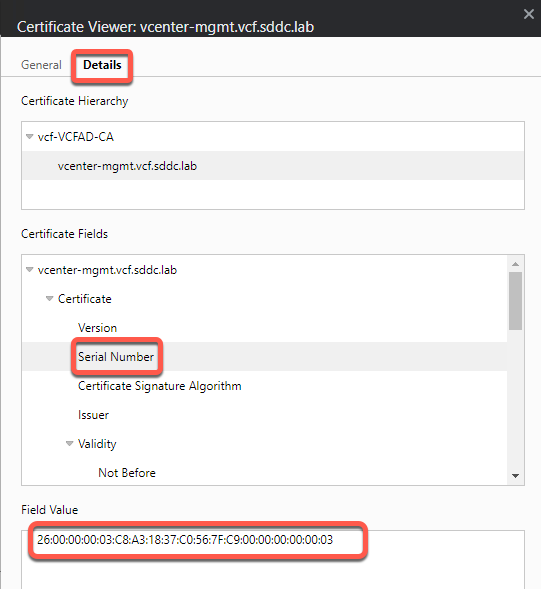
- Click Details tab then Serial Number. Keep this window open in this tab
- Open a new tab in Chrome and browse to SDDC Manager if necessary
- Click on Inventory -> Workload domains -> mgmt-domain
- Click on the Certificates tab and expand vCenter.
- Note the serial number matches the serial number in the details tab of the certificate viewer as well as the other information you entered in the CSR.
Module Summary
SDDC Manager simplifies and automates management of SSL Certificates across SDDC components.