
Holodeck: NSX Load Balancing
Module 3: Load Balancing
This module will add a Load Balancer for HTTP traffic
Lab 1: Configure load balancer
This lab will configure an L3-L7 load balancer on the NSX Tier-1 Router created in a Module 1.
Step 1: Configure OC-T1 to run on an Edge Cluster
To support stateful services, such as Layer 3-7 Firewall we need to configure OC-T1 as a Services Router (SR). This simply means associating OC-T1 with our existing NSX Edge cluster in management domain
- Open a new tab in the Chrome browser
- Click the Management NSX-T shortcut in the bookmark bar (click advanced / proceed to nsx-mgmt.vcf.sddc.lab, if required to accept the certificate)
- Log into NSX Manager as user: admin with the password: VMware123!VMware123!
- Navigate to Networking then click on Tier-1 Gateways
- Click the 3 dots next to OC-T1 and select edit
- Click on Select Edge Cluster and select EC-01
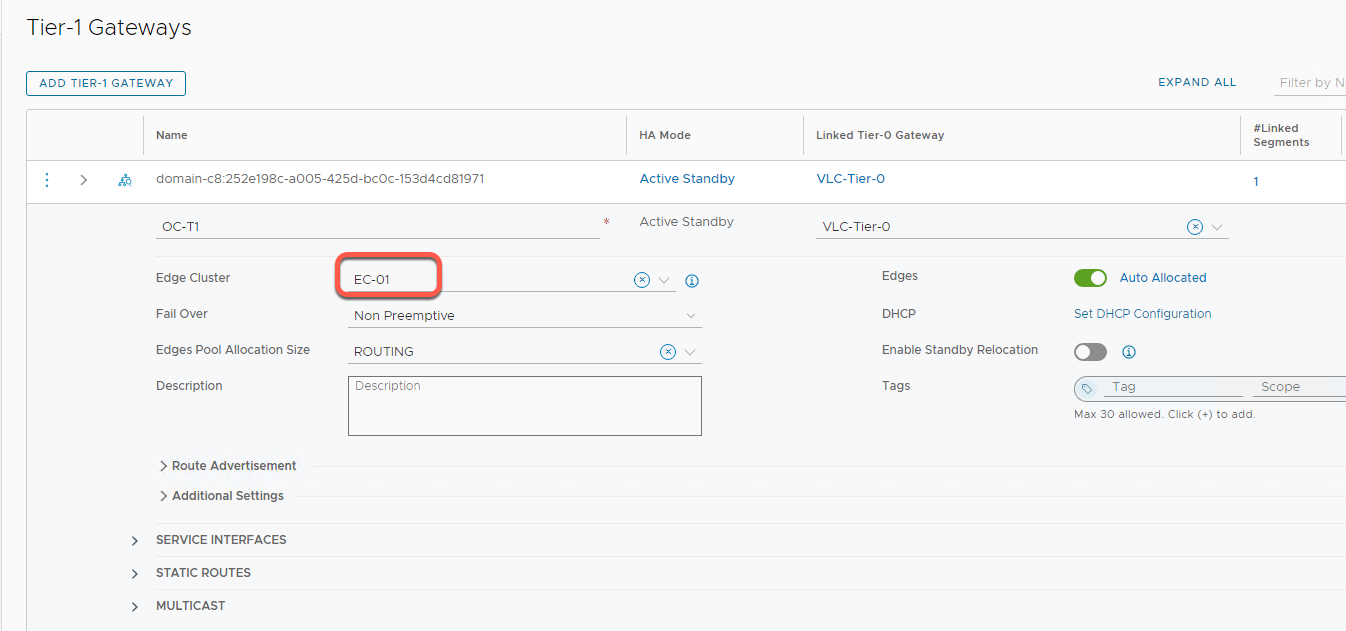
- Click Save
- Click Close Editing
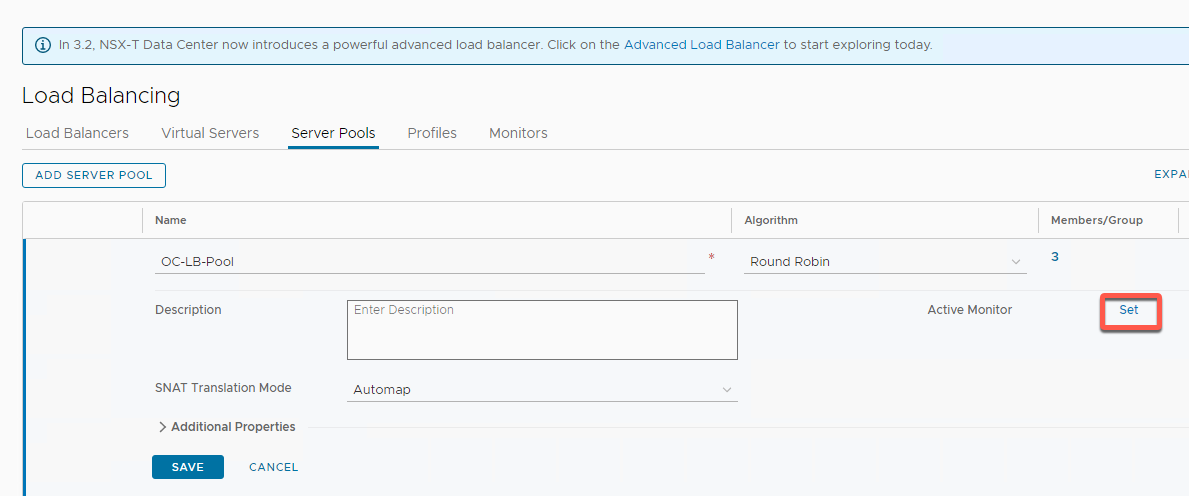
Step 2: Create Server Pool
A server pool is a set of servers that can share the same content.
- In NSX Manager, navigate to Networking and click on Load Balancing
- The click on the Server Pools tab and click Add Server Pool
- Name the pool OC-LB-Pool
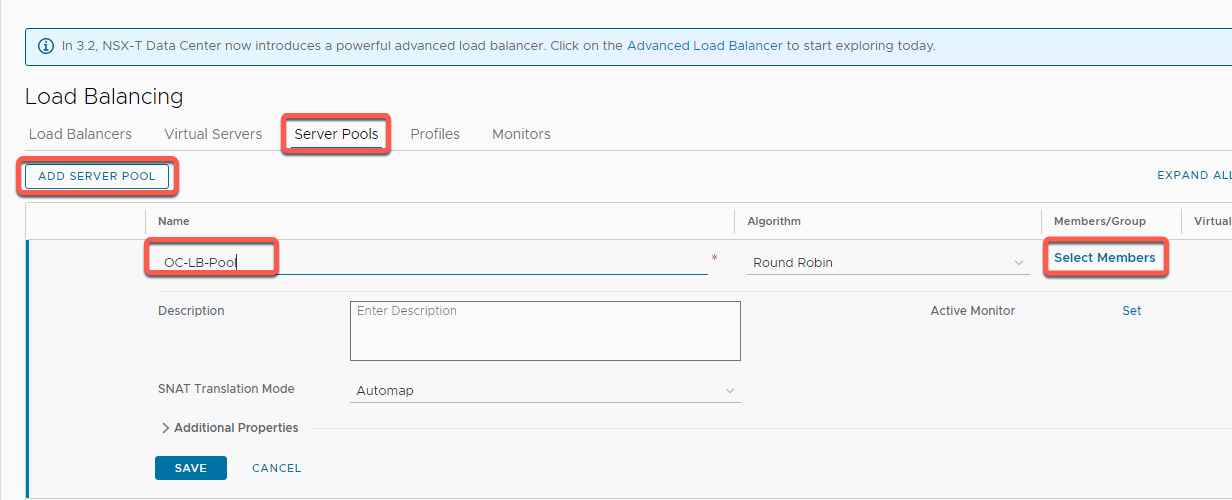
- Click Select Members
- Click Add Member
- Name OC-Apache-A, IP 10.1.1.18 Port 80
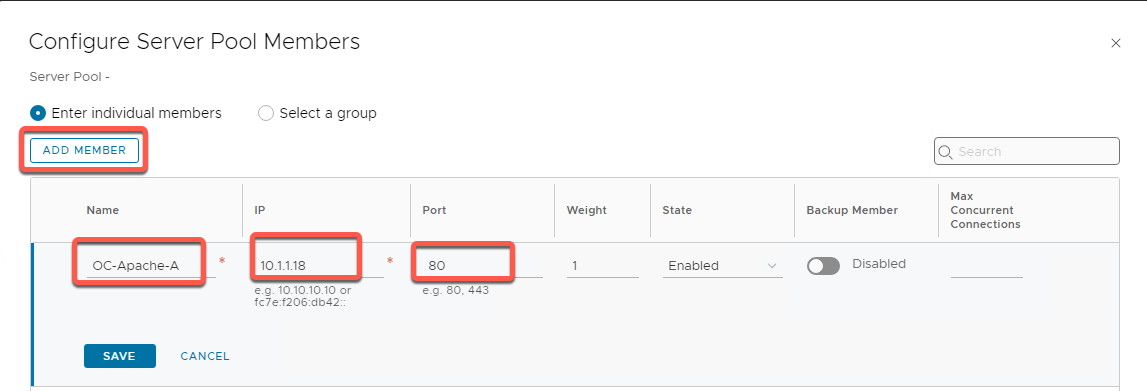
- Click Save
- Repeat steps for OC-Apache-B, using: Name OC-Apache-B, IP 10.1.1.19 Port 80
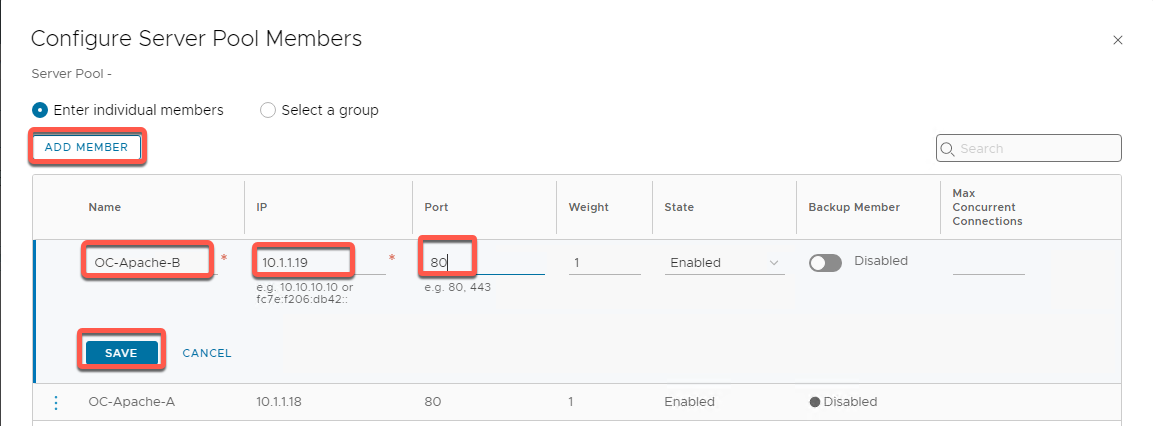
- If your lab is configured with OC-Apache-C, add it using Name OC-Apache-C, IP 10.1.1.20 Port 80
- Click Apply
- Click Set next to Active Monitor
- Select the default HTTP Port 80 monitor, then click Apply
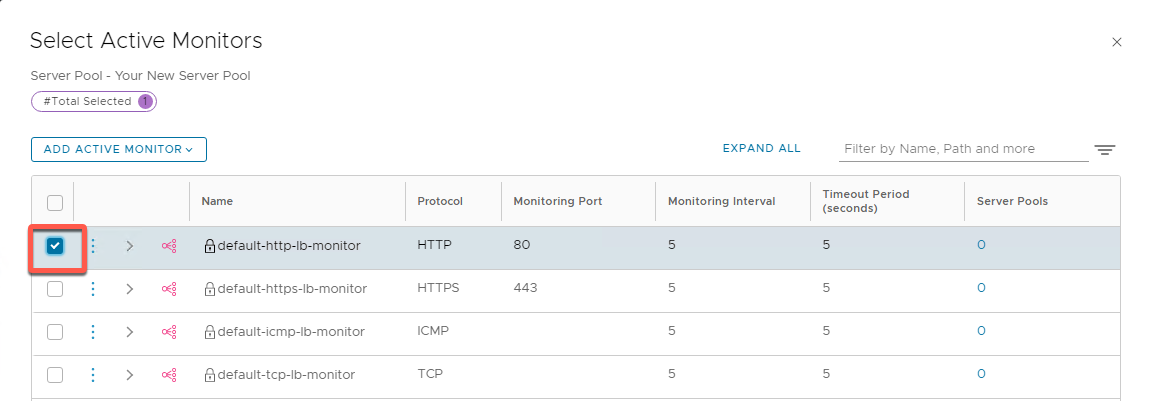
- Click Apply
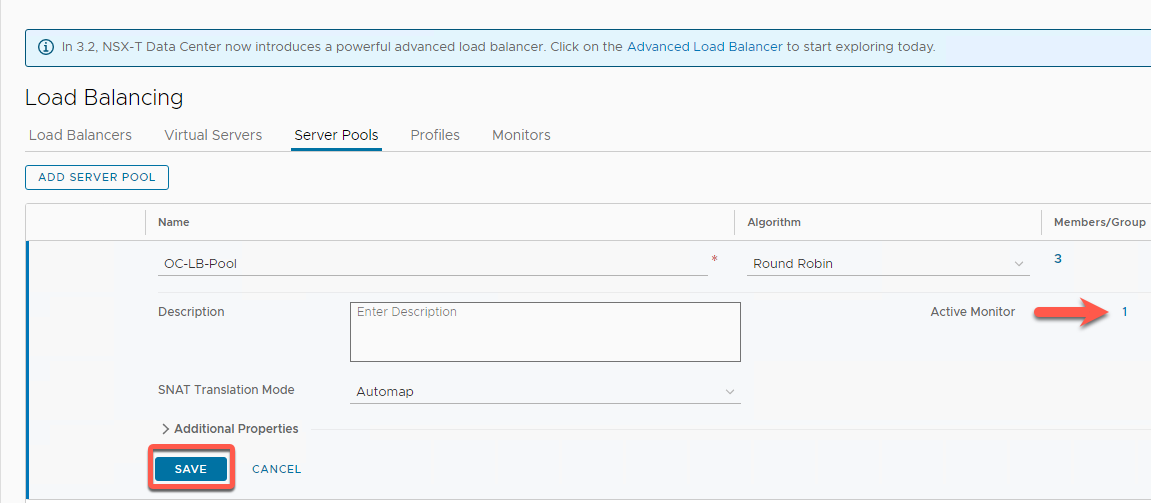
- Notice the active monitor shown
- Click Save
Step 3: Create Load Balancer
- Navigate to Networking and click Load Balancing
- Click Add Load Balancer
- Name the Load Balancer OC-LB. On Attachment select OC-T1
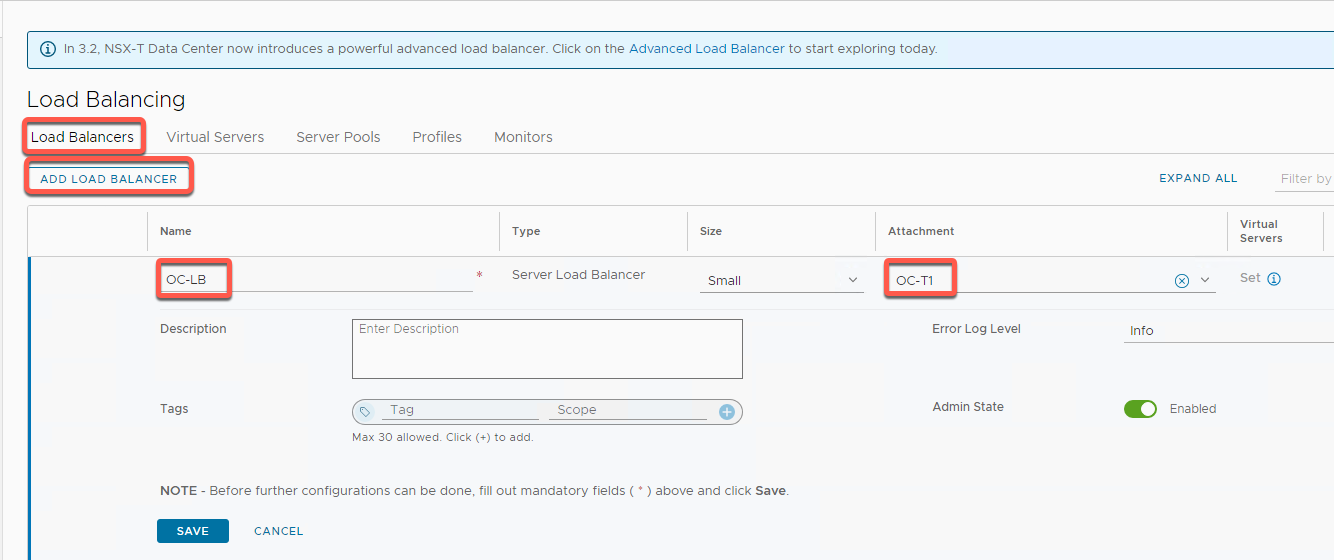
- Click Save
- When prompted Want to continue configuring this Load Balancer, select No
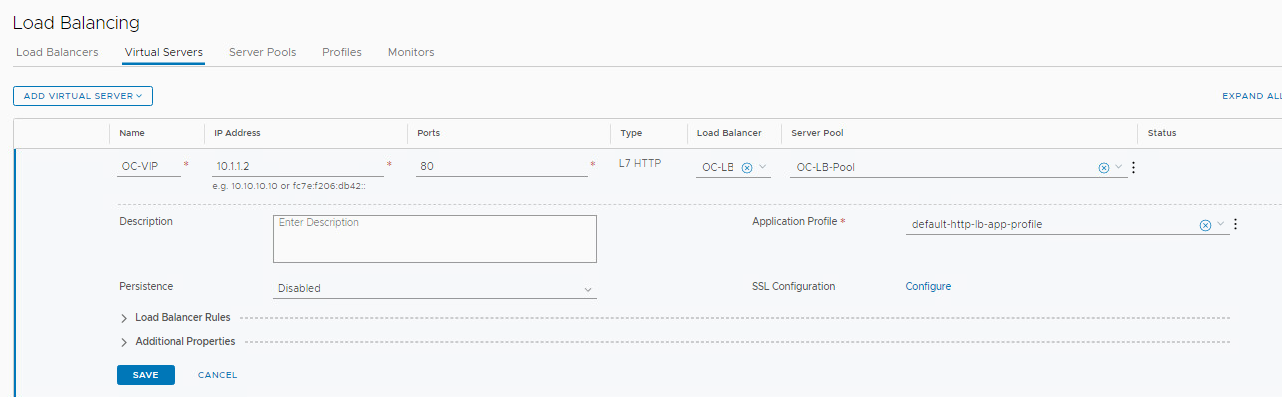
Step 4: Create Virtual Servers
A Virtual Server is an IP address that acts as the front end for a Server Pool
- Navigate to Networking and click on Load Balancing
- Click the Virtual Servers tab and then Add Virtual Server, L7 HTTP
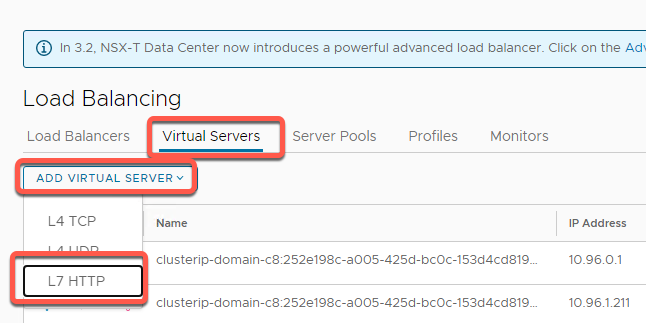
- Name the Virtual Server OC-VIP, IP Address 10.1.1.2, Port 80
- Type OC in the Load Balancer field and it will allow you to select OC-LB
- Type OC in the Server Pool field and select OC-LB-Pool
- Click on SAVE
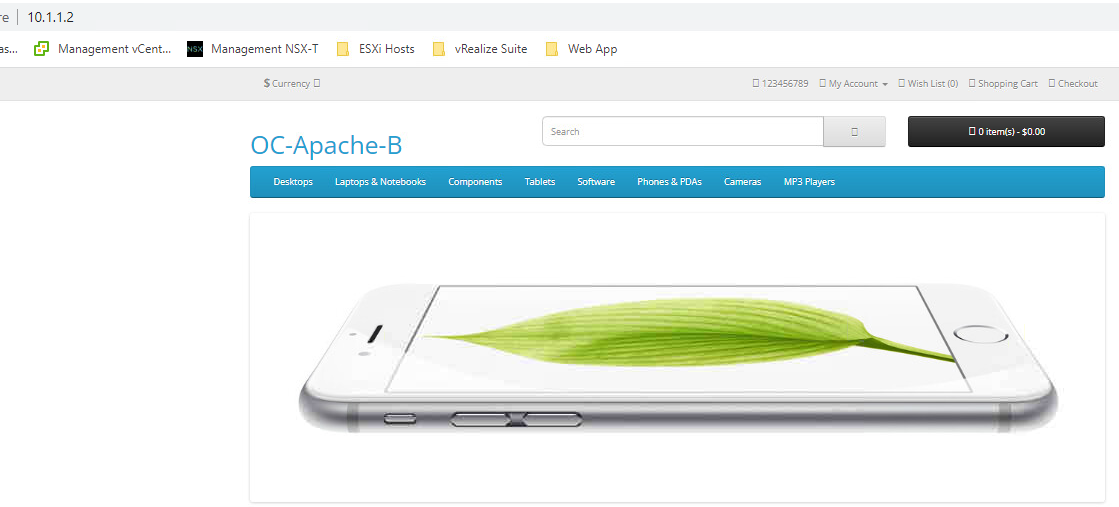
Step 5: Test Load Balancer
- Open a new tab for 10.1.1.2
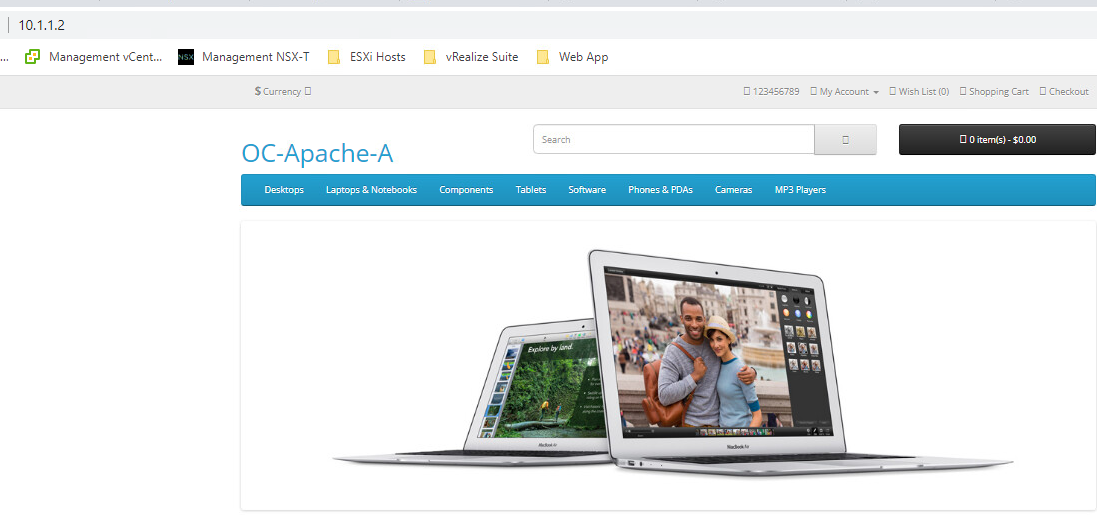
- Refresh the browser for this tab. You should see the opposite web server
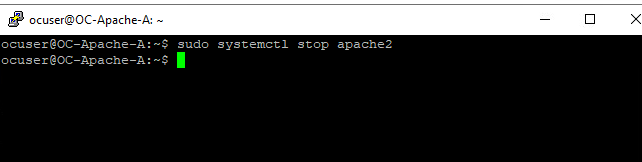
- Open a PuTTY session to OC-Apache-A, login ocuser, password VMware123!
- Run the command sudo systemctl stop apache2
- Wait approximately 30 seconds
- Refresh the browser for the 10.1.1.2 tab several times in a row. You should see the OC-Apache-B web page only, as the Active Monitor would detect the failure of OC-Apache-A quickly
- Return to the OC-Apache-A PUTTY session and run the command sudo systemctl start apache2
- Wait approx. 30 seconds
- Refresh the browser for the 10.1.1.2 tab several times in a row. You should see both OC-Apache-A and OC-Apache-B web pages, as the Active Monitor would detect the return of OC-Apache-A quickly
[Lab 1 Summary]
Lab 1 shows how quickly a load balancer can be instantiated on the NSX Tier-1 router
<END OF DOC>