
Holodeck: Workload Domain Creation
Module 4: Workload Domain Creation
This module will show the process of adding a workload domain to an environment.
**Note** This module requires the VLC-Holo-Site-1 configuration with hosts ESXi-10 through ESXi-12 commissioned and unassigned.
[Step 1] Log in to the environment
- Open a new tab in the Chrome browser (if necessary)
- Click the Managed Bookmarks folder in the bookmark bar then select SDDC Manager
- Log into SDDC Manager as user: administrator@vsphere.local with the password: VMware123!
- Click Login
[Step 2] Validate unassigned hosts are available
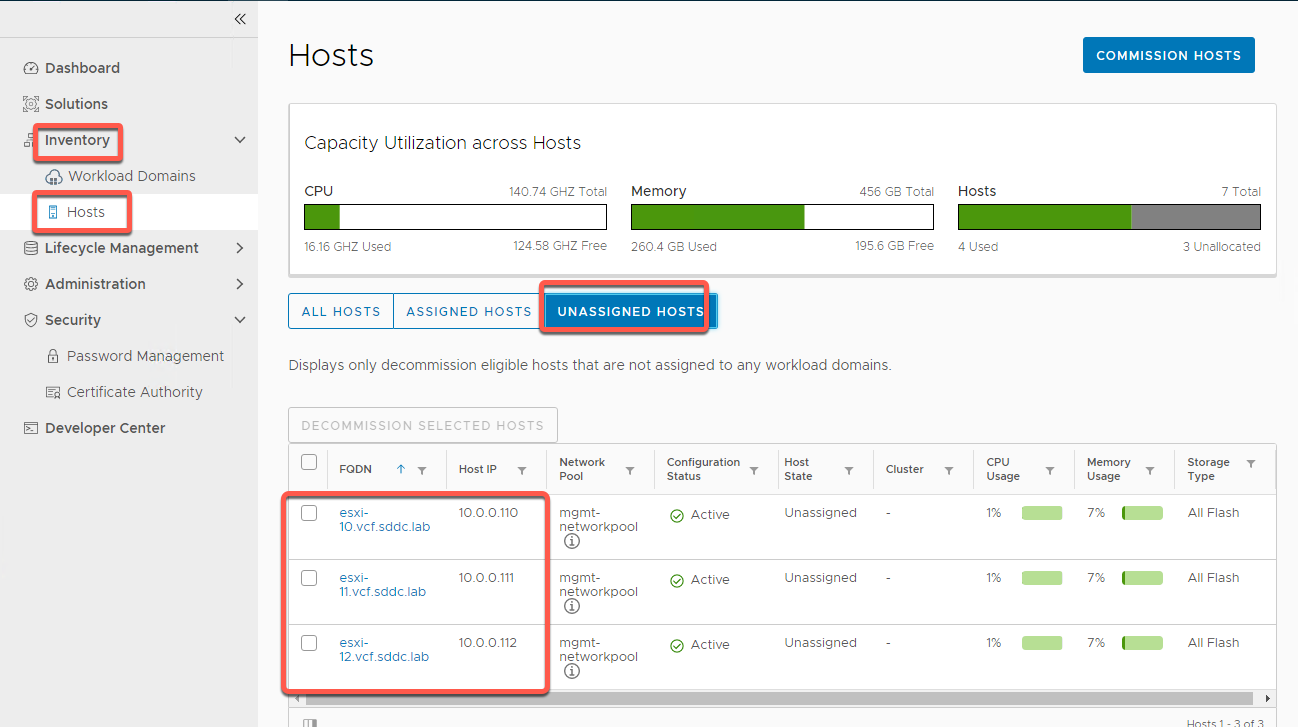
- On the left navigation panel select Inventory -> Hosts
- Select Unassigned Hosts
- Verify ESXi-10, ESXi-11 and ESXi-12 are available in the inventory
[Step 3] Create Workload Domain
- On the left navigation panel select Inventory -> Workload Domains
- Select +Workload Domains
- Select VI – Workload Domain

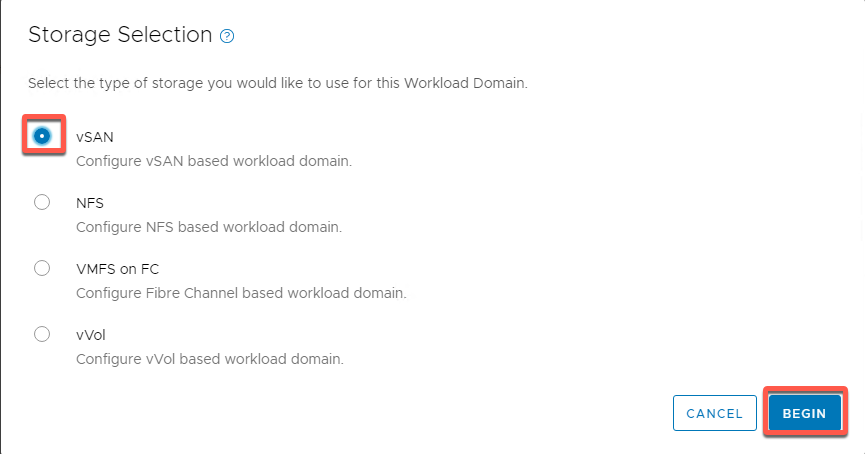
- Select vSAN and Begin
- Name the domain WLD-01
- Name the organization Holodeck
- Do not select Manage clusters in this workload domain using images (the nested lab config does not support image based VLCM)
- Click NEXT

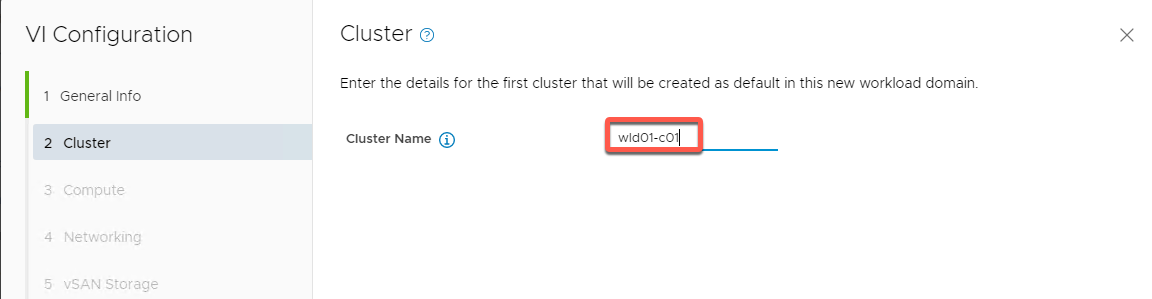
- Name the cluster wld01-c01 then click NEXT
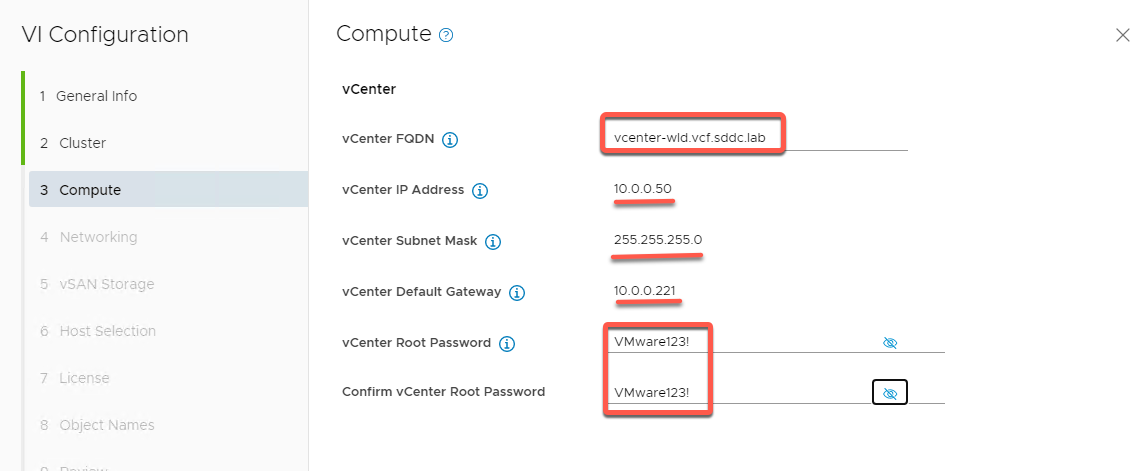
- Add compute info
- vCenter FQDN: vcenter-wld.vcf.sddc.lab
- vCenter IP (should auto populate to 10.0.0.50)
- vCenter Subnet (should auto populate to 255.255.255.0)
- vCenter Default gateway (should auto populate to 10.0.0.221)
- vCenter root password VMware123!
- Enter NSX info as follows: (Tip: You can cut and paste FQDN info from C:\VLC\VLC-Holo-Site-1\conf\additional_DNS_Entries.txt)
- FQDN 1: nsx1-wld.vcf.sddc.lab
- IP 1 (Should auto populate to 10.0.0.52)
- FQDN 2: nsx2-wld.vcf.sddc.lab
- IP 1 (Should auto populate to 10.0.0.53)
- FQDN 1: nsx3-wld.vcf.sddc.lab
- IP 1 (Should auto populate to 10.0.0.54)
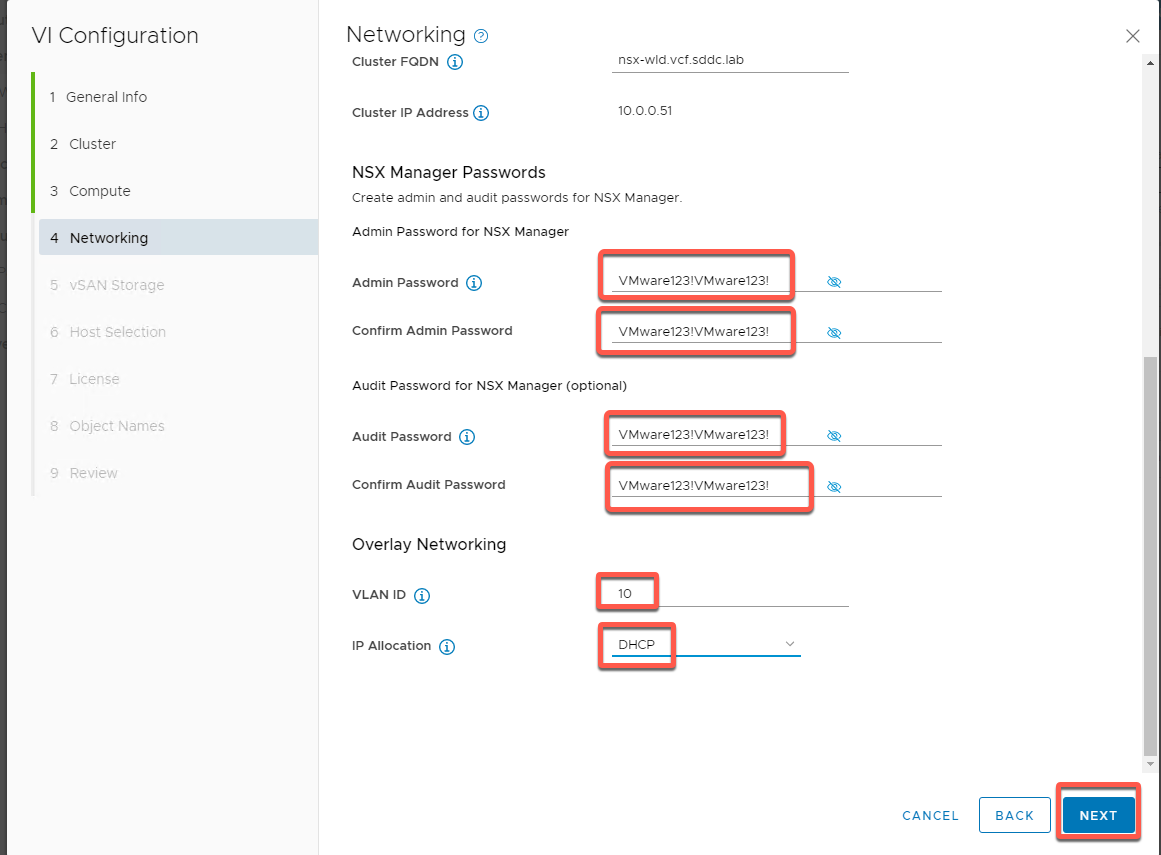
- Cluster FQDN: nsx-wld.vcf.sddc.lab
- Cluster IP (Should auto populate to 10.0.0.51)

- Scroll down and enter passwords for Admin and Audit. Both should be set to VMware123!VMware123!
- Set VLAN ID to 10
- Set IP Allocation to DHCP
- Click NEXT
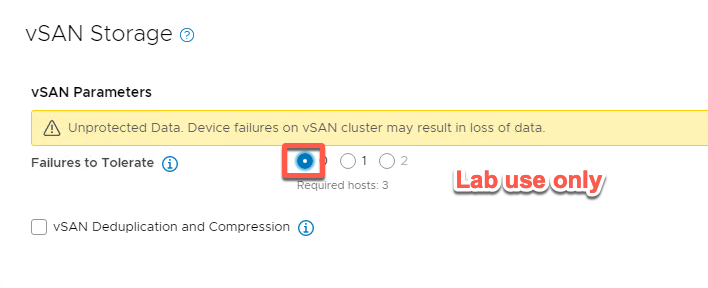
- Set Failures to Tolerate to 0, as this is a lab environment. (In live environments this must always be set to 1 or 2).
- Click NEXT
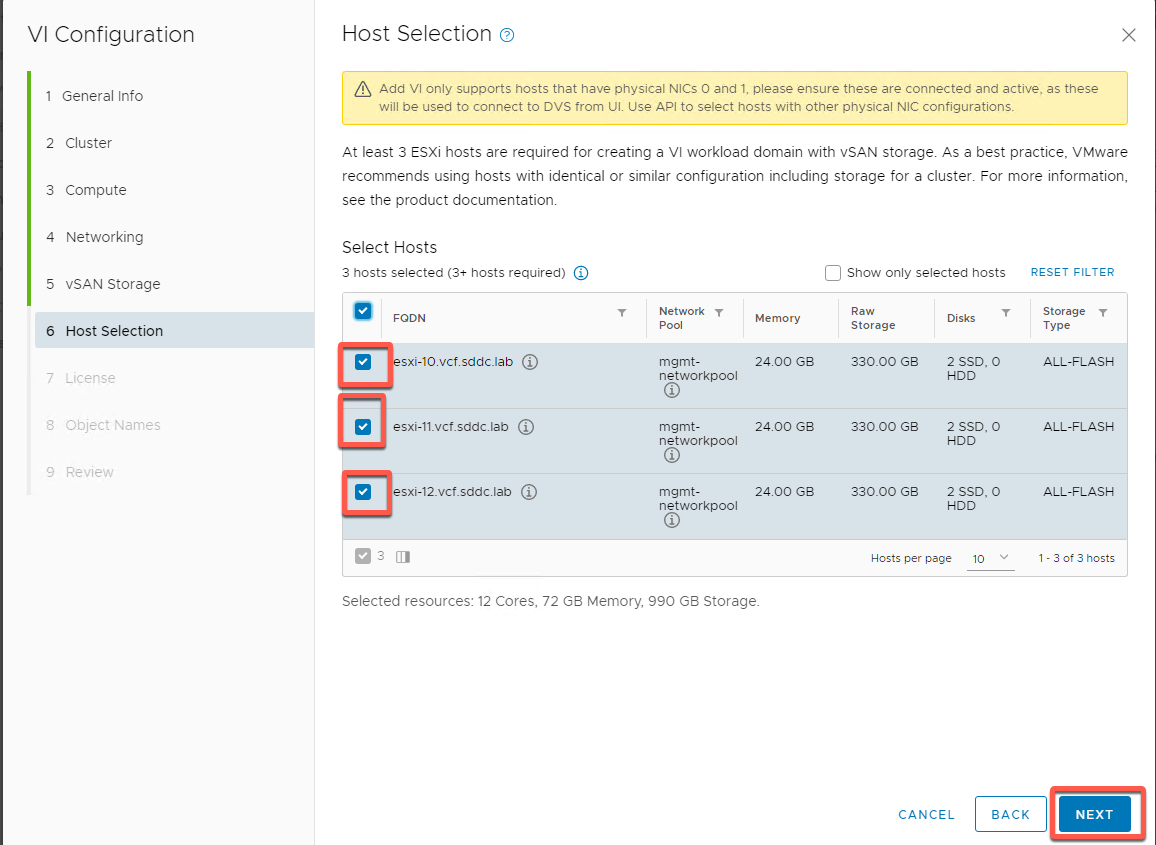
- Select hosts esxi-10, esxi-11 and esxi-12 then click NEXT
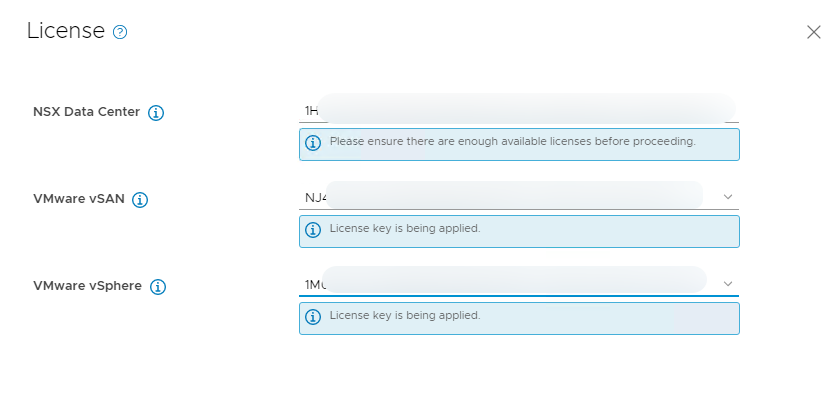
- Select your licenses from the drop down list
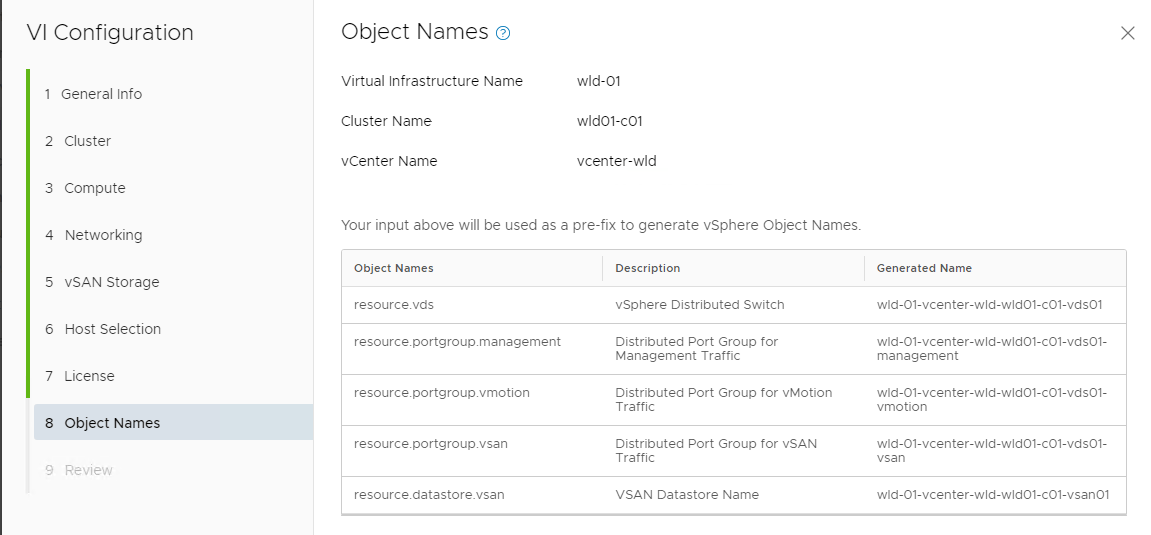
- Verify your object names then click NEXT
- Click Finish (NOTE: there is a known issue with VCF 4.5 that may show a black screen on the last Review )
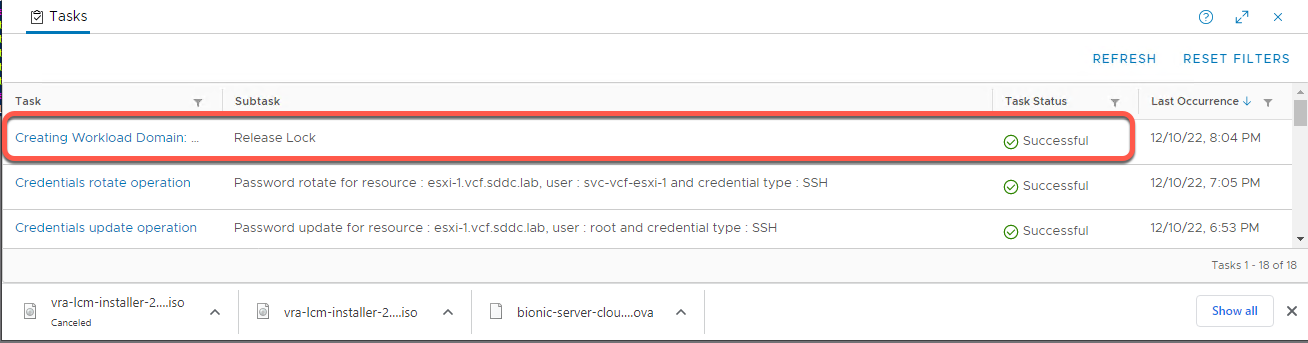
- Monitor progress in the task pane
[Step 4] Explore Workload Domain Components
- Open a new tab in the Chrome browser (if necessary)
- Click the Managed Bookmarks folder in the bookmark bar then Mgmt Domain -> Mgmt vCenter
- Log into vCenter Server as user: administrator@vsphere.local with the password: VMware123!
- Click Login
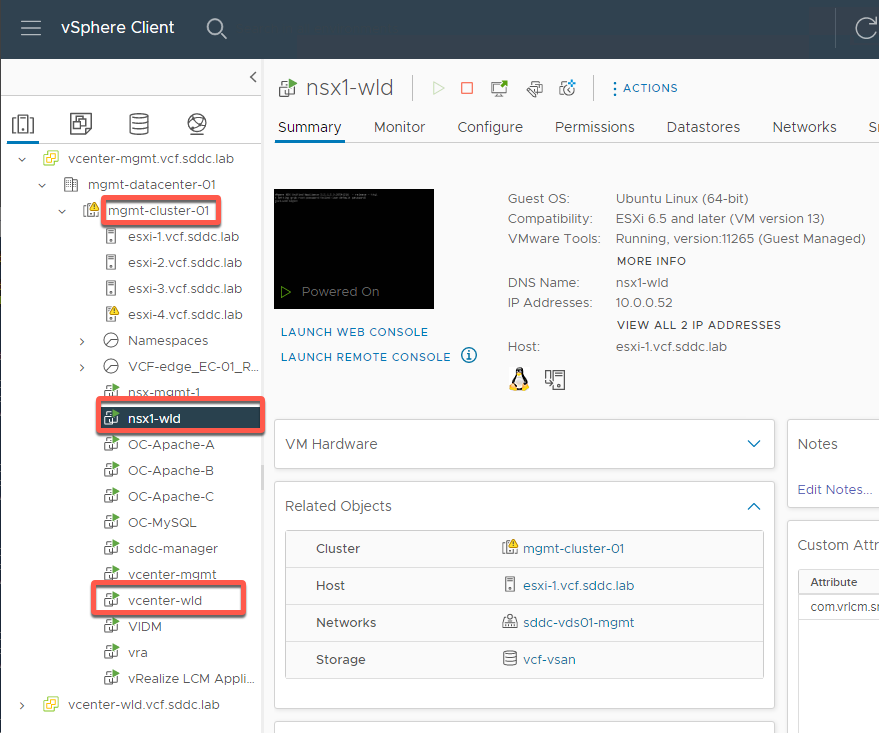
- Click Hosts and Clusters view, and expand mgmt-datacenter-01 -> mgmt-cluster-01
- Notice nsx1-wld and vcenter-wld virtual machines running in the management domain.
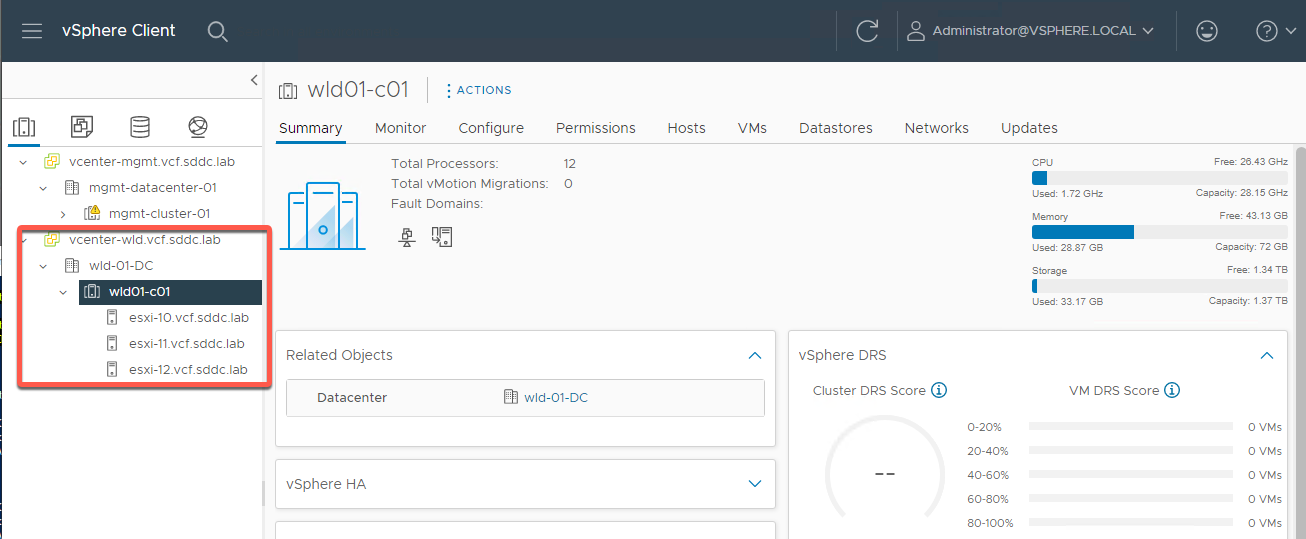
- Expand vcenter-wld.vcf.sdc.lab -> wld-01-DC -> wld01-c01
- Notice wld01-C01 with esxi-10, esxi-11 and esxi-12 as was built earlier
Module Summary
SDDC Manager significantly simplifies and automates deployment of additional capacity in a workload domain. This includes deploying NSX Manager, vCenter Server, and configuring a vSAN cluster.