Holodeck: Workload Domain Expansion
Module 5: Workload Domain Expansion
This module will show the process of adding a node to an existing cluster in a workload domain, as well as adding a cluster to an existing workload domain.
Prerequsites:
- Holodeck pod with hosts ESXi-5 through ESXi-8 initialized in the nested environment commissioned.
- Expects C:\VLC\VLC-Holo-Site-1\add_hosts5-8_bulk_commission_VSAN.json configuration used in commissioning
[Step 1] Log in to the environment
- Open a new tab in the Chrome browser (if necessary)
- Click the Managed Bookmarks folder in the bookmark bar then select SDDC Manager
- Log into SDDC Manager as user: administrator@vsphere.local with the password: VMware123!
- Click Login
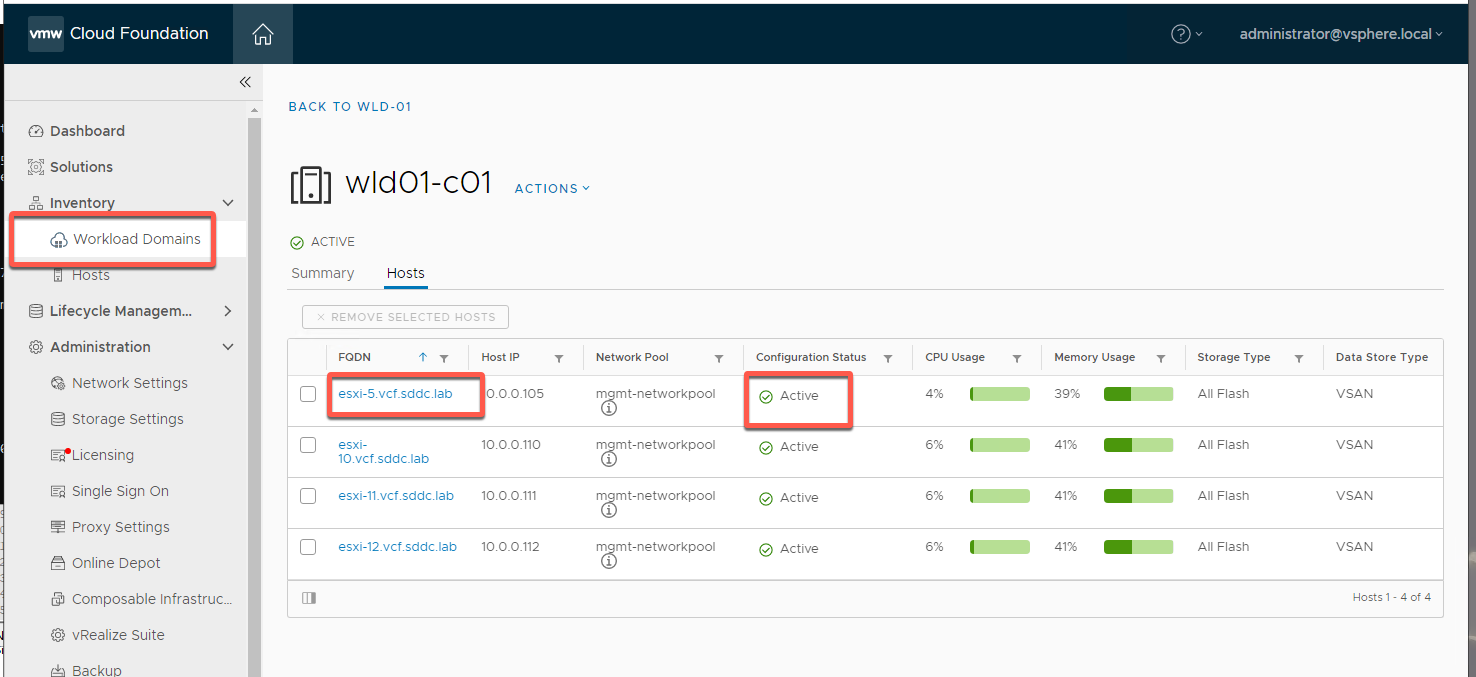
[Step 2] Add host to cluster
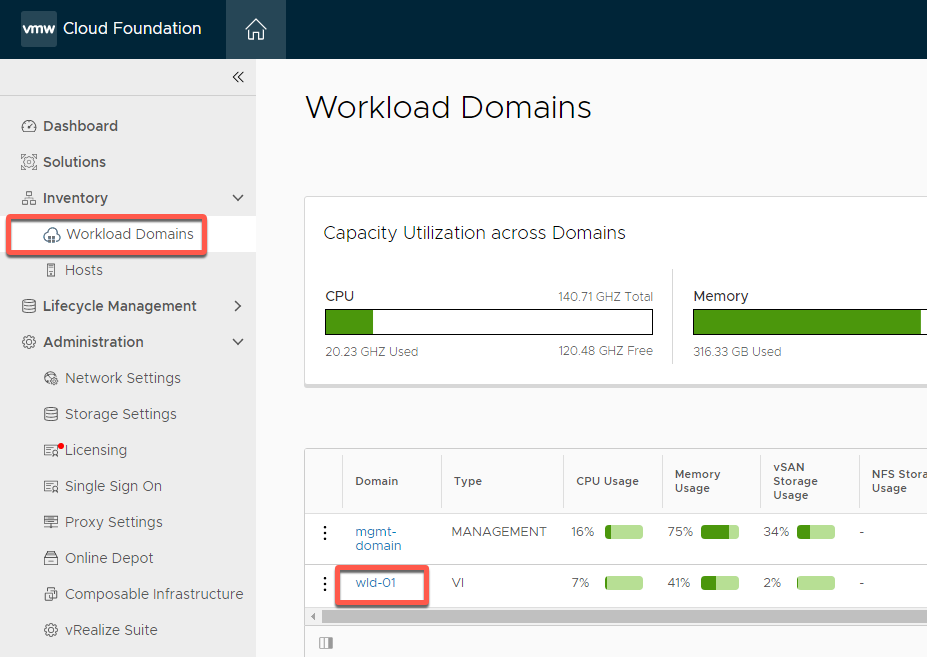
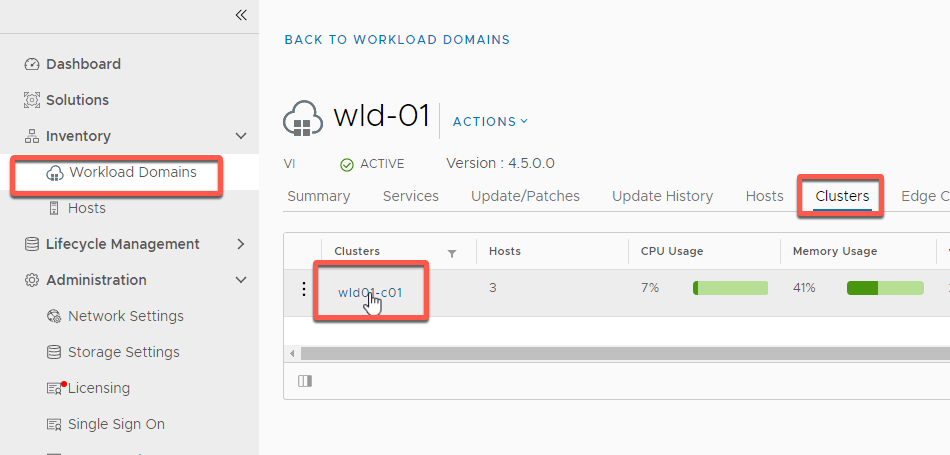
- Select Inventory -> Workload Domains-> wld-01
- Select Clusters -> wld01-c01
- Select Actions -> Add Host
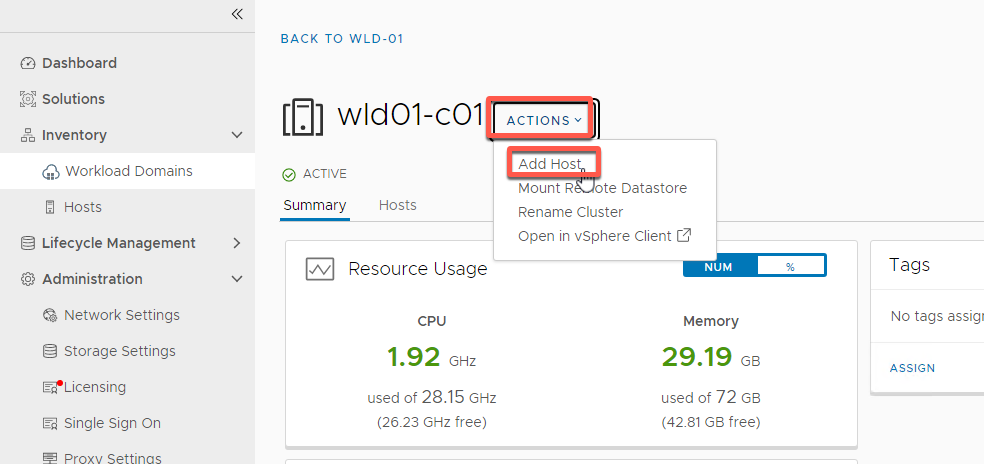
- Select esxi-5 then Next
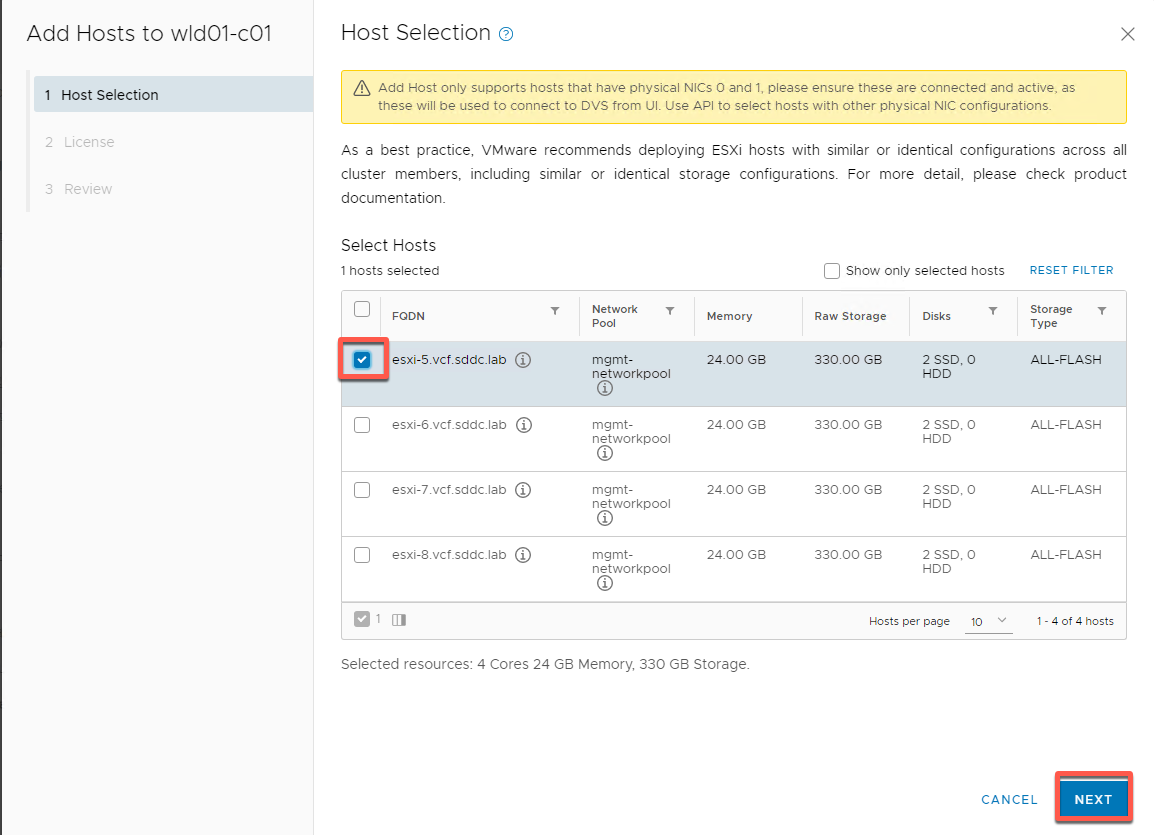
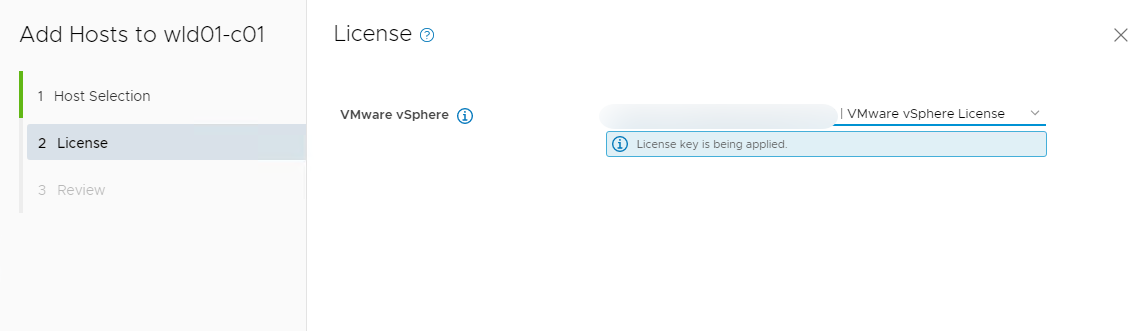
- Select your vSphere license then Next
- Review details, then click Finish
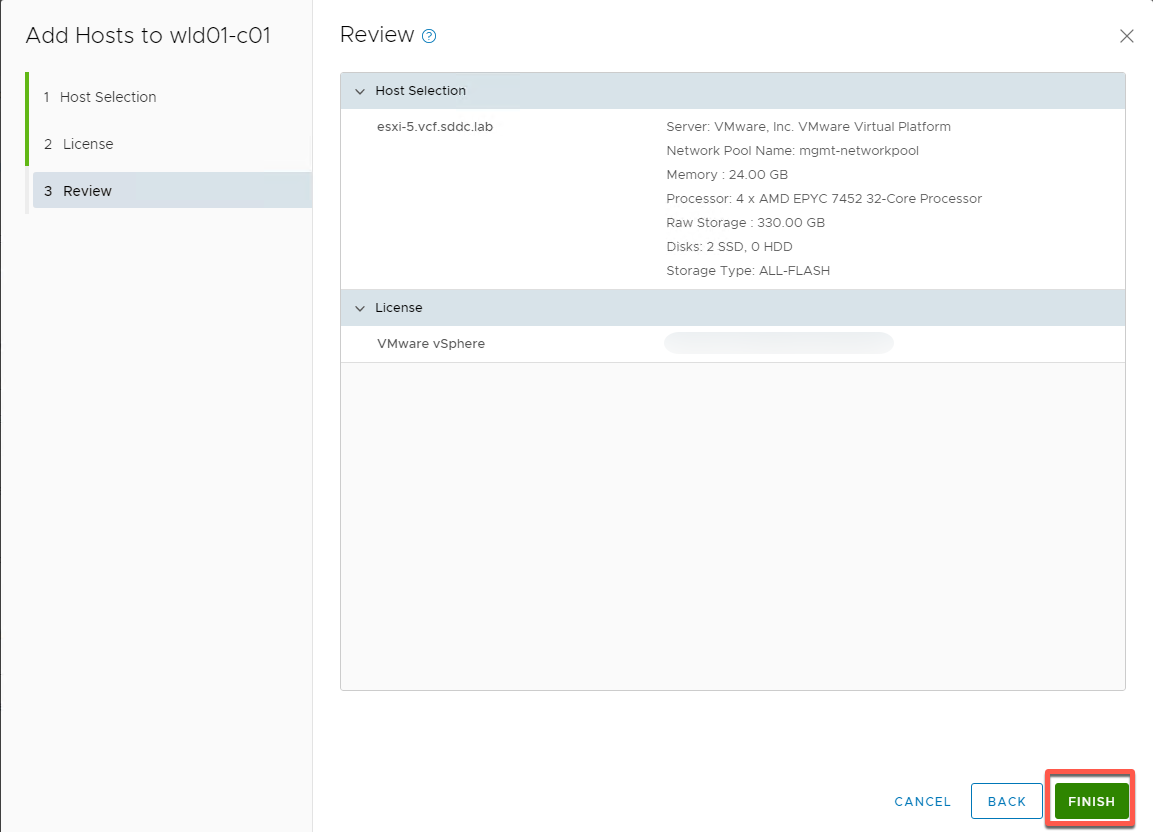
- Monitor progress in the task panel
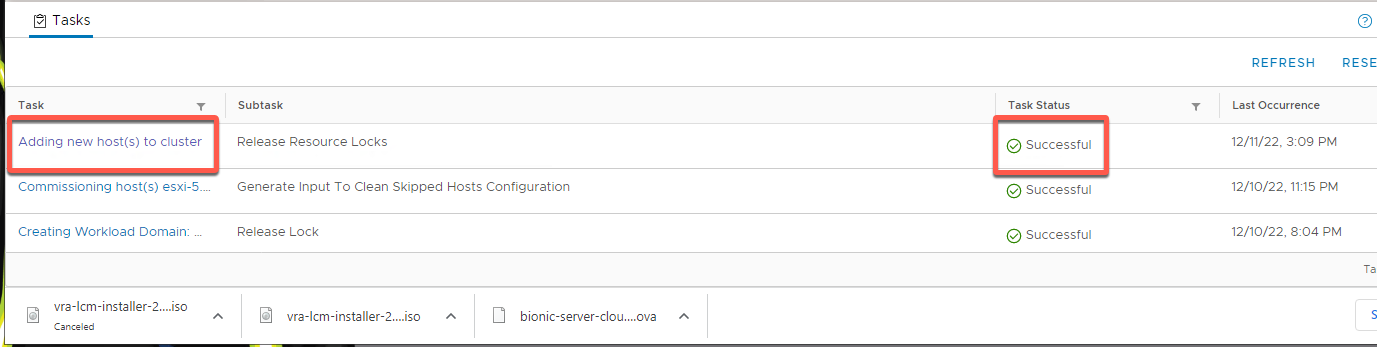
- Your result should be
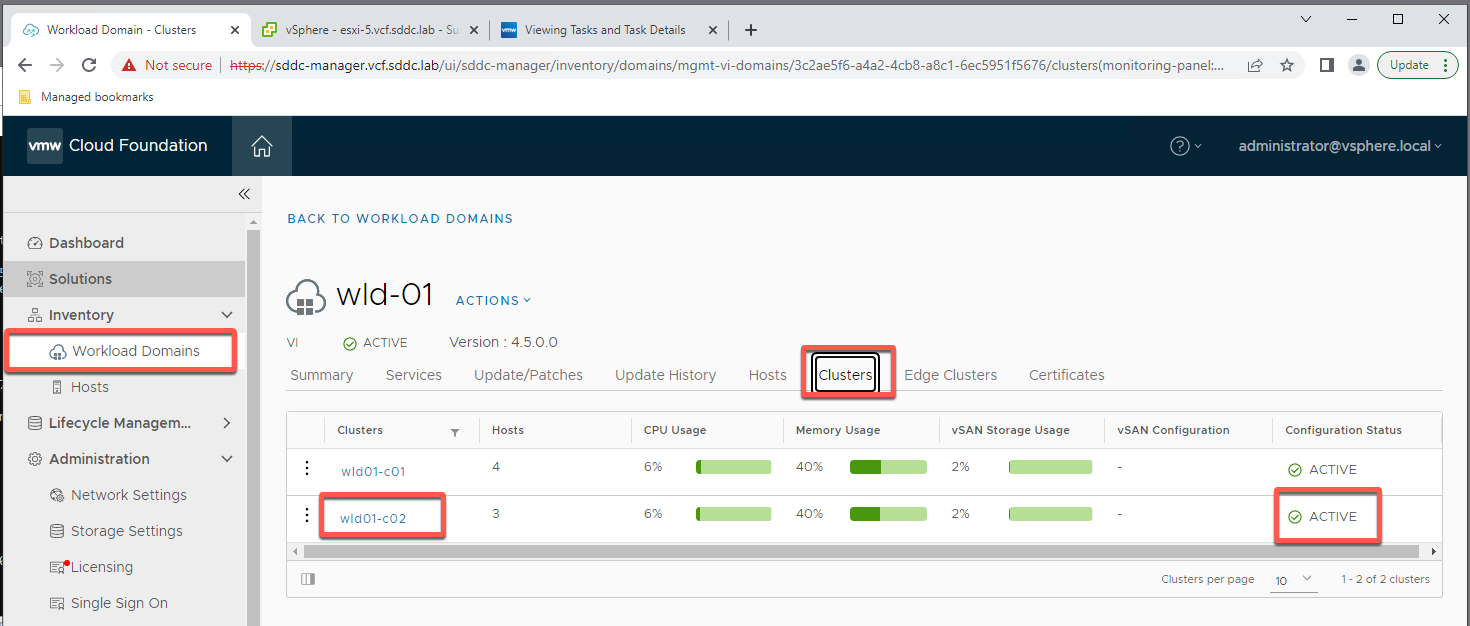
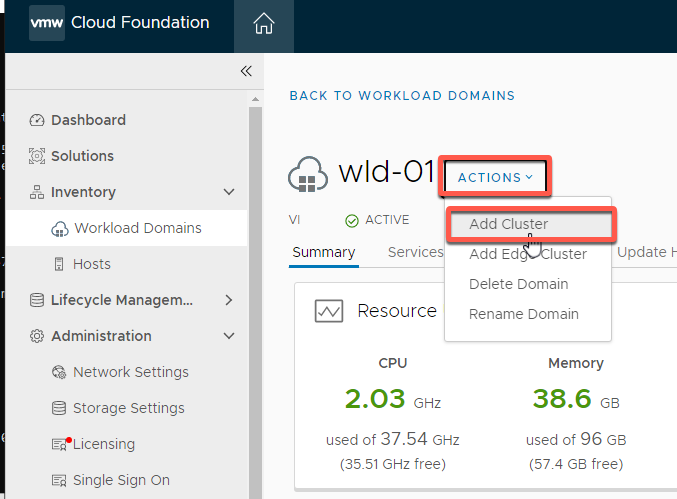
[Step 3] Add cluster to Workload Domain
- Select Inventory -> Workload Domains-> WLD-01
- Select Actions -> Add Cluster
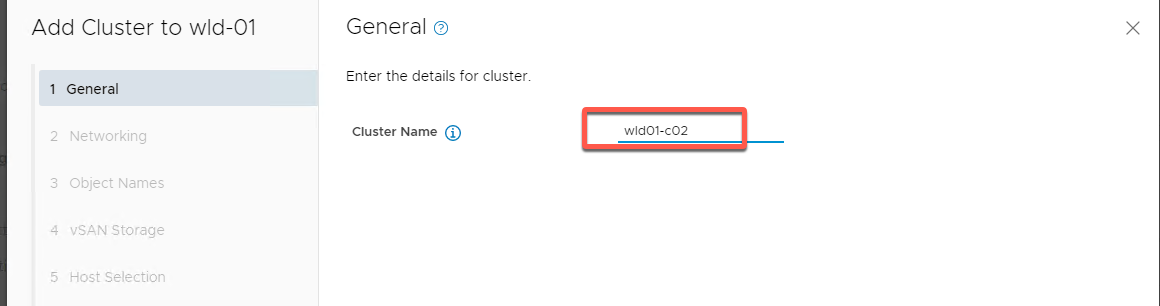
- Select VSAN for Storage and click Begin
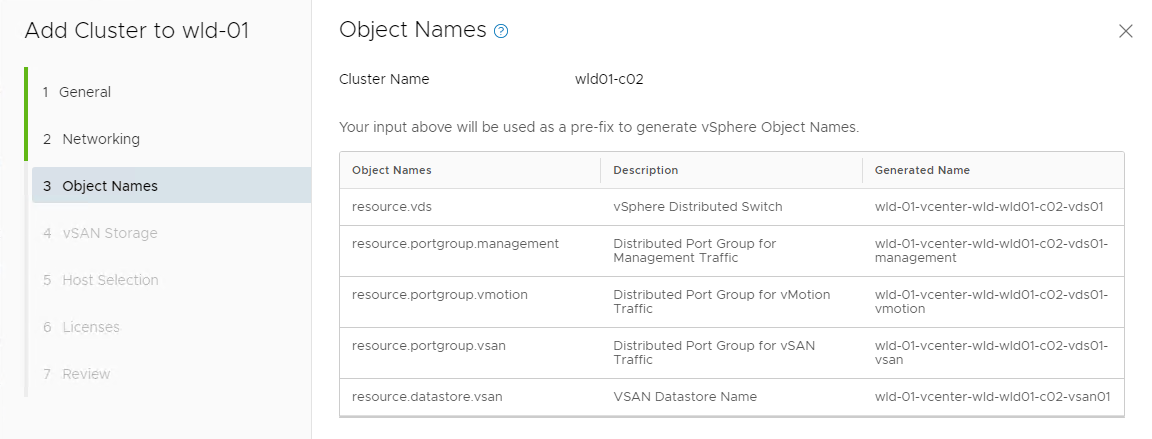
- Name the cluster wld01-c02 and click Next
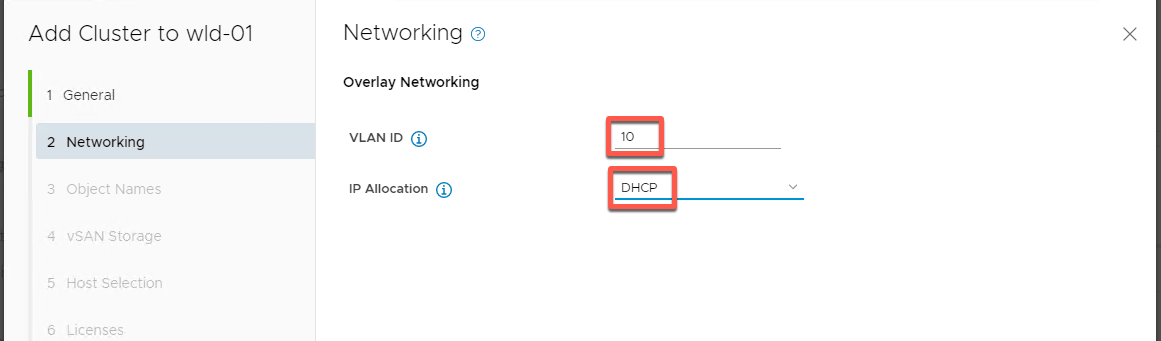
- Set VLAN to 10 and DHCP addressing for IP Allocation then Next
- Accept Object naming and click NEXT
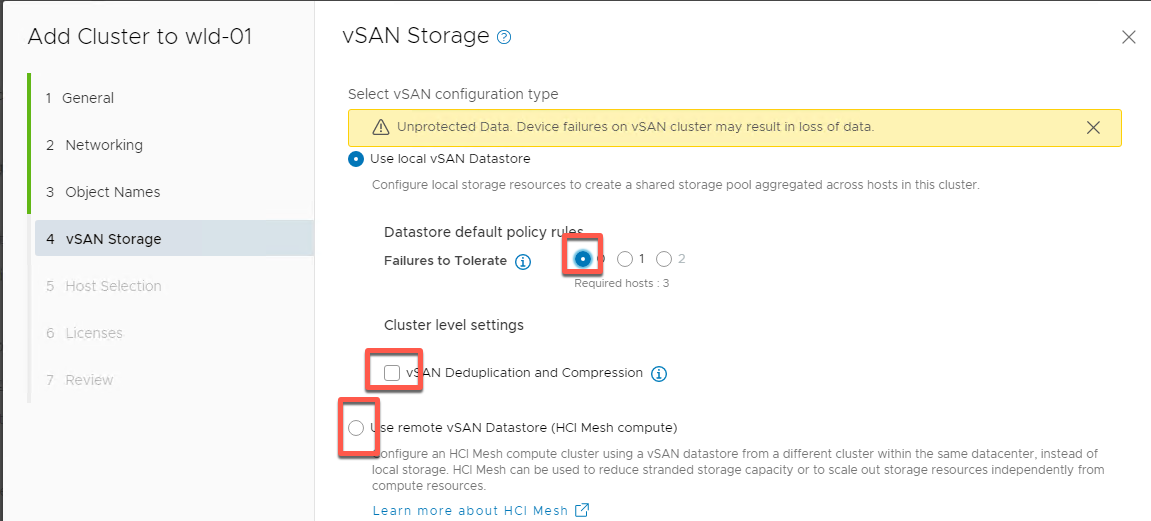
- Select 0 for Failures to Tolerate. Do not check Deduplication and Compression as this is a nested lab. The lab is also not configured for HCI Mesh
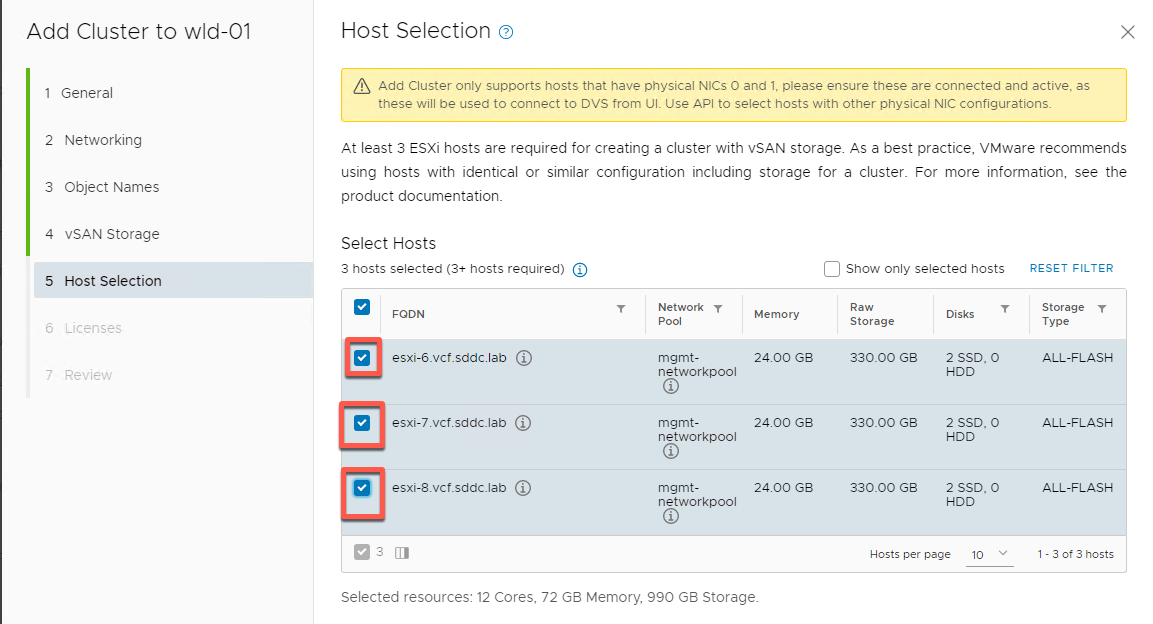
- Select hosts esxi-6, esxi-7 and esxi-8 then click Next
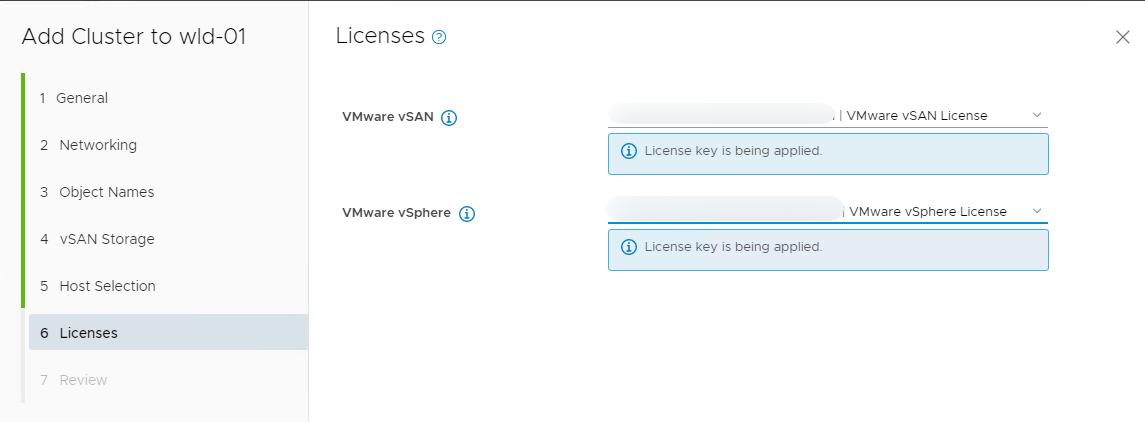
- Apply your licenses then click Next
- Review details and click Finish (NOTE: There is a known issue with Chrome browser and several summary screens. If the Review screen is black, simply click finish to move forward)
- Monitor in task pane
- Your results should look like this