
Kubeflow Validation
Kubeflow Function Validation
Introduction
Kubeflow allows a notebook-based modeling system to easily integrate with the data preparation on a local data lake or in the cloud in a similar way. Kubeflow supports multi-tenant machine learning environments by managing the container orchestration aspect of the infrastructure that enables simple and effective sharing.
We validated the core functions from Notebooks to Pipelines and model serving and showcased an integrated end-to-end Pipeline example:
- Kubeflow Notebooks
- Run TensorFlow example
- Run PyTorch example
- Run Pipeline example
- KServe inference example
- End-to-end Pipeline example
Kubeflow Notebooks
Kubeflow Notebooks provides a way to run web-based development environments inside your Kubernetes cluster by running inside pods. It provides several default images. System administrators can provide customized notebook images for their organization with required packages pre-installed.
Access control is managed by Kubeflow’s RBAC, enabling easier notebook sharing across the organization. Users can create notebook containers directly in the cluster.
Creating a Kubeflow Notebook
Data scientists can create notebook servers for their data preparation and model development.
To spin up a notebook, perform the following steps:
Click the Central Dashboard Notebooks tab and click New Notebook:

Figure 1: New Notebook Wizard
Note: Kubeflow uses “limits” in pod requests to provision GPUs onto the notebook pods (details about scheduling GPUs can be found in the Kubernetes Documentation). If we want to enable GPU on your notebook, in the GPU drop-down list, specify any “GPU Vendor” devices that your notebook server requests. In our environment, as Figure 1 shows, we select NVIDIA GPU.
We can configure a ReadWriteMany persistent volume according to Using ReadWriteMany Volumes on TKG Clusters. See example here.
Note: RWM volume is not natively supported with vSAN File Services in the current version.
Figure 2 shows the “external-nfs-pvc” volume in the Volumes Web UI, which is provisioned in the configuration section, also other ReadWriteOnce volumes in the user namespace are in the list.

Figure 2: RWM Volume Backed by vSAN File Service
We can attach the existing RWM volume to the new notebook.
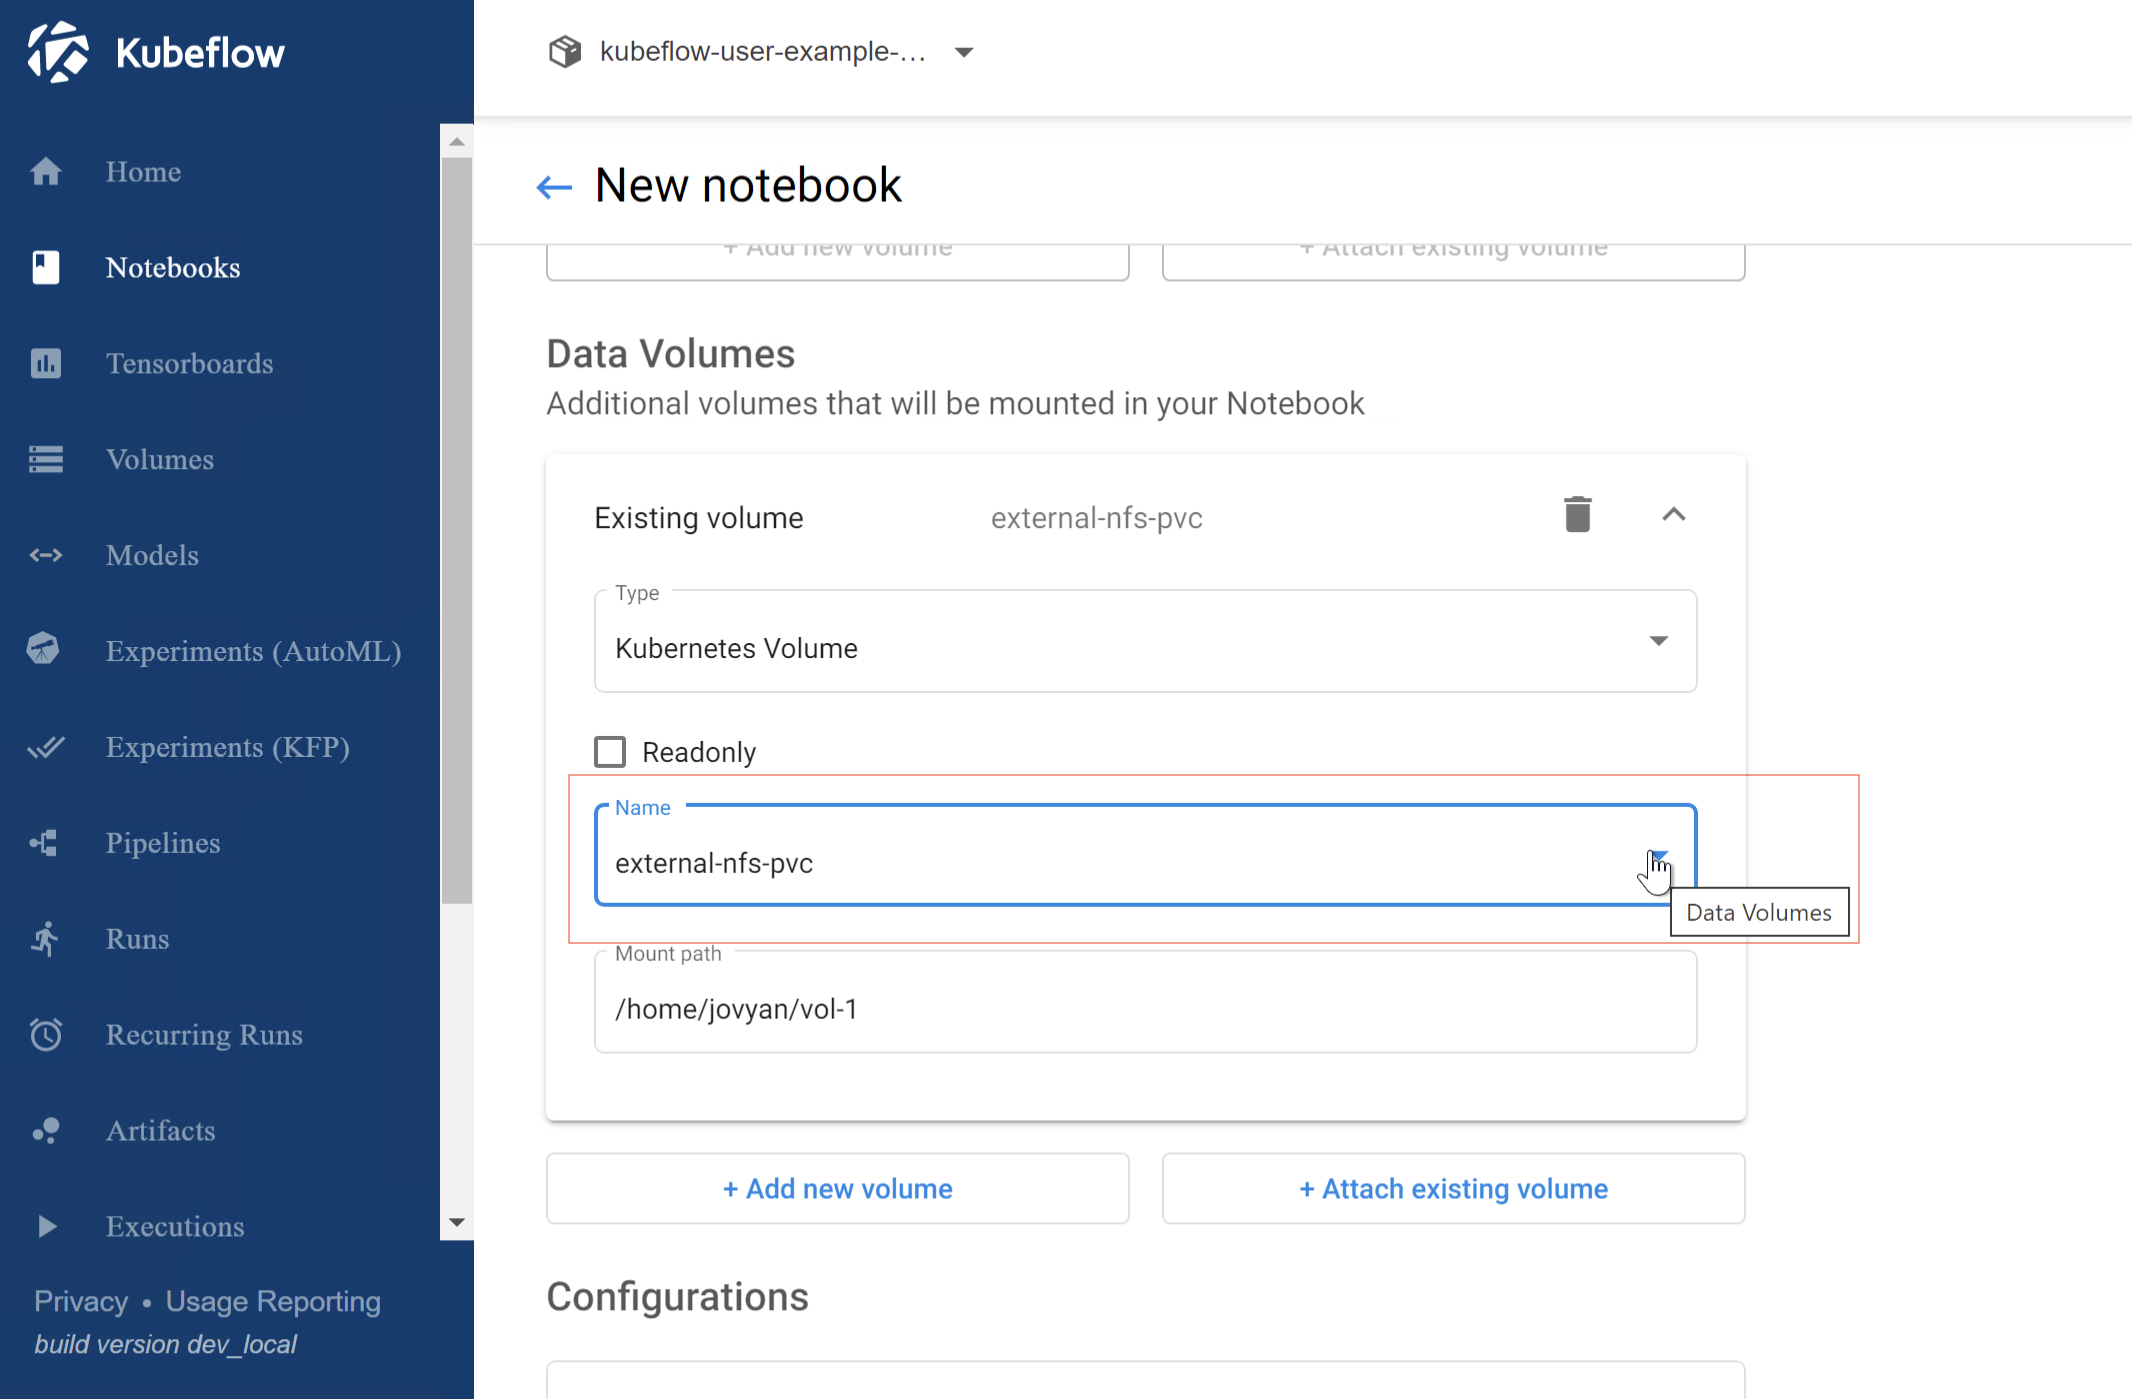
Figure 3: Attach the Existing Volume to New Notebook
For more information, see the notebooks quickstart guide.
Run TensorFlow Example
We use the BERT for TensorFlow Jupyter Notebook for testing. Bidirectional Embedding Representations from Transformers (BERT) is a method of pre-training language representations, which obtains state-of-the-art results on a wide array of Natural Language Processing (NLP) tasks. NVIDIA's BERT is an optimized version of Google's official implementation. The notebook provides a worked example for utilizing the BERT for TensorFlow model scripts.
After deploying the tensorflow-cuda image notebook, click on CONNECT, since the scripts are based on TensorFlow 1.15 version, either change some of the deprecated API to new ones or build a customized image on the same tensorflow version to make the code pass.
We chose the notebook server image with tensorflow+cuda 11.
![]()
Follow the steps to run an example use case of the BERT model for end-user applications.
Figure 4 shows inference using GPU.
![]()
Figure 4: BERT_Jupyter Notebook using GPU
Figure 5 is an example prediction result for using the BERT for TensorFlow.
![]()
Figure 5: Prediction Result
Run Pytorch YOLOV5 Example
We use YOLOV5 to verify the inference and validation, which is a family of object detection architectures and models pre-trained on the COCO dataset.
Notes: Require customized image to have pycocotools library installed (which needs gcc library installed, this is not included in the default kubeflow notebook images).
In our validation, the GPU is NVDIA A100, we installed pytorch with cuda v 11.3. In the Notebook, we first installed below:
pip3 install torch torchvision torchaudio --extra-index-url https://download.pytorch.org/whl/cu113
pip3 install pycocotools
Then we followed the tutorial notebook to run the validation and inference case.

Figure 6: YOLOV5 Validation on coco Dataset Screenshot Using A100 MIG

Figure 7: YOLOV5 Inference Screenshot
Run Pipeline Example
A Kubeflow Pipeline is a portable and scalable definition of a machine learning workflow, based on containers. Kubeflow Pipelines are reusable end-to-end machine learning workflows composed of a set of input parameters and a list of the steps using the Kubeflow Pipelines SDK.
You can follow https://www.kubeflow.org/docs/components/pipelines/tutorials/build-pipeline/ to upload a compiled pipeline.
Kubeflow Pipelines offers a few samples that you can use to try out the pipelines quickly.
To run a basic pipeline, perform the following steps:
- From the Kubeflow Pipeline UI
Click the name of the sample XGBoost-iterative model training in Figure 8, the source code is
https://github.com/kubeflow/pipelines/tree/master/samples/core/train_until_good

Figure 8: Example XGBoost Training Pipeline
A component in a pipeline can be responsible for data preprocessing, data transformation, model training, and so on.
The Artifacts include Pipeline packages, views, and large-scale metrics (time series). Use large-scale metrics to debug a pipeline run or investigate an individual run’s performance. Kubeflow Pipeline installation stores the artifacts in an artifact store Minio server by default. Below is the pipeline running log stored in Artifacts:

Figure 9: Artifact Stores in MinIO Server
The lineage explorer displays the running flow of pipeline components:

Figure 10: Artifacts for a Pipeline Running Log Lineage Explorer
From the Kubeflow-user-example-com namespace, we can also see the pipeline pod’s status is completed.

Figure 11: Pipeline Pods Status Become Completed
For more details, see Kubeflow pipeline introduction.
KServe Inference Example
KServe enables serverless inferencing on Kubernetes and provides performant, high abstraction interfaces for common machine learning frameworks like TensorFlow, XGBoost, scikit-learn, PyTorch, and ONNX to handle production model serving use cases. For more details, visit the KServe website.
KServe provides a simple Kubernetes CRD to allow deploying single or multiple trained models onto model servers such as TFServing, TorchServe, ONNXRuntime, and Triton Inference Server. See samples for more information.
We validated the basic inference service which loads a simple iris machine learning model, sends a list of attributes, and prints the prediction for the class of iris plant, see the YAML file.
kubectl apply -f isvc.yaml -n kubeflow-user-example-com
The inference service will be ready as the figure shows.


Figure 12: inference Service Becomes Ready
You can also check the inference service from the Model Servers tab in Figure 13.

Figure 13: Deploy the Inference Service in the Model Servers Tab
Figure 14 is the screenshot of Model server details including service URL, Storage URI, and Predictor type.

Figure 14: Inference Service Details
Figure 15 is an example notebook to do prediction using the deployed inference service.

Figure 15: Call Inference Service for Prediction Example
Check the examples running KServe on Istio/Dex to access the endpoint outside the cluster.
End-to-End Pipeline Example
We validated an integrated MNIST end-2-end pipeline test to perform the following tasks:
- Hyperparameter tuning using Katib
- Distributive training with the best hyperparameters using TFJob
- Serve the trained model on local pvc using KServe
Before validation, make sure to set a default storageclass and install the python libraries in the requirements.txt, also you can set the parameters in the settings.py.
As shown in Figure 16, start the pipeline ./runner.sh

Figure 16: Kickoff the E2E Pipeline
We can monitor the pipeline running from the central dashboard.
Figure 17: E2E mnist Pipeline Graph
Figure 17 shows the component running steps.
The first step is the Experiments to tune Hyperparameter using Katib. The Experiment uses a "random" algorithm and TFJob for the Trial's worker.

Figure 18: Katib AutoML Hyperparameter Tuning
Then the pipeline created a pvc to store the model. Next is the TFJob runs the Chief and Worker with 1 replica, and last is serving the model using the KServe inference service. And the pipeline runs status changed from running to success.


Figure 19: Pipeline Execution Steps and Status
Check out the solution Home Page for more information.
Previous page: Kubeflow Deployment
Next page: Kubeflow Best Practice