
New Installations
Overview of vCenter Server Appliance Deployment
vCenter Server Appliance Deployment
vSphere 6.5 and 6.7 now take the VCSA deployment experience to the next level! The vCenter Server Appliance installer no longer requires a plugin, making it browser agnostic. If that wasn’t enough, the vCenter Server Appliance installer now supports use on macOS, Linux, and Windows.
Installer
vSphere 6.5 and 6.7 include two ways to deploy your vCenter Server Appliance. The first method is utilizing the UI Installer. The UI installer is the interface you are most familiar with as it includes a GUI to guide you through the installation. The second method to deploy the vCenter Server appliance is the CLI installer. The CLI installer allows you to generate a JSON template with parameters for your vCenter Server deployment allowing you to execute your install with a single line of code.
Because the vCenter Server Appliance installer no longer requires the Client Integration Plugin (CIP), browser features such as OVA/OVF import that were dependent on CIP are now native.
Other CIP provided functions that are now native to the vCenter Server in vSphere 6.5 and 6.7 include:
- Exporting VM or vApp as an OVF/OVA
- Deploying OVF/OVA from a local file system or URL
- Exporting and importing from Content Library to the local file system
- Downloading and uploading files to and from a datastore
- Connecting remote devices to a VM (CD-ROM, USB, etc.)
A plugin is still needed when enabling Windows Authentication (SSPI) and/or Smart Card Authentication. The Enhanced Authentication Plugin (EAP) is available to enable these two functions. Finally, always check the documentation to see supported OS versions. For the best vCenter Server Appliance 6.5 installer performance check the system requirements.
Deployment
The vCenter Server Appliance install in vSphere 6.0 only had a one stage deployment. This meant any issues which occurred during the deployment would need a re-deploy. With the vCenter Server Appliance install in vSphere 6.5 and 6.7, a two-stage deployment workflow is now available. A two stage deployment workflow provides better validation checks during the vCenter Server deployment. Stage 1 deploys the vCenter Server Appliance OVA, configures basic networking, and starts the VMware vSphere Appliance Management Interface (VAMI) service. Stage 2 is the setup and configuration of the vCenter Server Appliance. This two stage workflow provides a lot of flexibility that was not possible before:
- The opportunity to take a snapshot between stages, in case any issues occur during Stage 2.
- Staging the vCenter Server Appliance deployment and continuing configuration later through the VAMI.
The deployment workflow introduces a new deployment size “X-Large”. With X-Large, the vCenter Server can manage up to 2K ESXi hosts and 35K powered on VMs. Also new is the option to increase the Stats, Events, Alarms, and Tasks (SEAT) storage size. The deployment workflow presents two storage options, Large and X-Large. The SEAT data storage can be increased at the time of the VCSA deployment or after.
vCenter Server 6.5 Appliance Embedded Deployment using the UI Installer


Download the VCSA installer to your local machine and run the installer from the vcsa-ui-installer directory.
You can run the installer from windows, linux or mac OS.

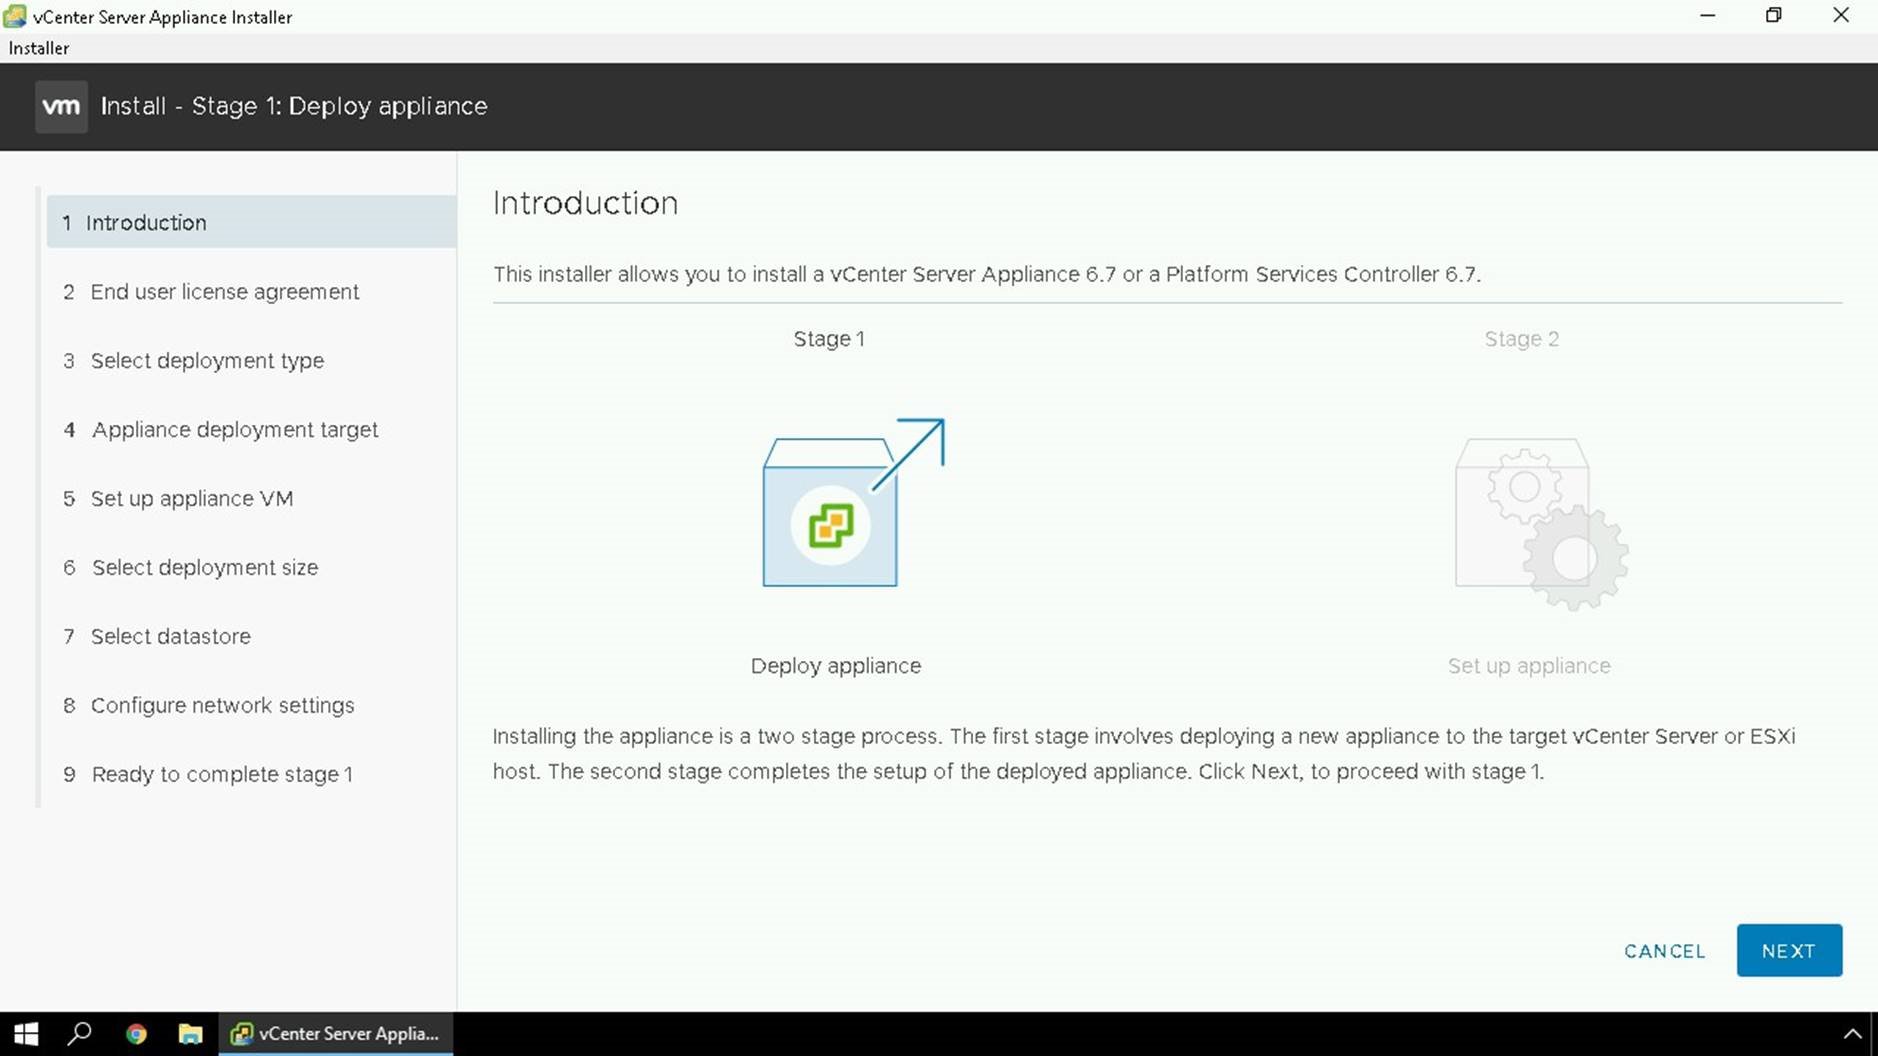
Once the installer is launched, we will use the Install option.

This screen explains how the install process works, it will be a two stage process. Stage 1 a new appliance will be deployed, and Stage 2 is where we will configure the new appliance.

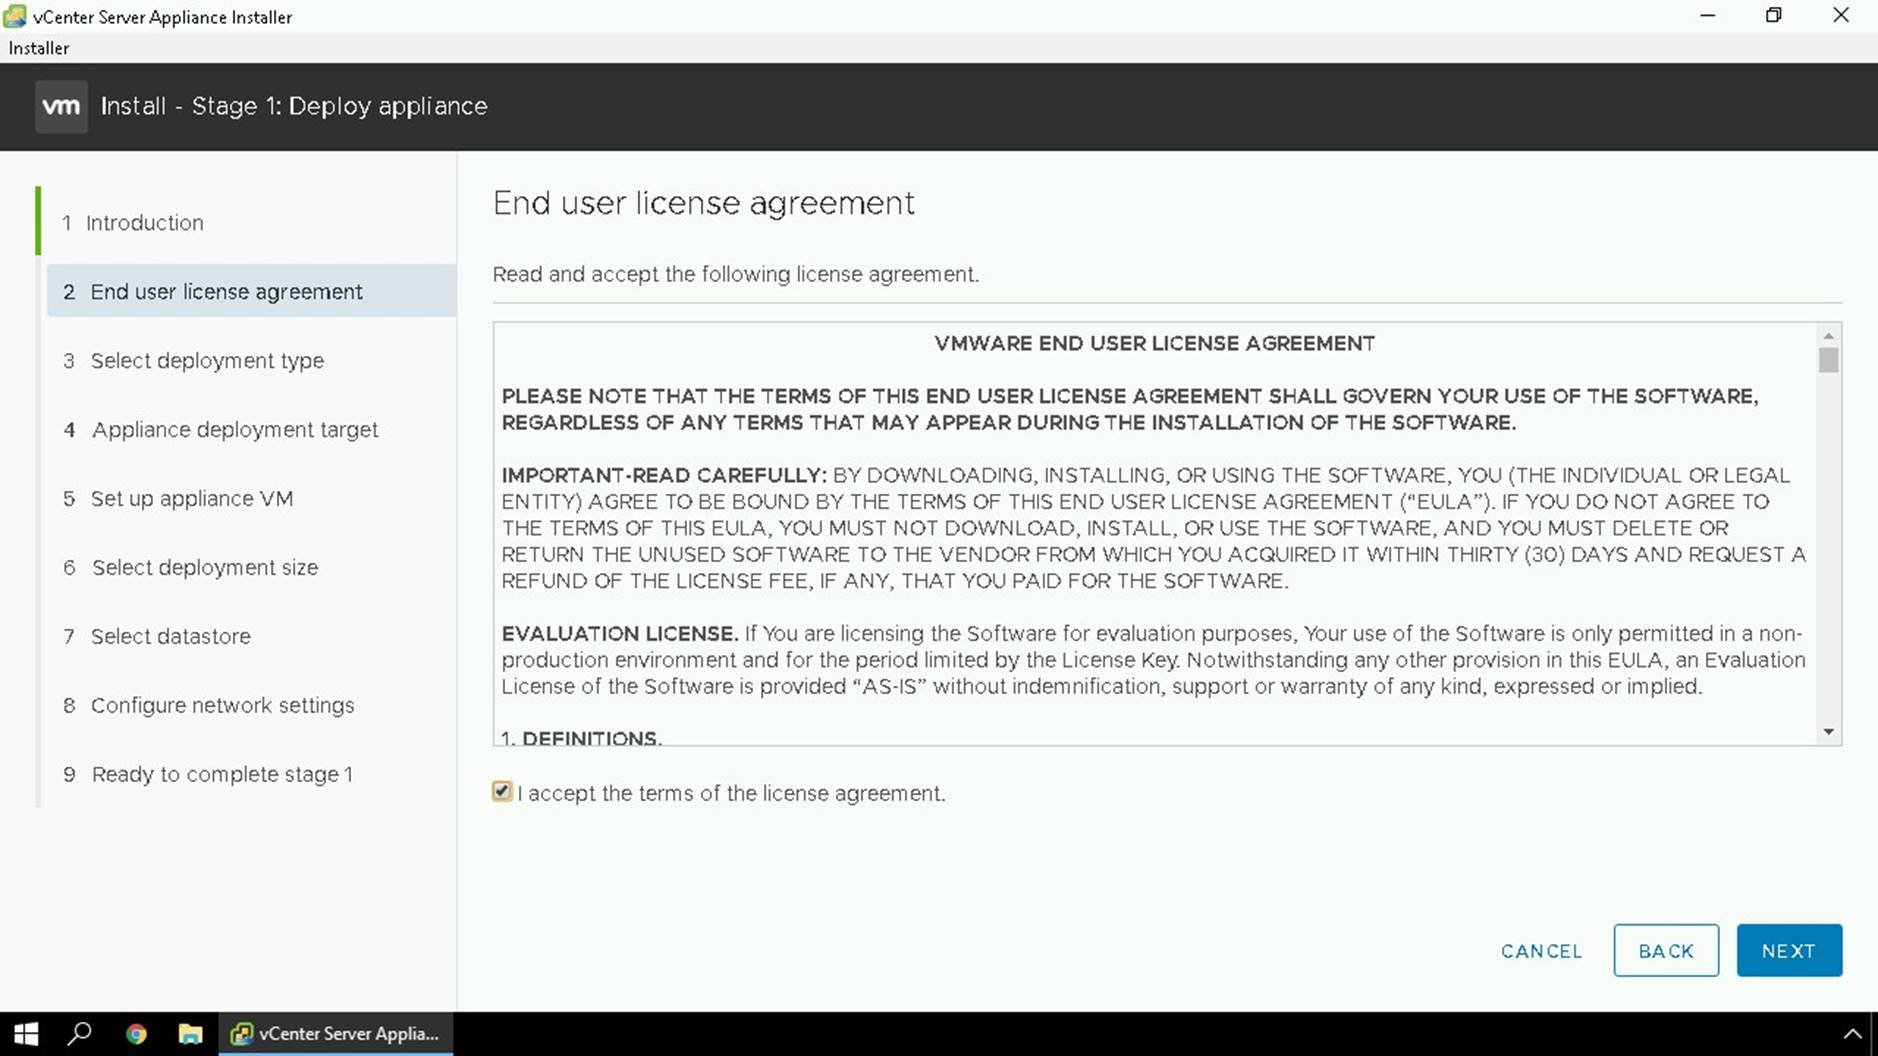
Accept the End user license agreement

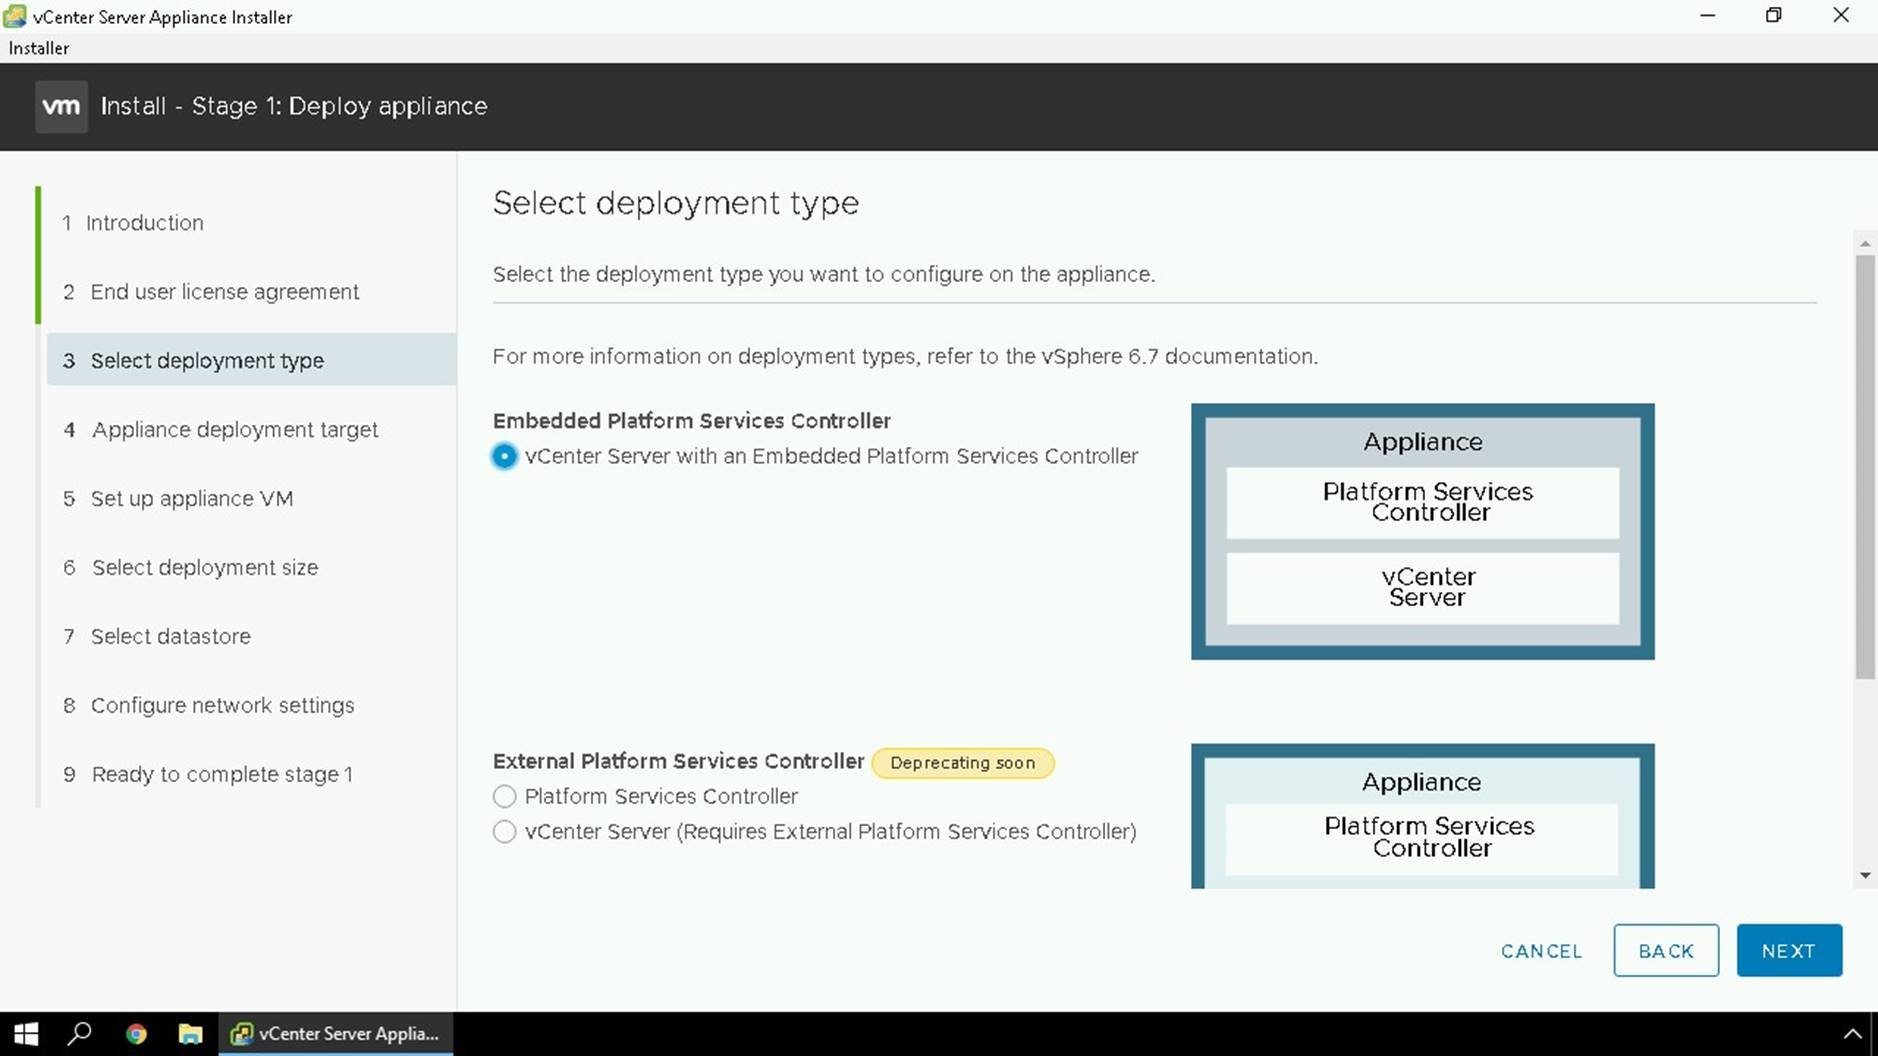
Select the Embedded Platform Services Controller option and Click Next.

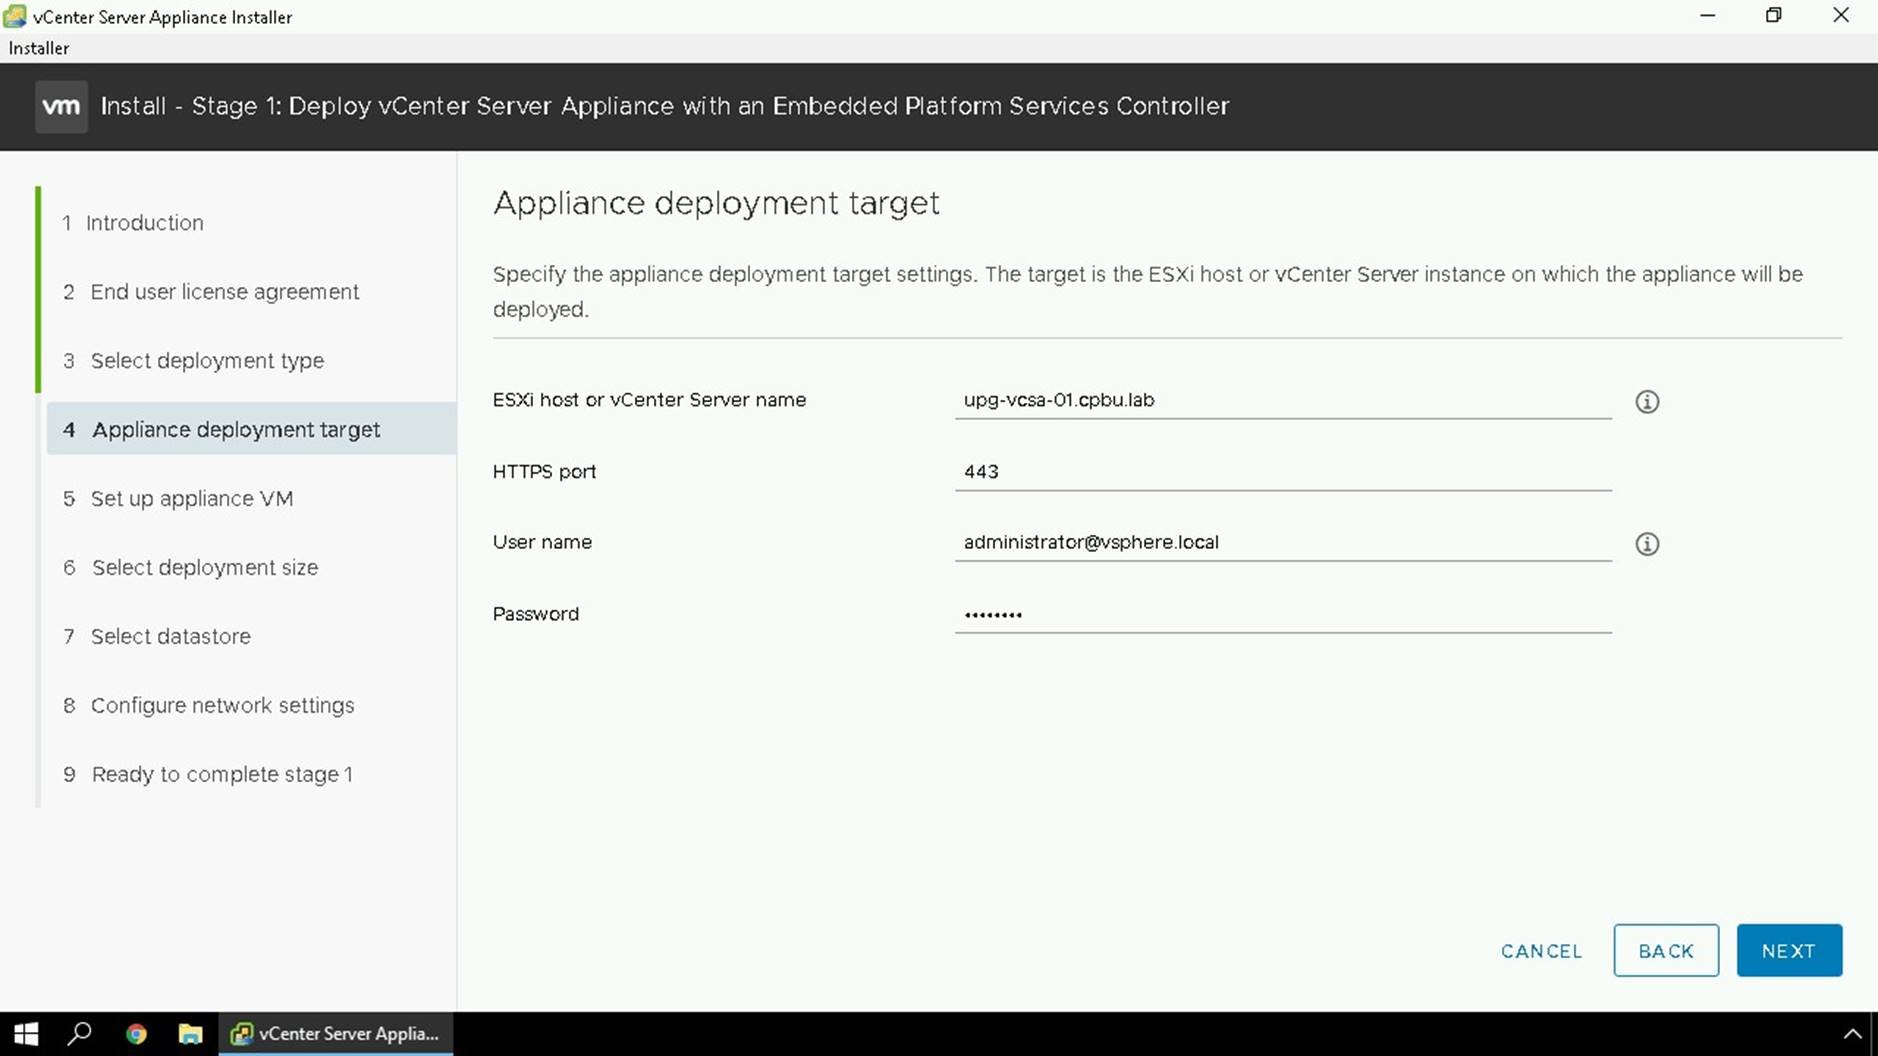
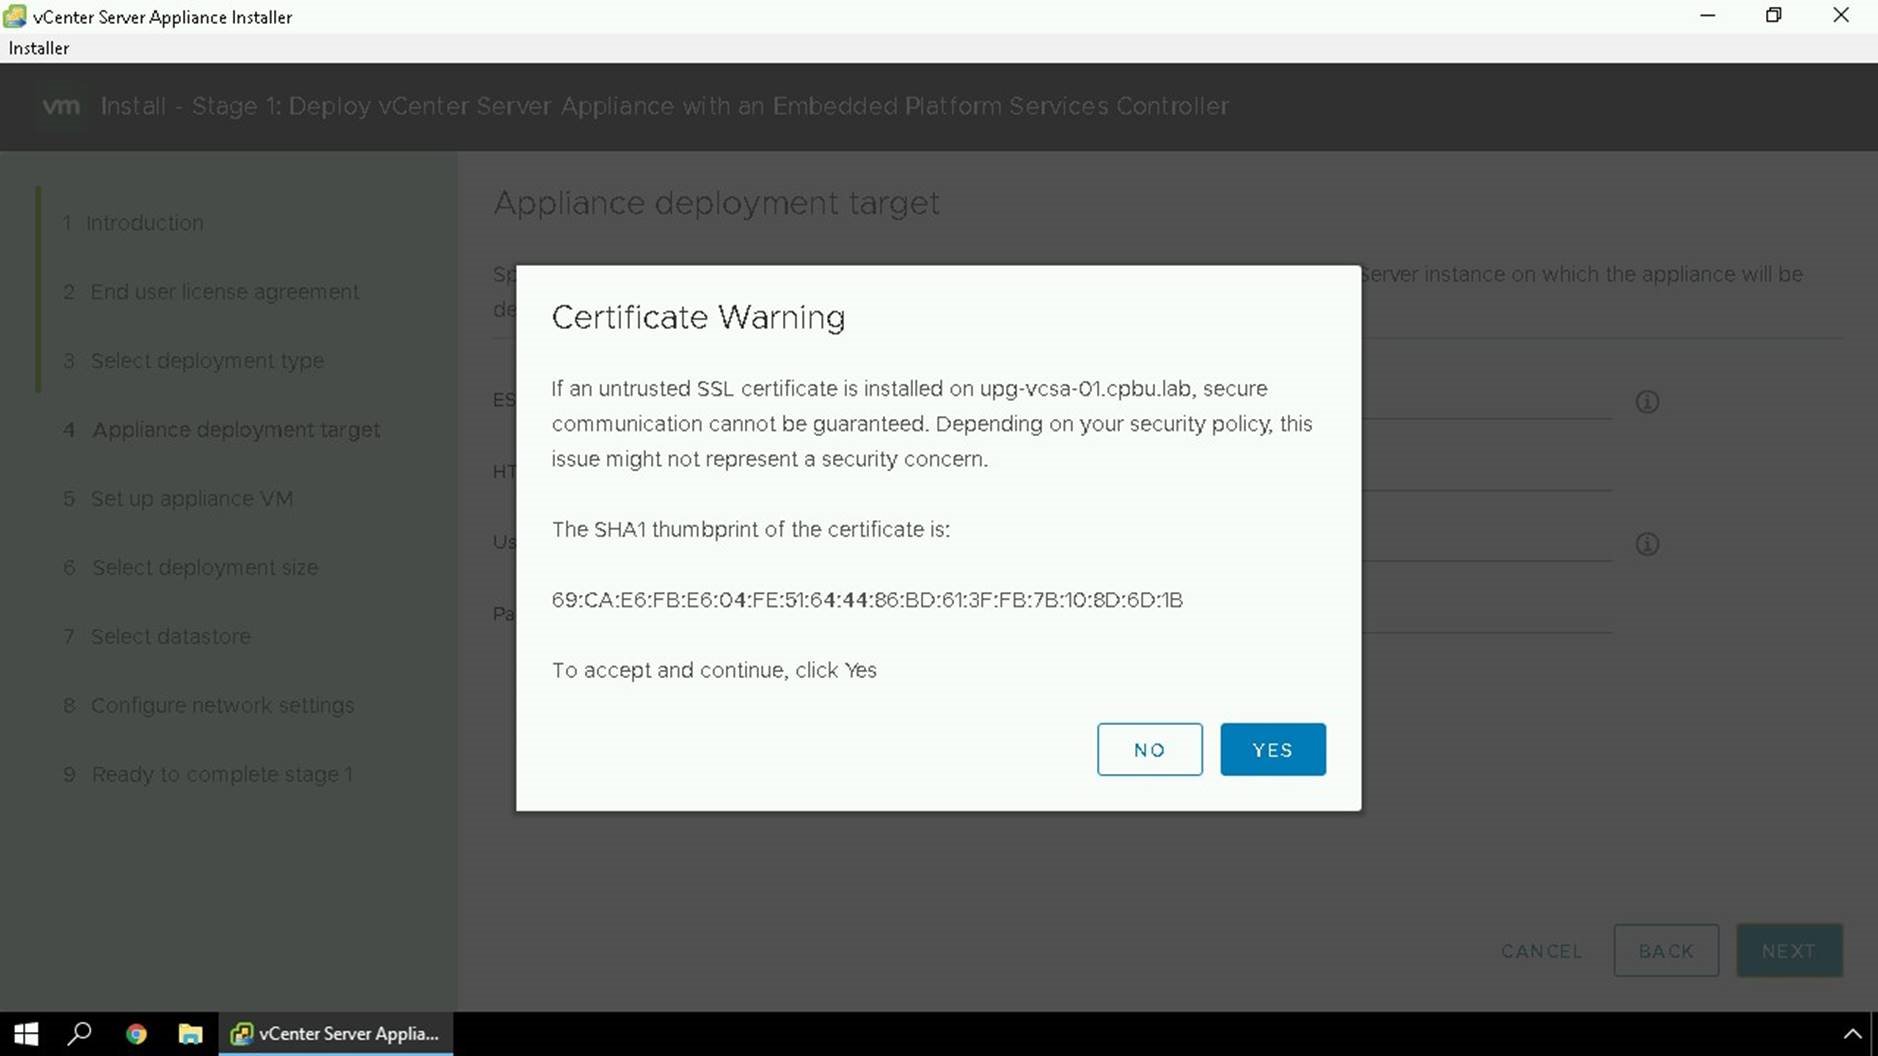
Here you will specify the destination where you want the appliance to be deployed.

You will need to accept the SSL thumbprints.

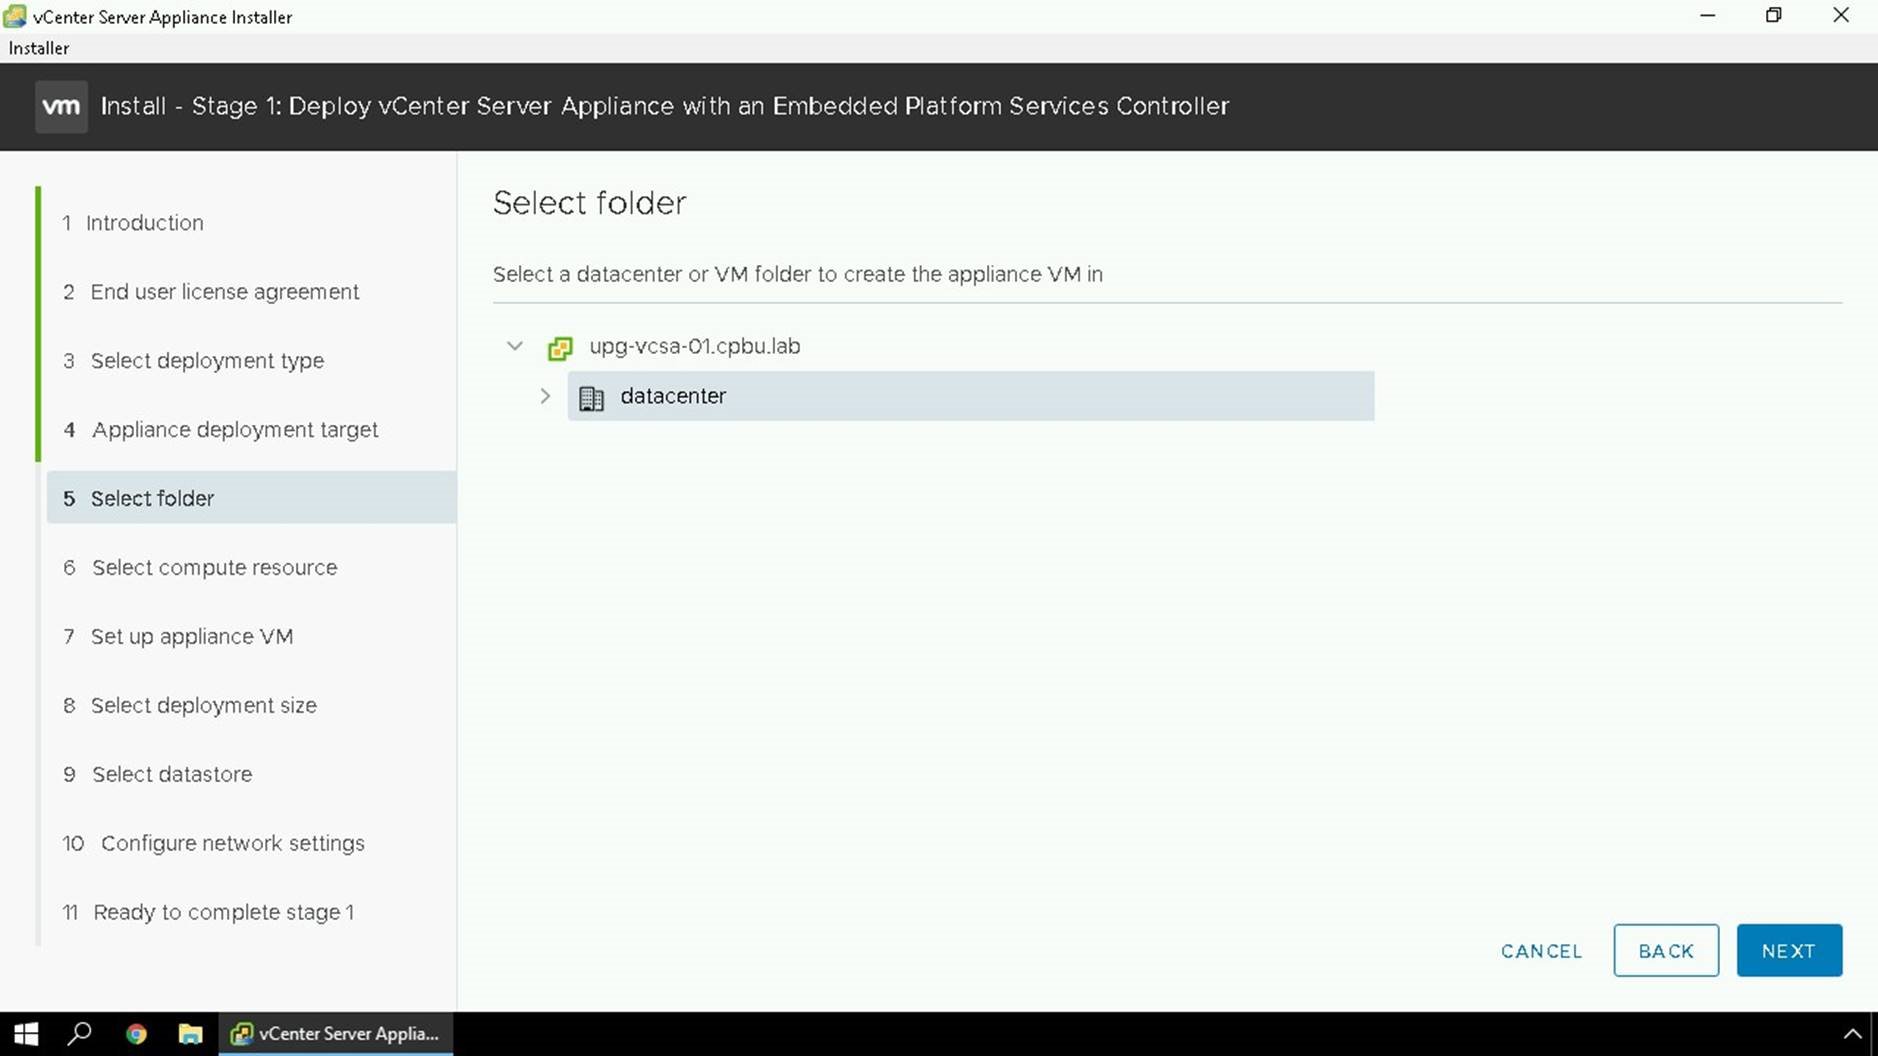
Select VM folder you wish the appliance to be deployed in

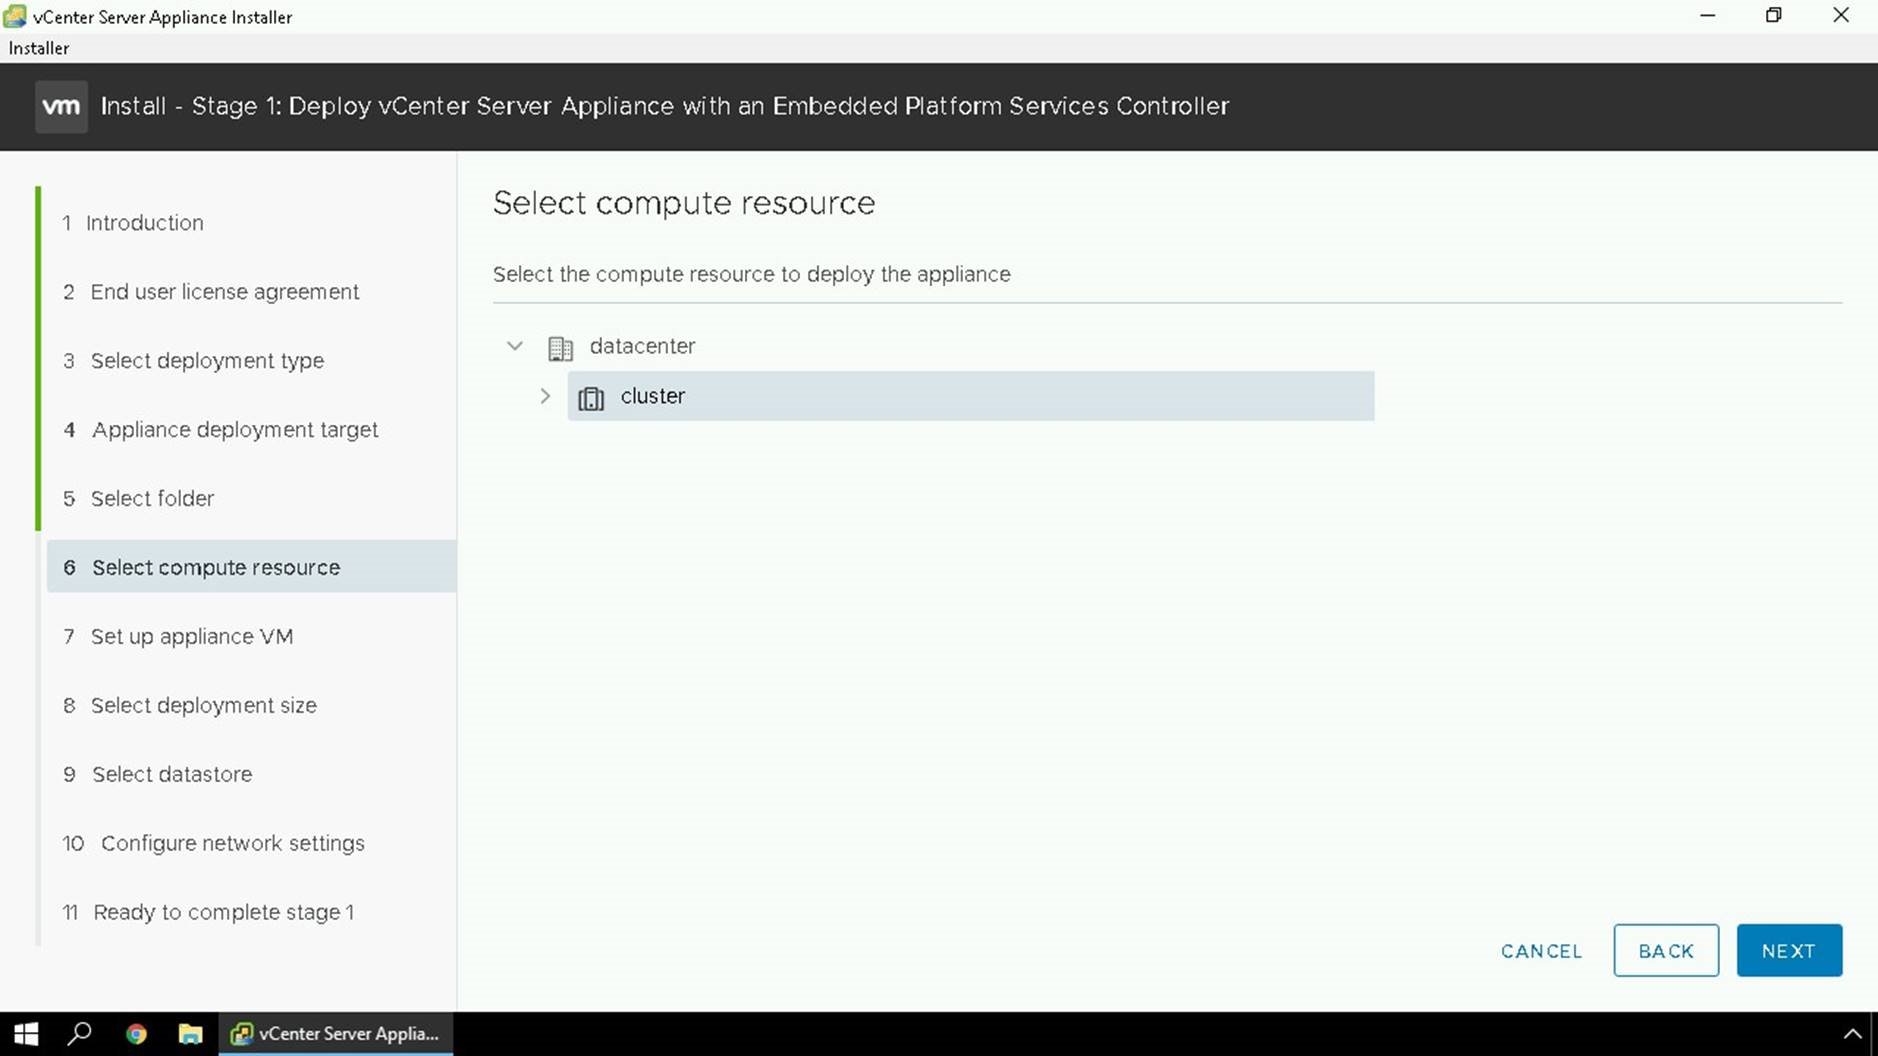
Select the compute resource you would like to deploy the appliance to. You can specify a cluster, or standalone host.

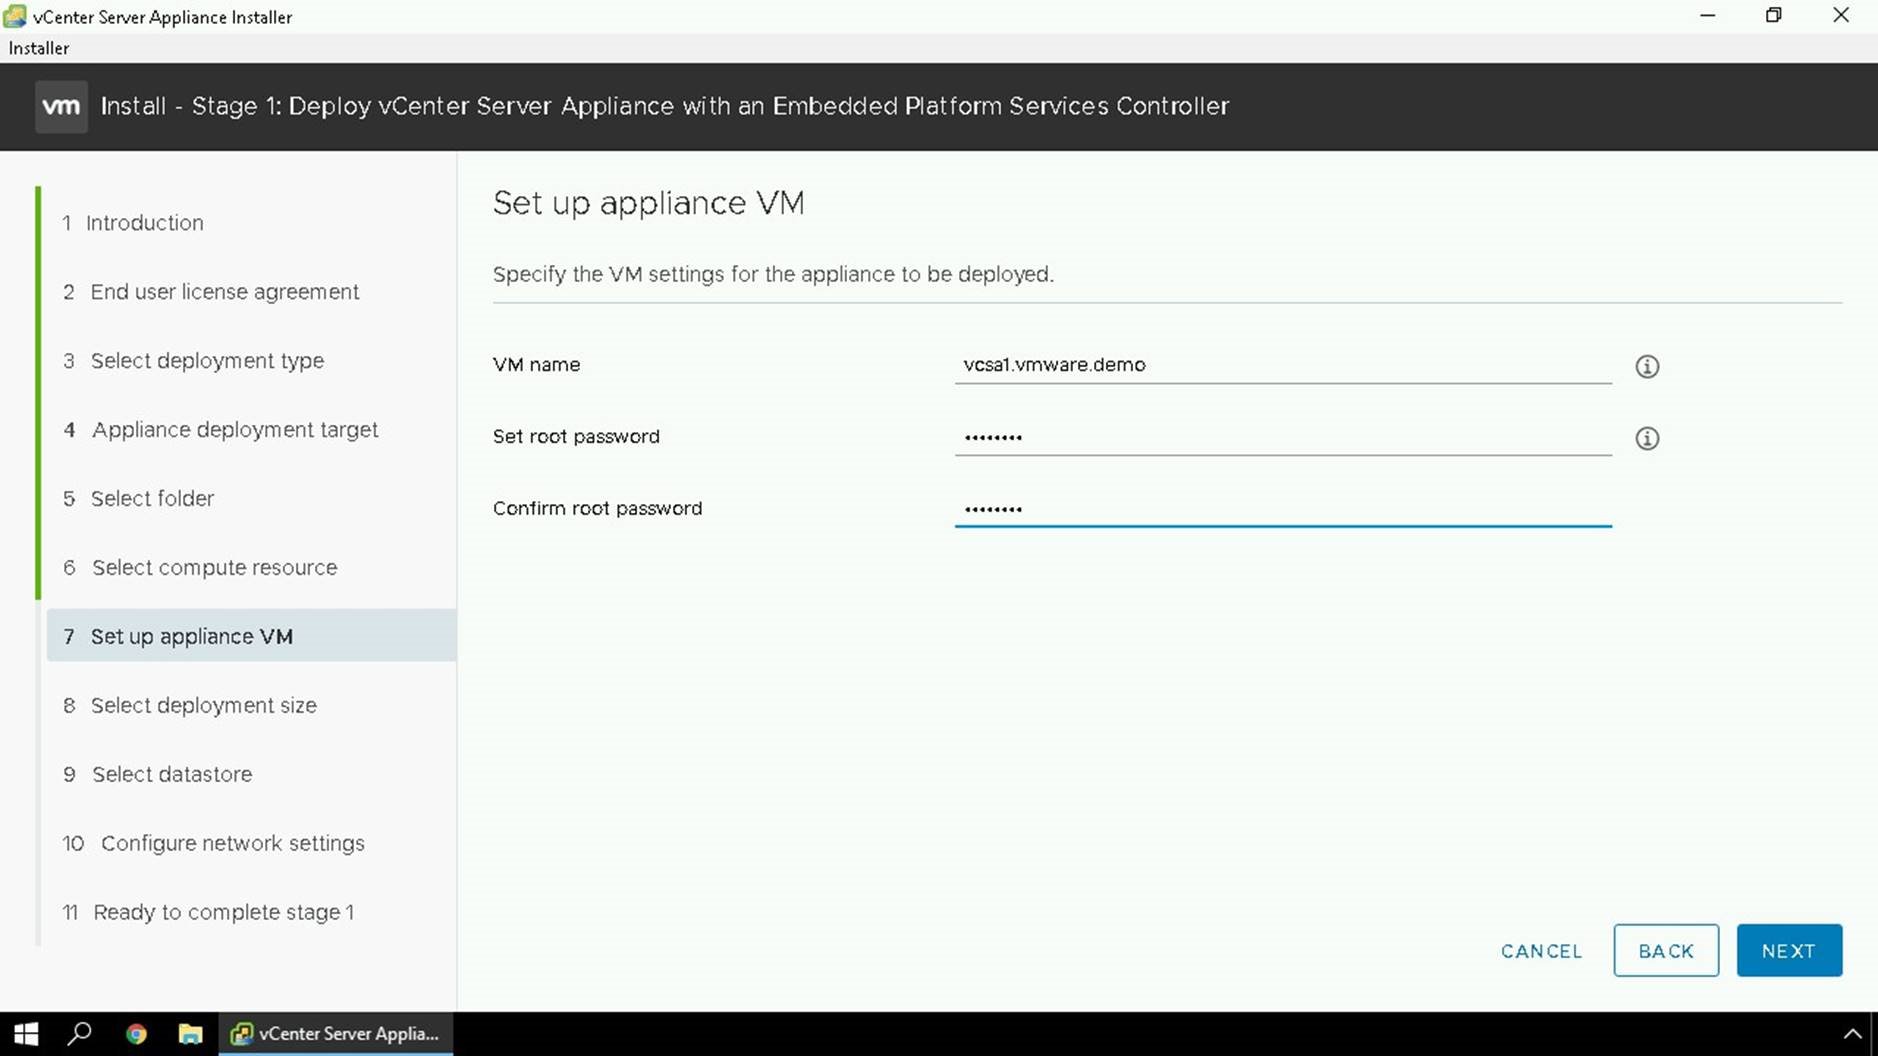
Here we will specify the display name for our appliance in vCenter inventory, it must be unique. We will also set a new root password for the appliance.

We will chose a deployment size and storage size for our appliance. Note: If you plan to use vCenter High Availability a deployment size of Small or larger is required. vCenter High Availability is not supported on Tiny deployments.

Specify the storage location for the new appliance and if you would like it to be thin provisioned you will check the box.

Specify the network settings to be used for your appliance including the FQDN and IP Information.

Validate all the information you entered is complete and we will finalize stage 1 of the install process.

First step of stage 1 is the appliance is deployed.

Additional configuration to the deployment where RPM's are loaded and installed.

Once stage 1 is complete, we can continue the install wizard to start stage 2. If the installer closes or you wish to continue this step later you can re-start the wizard through the VMware Appliance Management Interface (VAMI) on port 5480 of the temporary IP address.

We will now start the process of configuring your new appliance.
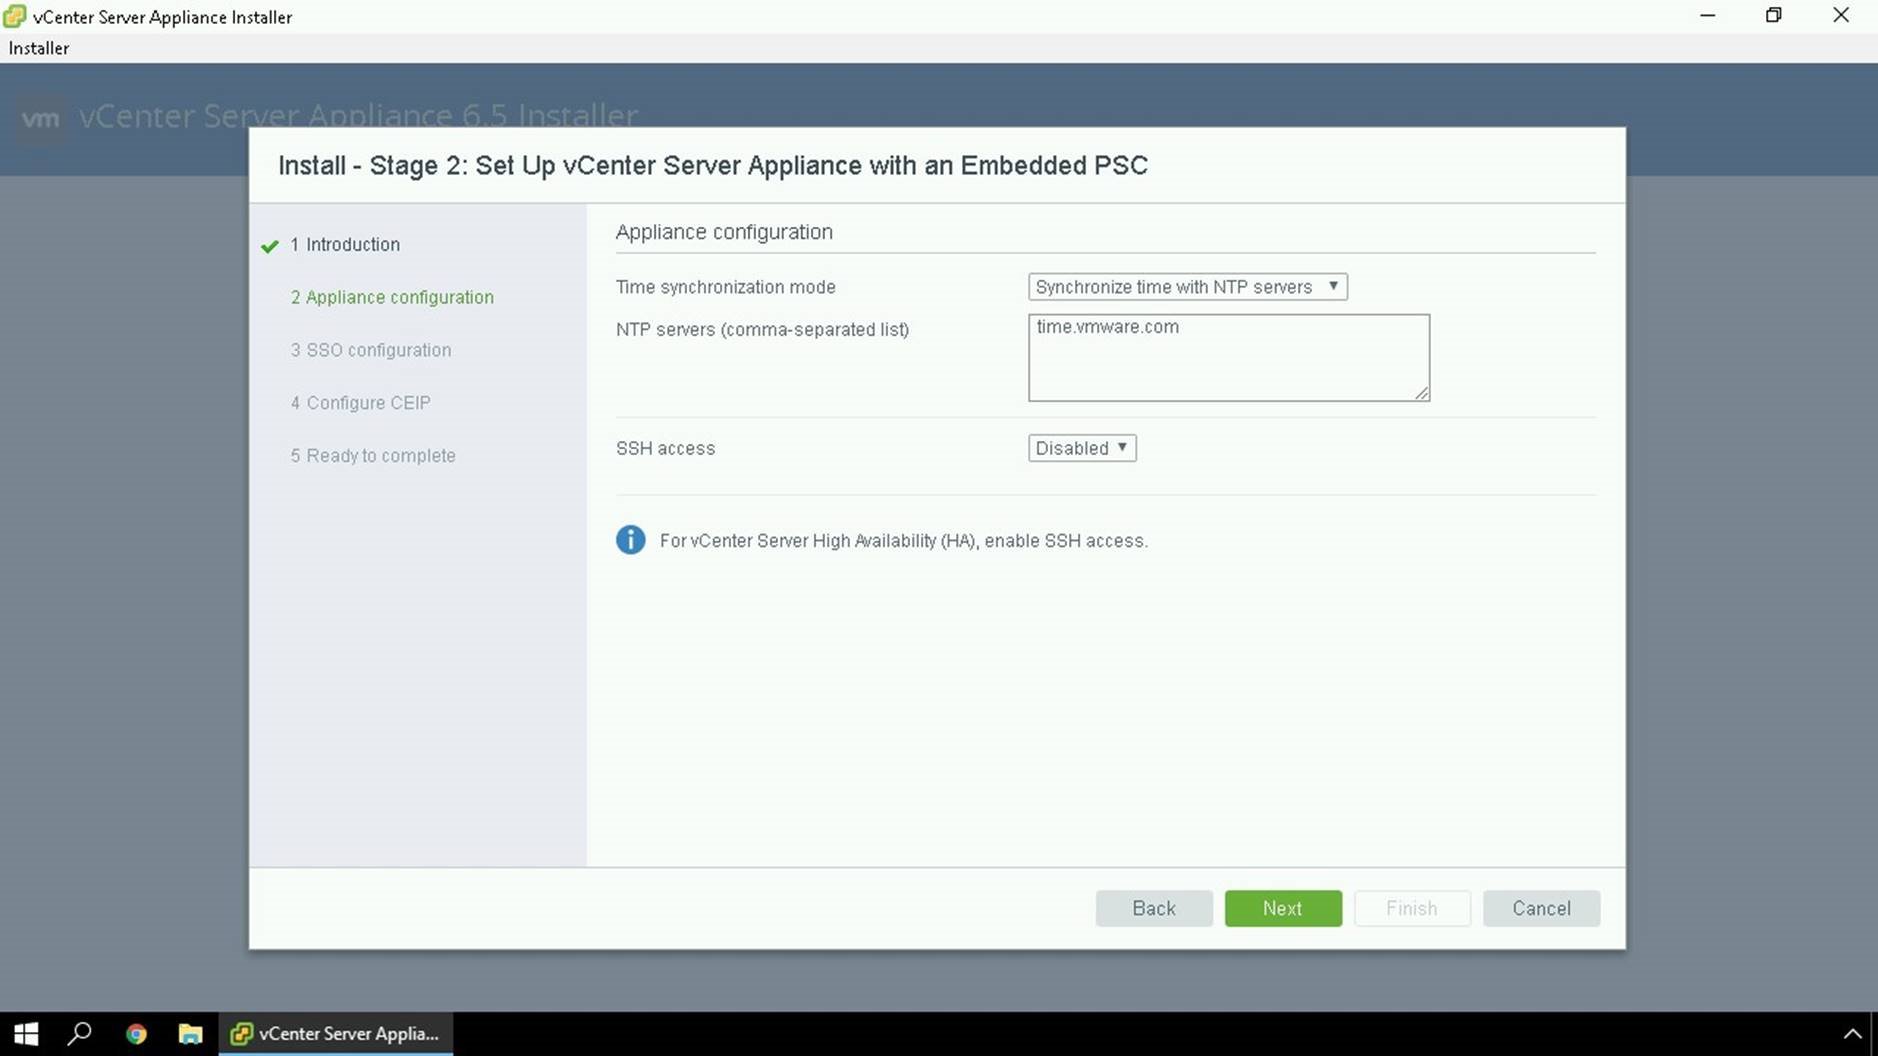
Specify NTP Servers to be used for time synchronization. If using vCenter HA, SSH should be enabled.

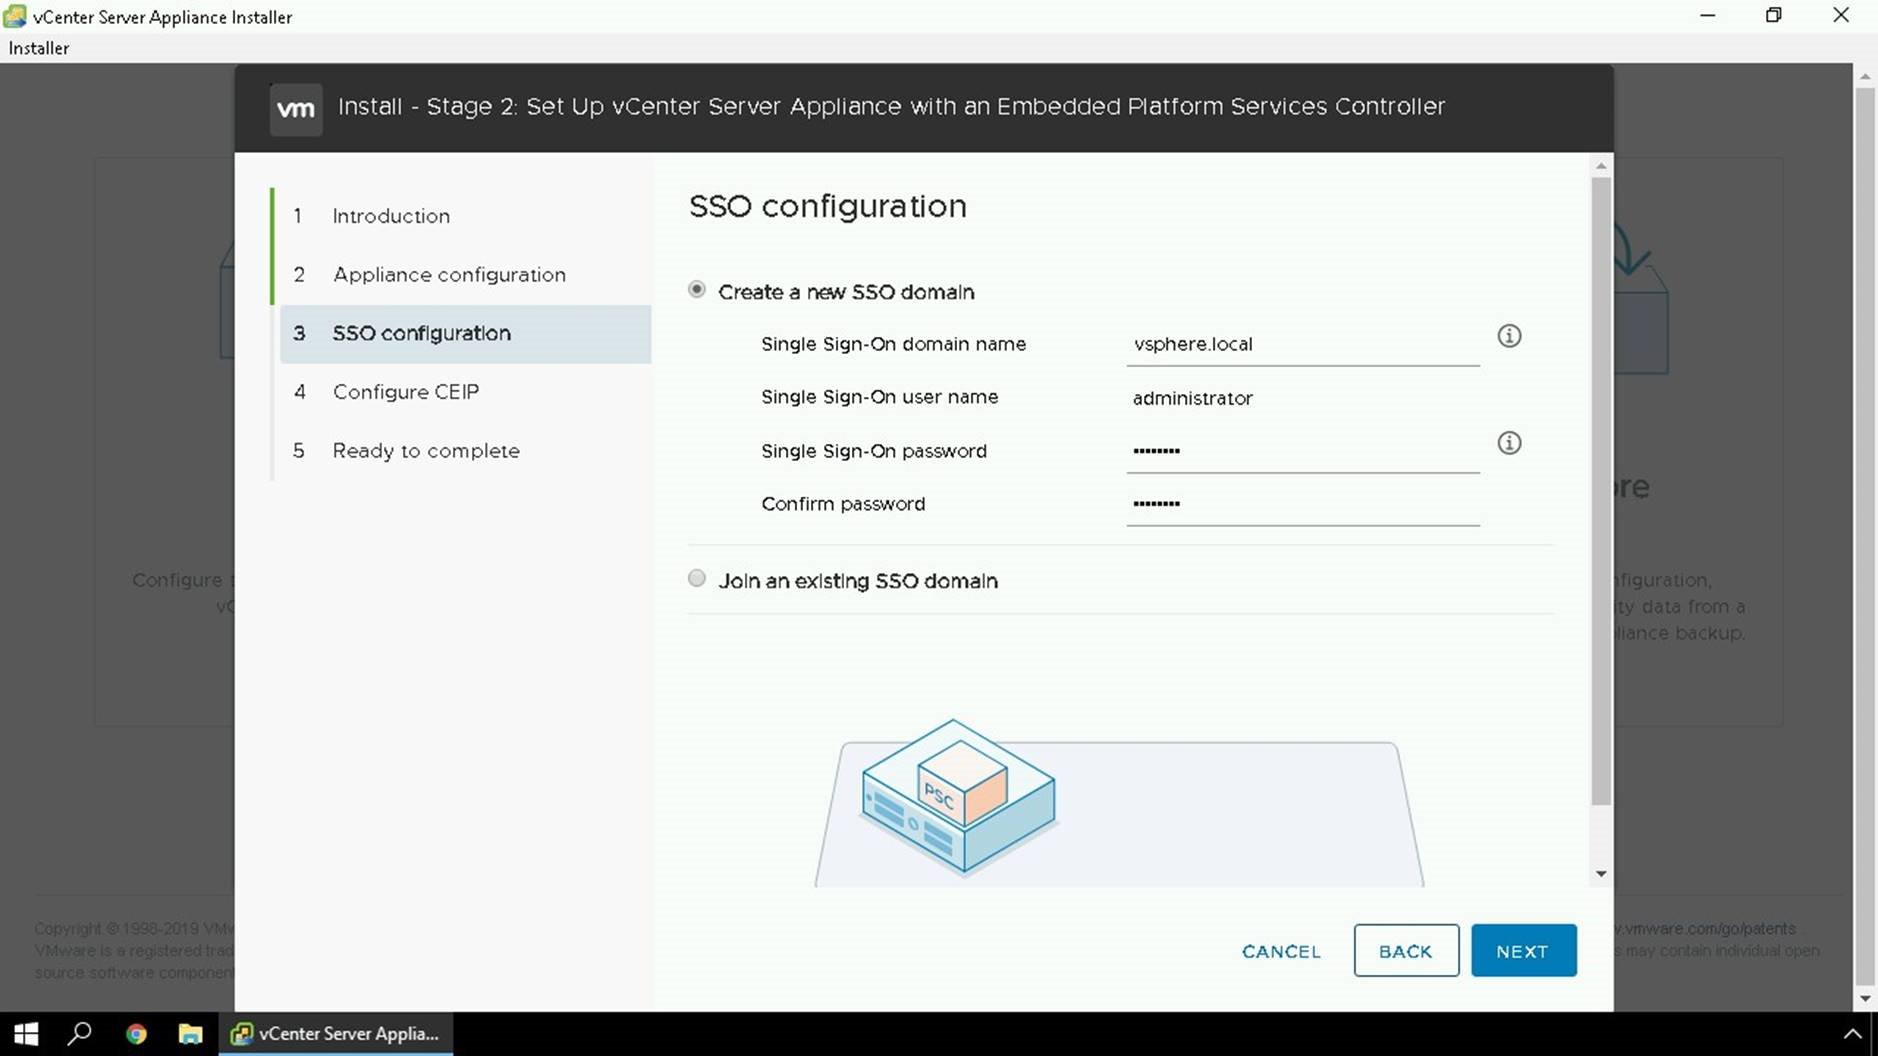
Specify your SSO domain information. If this is the first install chose the option to Create a new SSO domain, if you have an existing SSO domain and wish to use Enhanced Linked Mode, join an existing SSO domain.

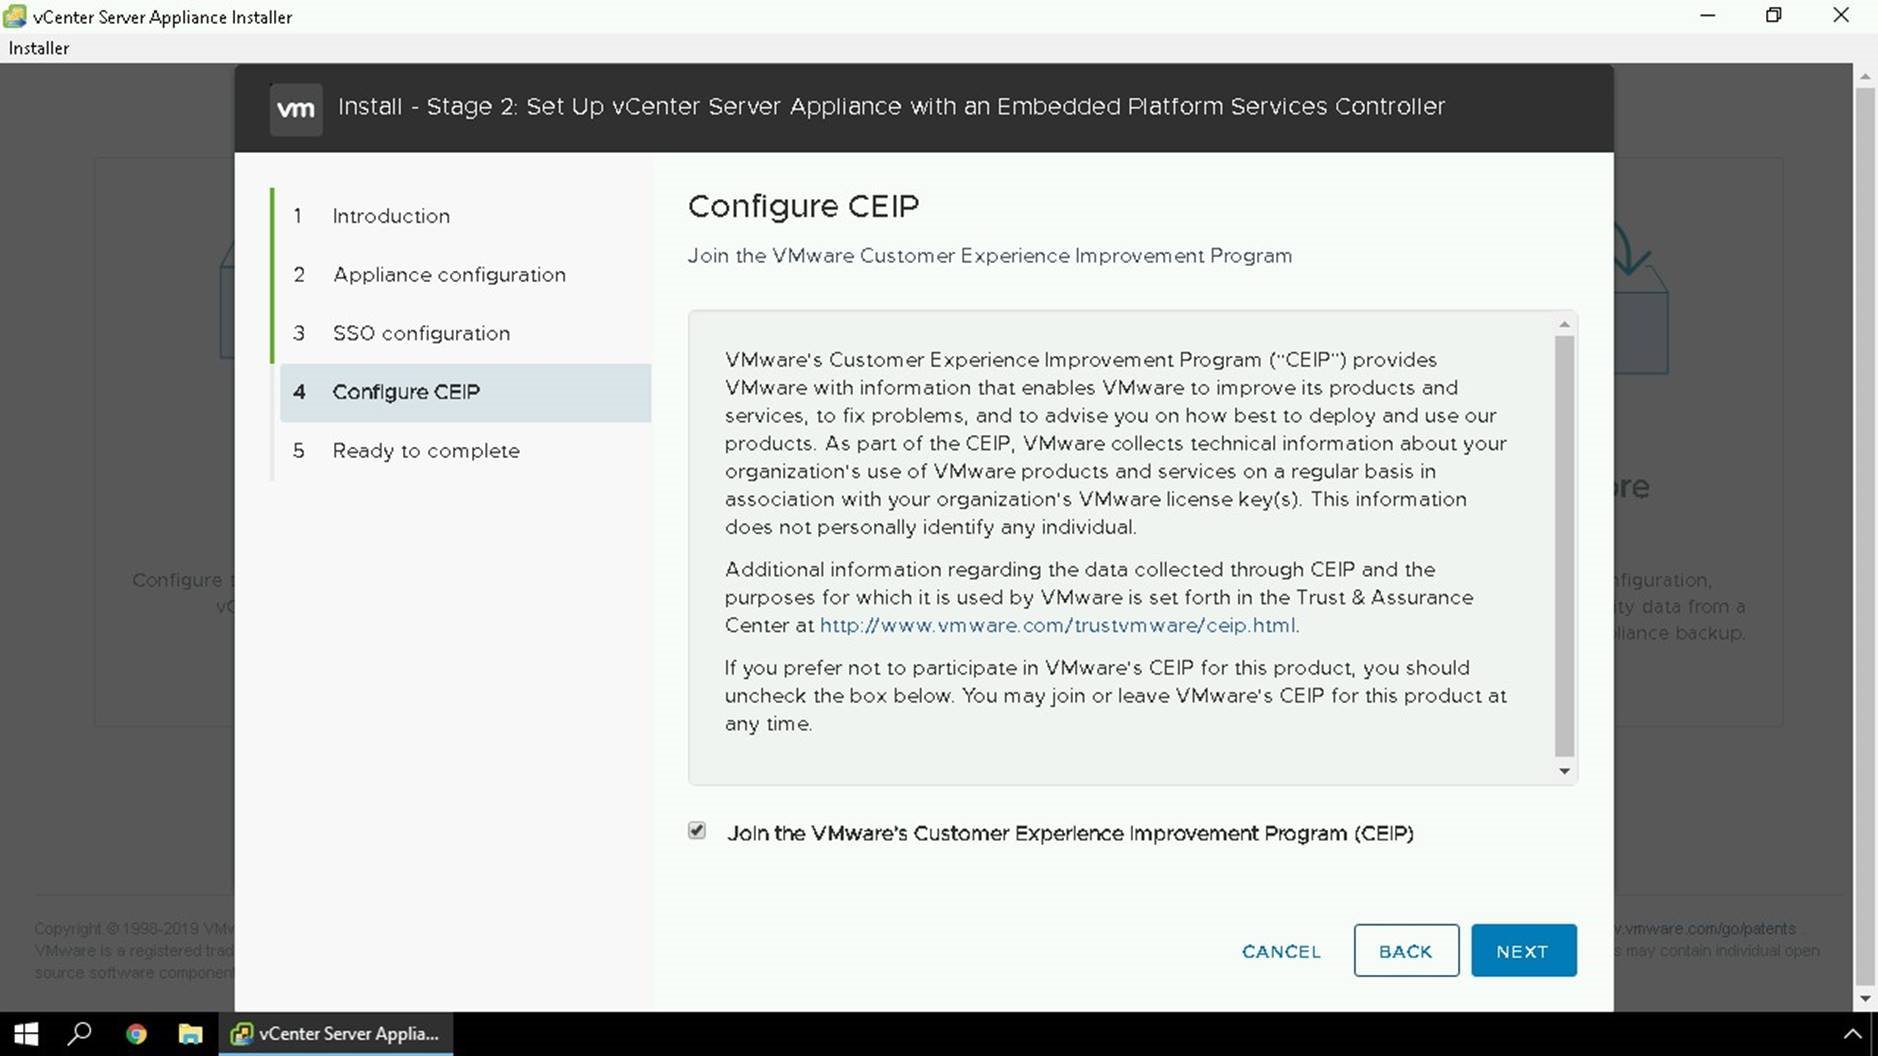
Specify if you would like to join the Customer Experience Improvement Program (CEIP) or not.
CEIP data is completely anonymous and helps us with proactive support and metrics.

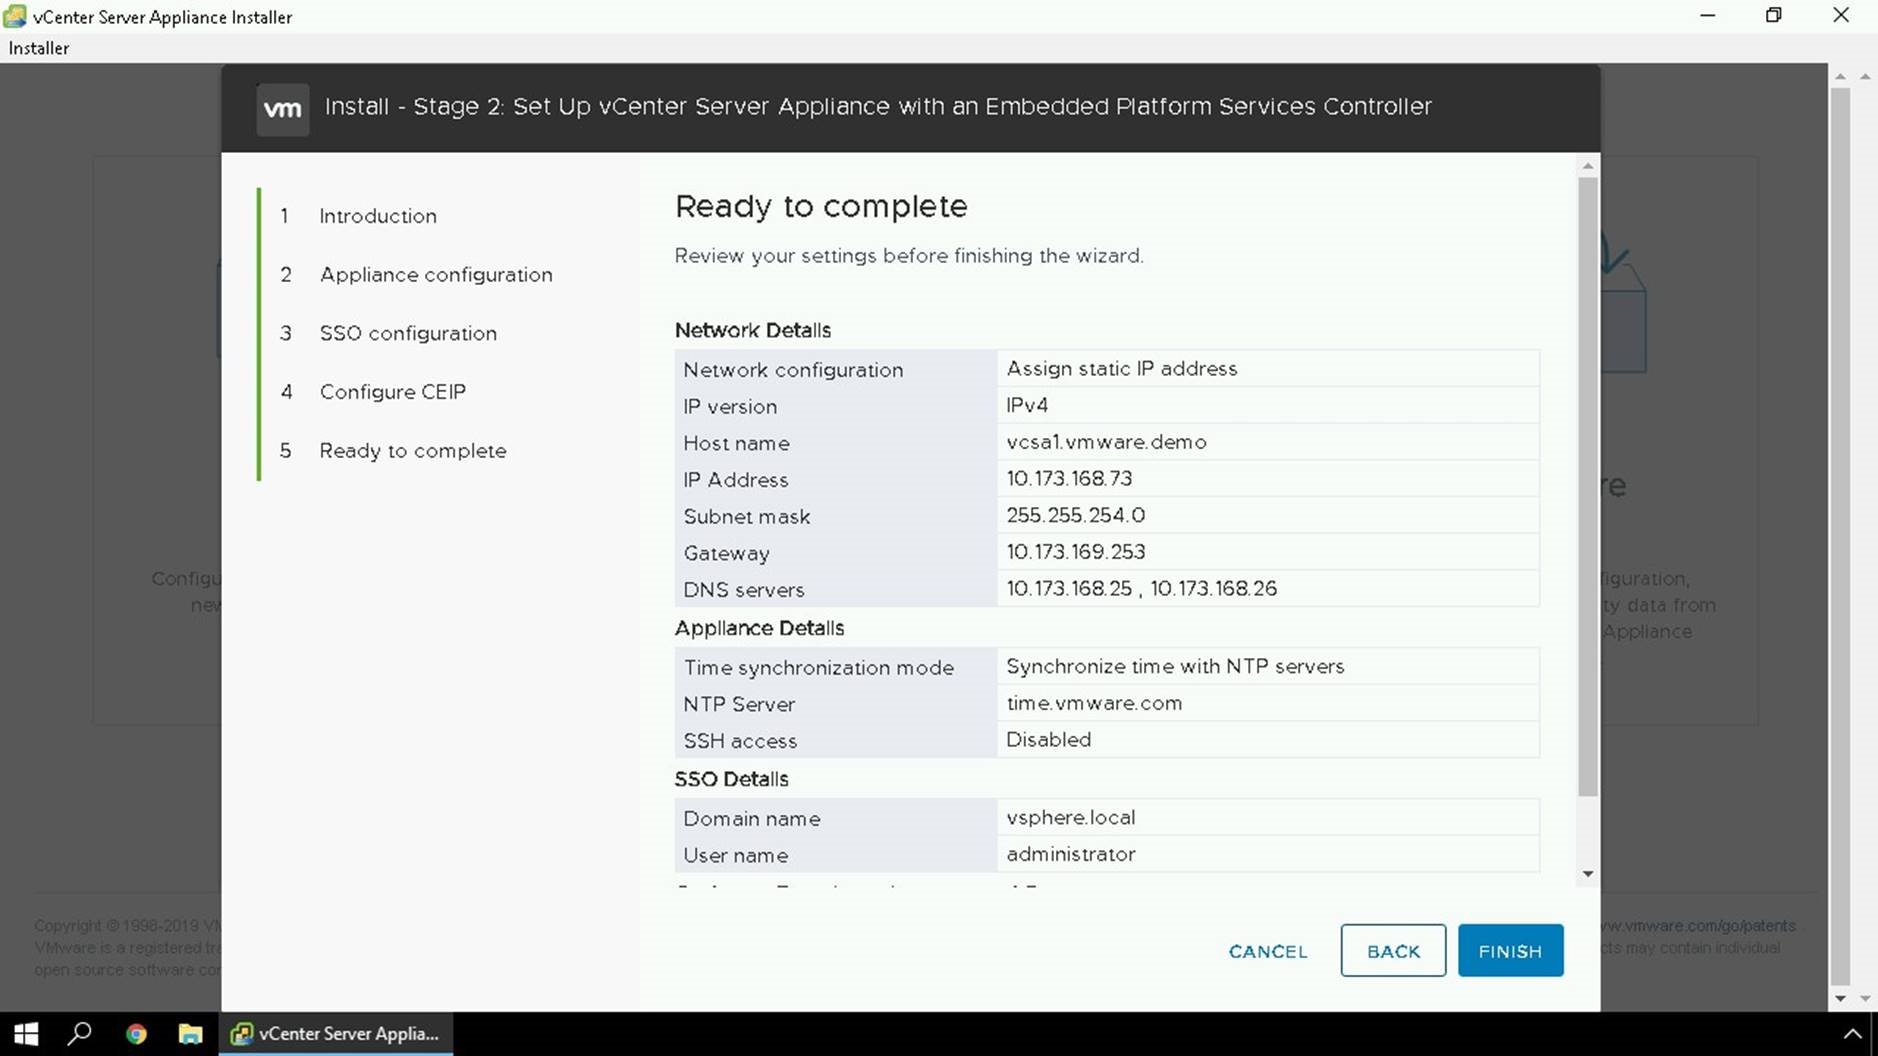
Review your configuration information and click Finish to proceed.

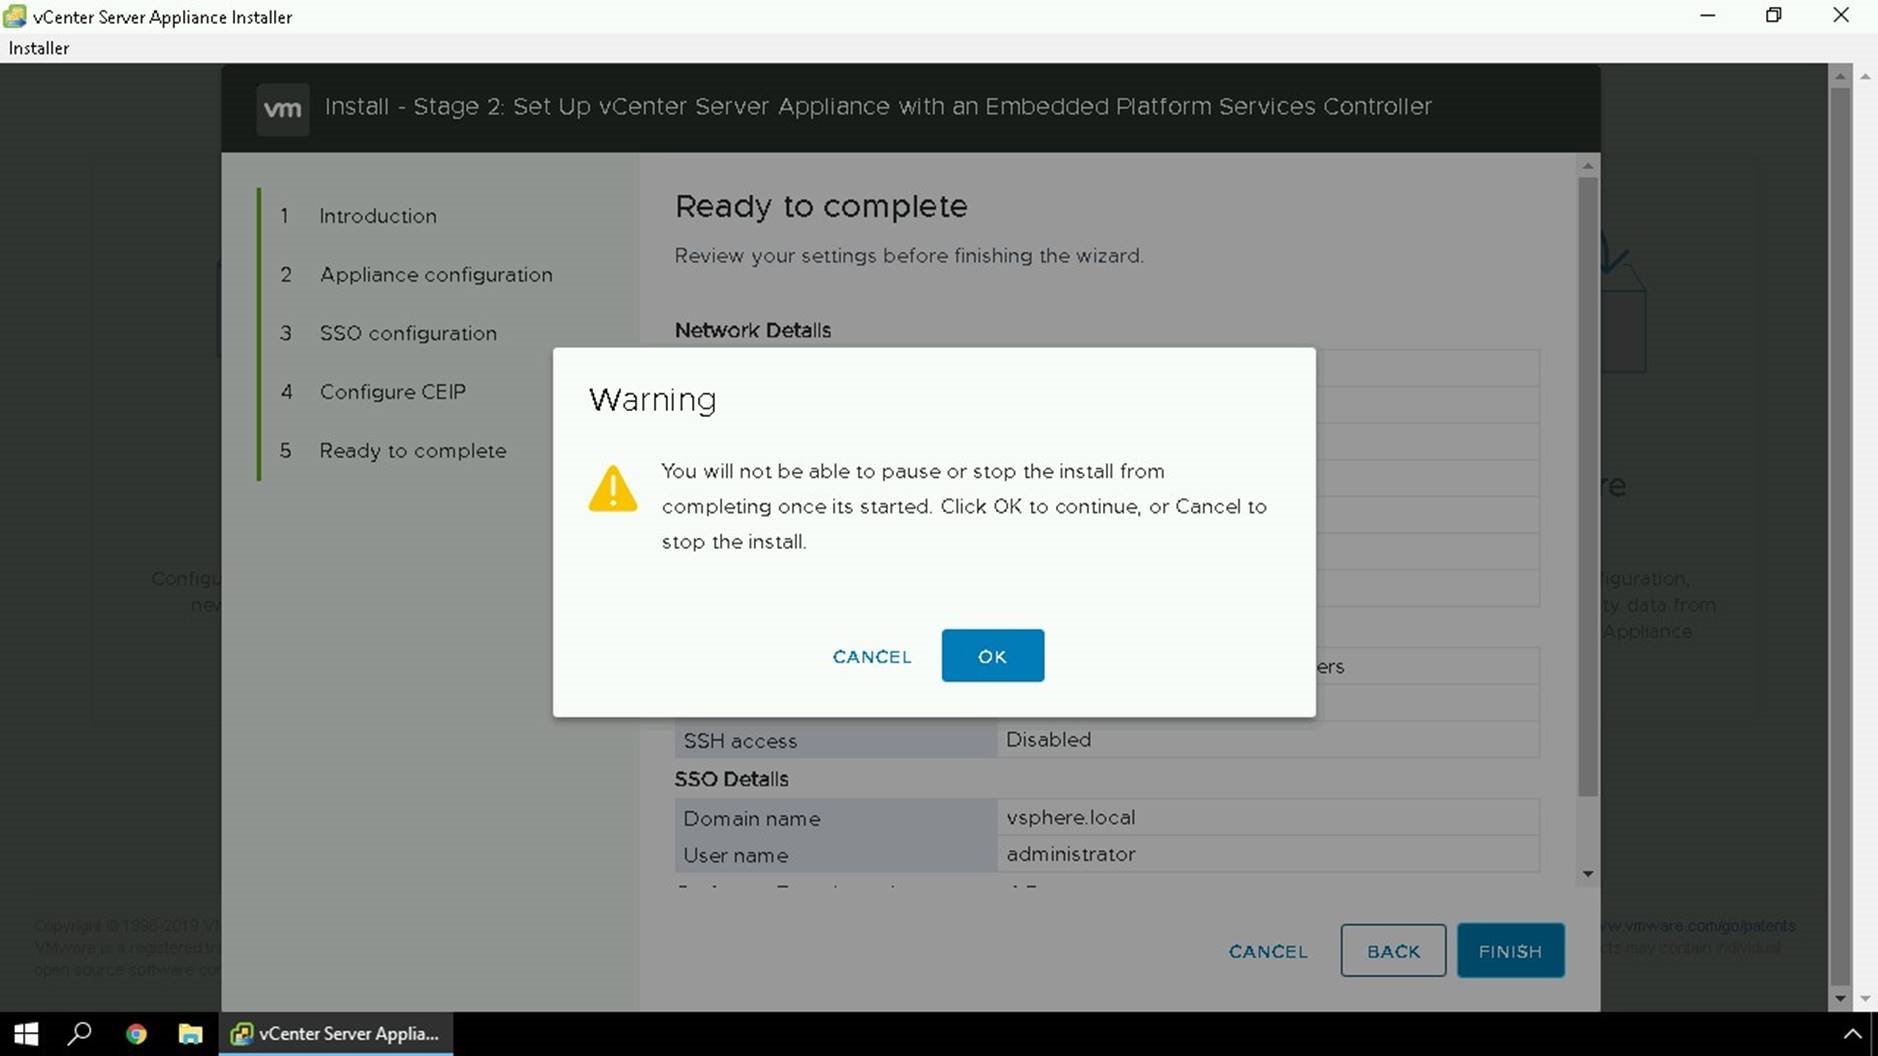
Warning will show you that during this process it cannot be stop or paused. Click OK to proceed.

Services will now be started on the vCenter Server Appliance.

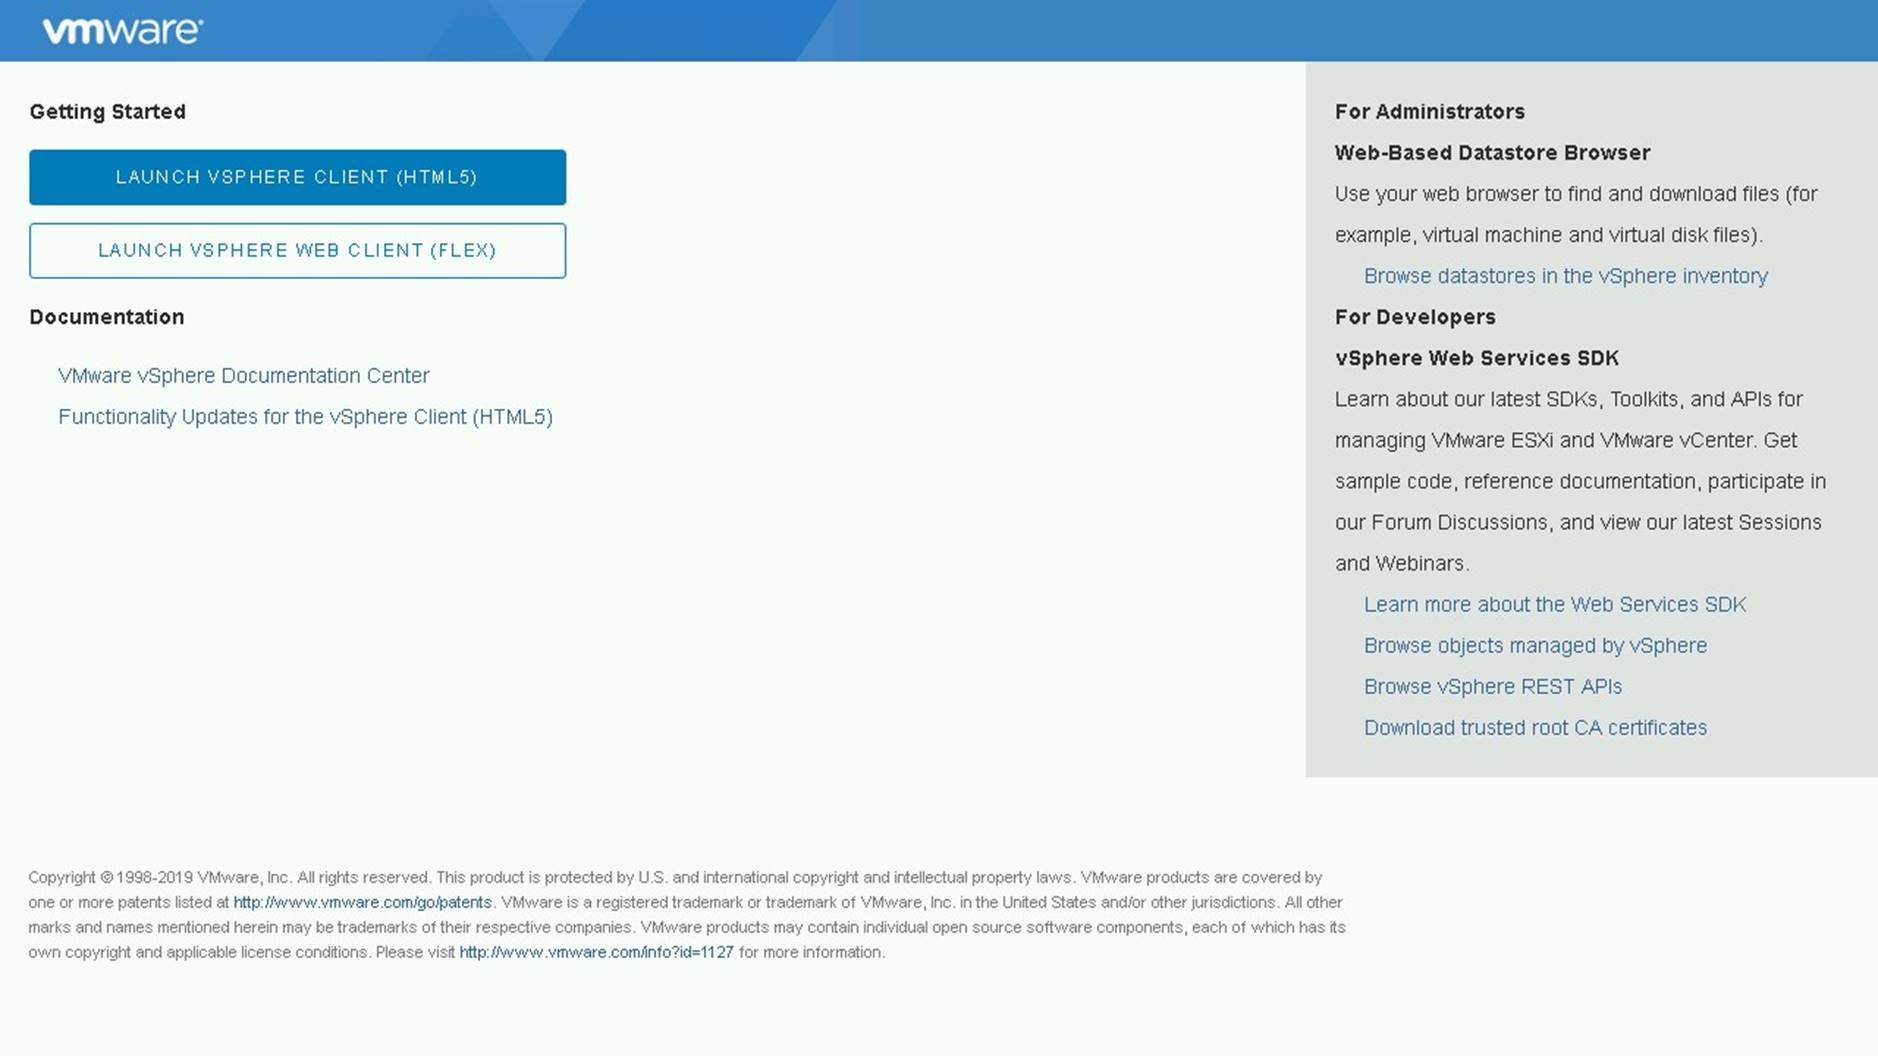
Your installation is now complete. Click on the application getting started page to learn more about your newly deployed appliance.


vCenter Server 6.7 Appliance Embedded Deployment using the UI Installer
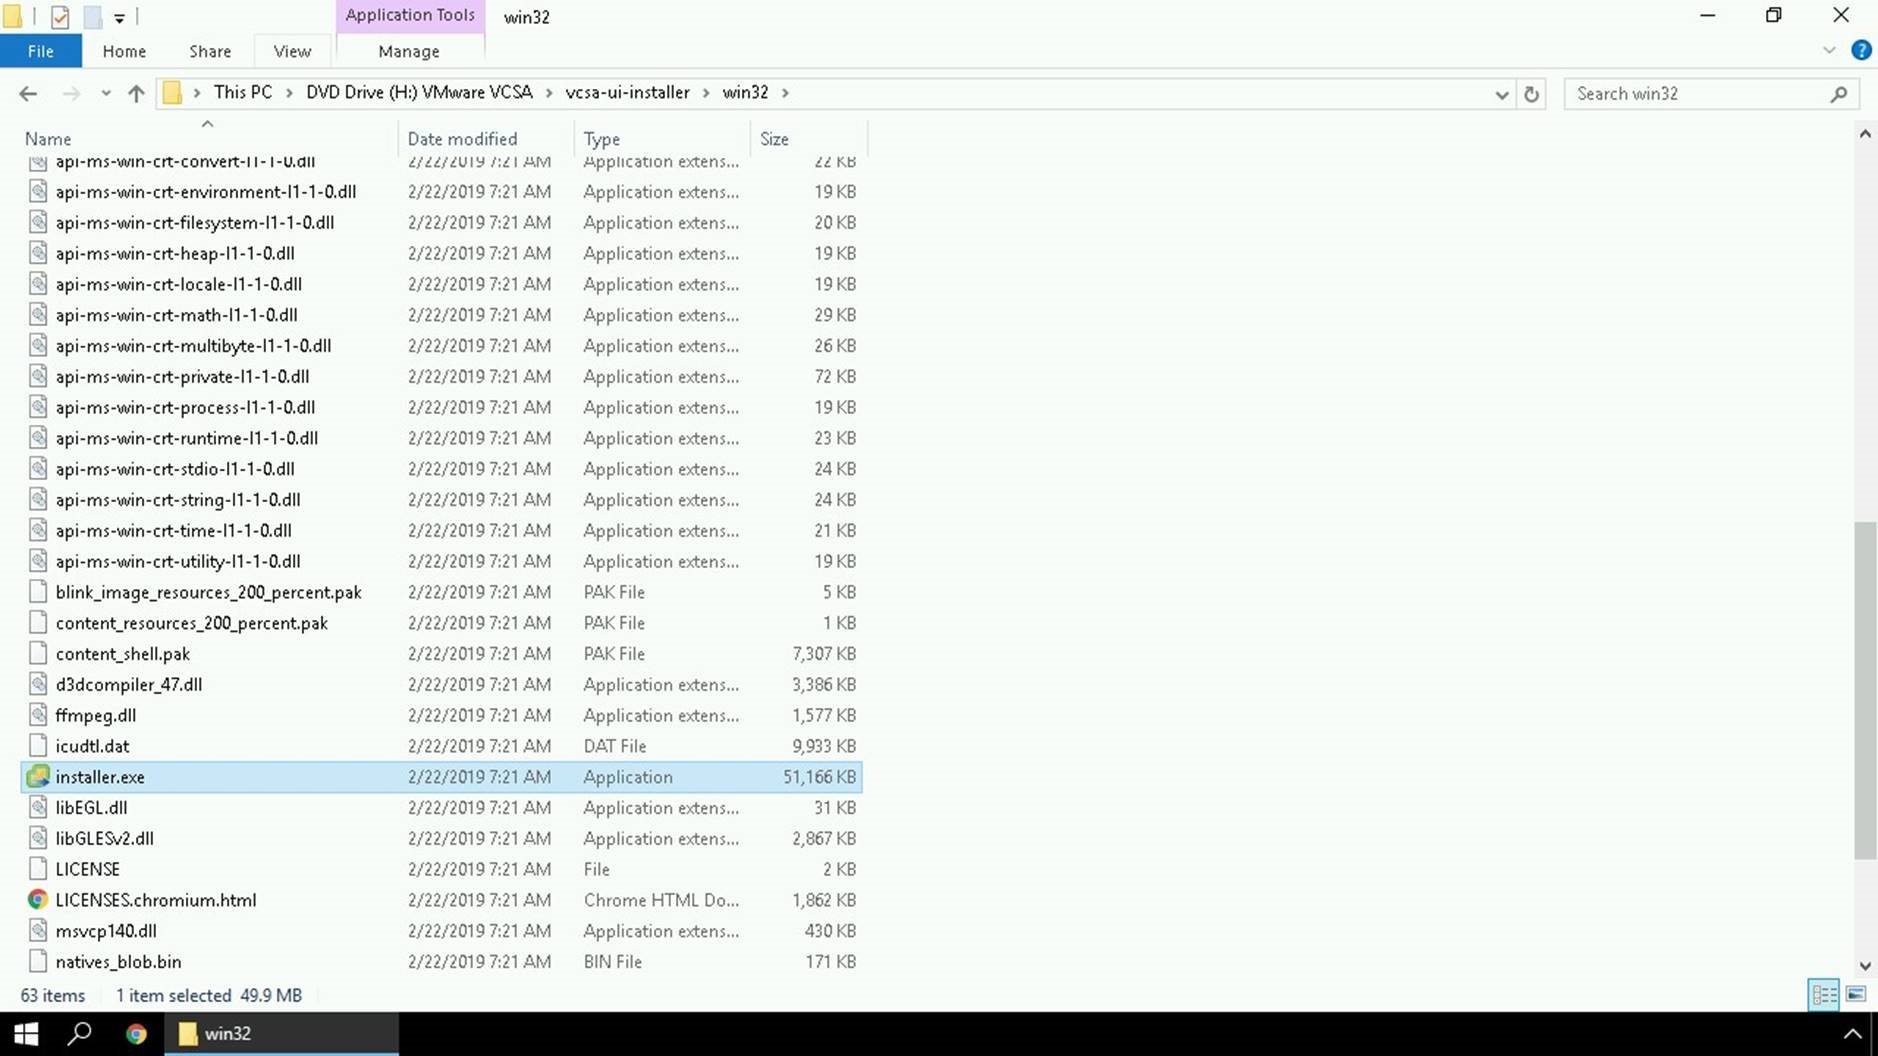
Download the VCSA installer to your local machine and run the installer from the vcsa-ui-installer directory.
You can run the installer from windows, linux or mac OS.
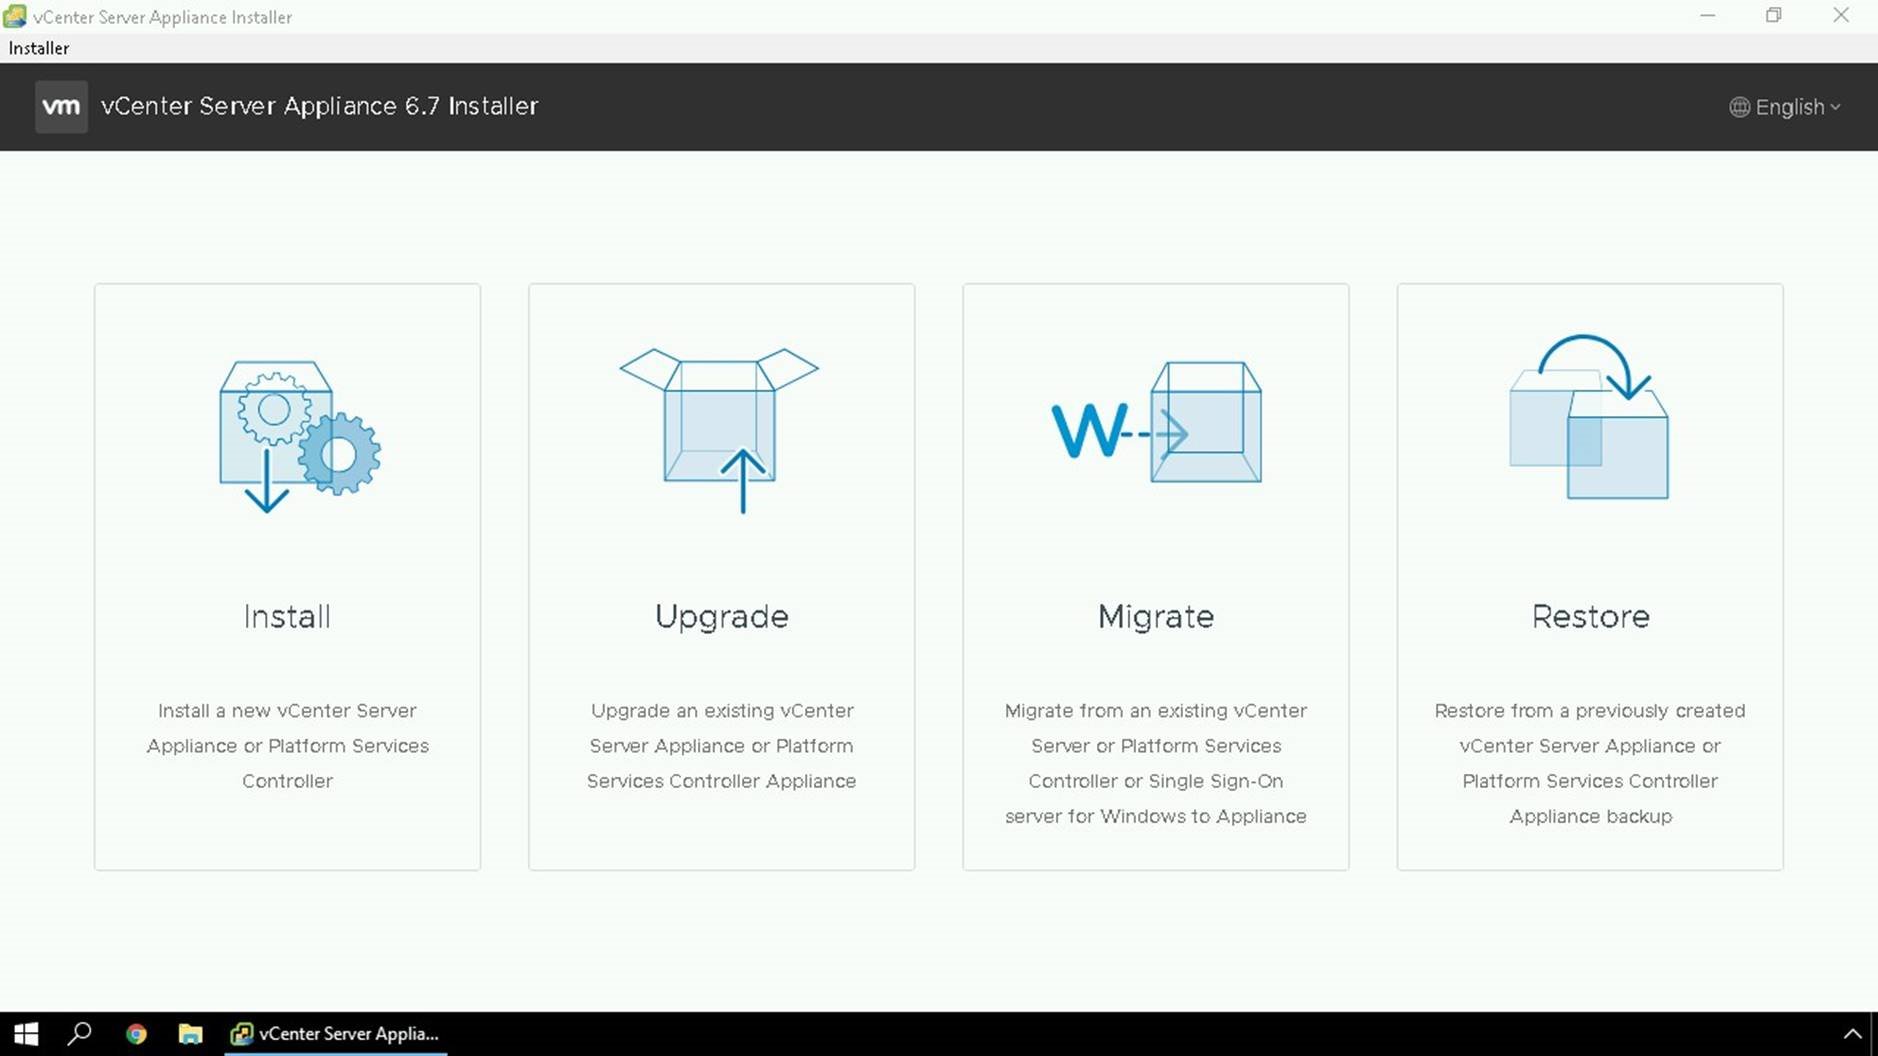
Once the installer is launched, we will use the Install option.
This screen explains how the install process works, it will be a two stage process. Stage 1 a new appliance will be deployed, and Stage 2 is where we will configure the new appliance.
Accept the End user license agreement
Select the Embedded Platform Services Controller option and Click Next.
Here you will specify the destination where you want the appliance to be deployed.
You will need to accept the SSL thumbprints.
Select VM folder you wish the appliance to be deployed in
Select the compute resource you would like to deploy the appliance to. You can specify a cluster, or standalone host.
Here we will specify the display name for our appliance in vCenter inventory, it must be unique. We will also set a new root password for the appliance.
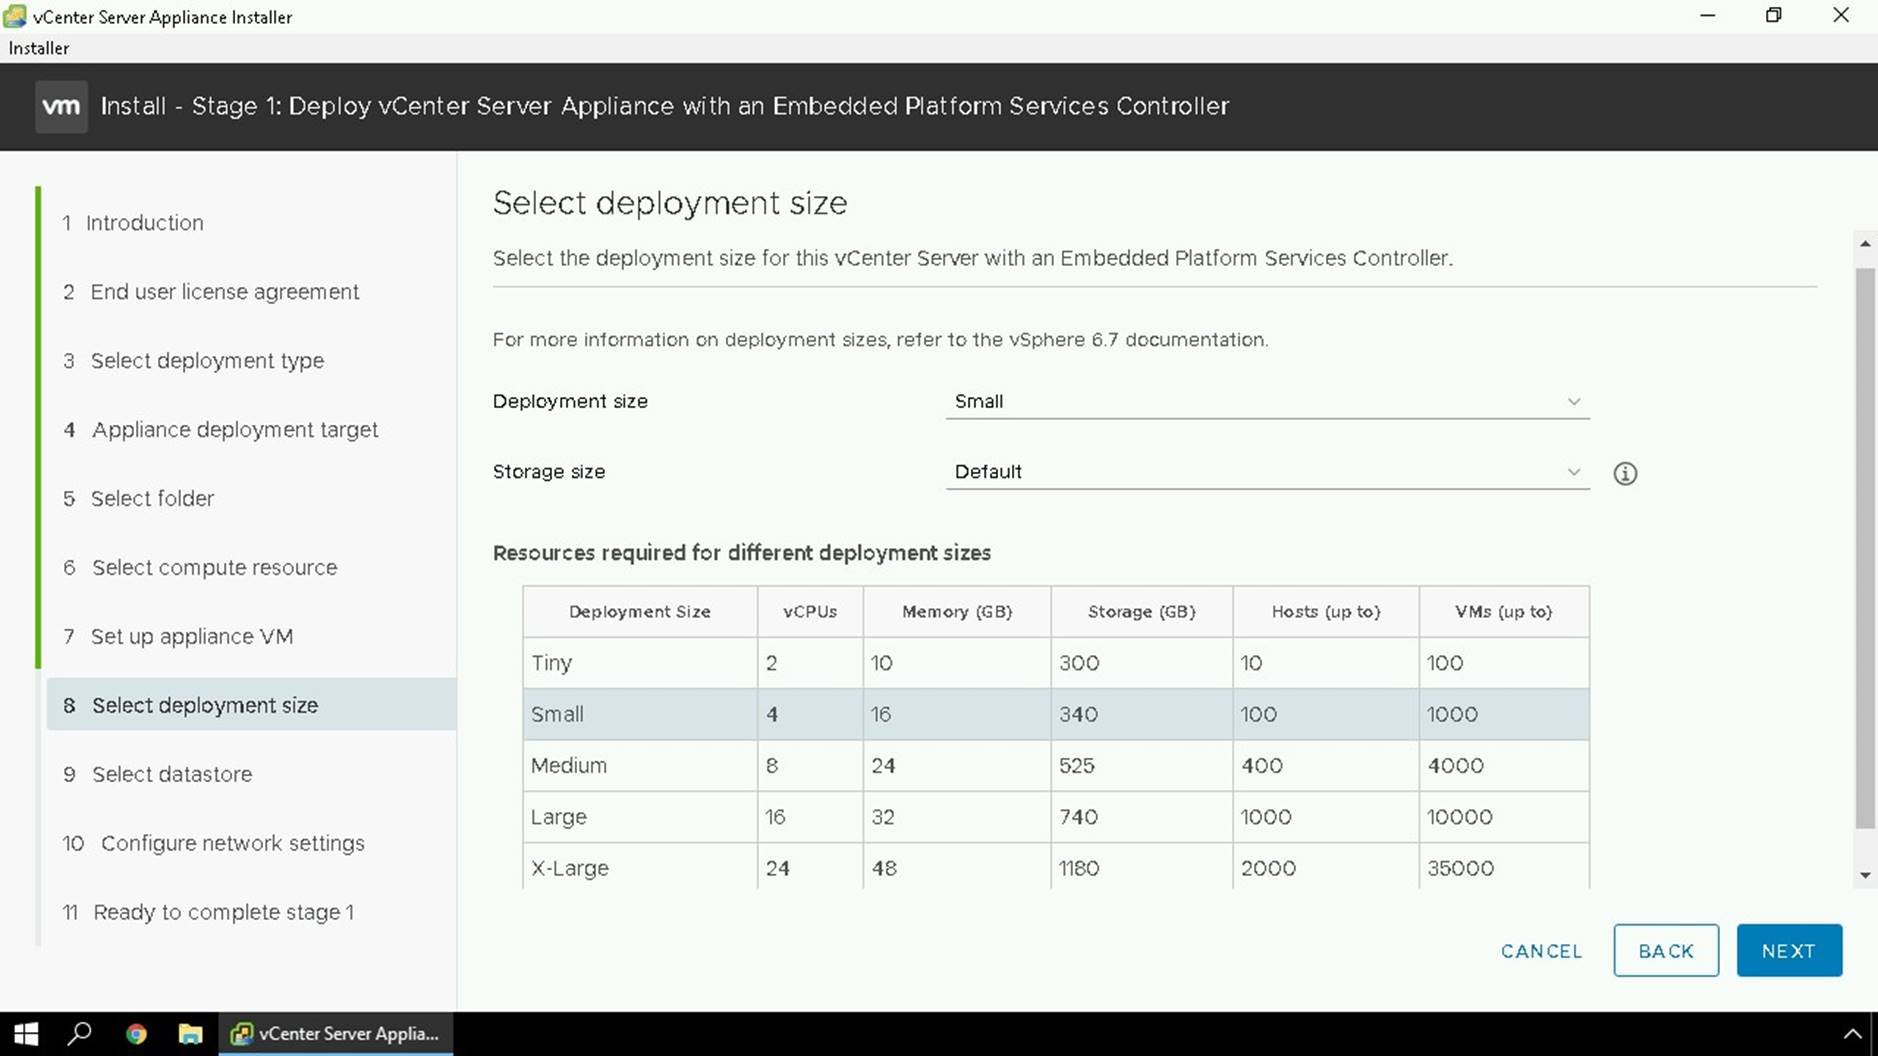
We will chose a deployment size and storage size for our appliance. Note: If you plan to use vCenter High Availability a deployment size of Small or larger is required. vCenter High Availability is not supported on Tiny deployments.
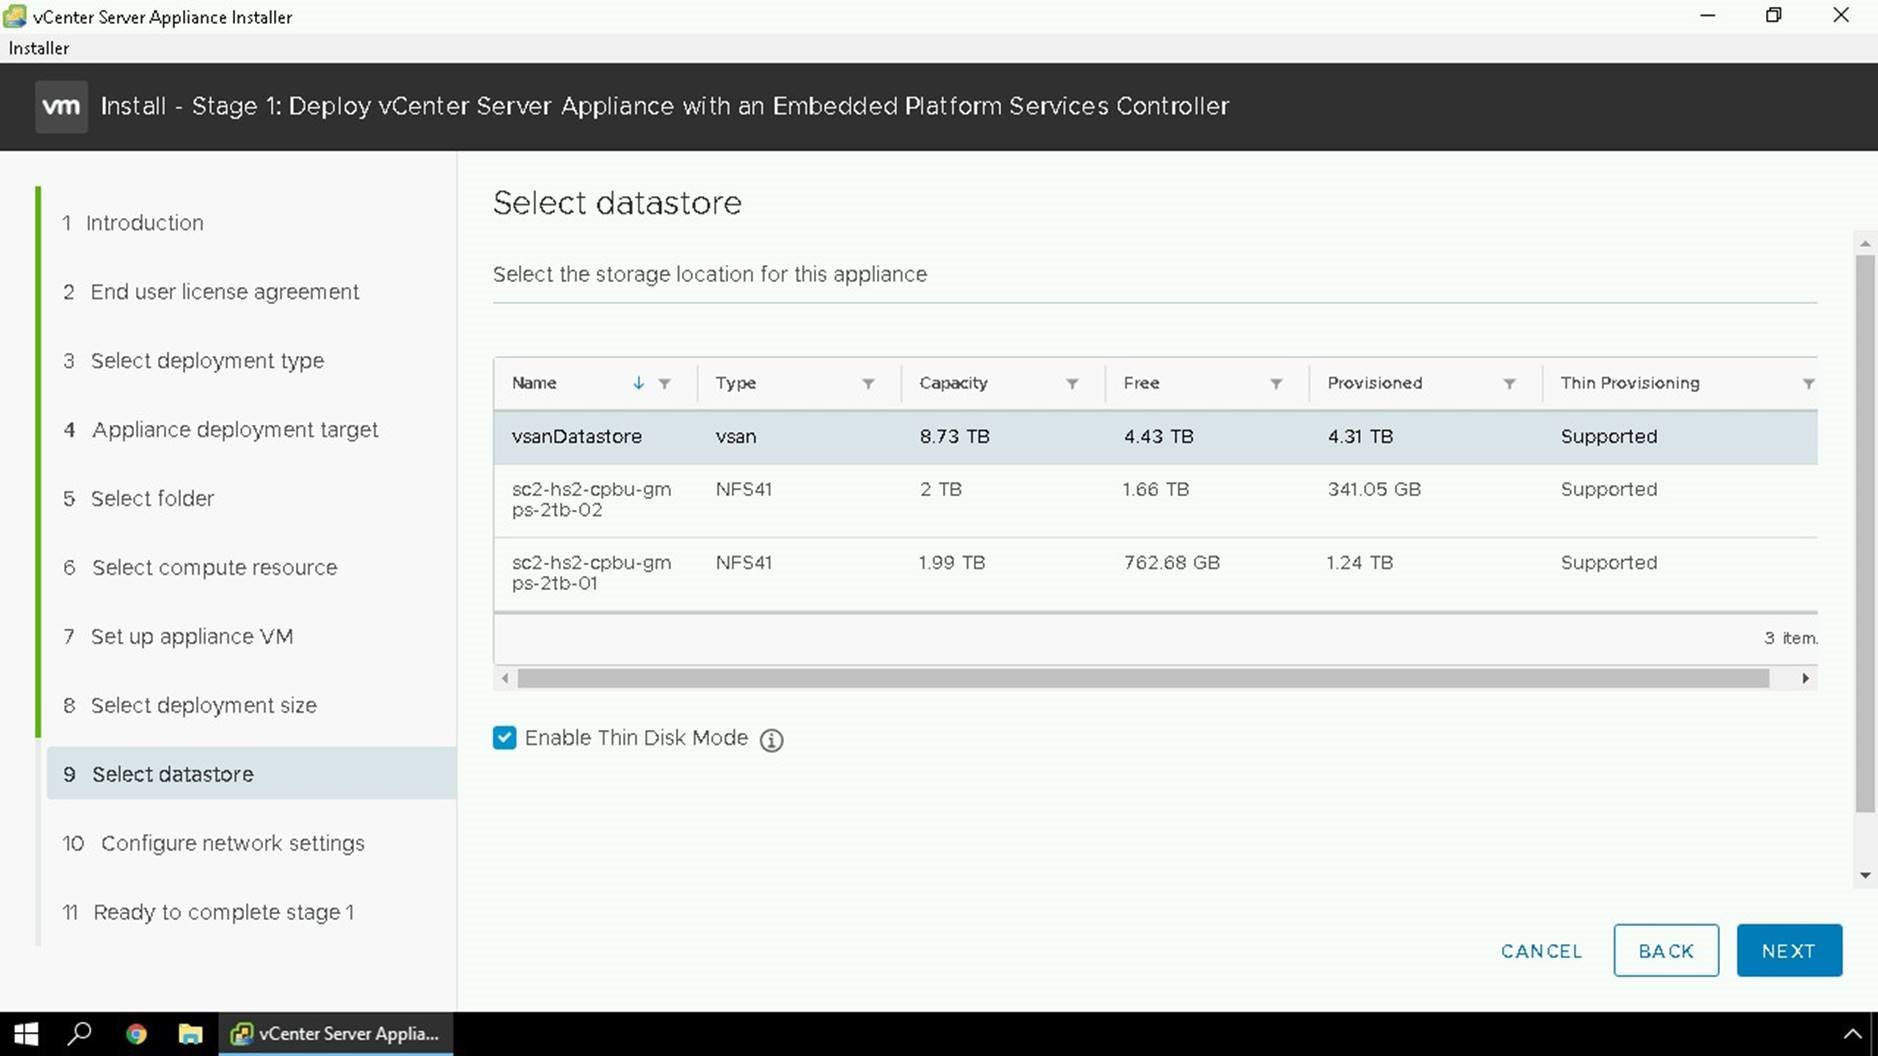
Specify the storage location for the new appliance and if you would like it to be thin provisioned you will check the box.
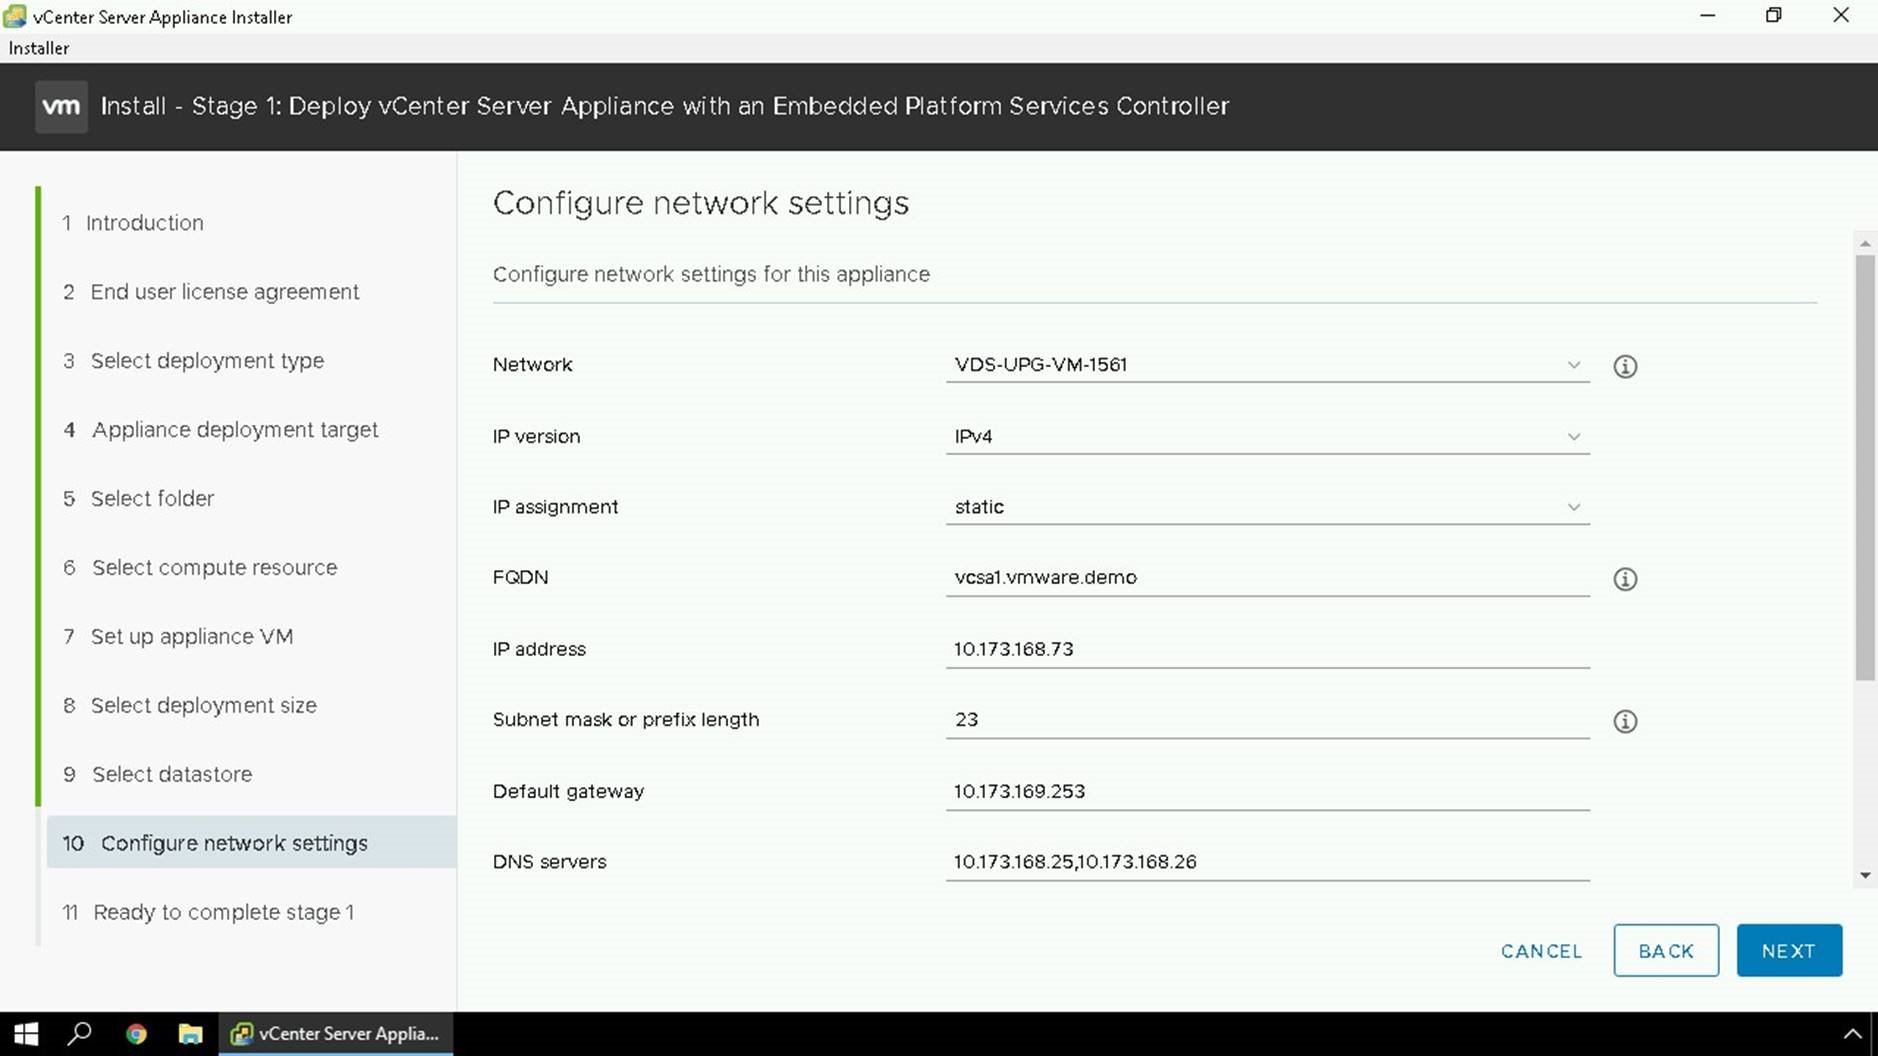
Specify the network settings to be used for your appliance including the FQDN and IP Information.
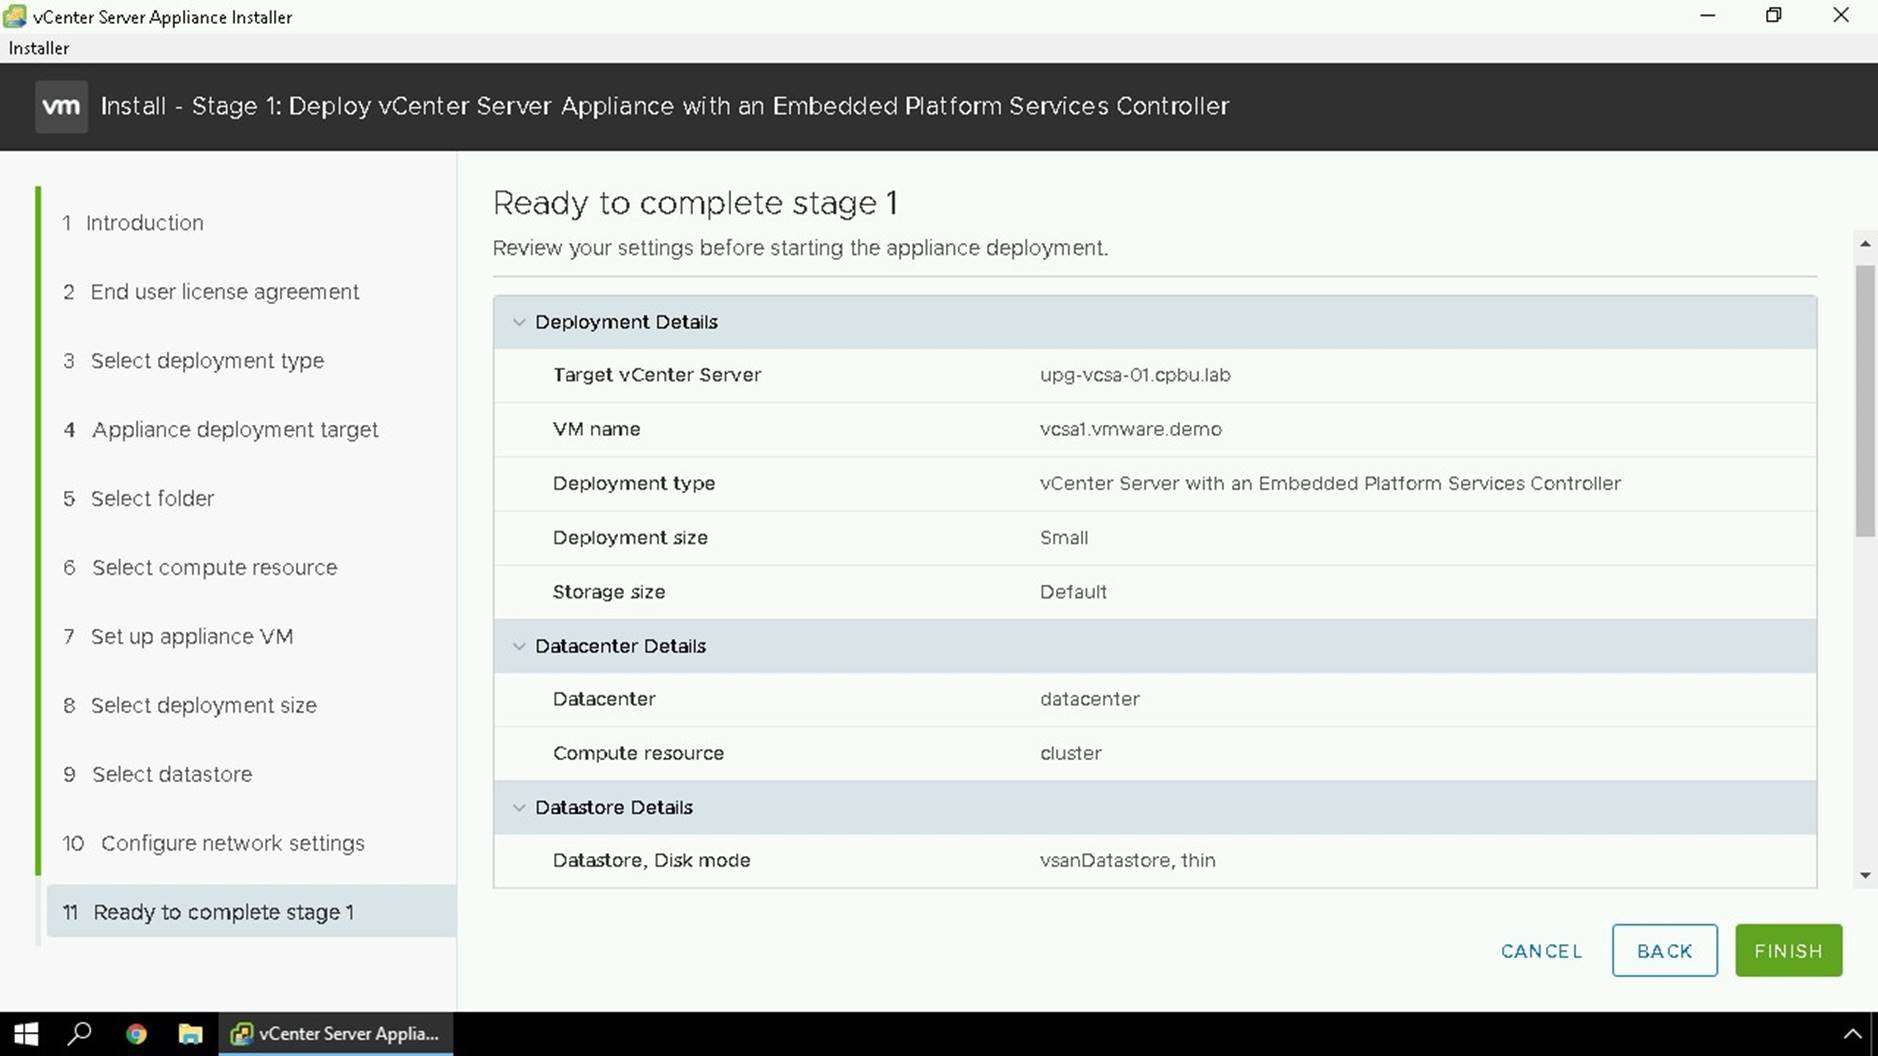
Validate all the information you entered is complete and we will finalize stage 1 of the install process.
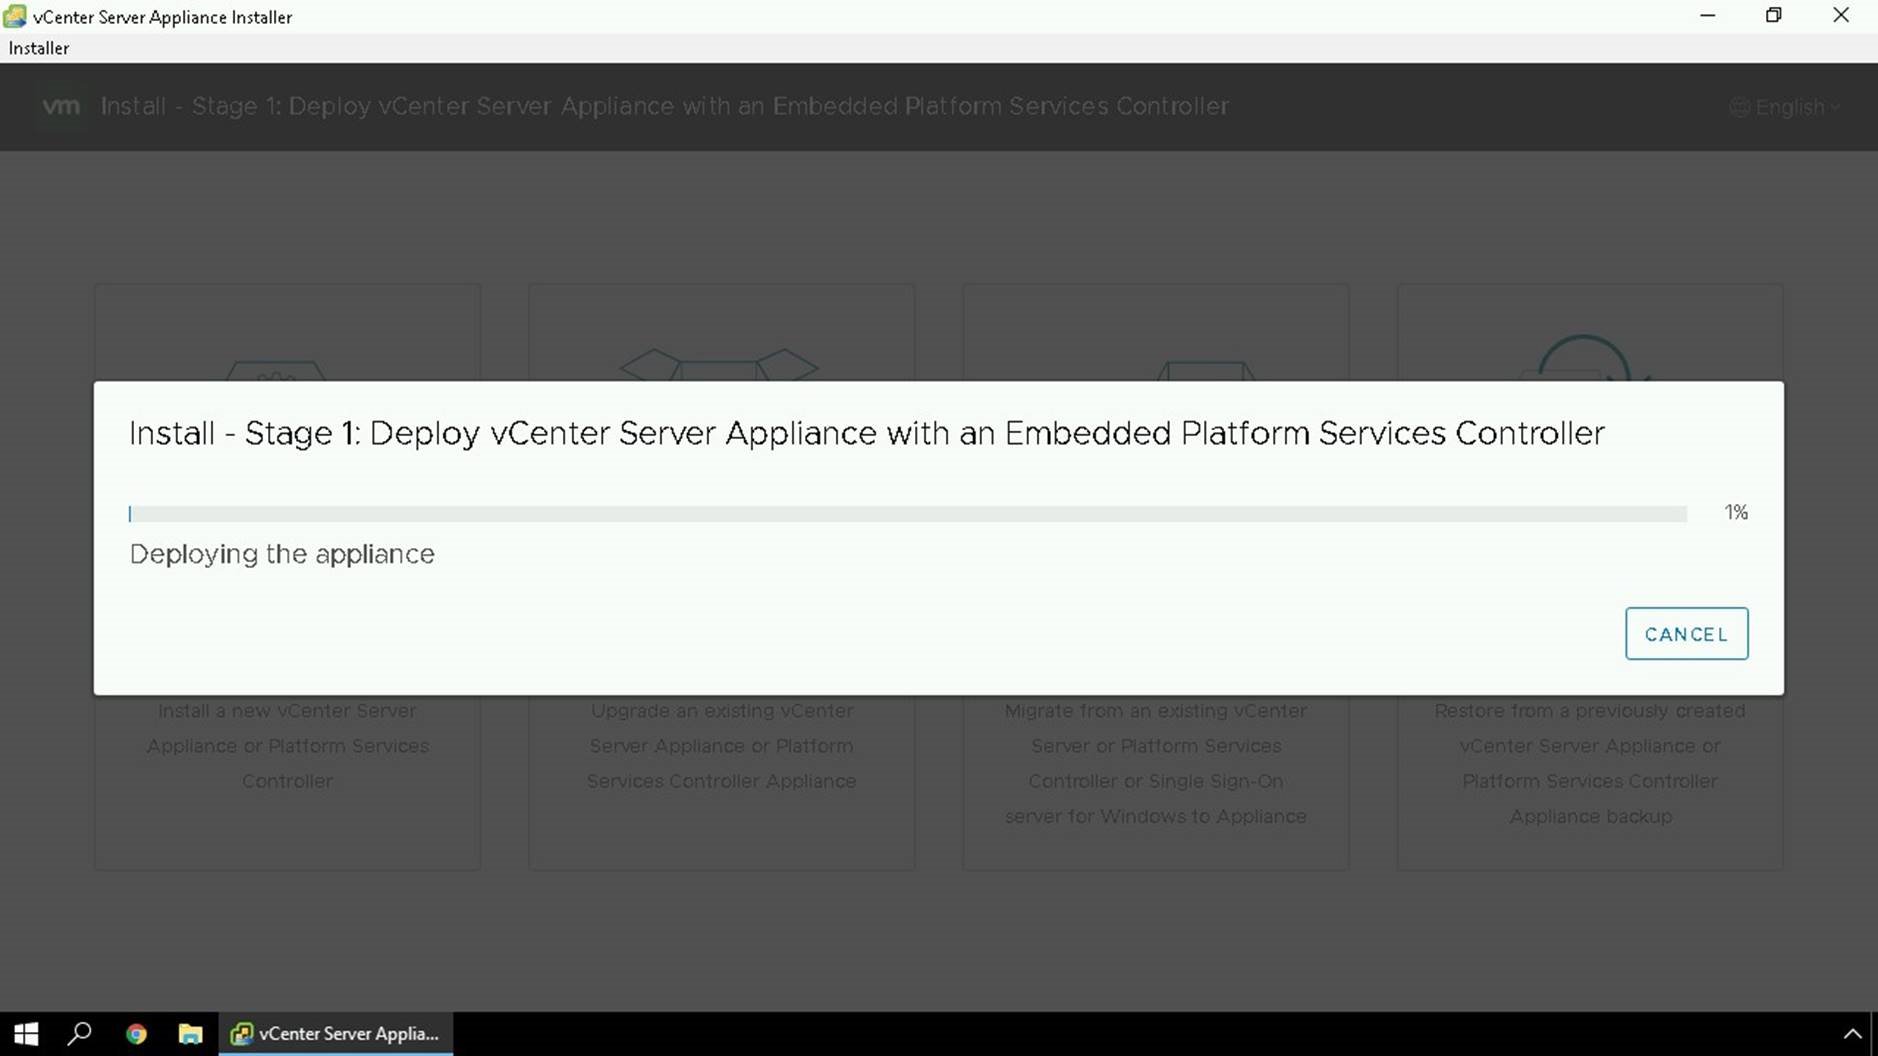
First step of stage 1 is the appliance is deployed.
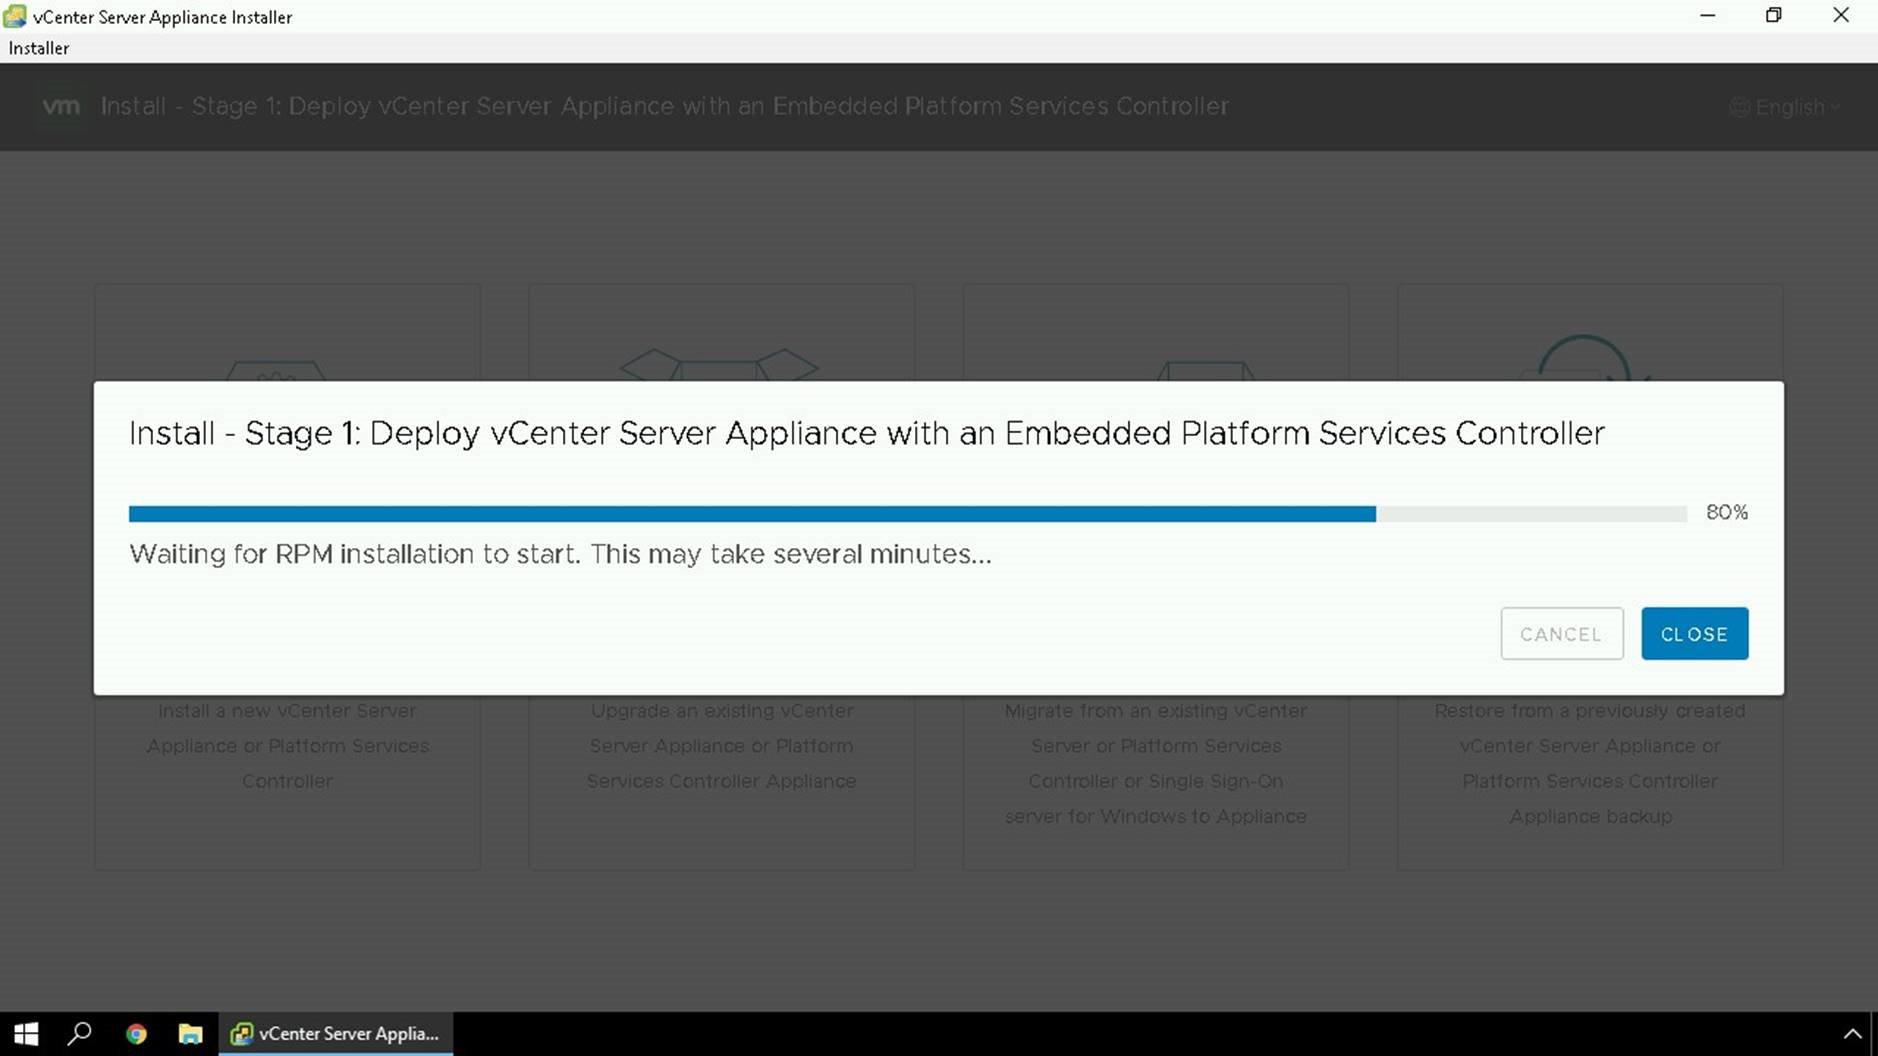
Additional configuration to the deployment where RPM's are loaded and installed.

Once stage 1 is complete, we can continue the install wizard to start stage 2. If the installer closes or you wish to continue this step later you can re-start the wizard through the VMware Appliance Management Interface (VAMI) on port 5480 of the temporary IP address.
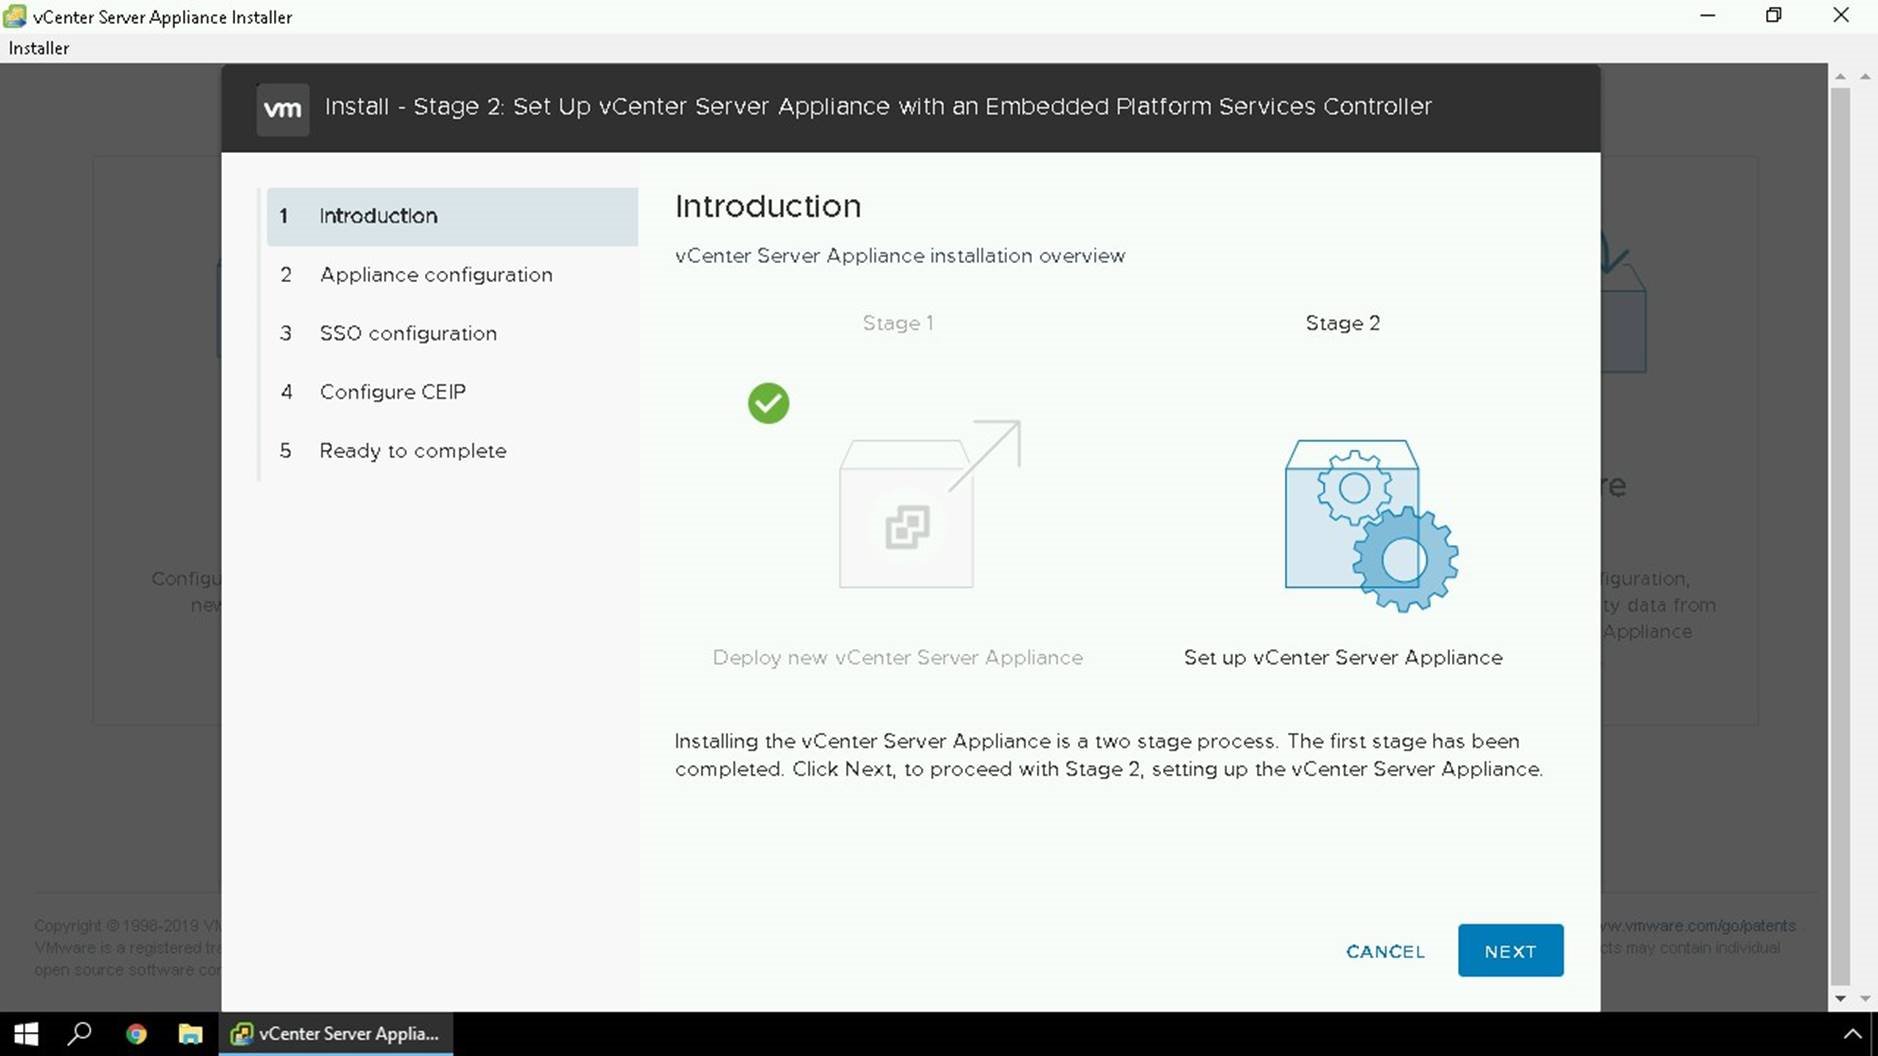
We will now start the process of configuring your new appliance.
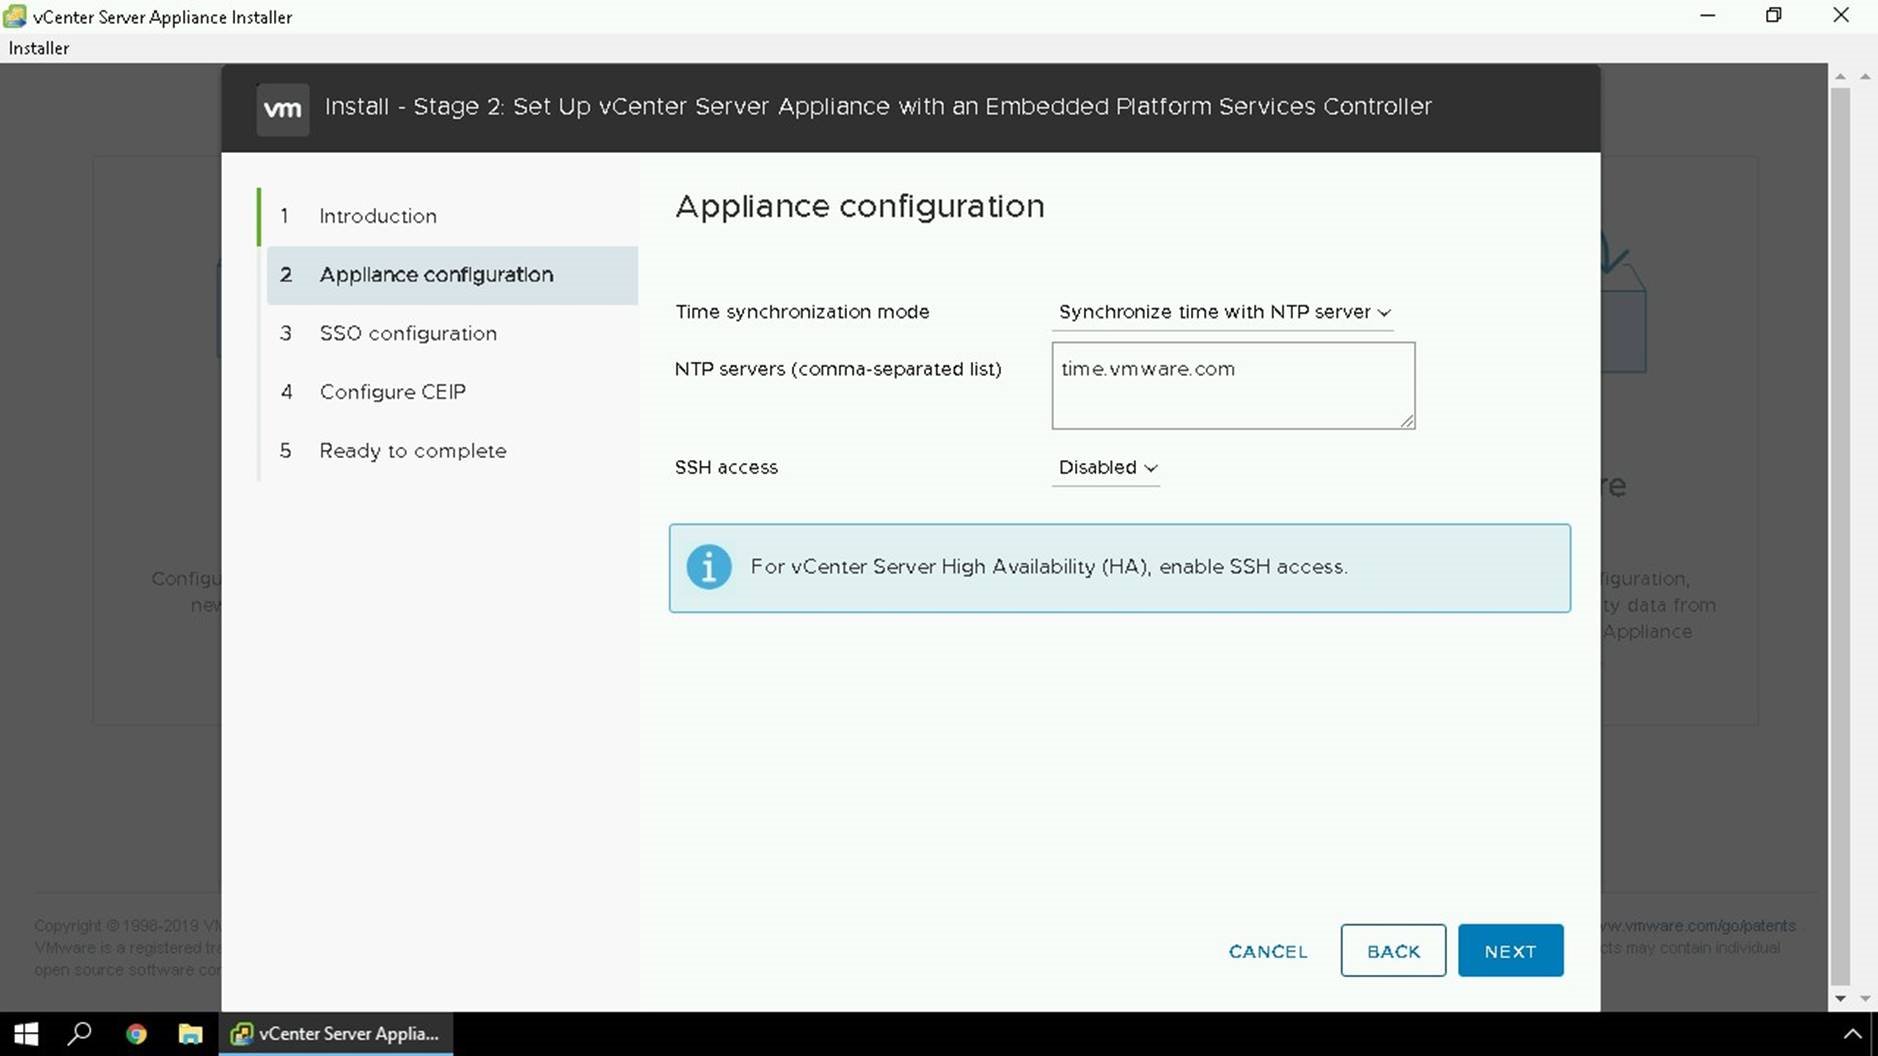
Specify NTP Servers to be used for time synchronization. If using vCenter HA, SSH should be enabled.
Specify your SSO domain information. If this is the first install chose the option to Create a new SSO domain, if you have an existing SSO domain and wish to use Enhanced Linked Mode, join an existing SSO domain.
Specify if you would like to join the Customer Experience Improvement Program (CEIP) or not.
CEIP data is completely anonymous and helps us with proactive support and metrics.
Review your configuration information and click Finish to proceed.
Warning will show you that during this process it cannot be stop or paused. Click OK to proceed.
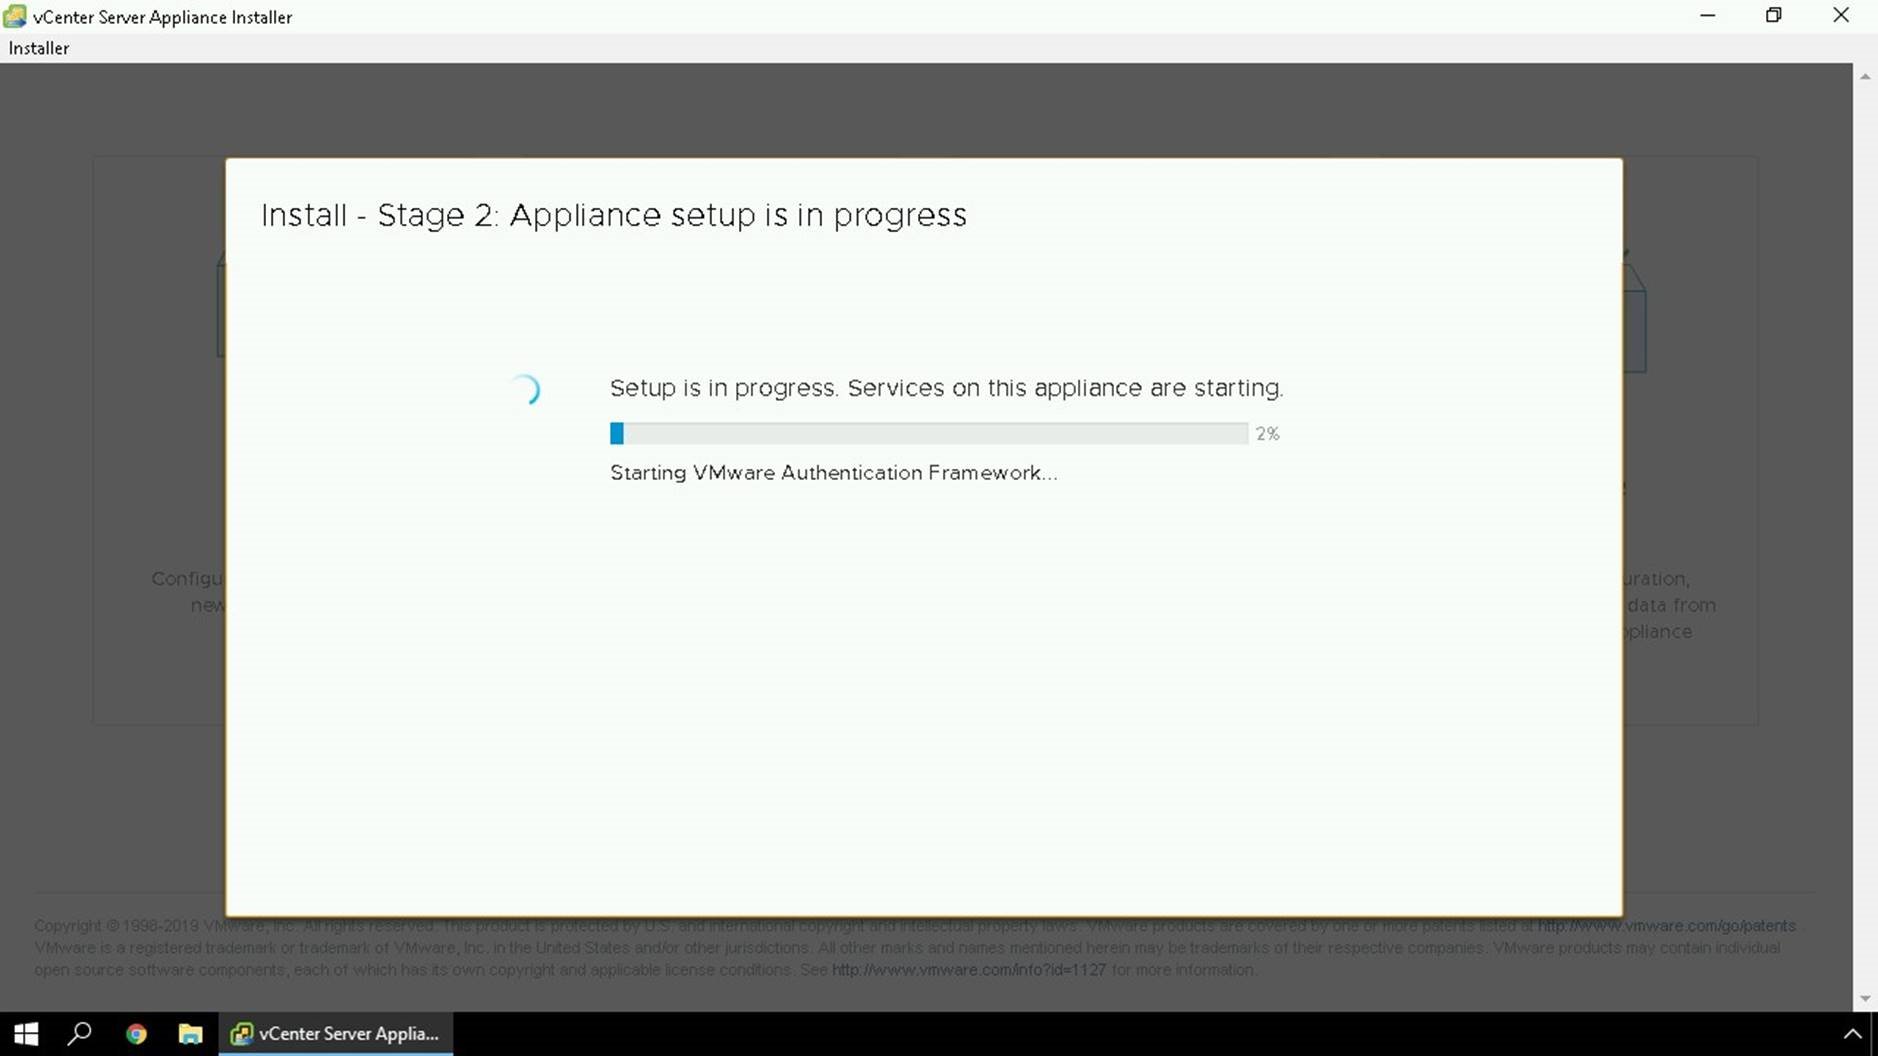
Services will now be started on the vCenter Server Appliance.
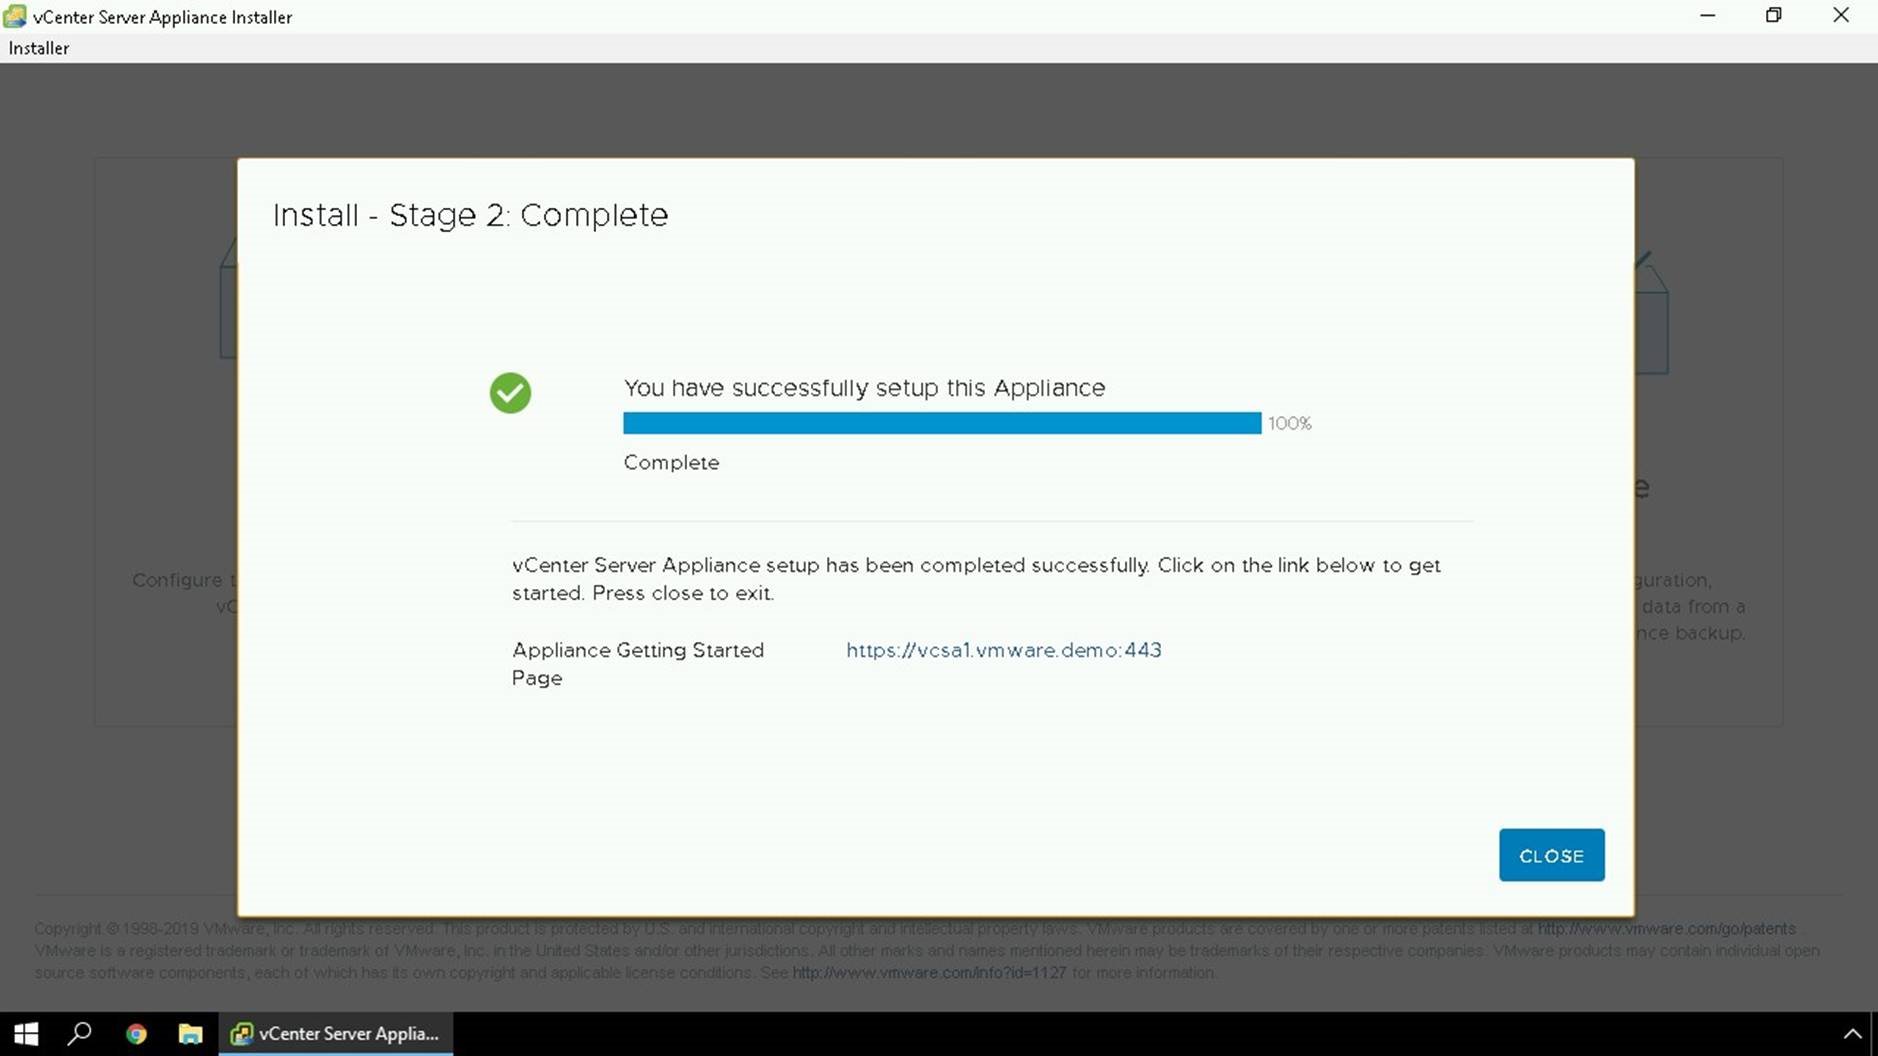
Your installation is now complete. Click on the application getting started page to learn more about your newly deployed appliance.
vCenter Server Appliance External Deployment
This guide will show how to deploy vCenter Server and the Platform Services Controller components on their own virtual machines. An external deployment is necessary if Enhanced Linked Mode is a requirement. Enhanced Linked Mode allows the ability to manage multiple vCenter Servers from a single vSphere Web Client.