
Standalone ESXi Installation and Configuration
ESXi Console Overview

This walkthrough is designed to provide a step-by-step overview on how to manage the ESXi host using Direct Control User Interface. Use arrow keys to navigate through the screens.
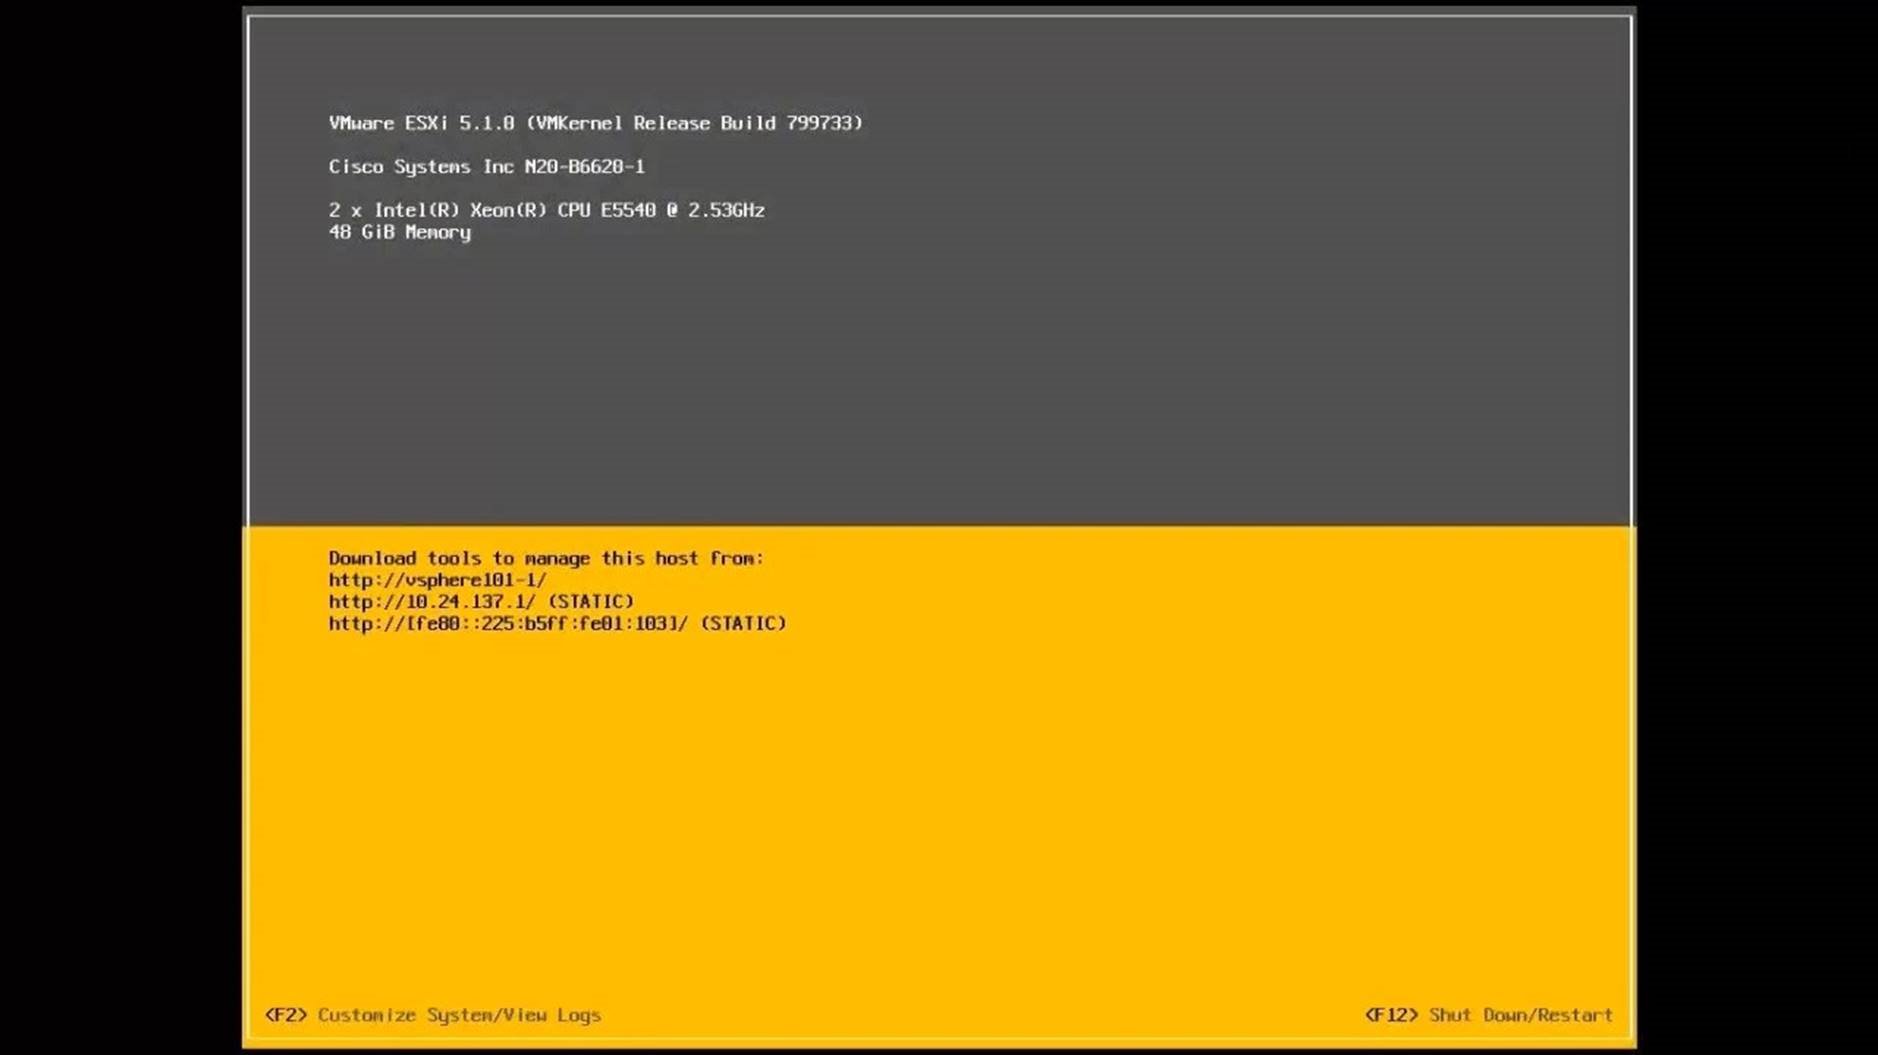
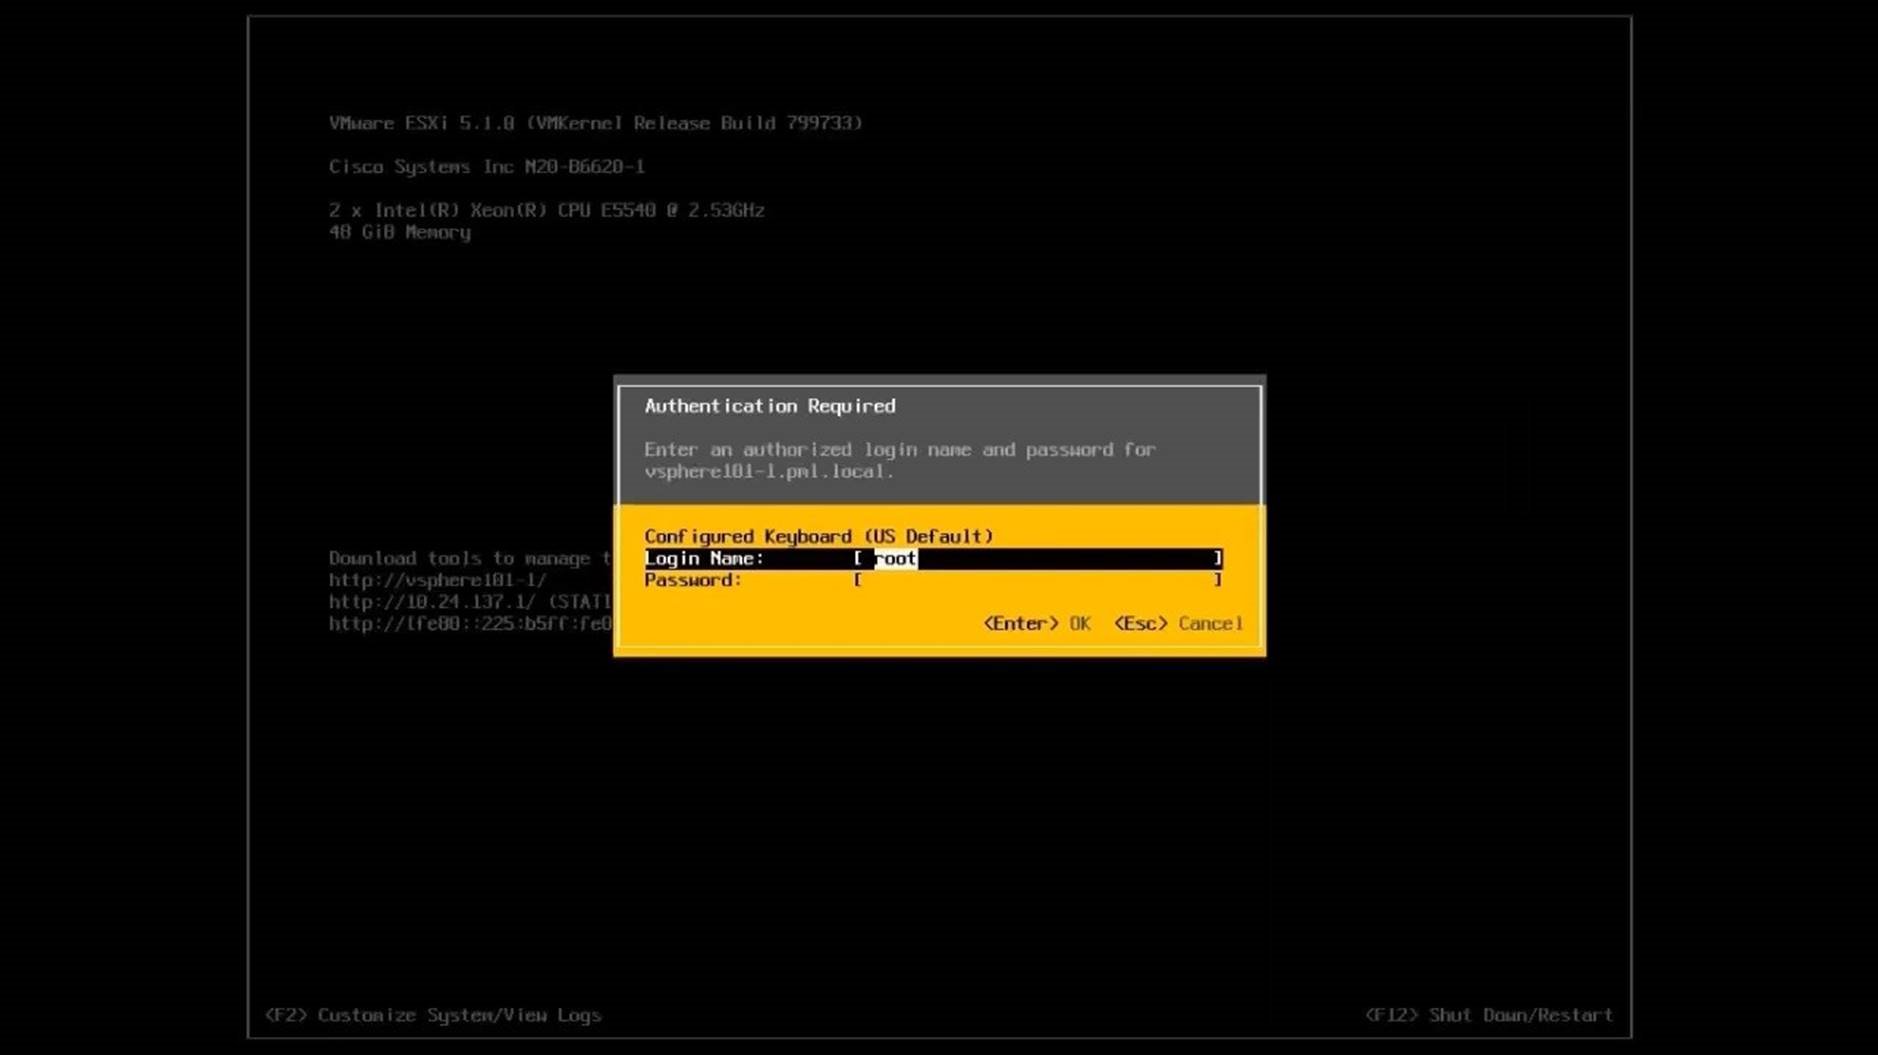
Connect to the host console. Select [Customize System/View Logs] to customize the system.
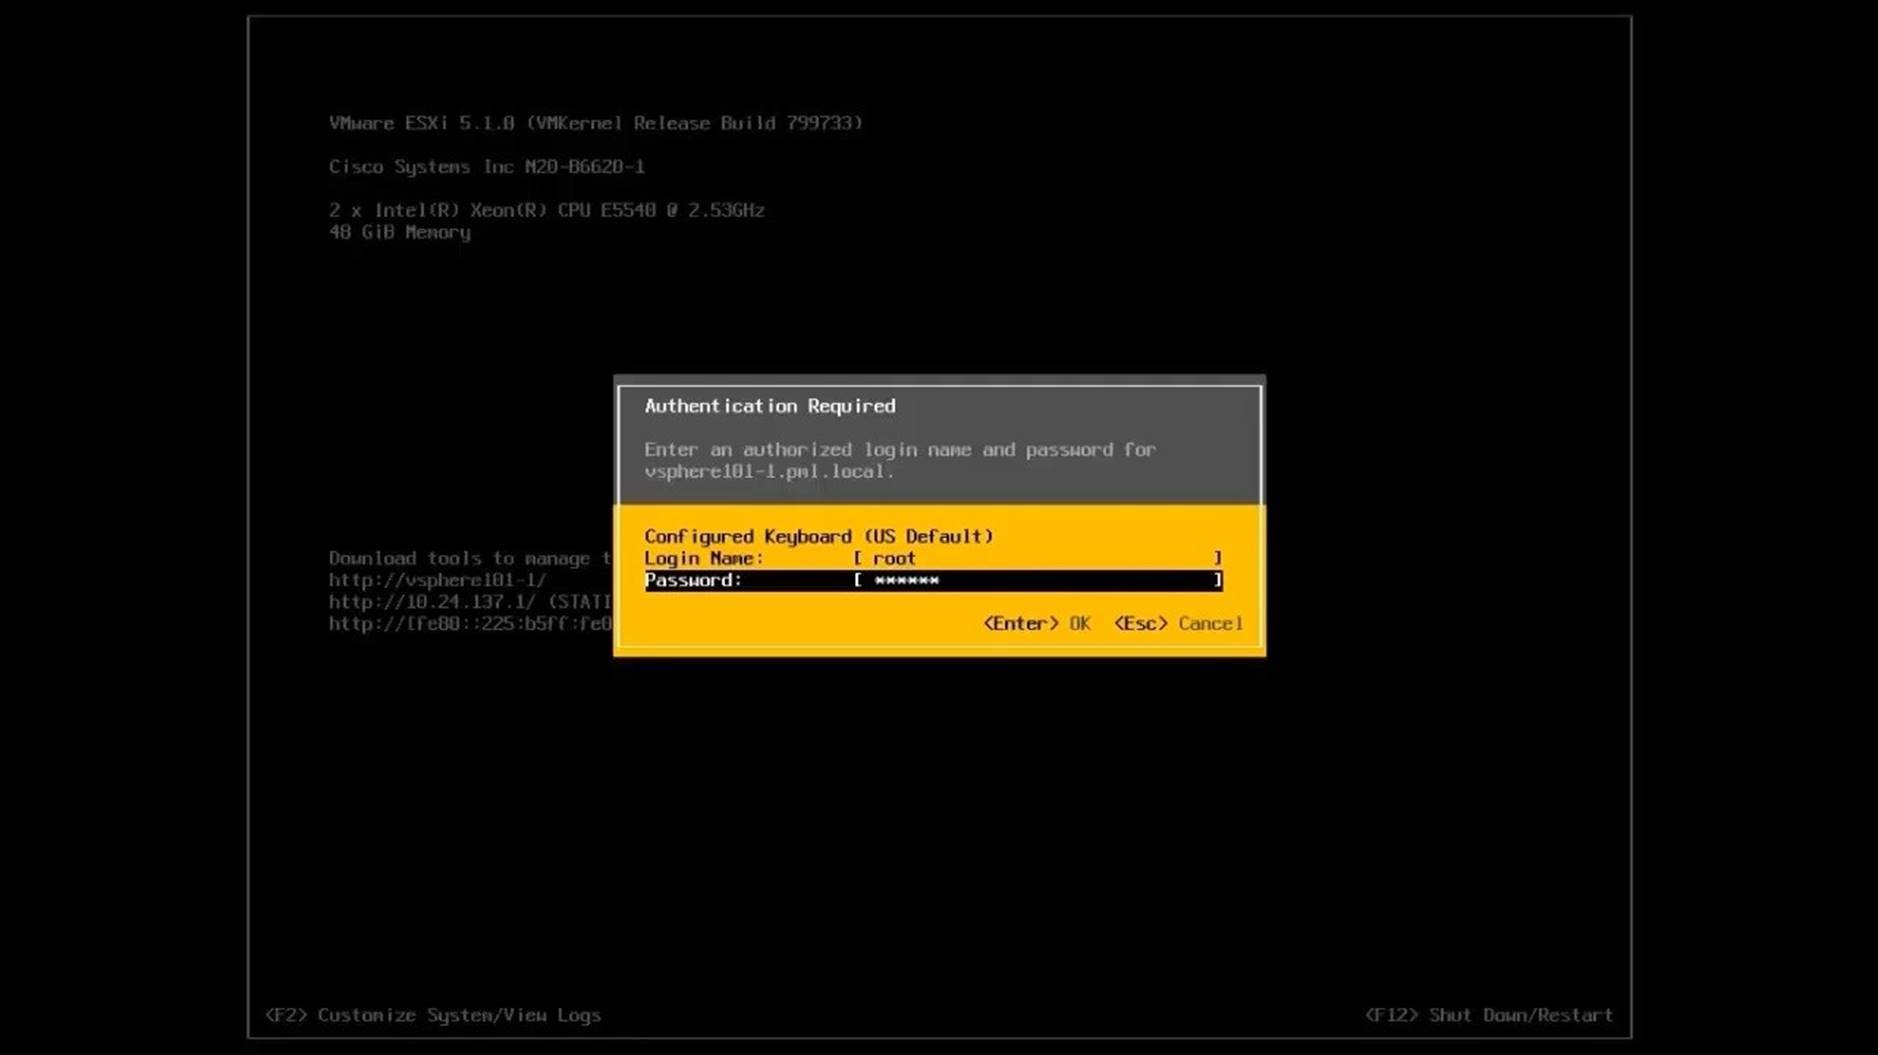
Login using the root user ID and the password that were set during the installation. Select [OK] to access the System Customization screen.
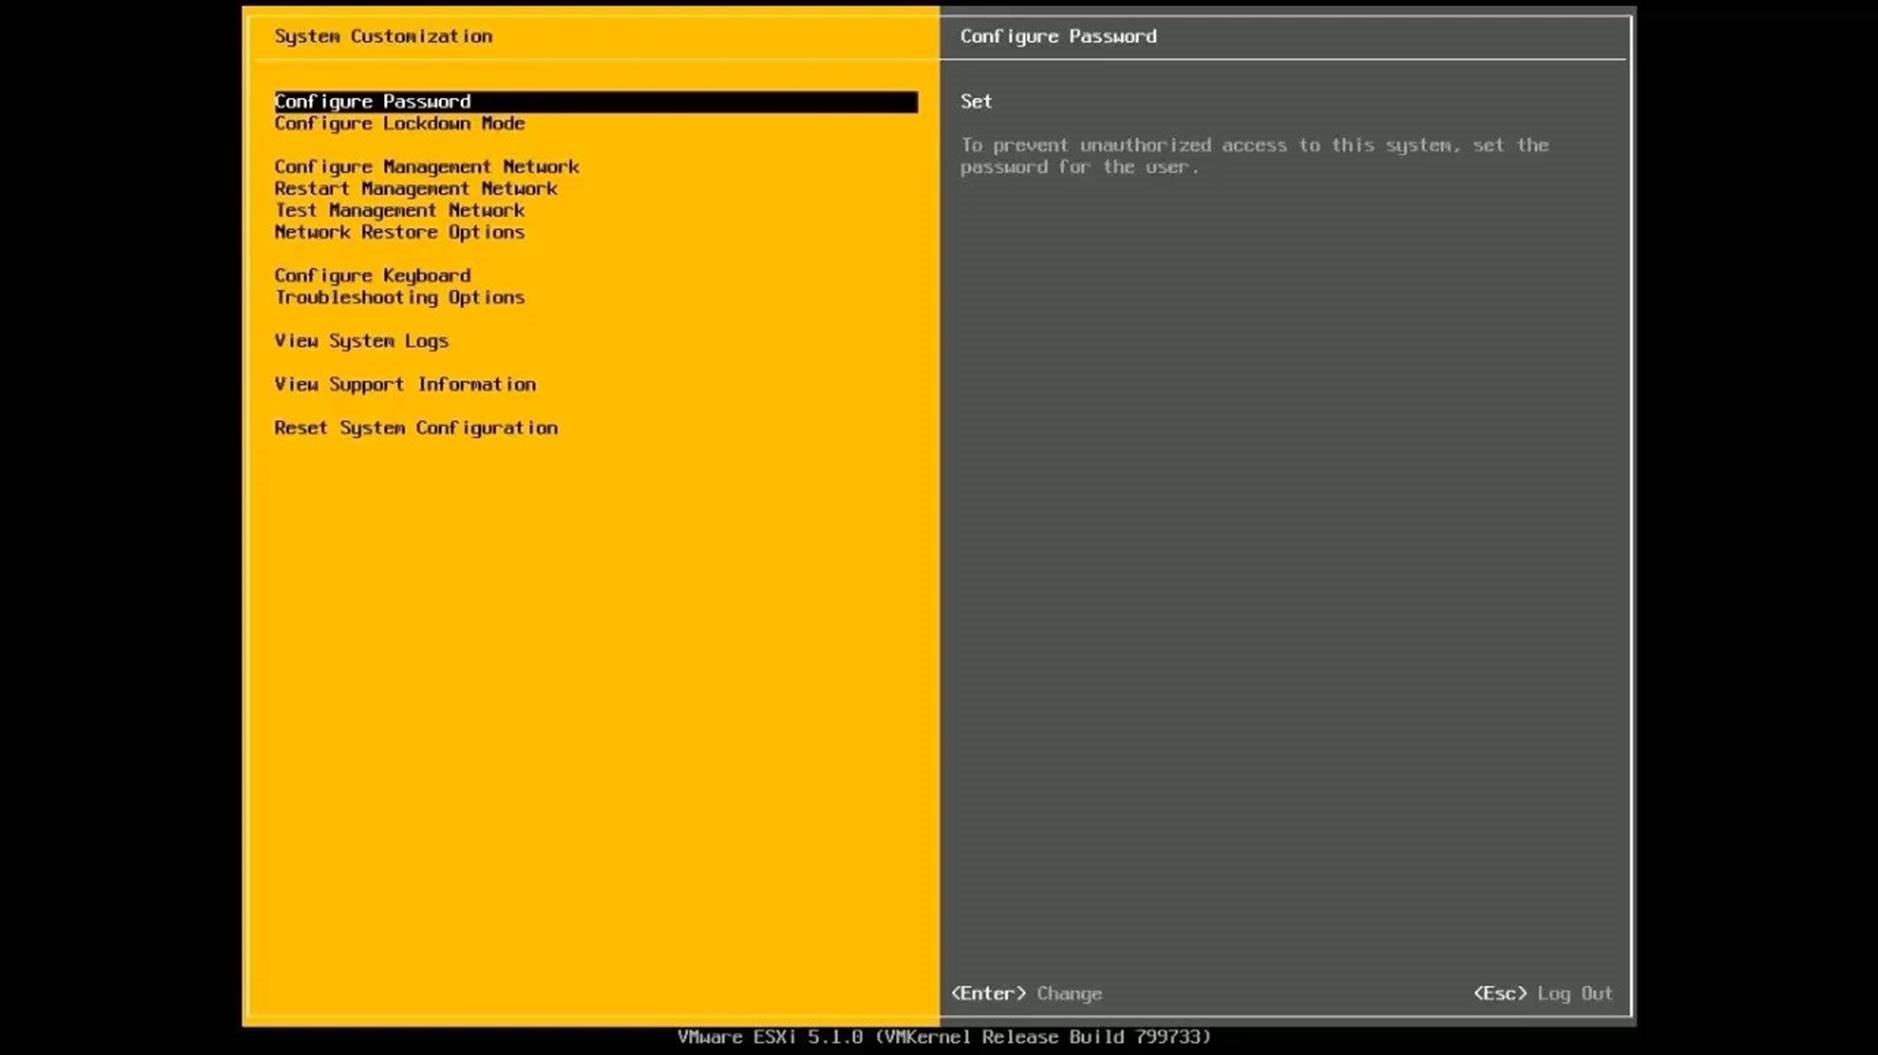
From the list of customization options, select [Configure Password] to modify the password. Select [ Change] to configure password.
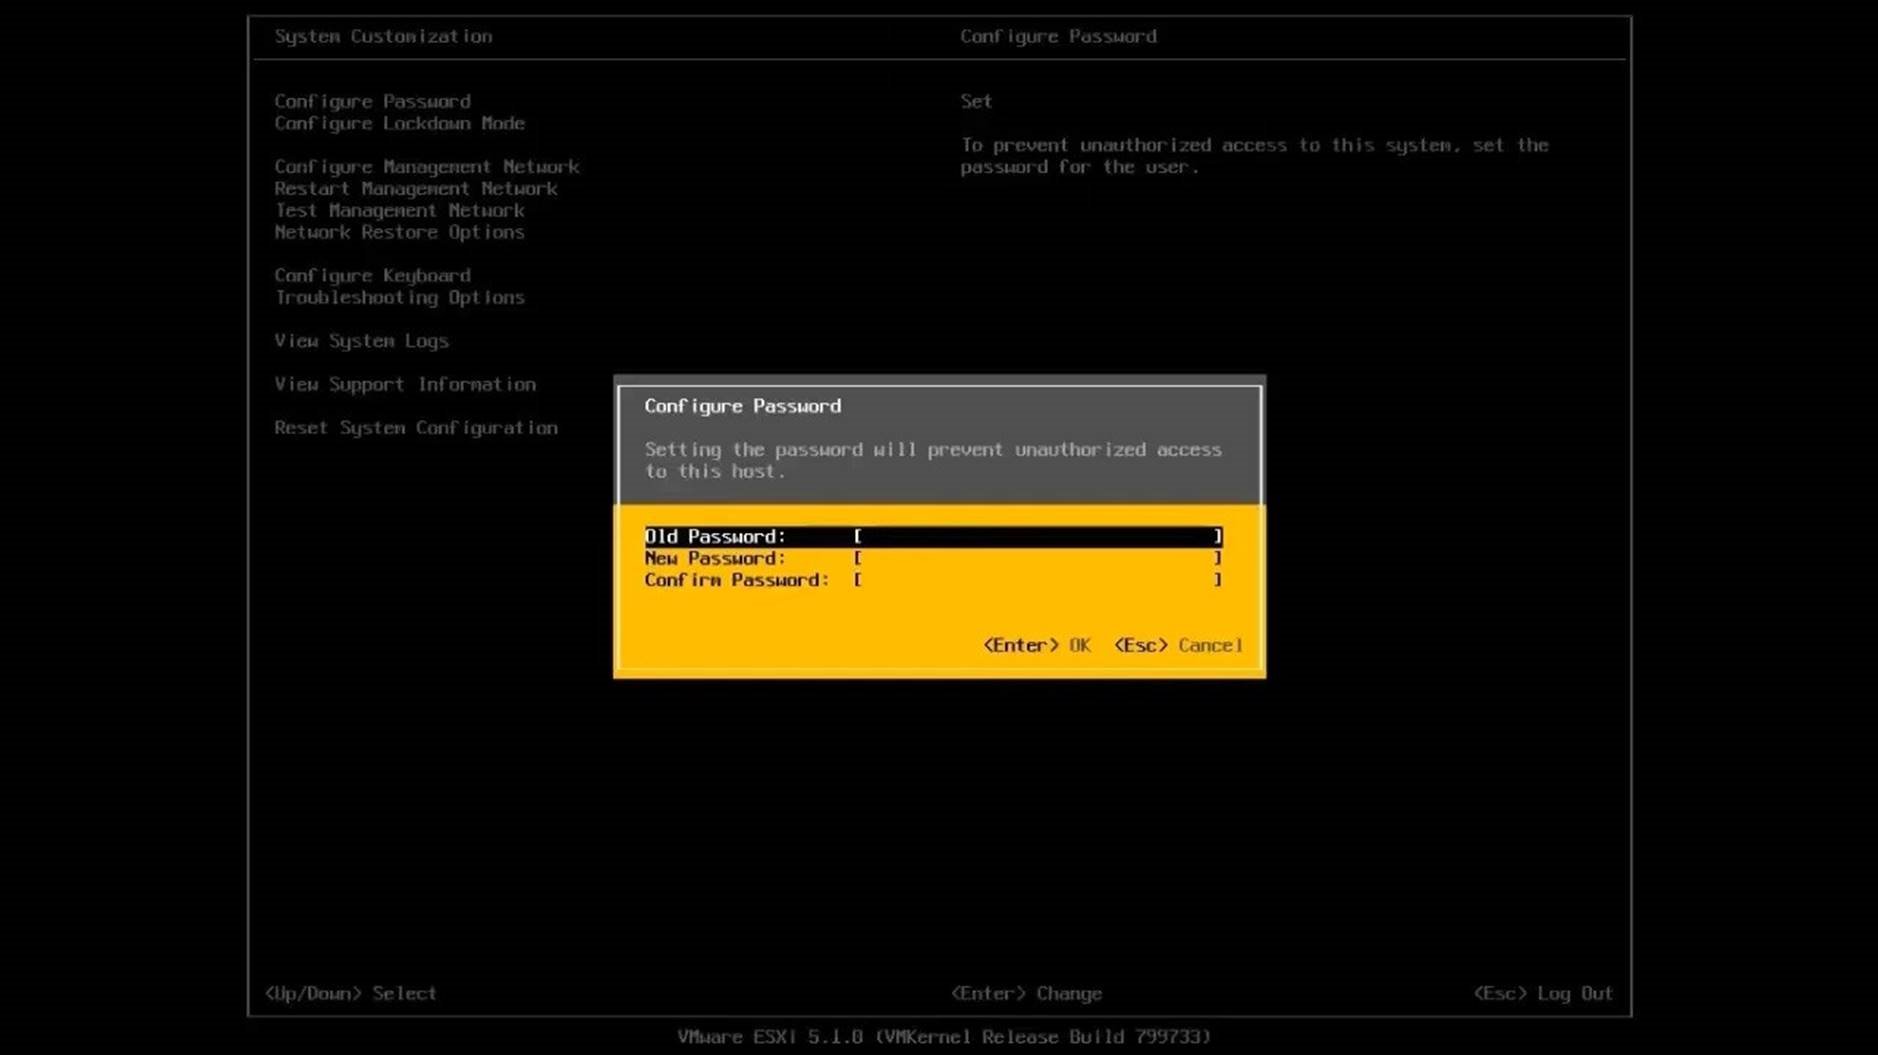
Update the password. Select [OK] to save and go back to the home screen.

On the System Customization screen, select [Configure Lockdown Mode]. Use the Spacebar to Enable/Disable lockdown mode and select [OK] to save.
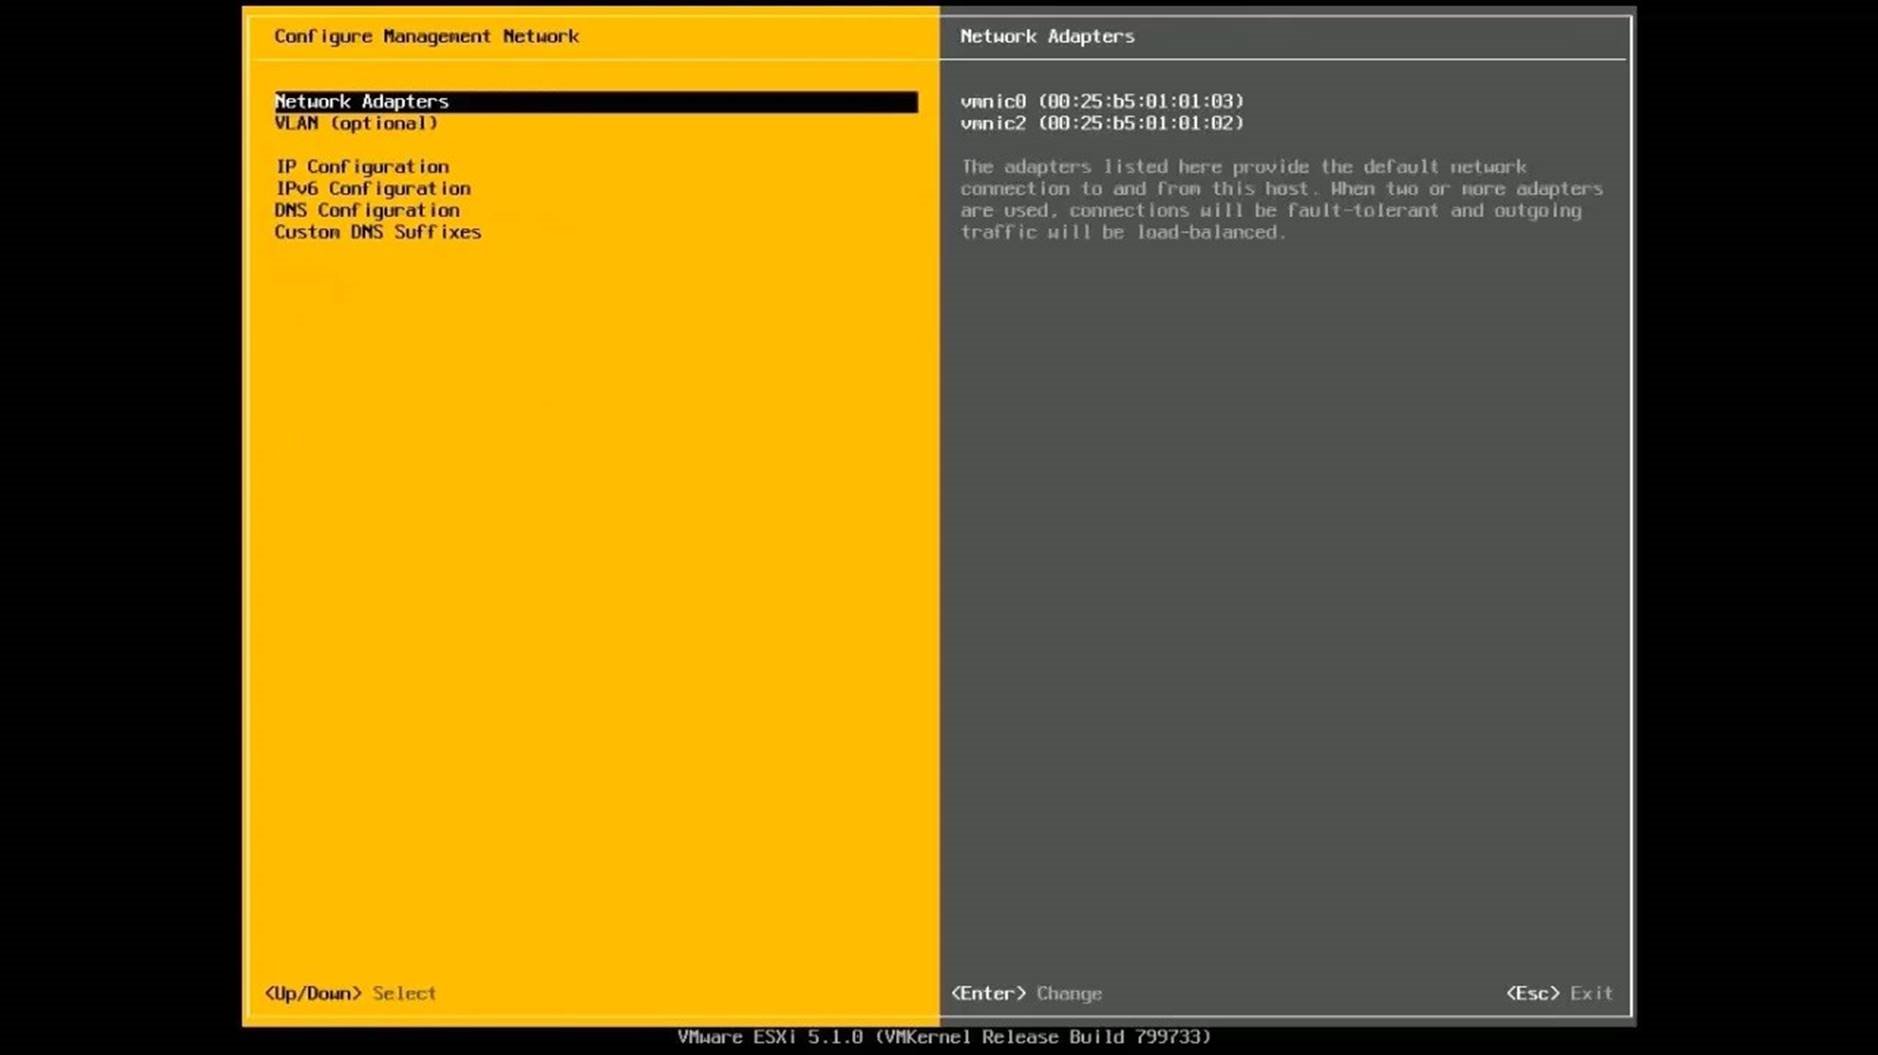
From the System Customization screen, select Configure Management Network. Go to [Network Adapters] and select [ Change] to update network adapters.
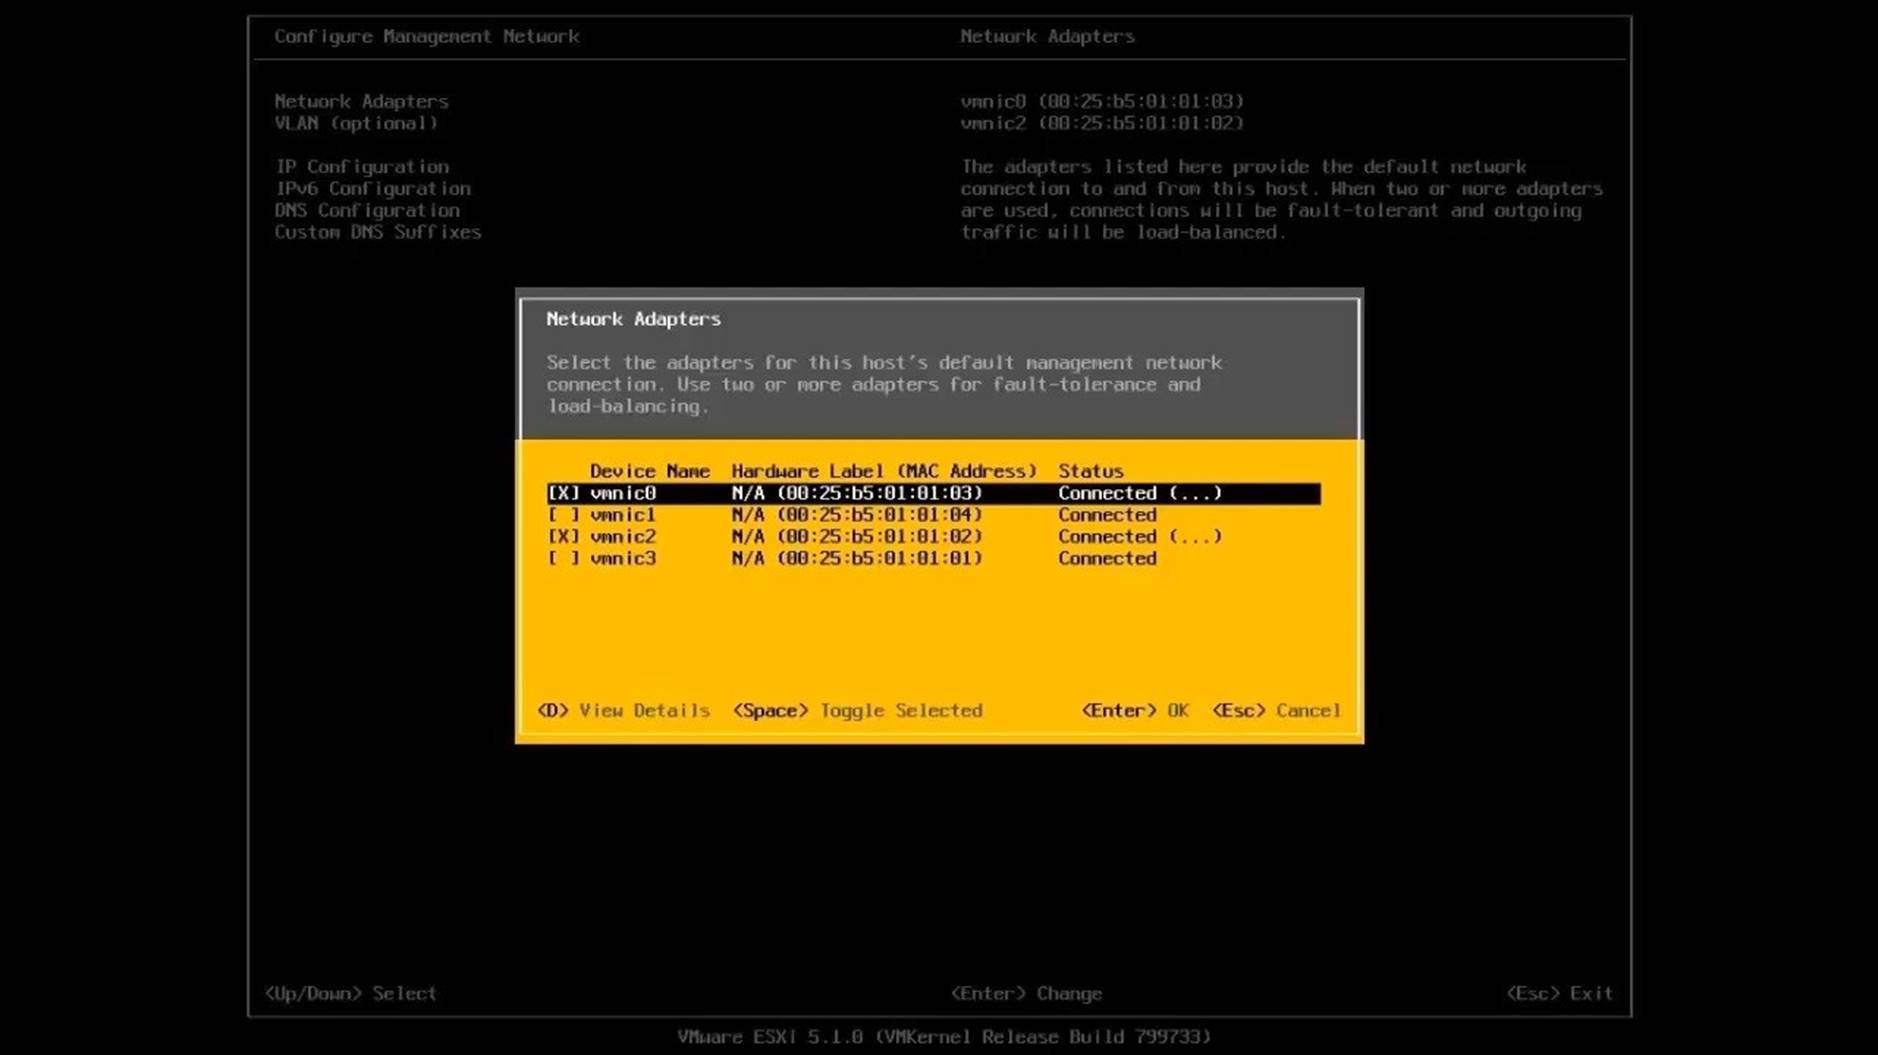
Assign multiple adapters to provide for redundancy. Select [OK] to save and go back.
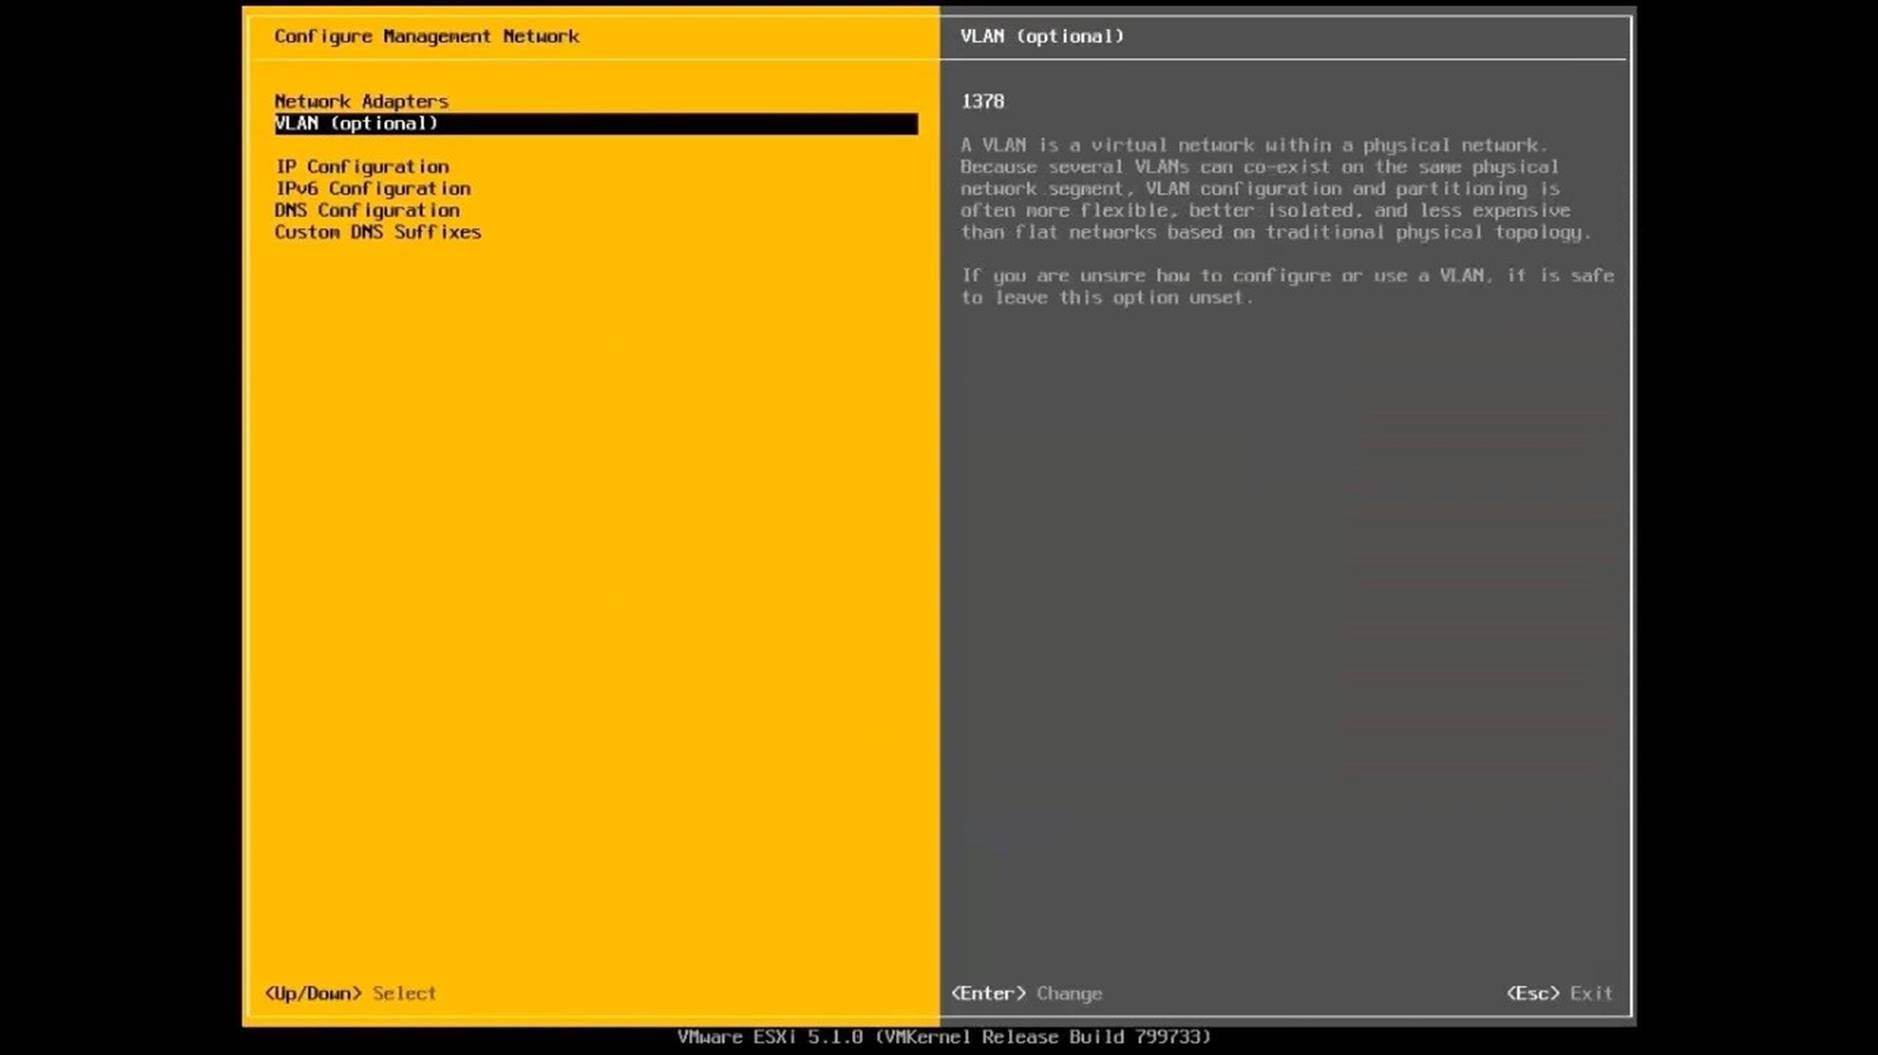
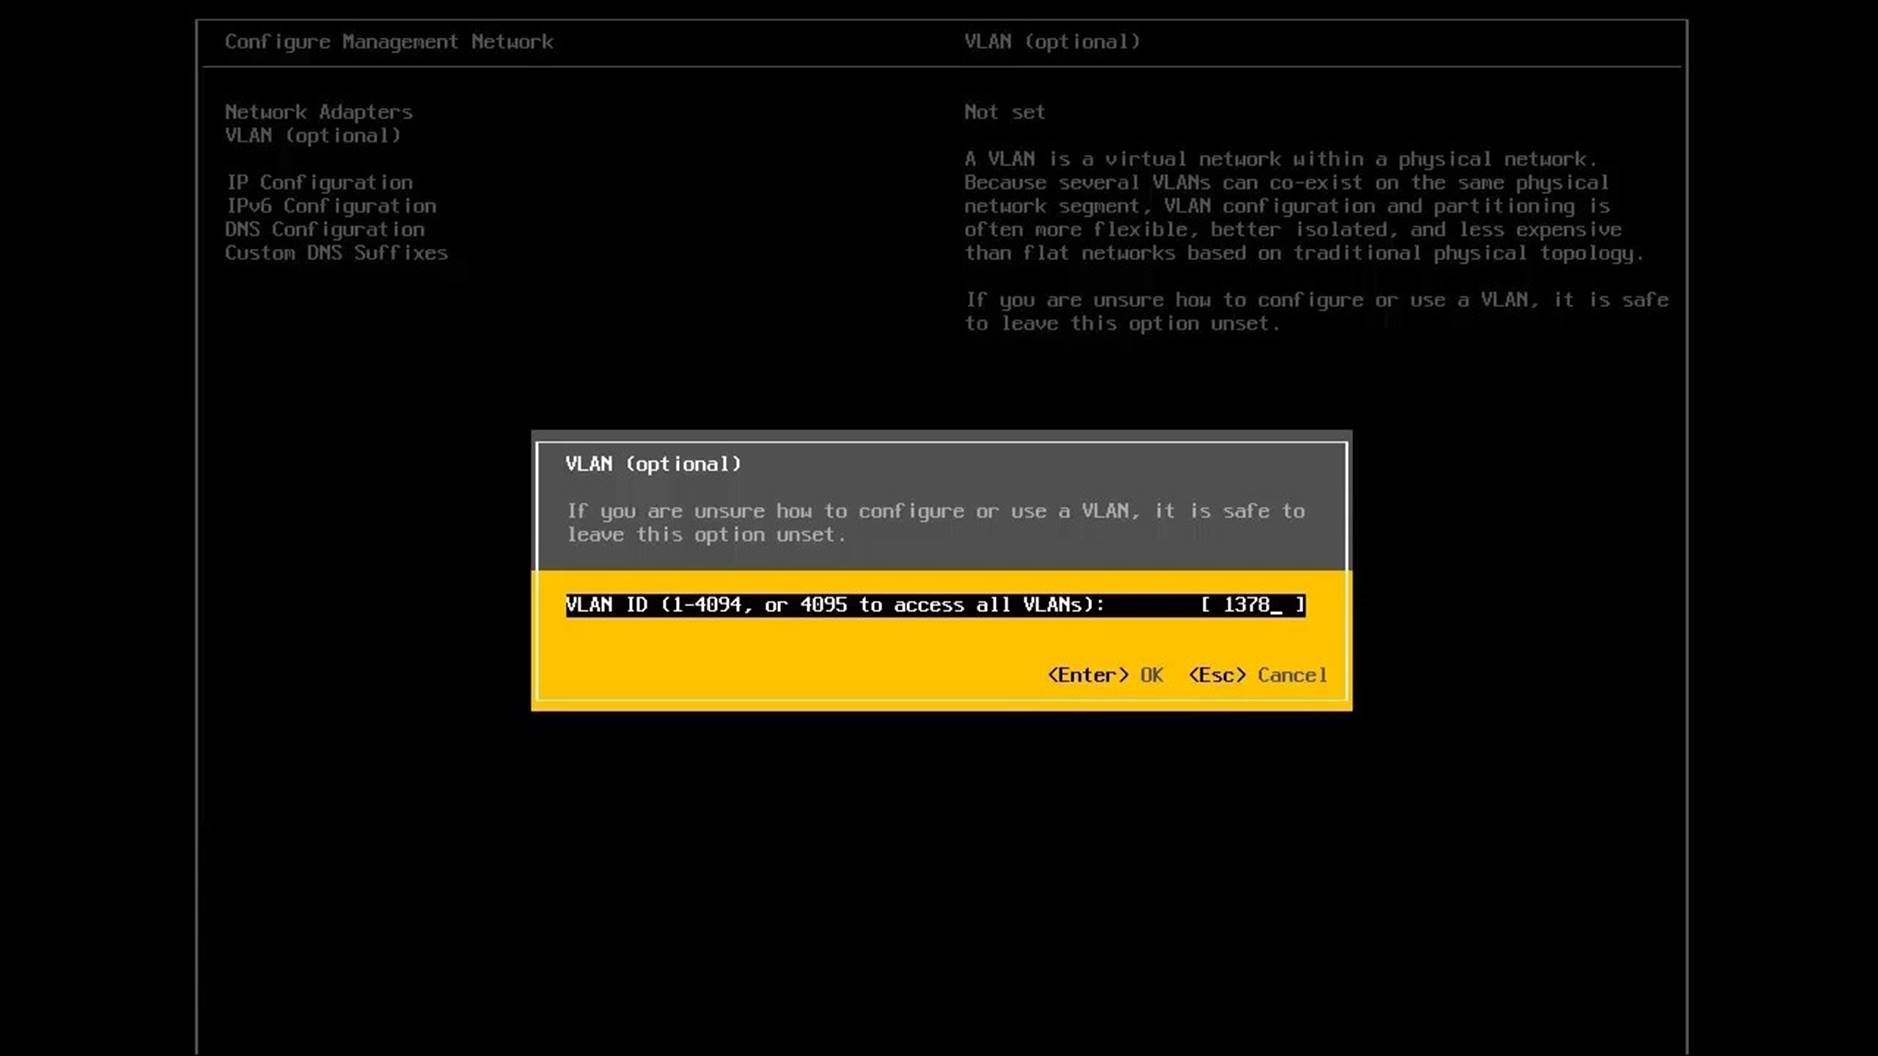
Choose VLAN from the list and select [ Change] to set the VLAN ID.
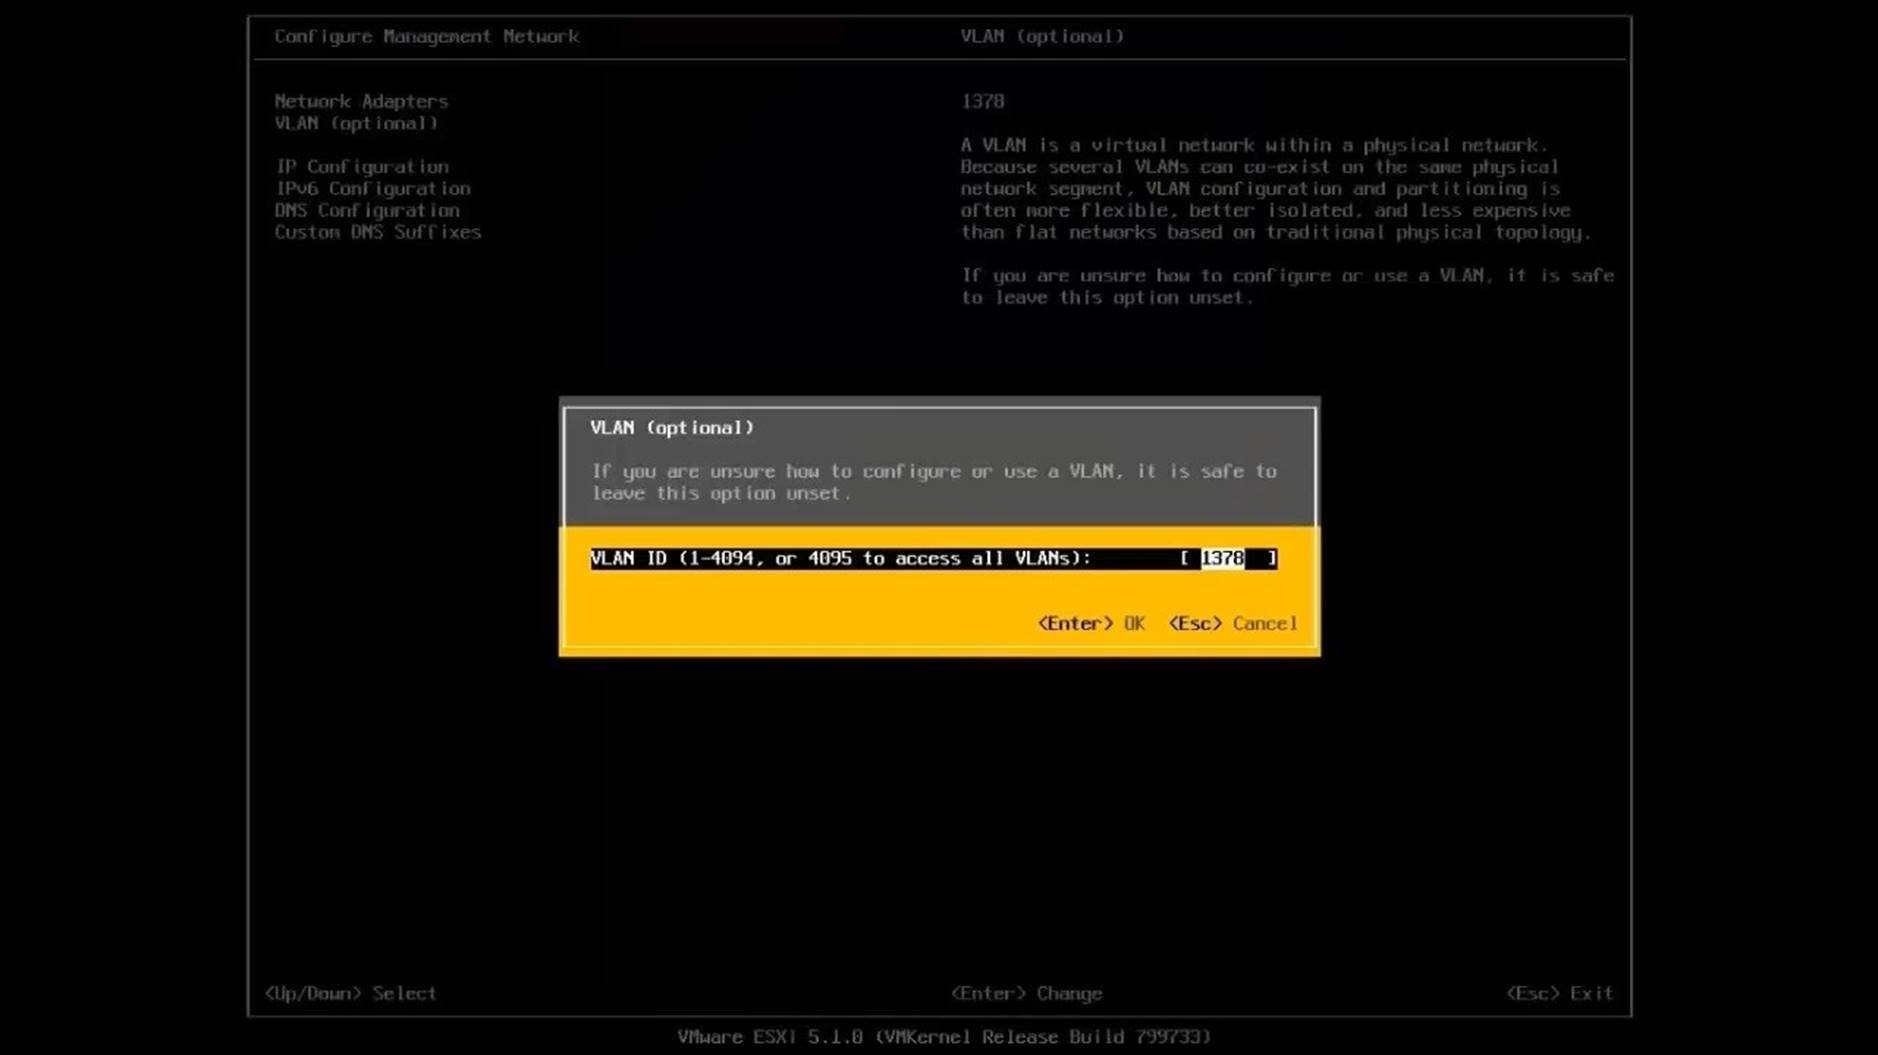
Setting the VLAN ID is optional. Once complete, select [OK] to save and continue.
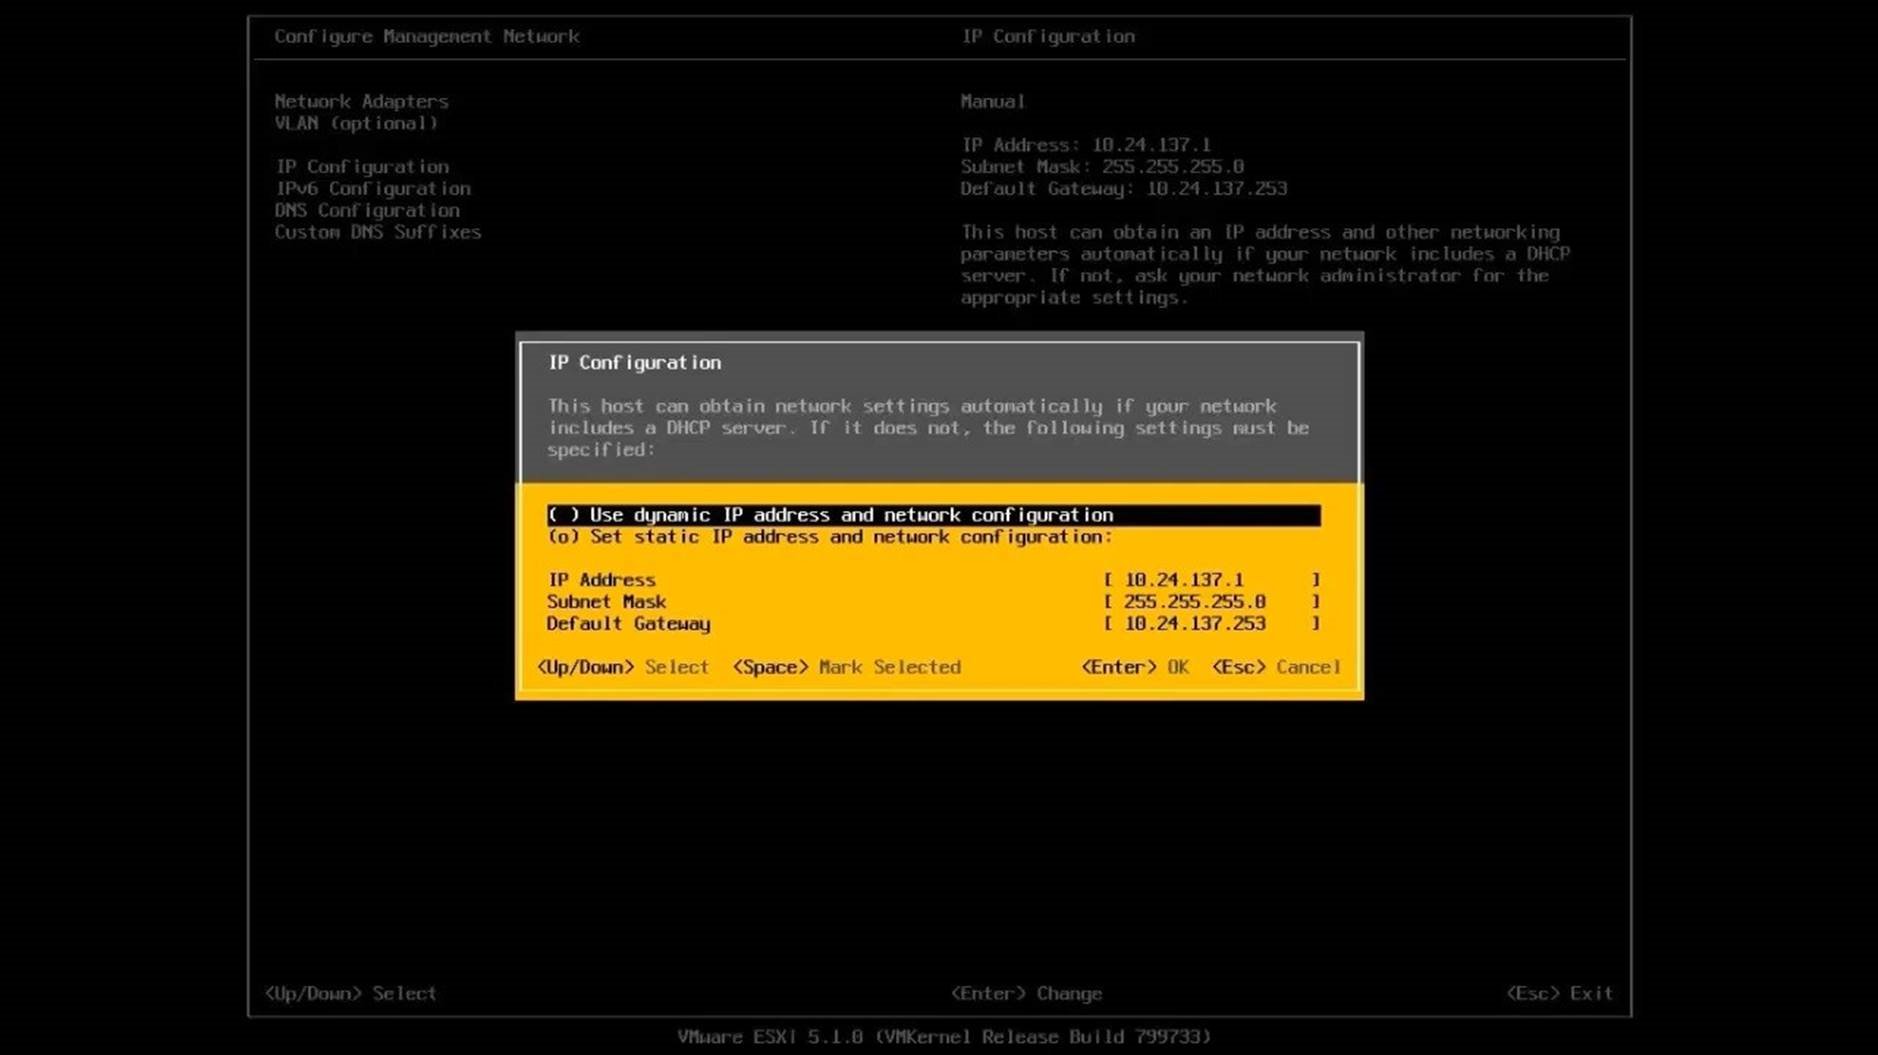
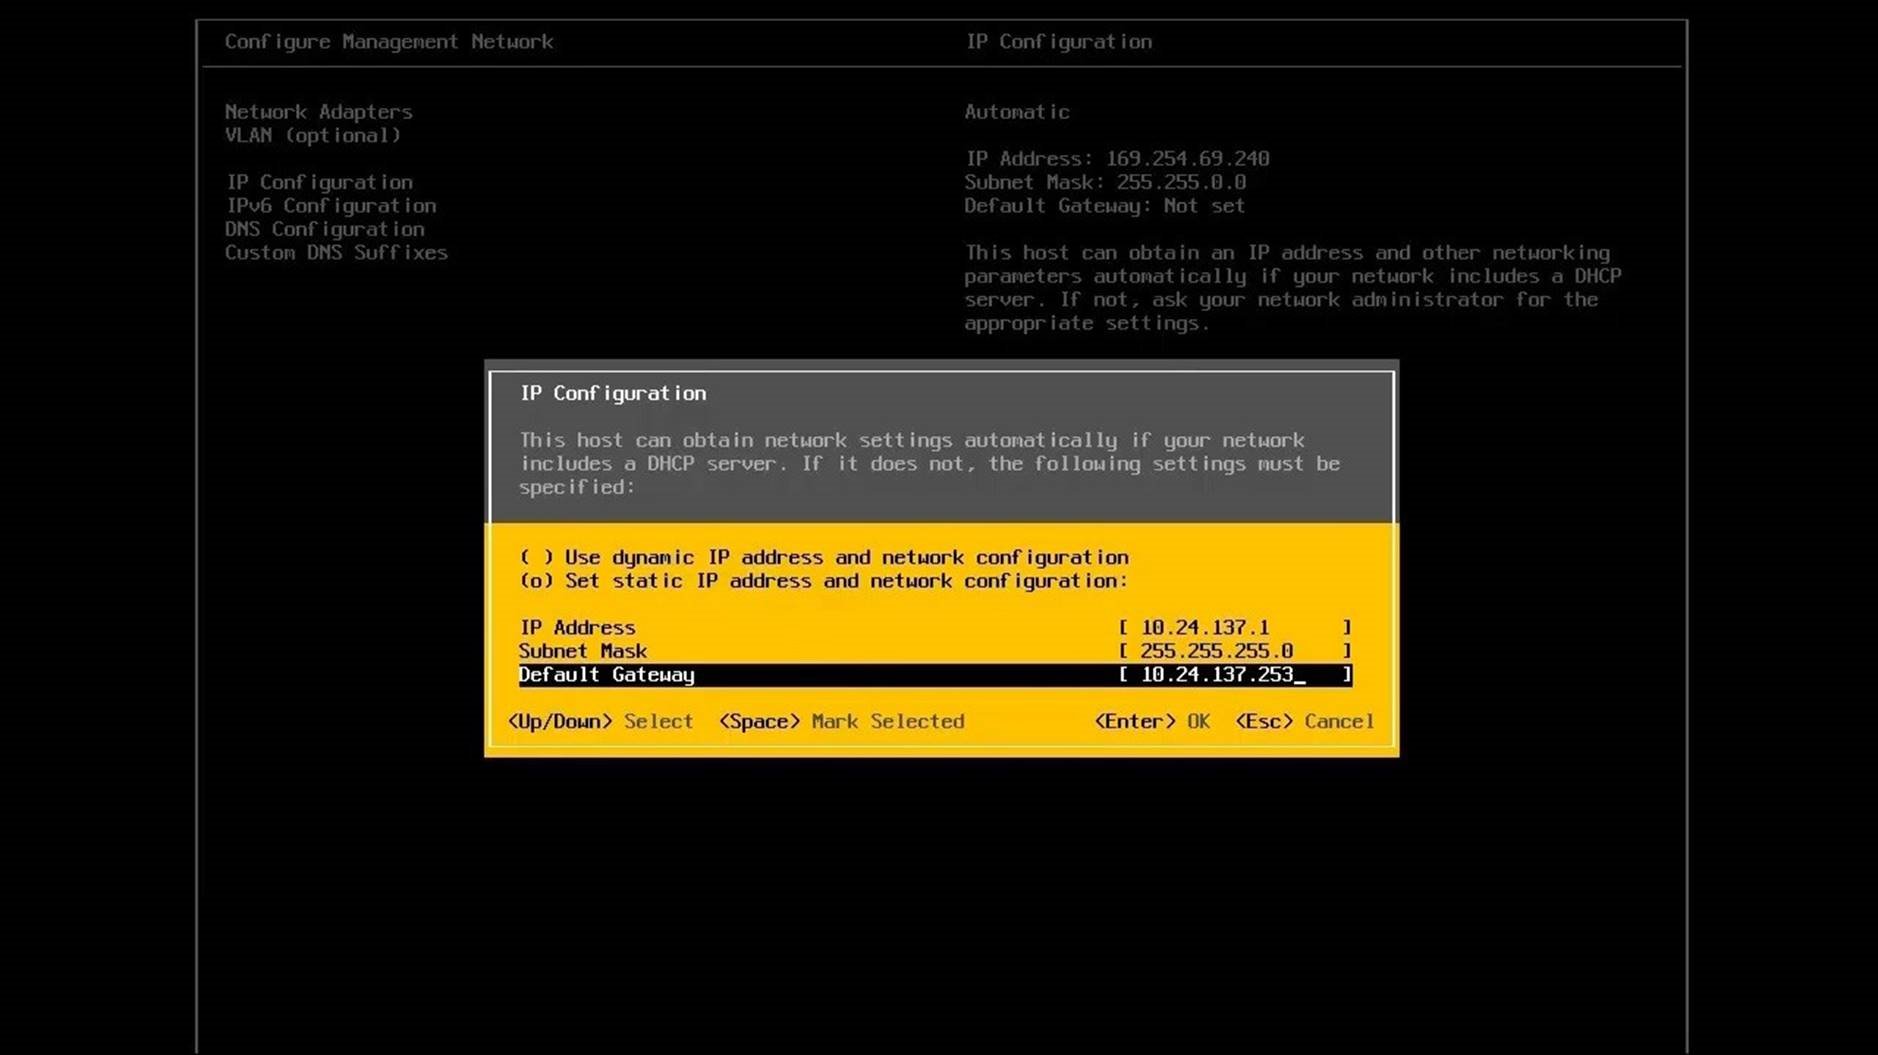
Select [IP Configuration] from the Configure Management Network list. Set up the IP, the subnet mask and the default gateway. Select [OK] to save.
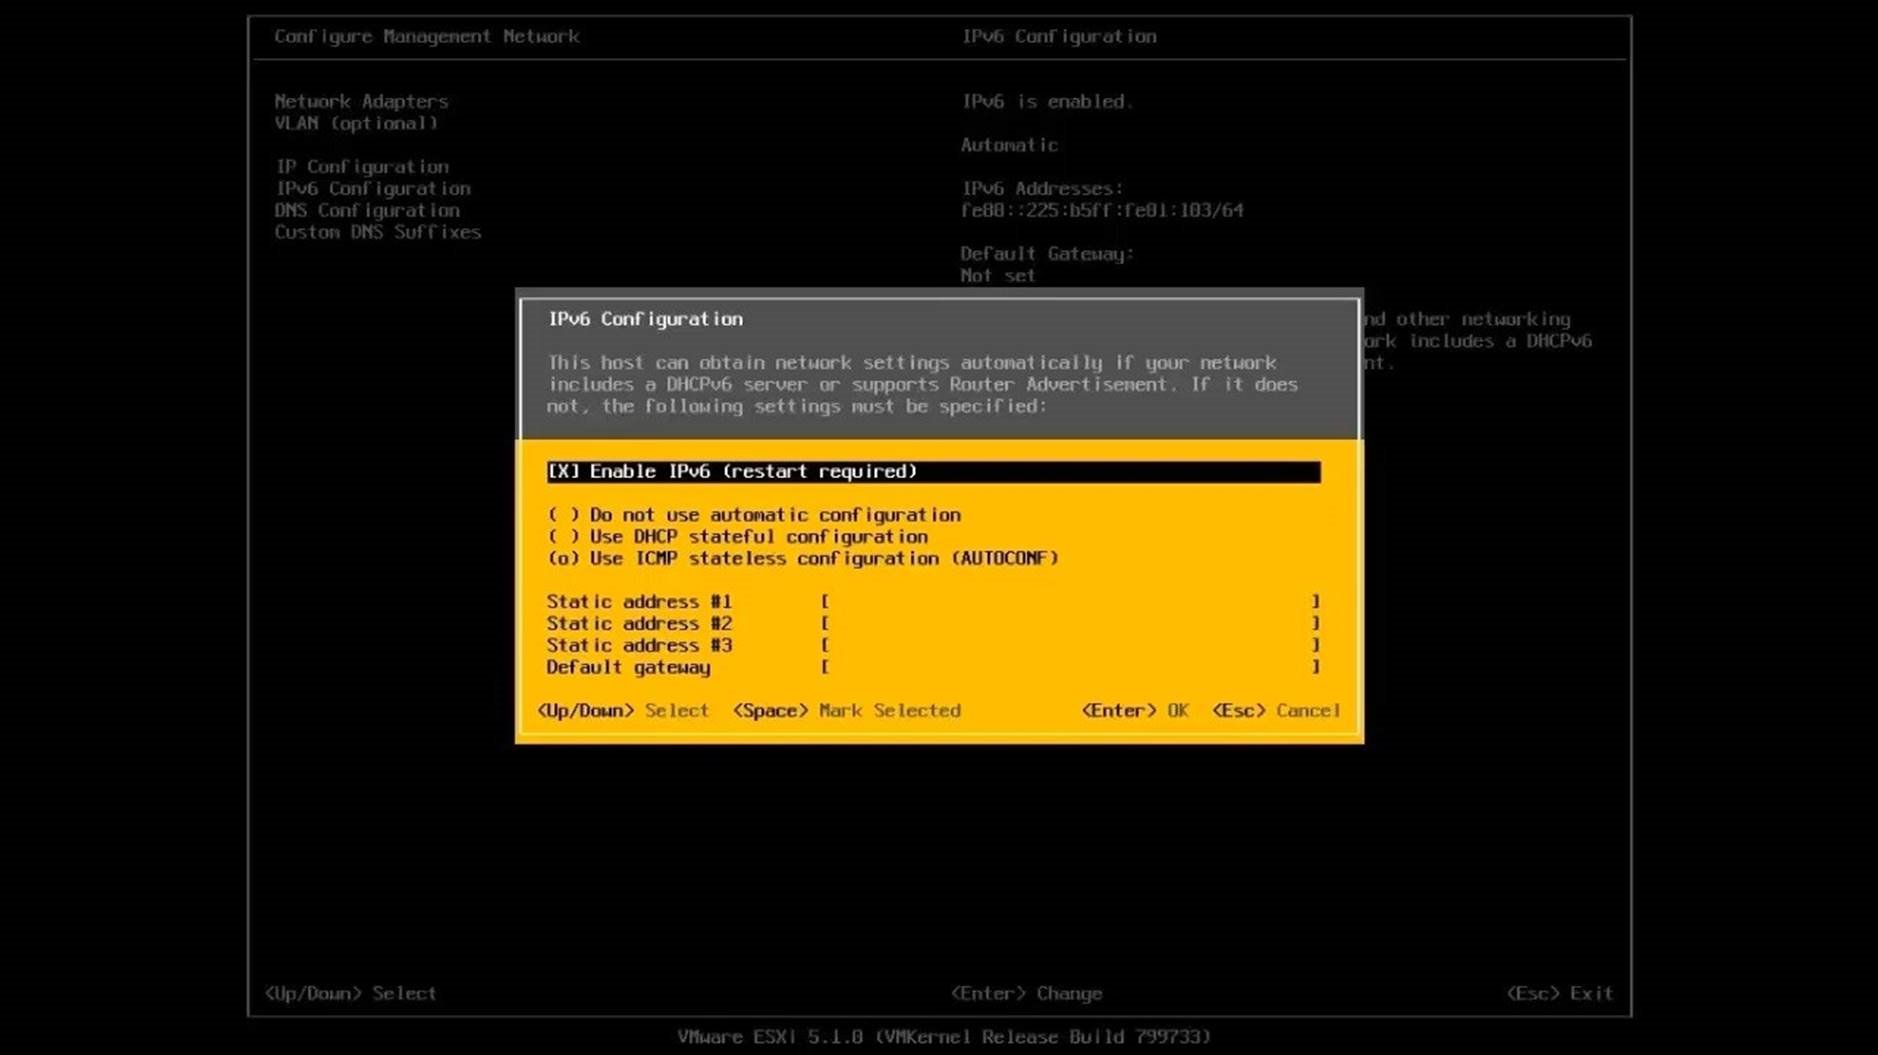
Select [IPv6 Configuration] from the Configure Management Network list to reach this screen. Enable/disable IPv6. Any changes here will restart the host without a warning. Select [OK] to save.
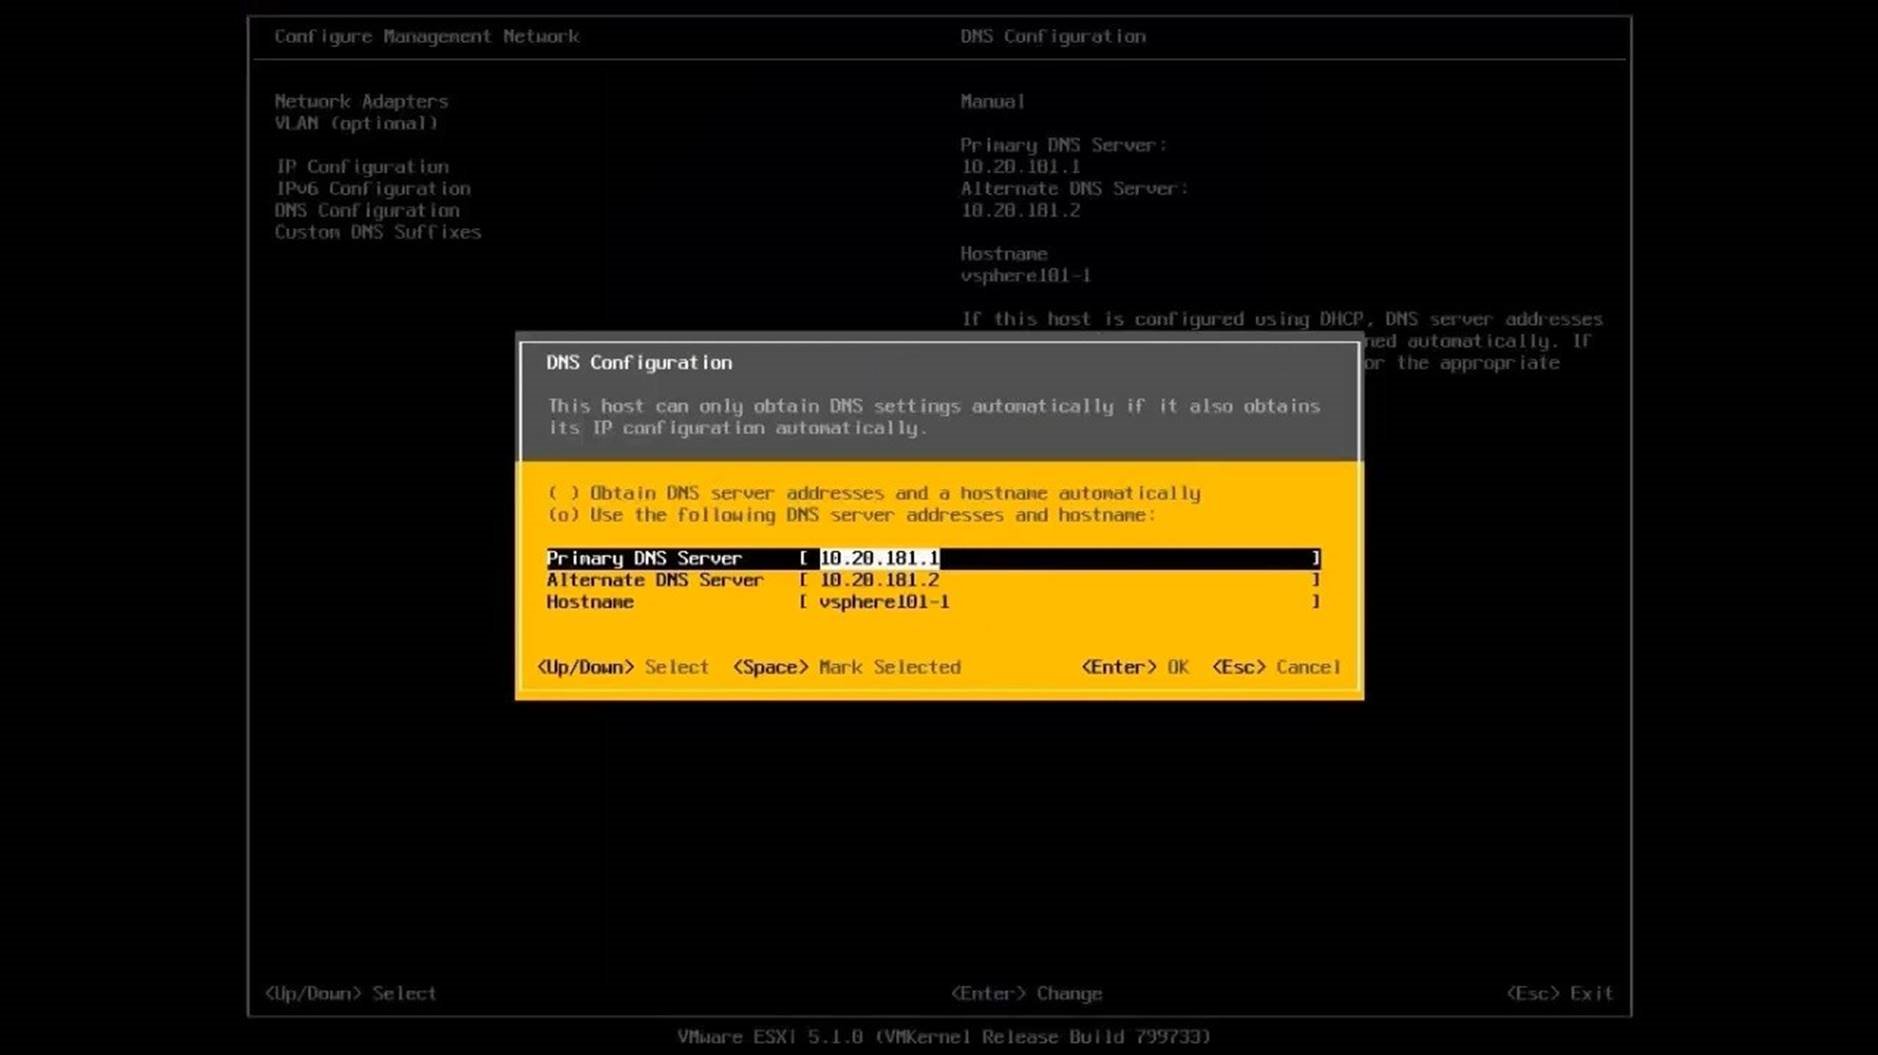
Select [DNS Configuration] from the list. Specify the IP addresses of the primary and alternate DNS servers, and the hostname of the vSphere host.
Select [OK] to save and proceed.
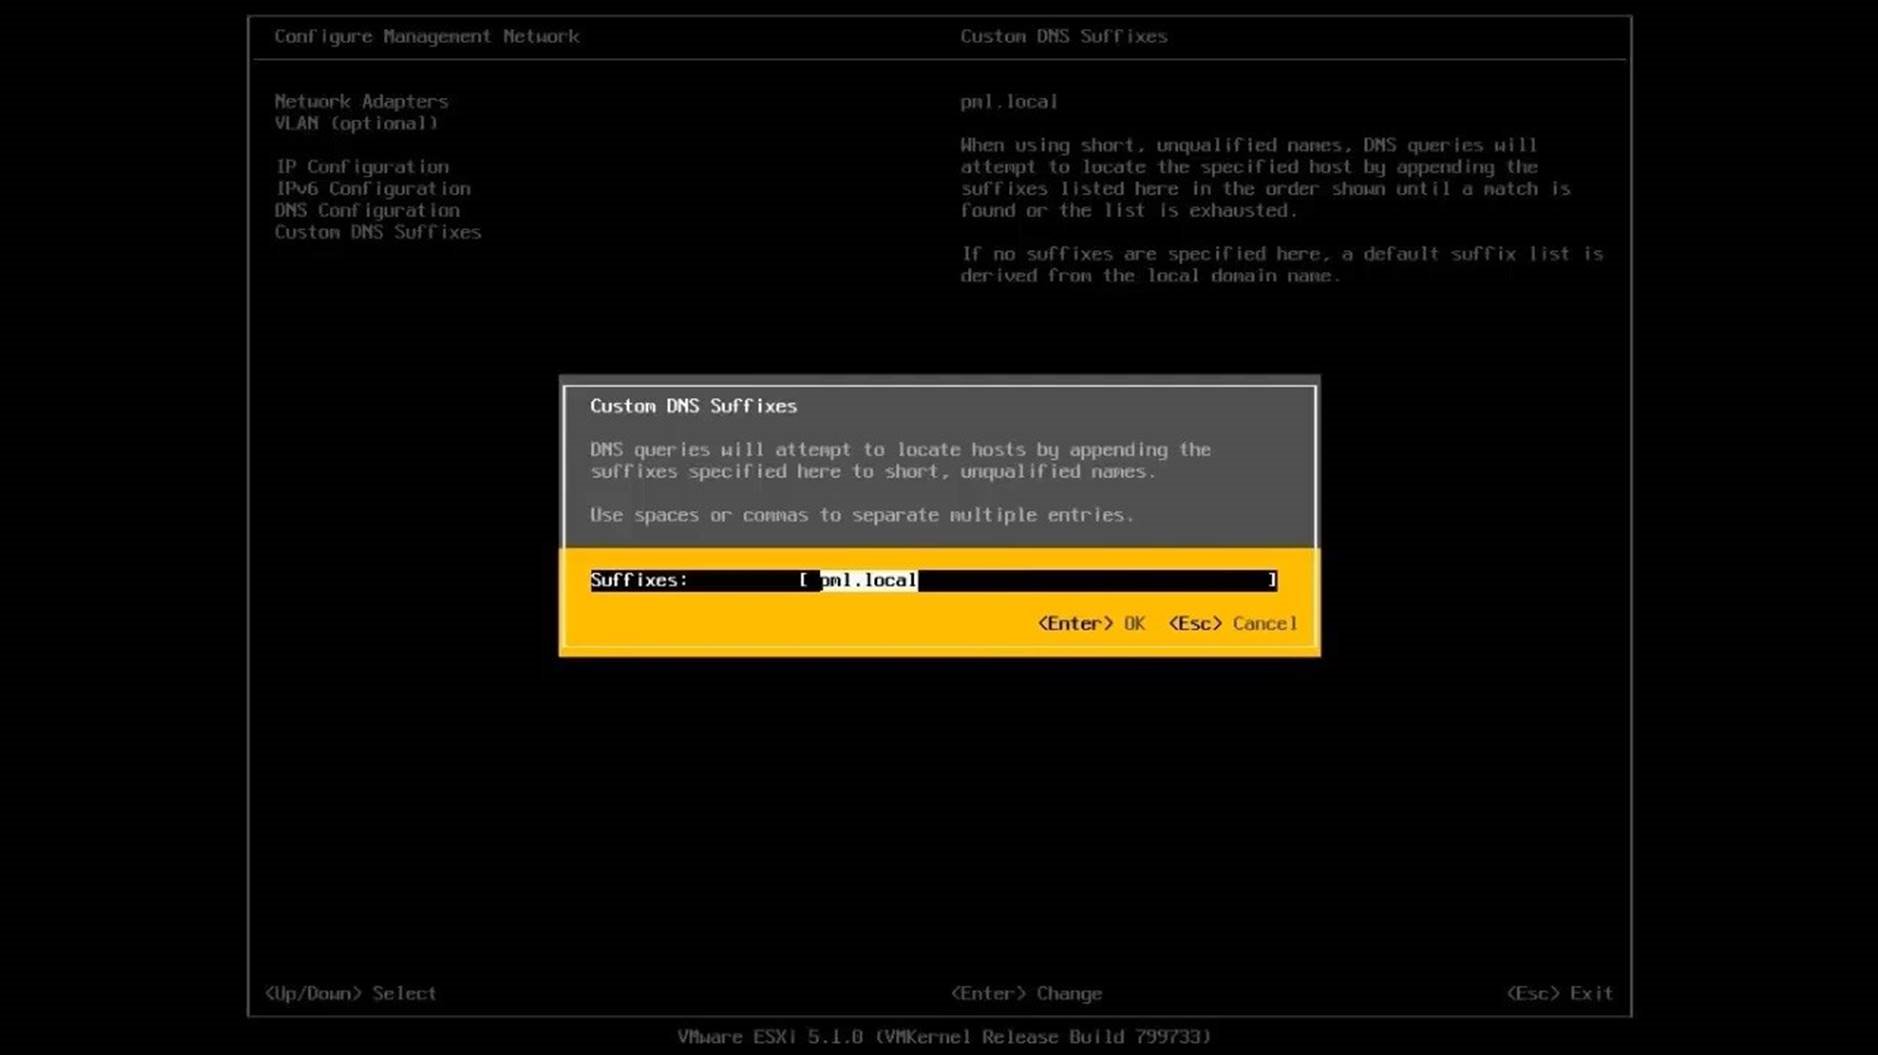
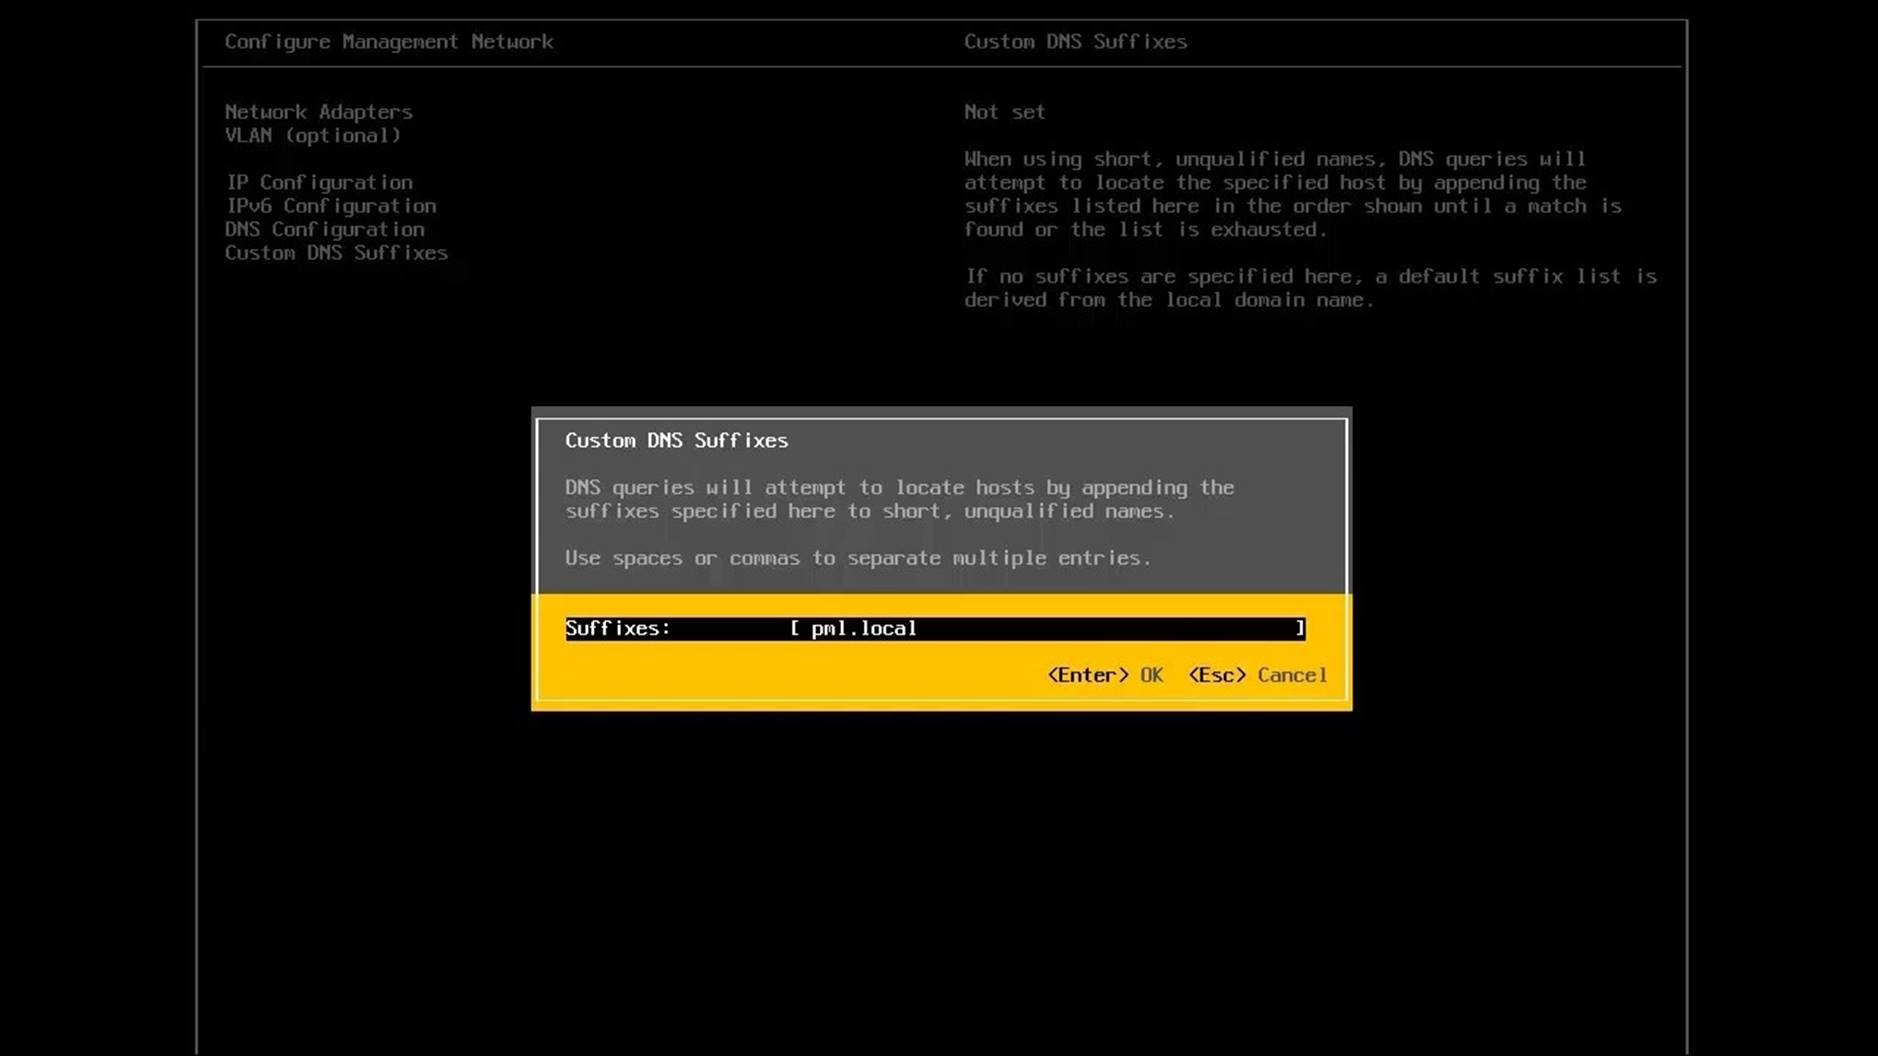
Select [Custom DNS Suffixes] to configure additional DNS suffixes. Specify the desired DNS suffix and select [OK]. Go back to the main screen using the [Esc] key.
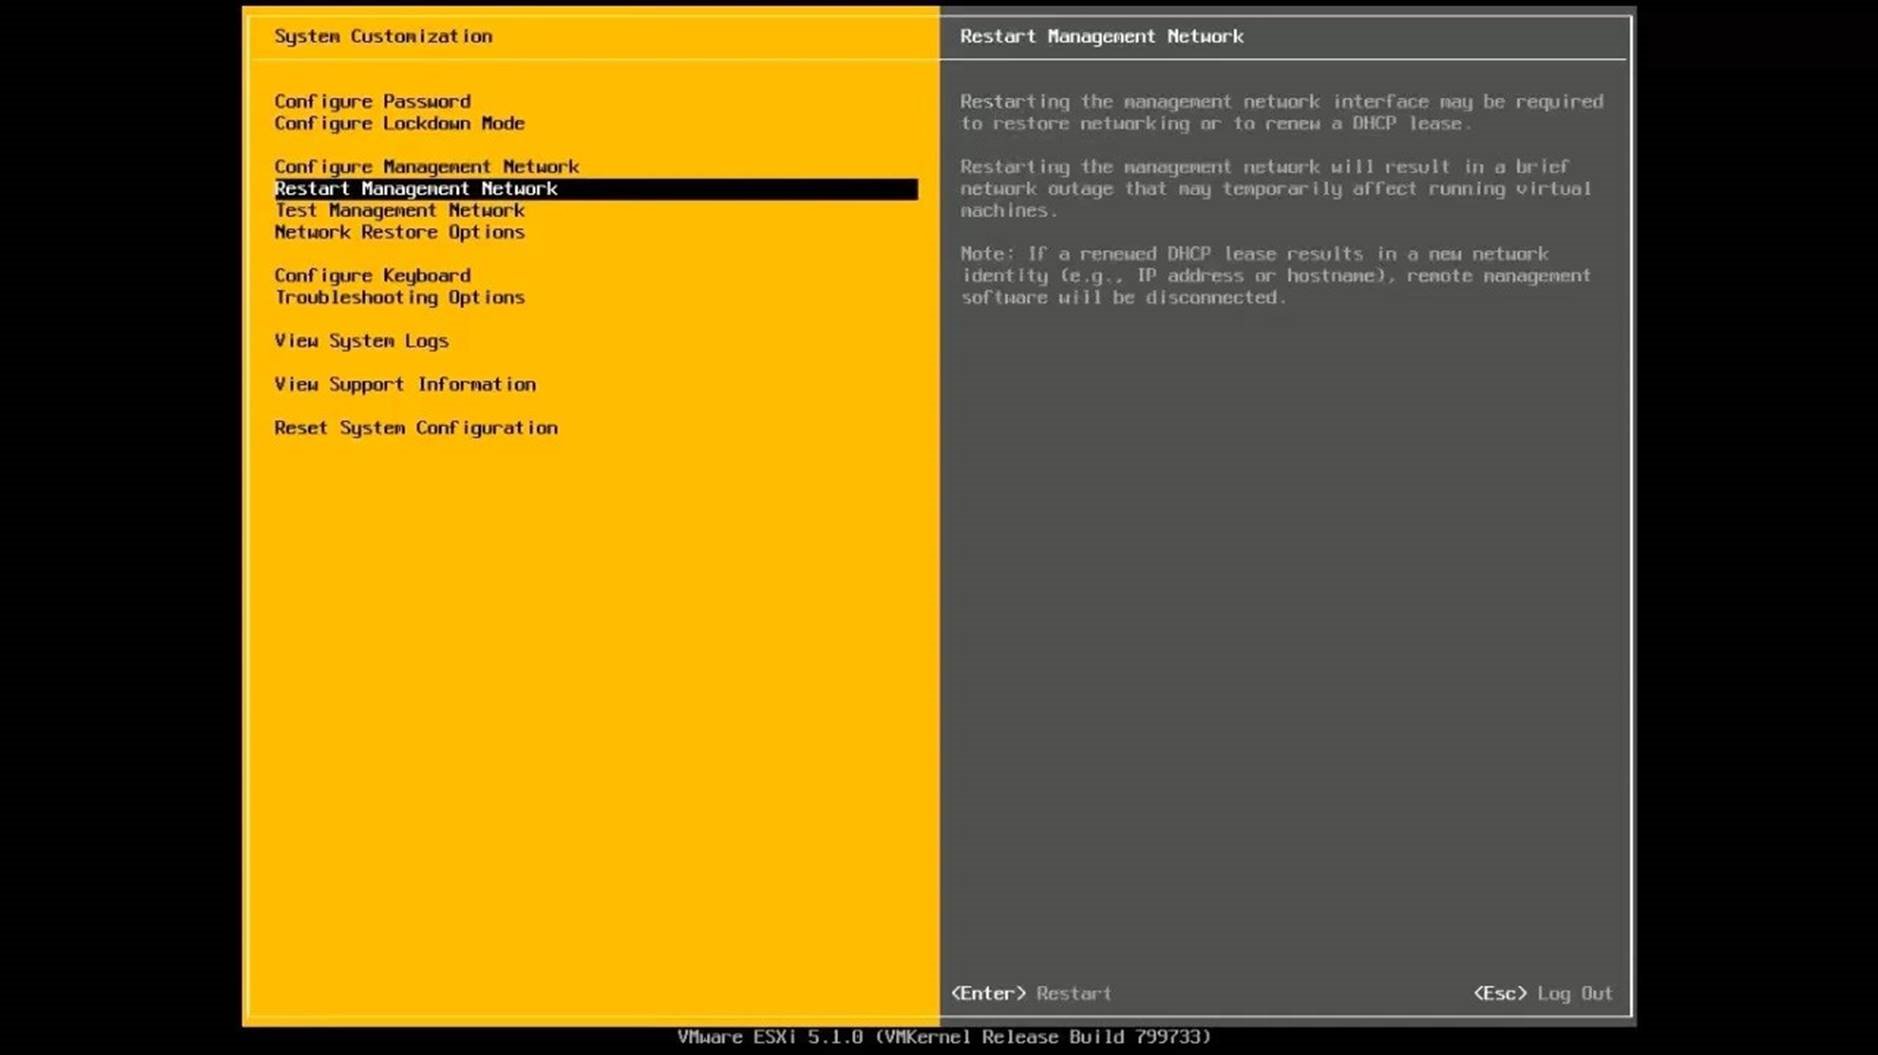
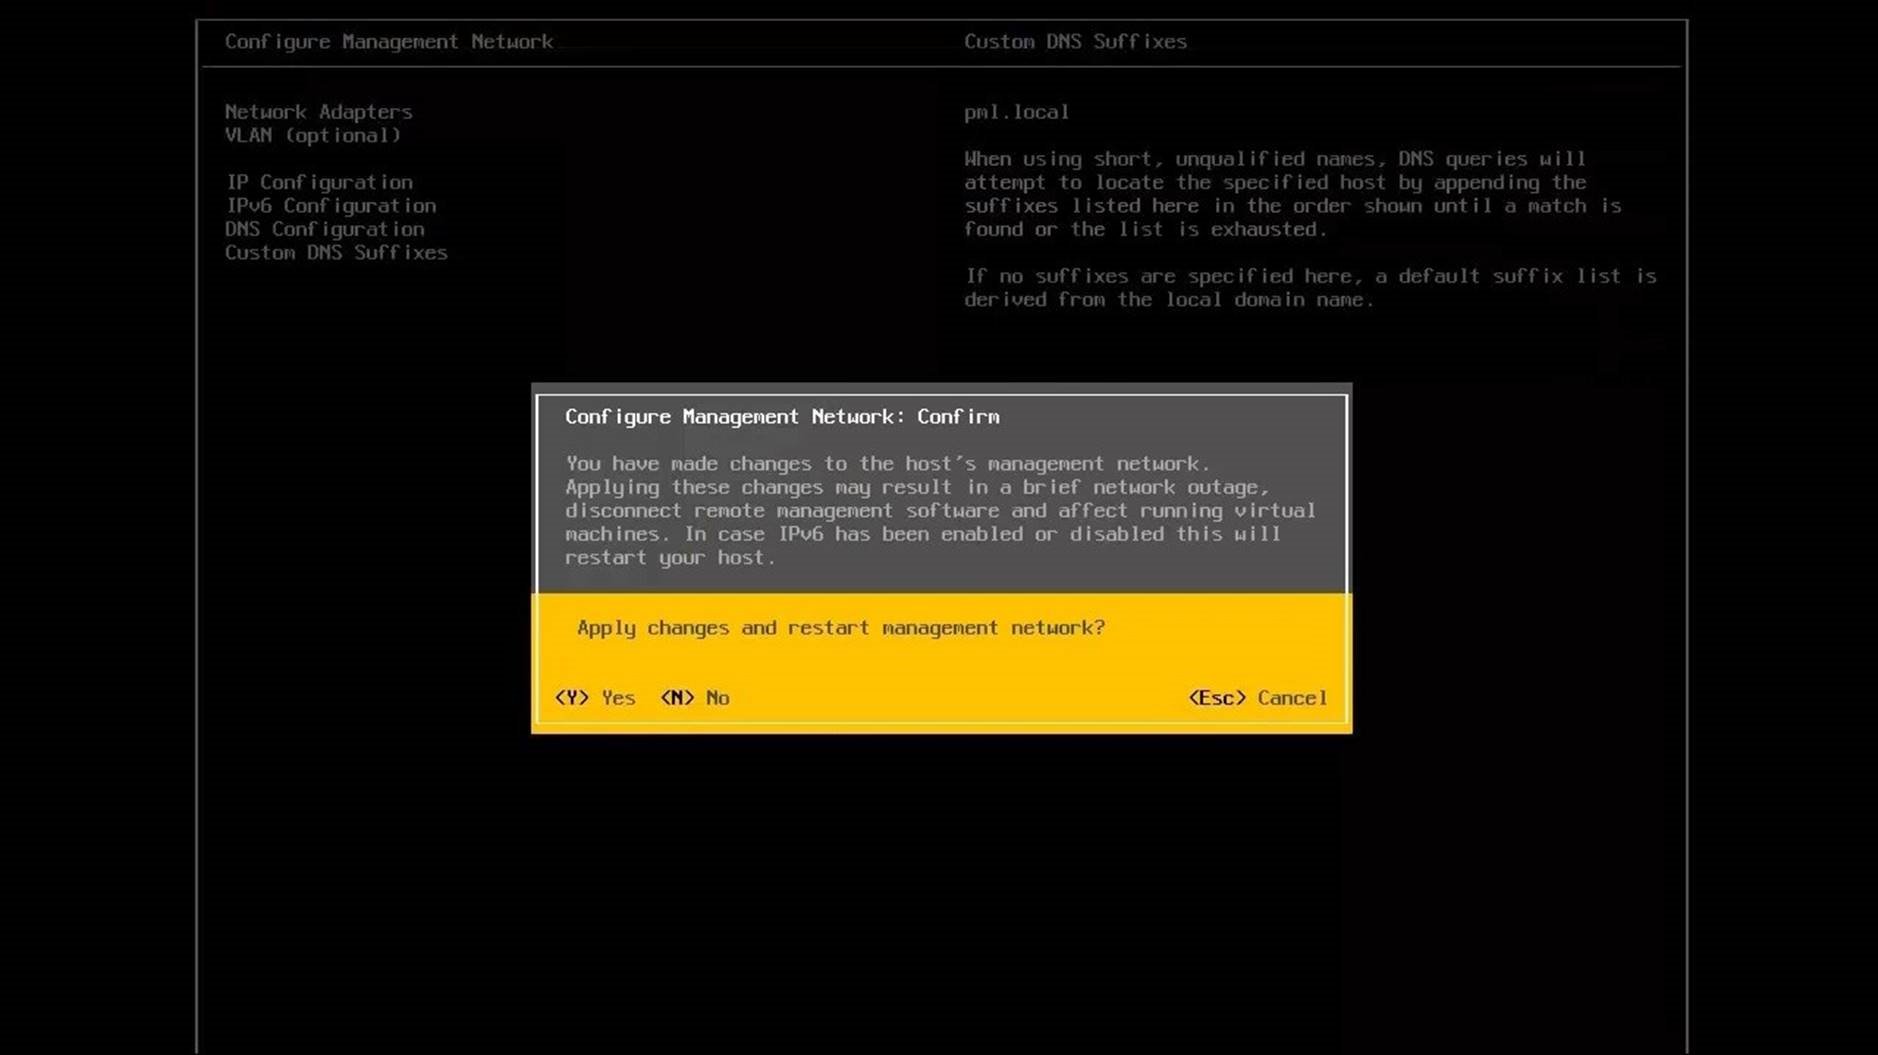
Choose [Restart the Management Network] from the list and select [Restart] to confirm.
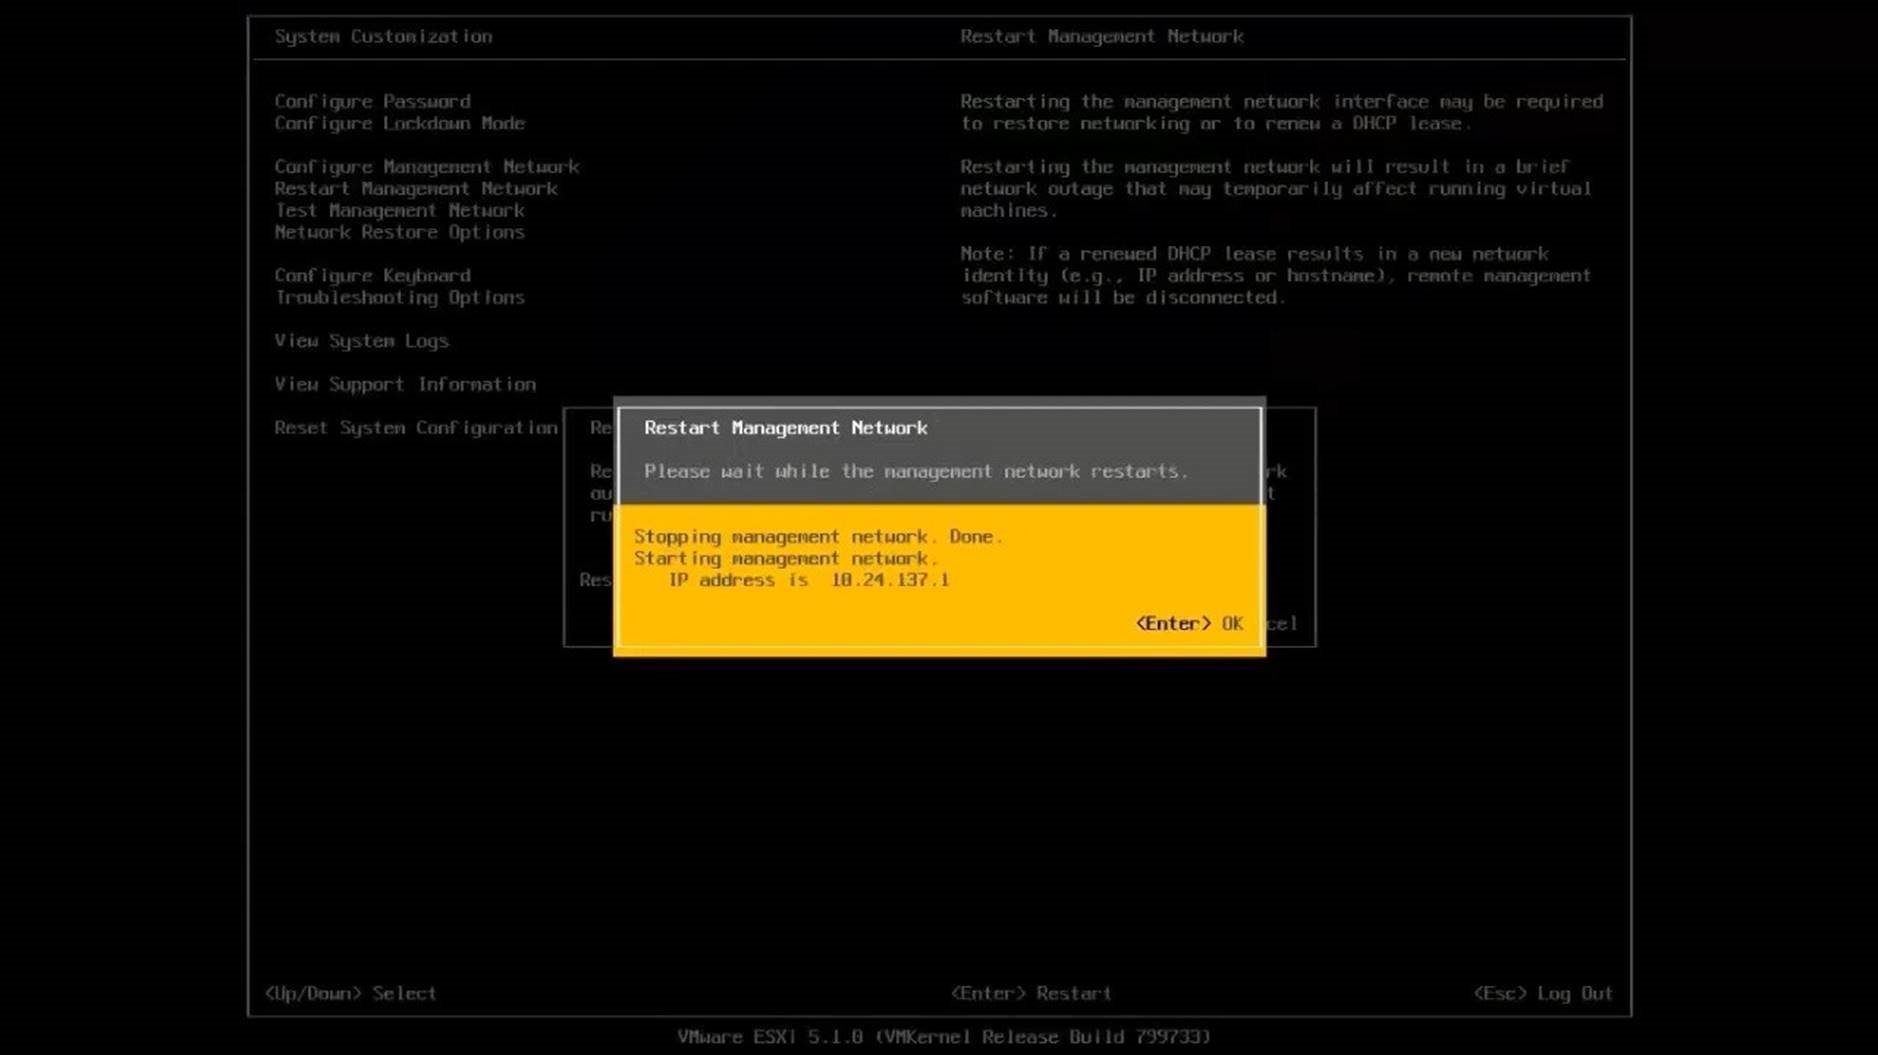
Select [OK] to close the Restart Management Network window and proceed.
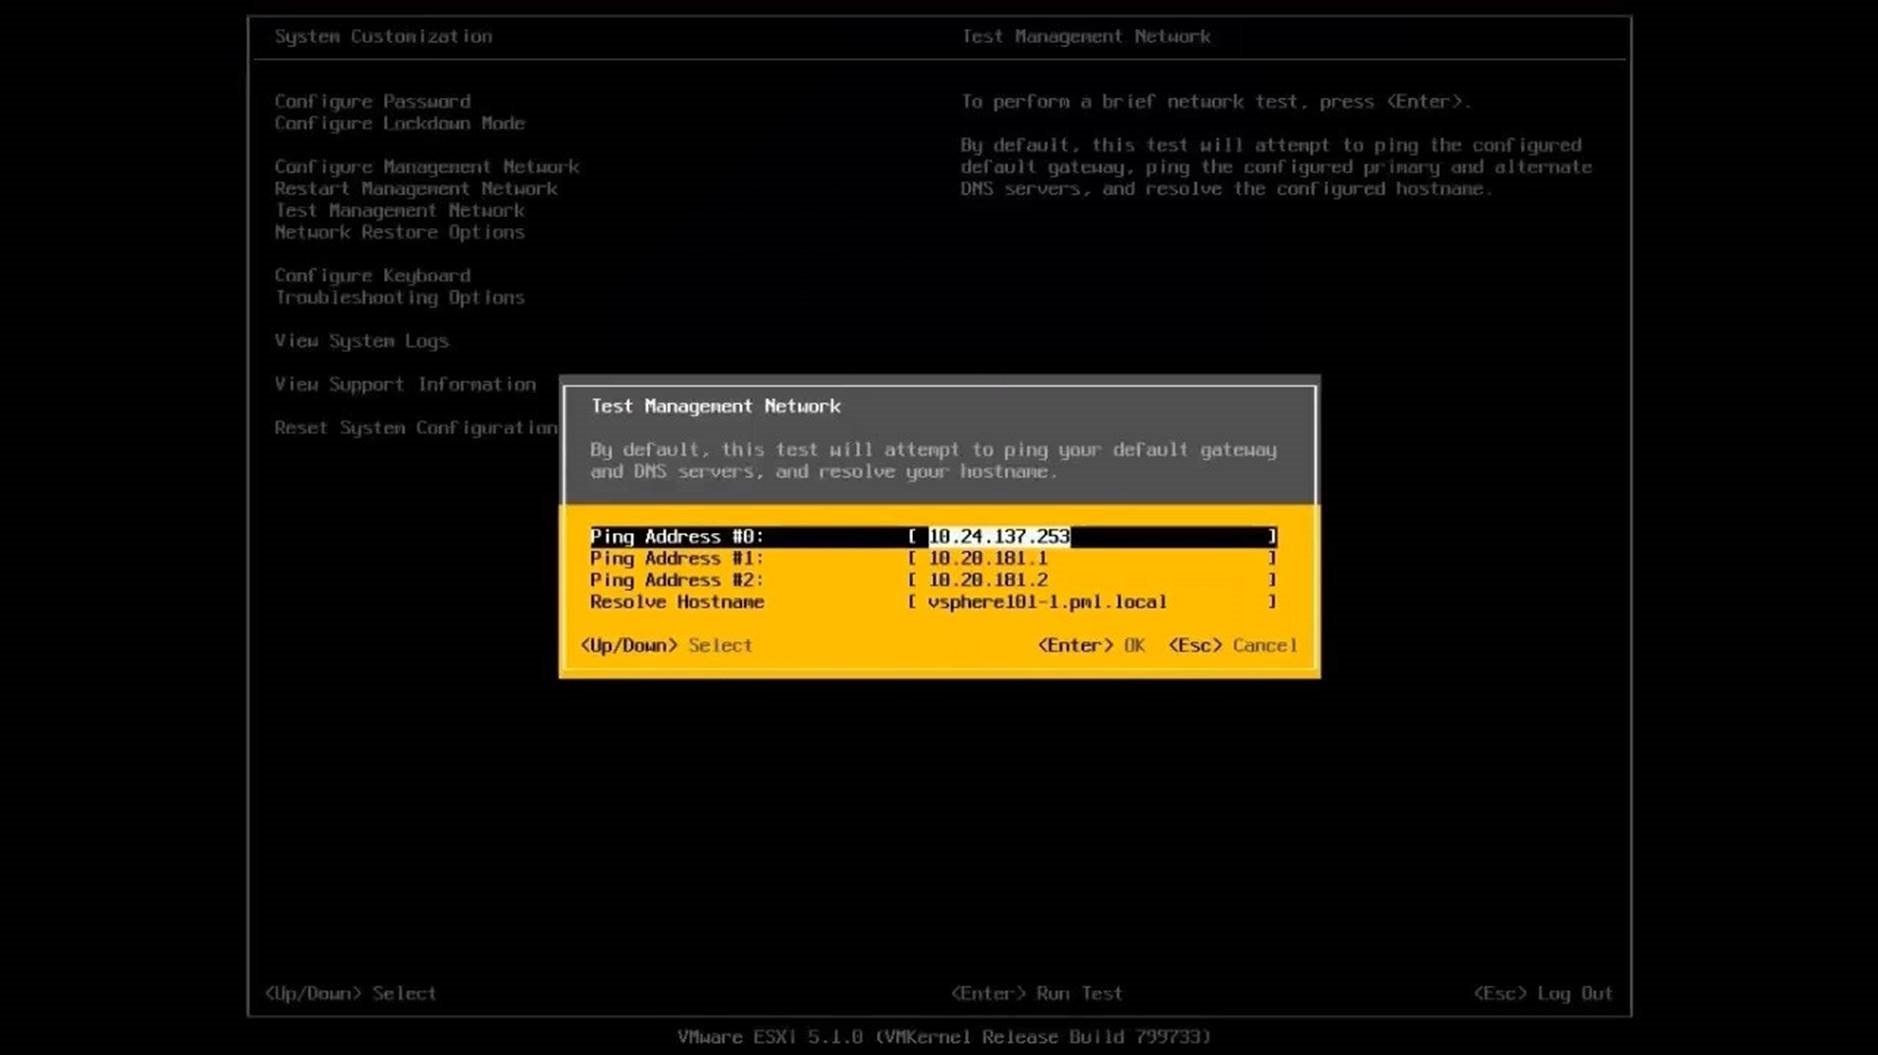
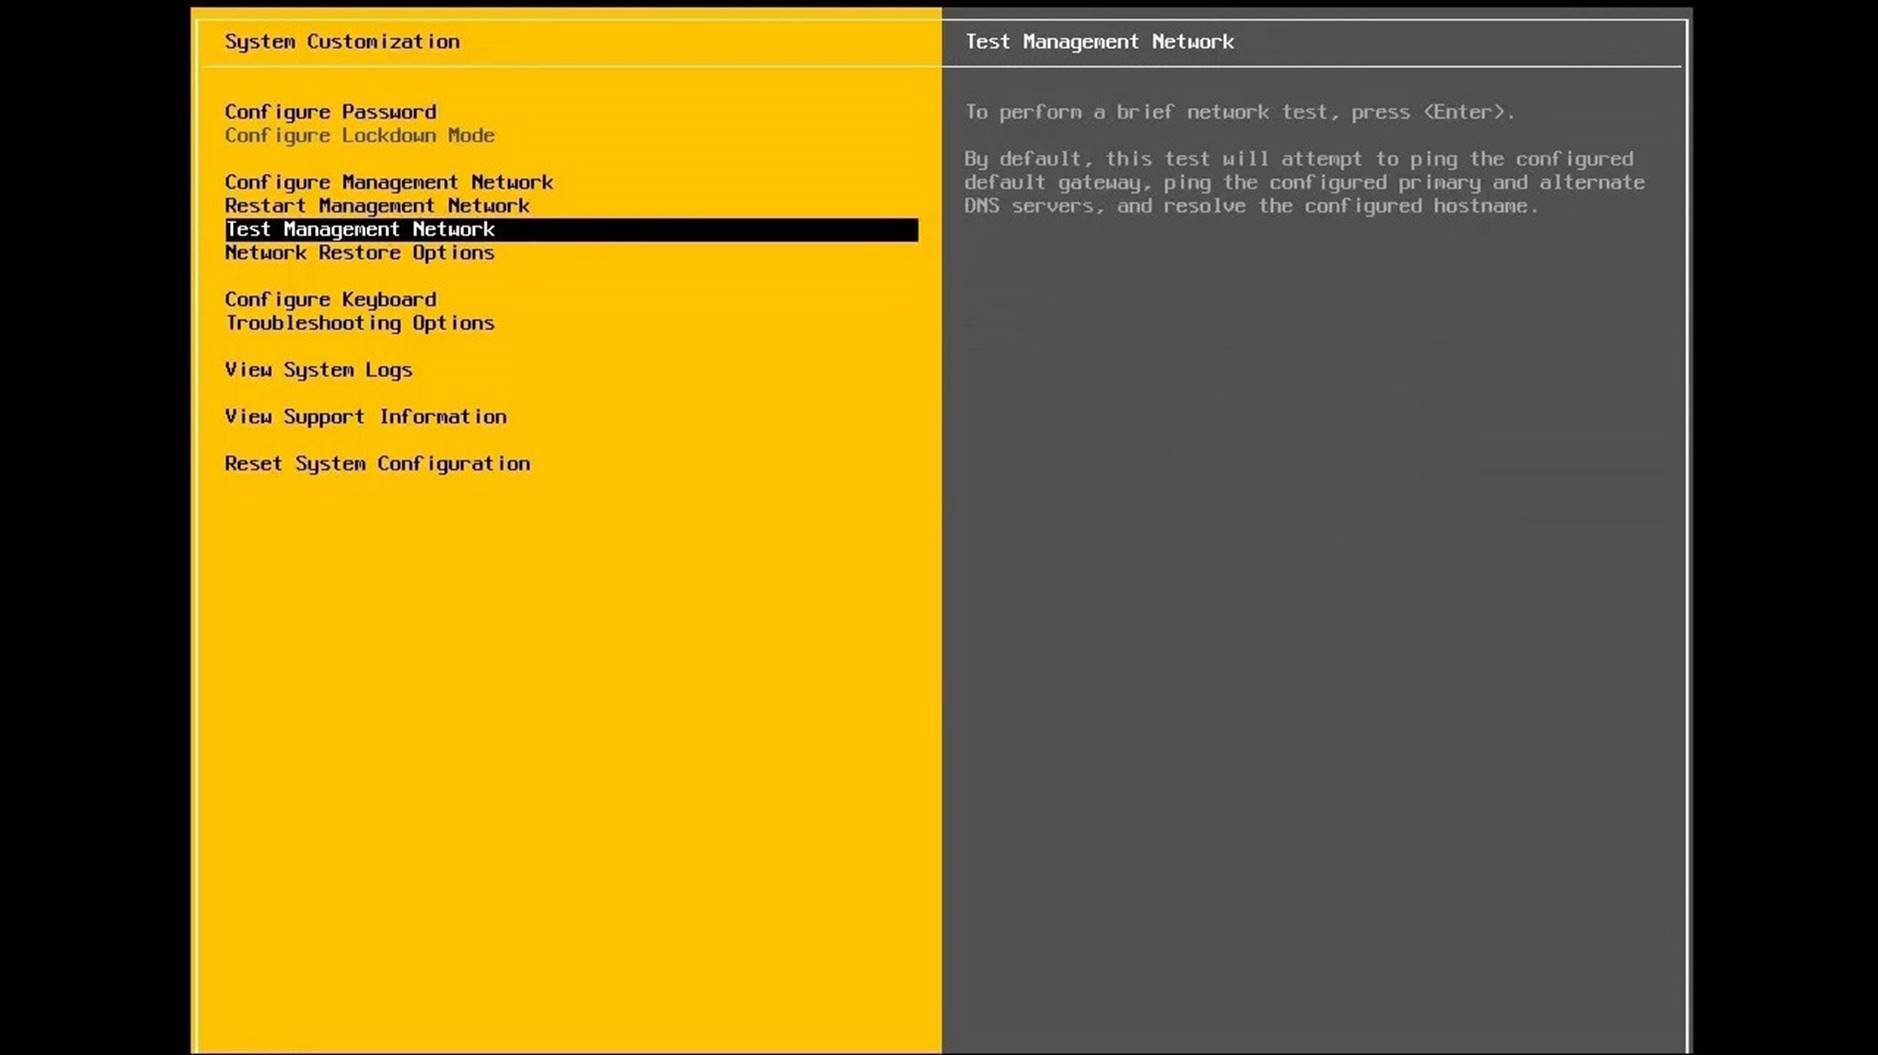
Choose [Test Management Network] from the list. It pings the local gateway along with the IP addresses of the DNS server. Select [OK] to continue.
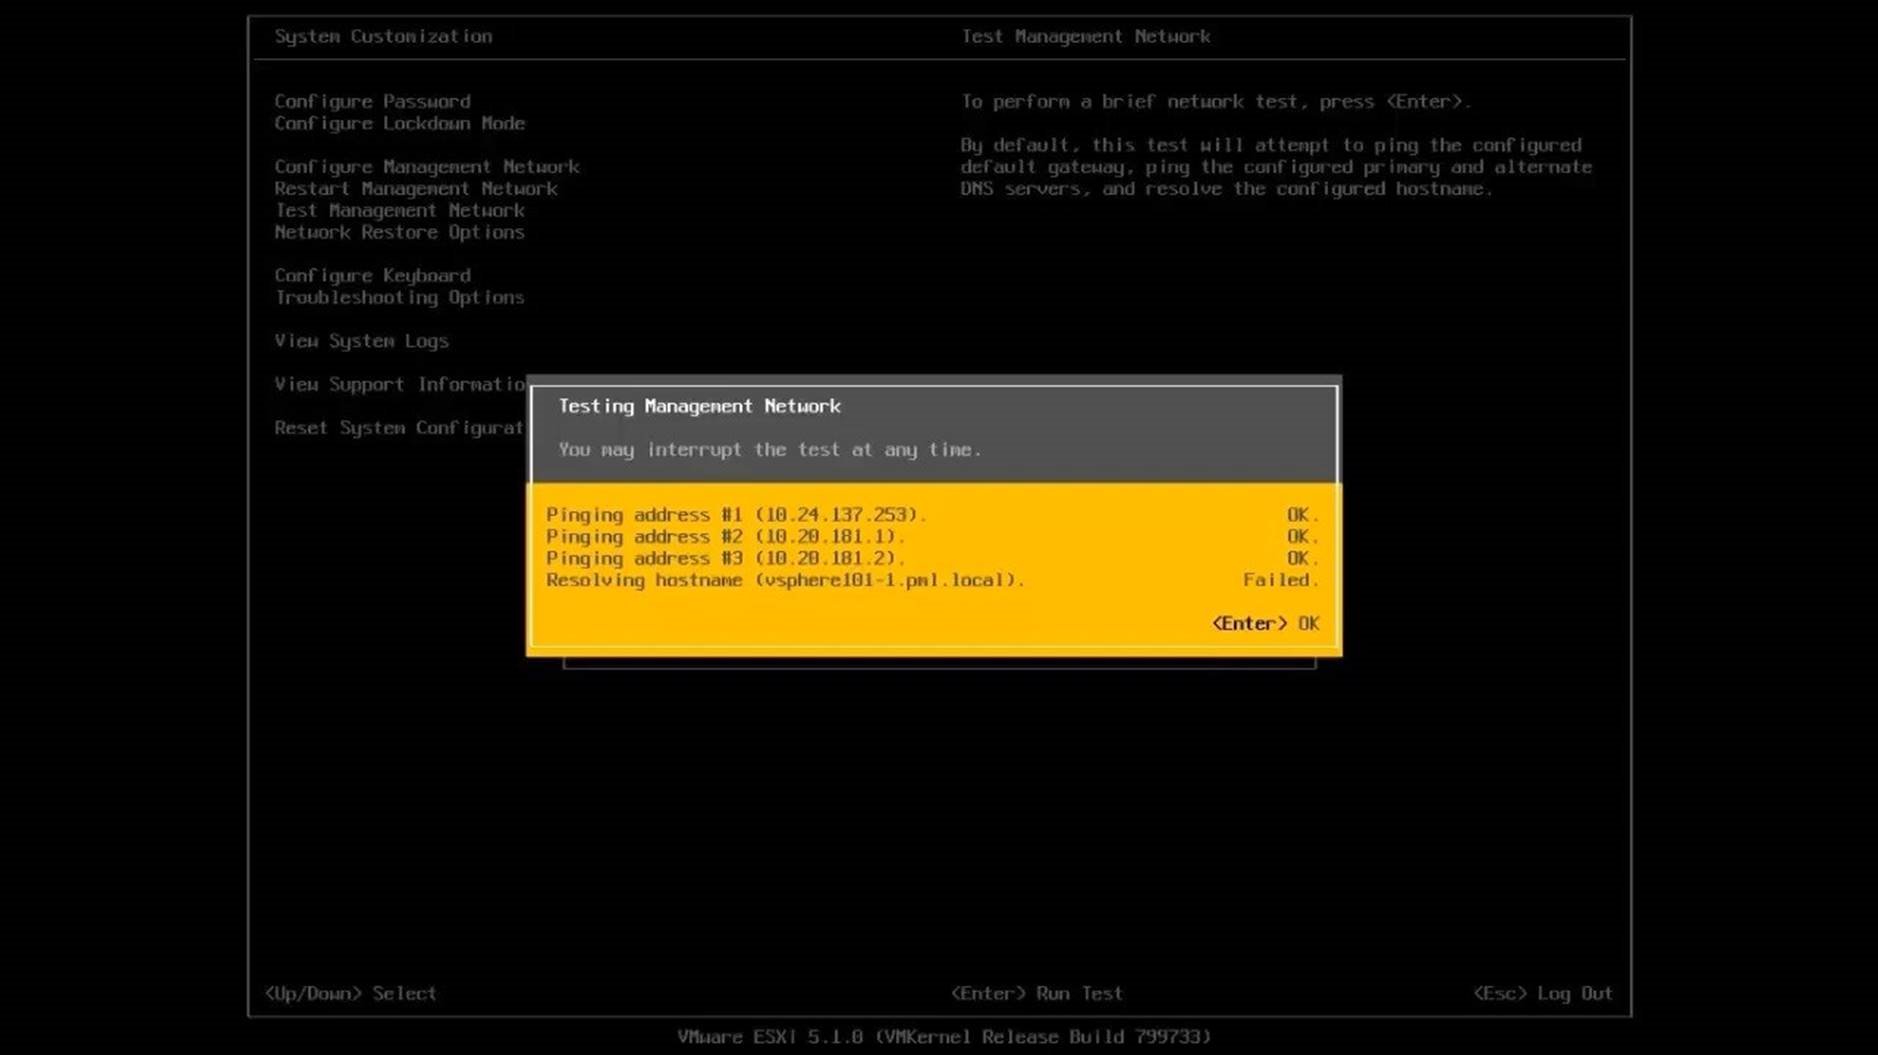
It automatically performs a resolution on the hostname. Select [OK] to close this window and go back to the home screen to view options to restore the network.
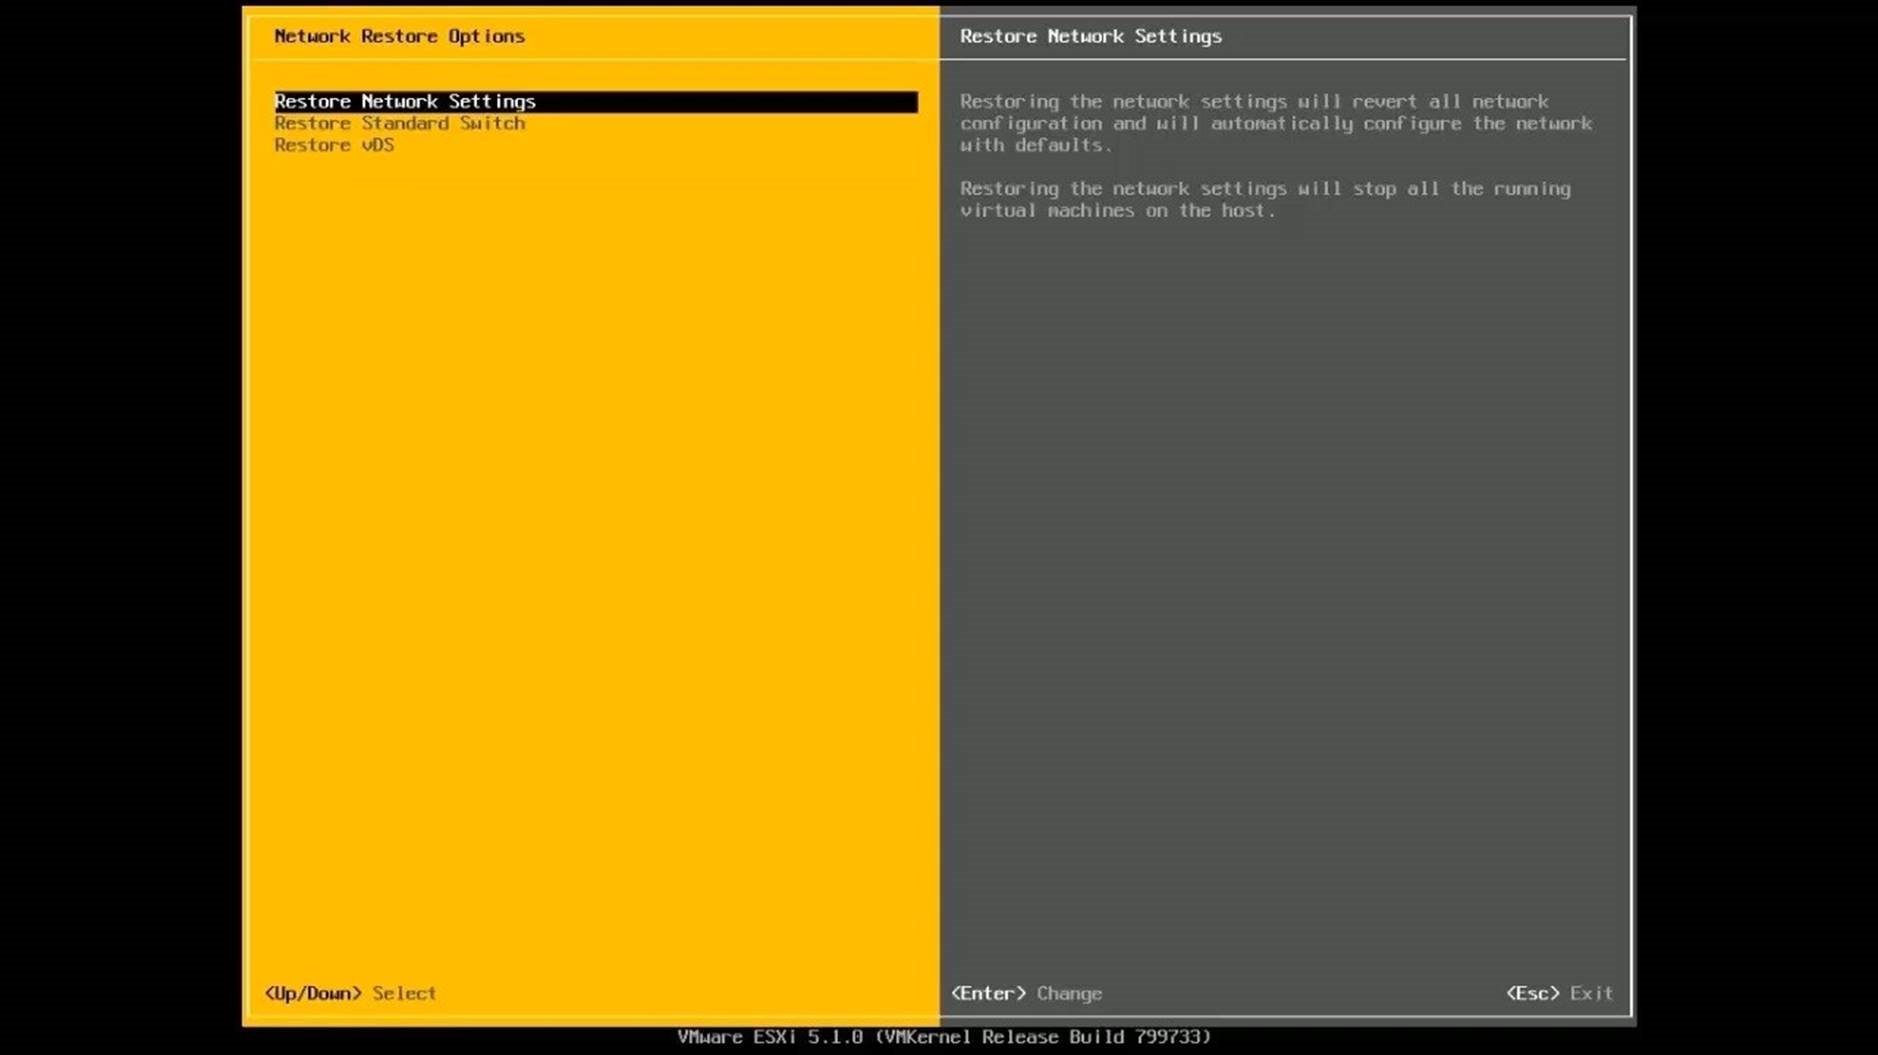
Choose [Network Restore Options]. It helps restore connectivity when a host gets disconnected from the network. Select [Change] to customize settings and [Exit] to go back.
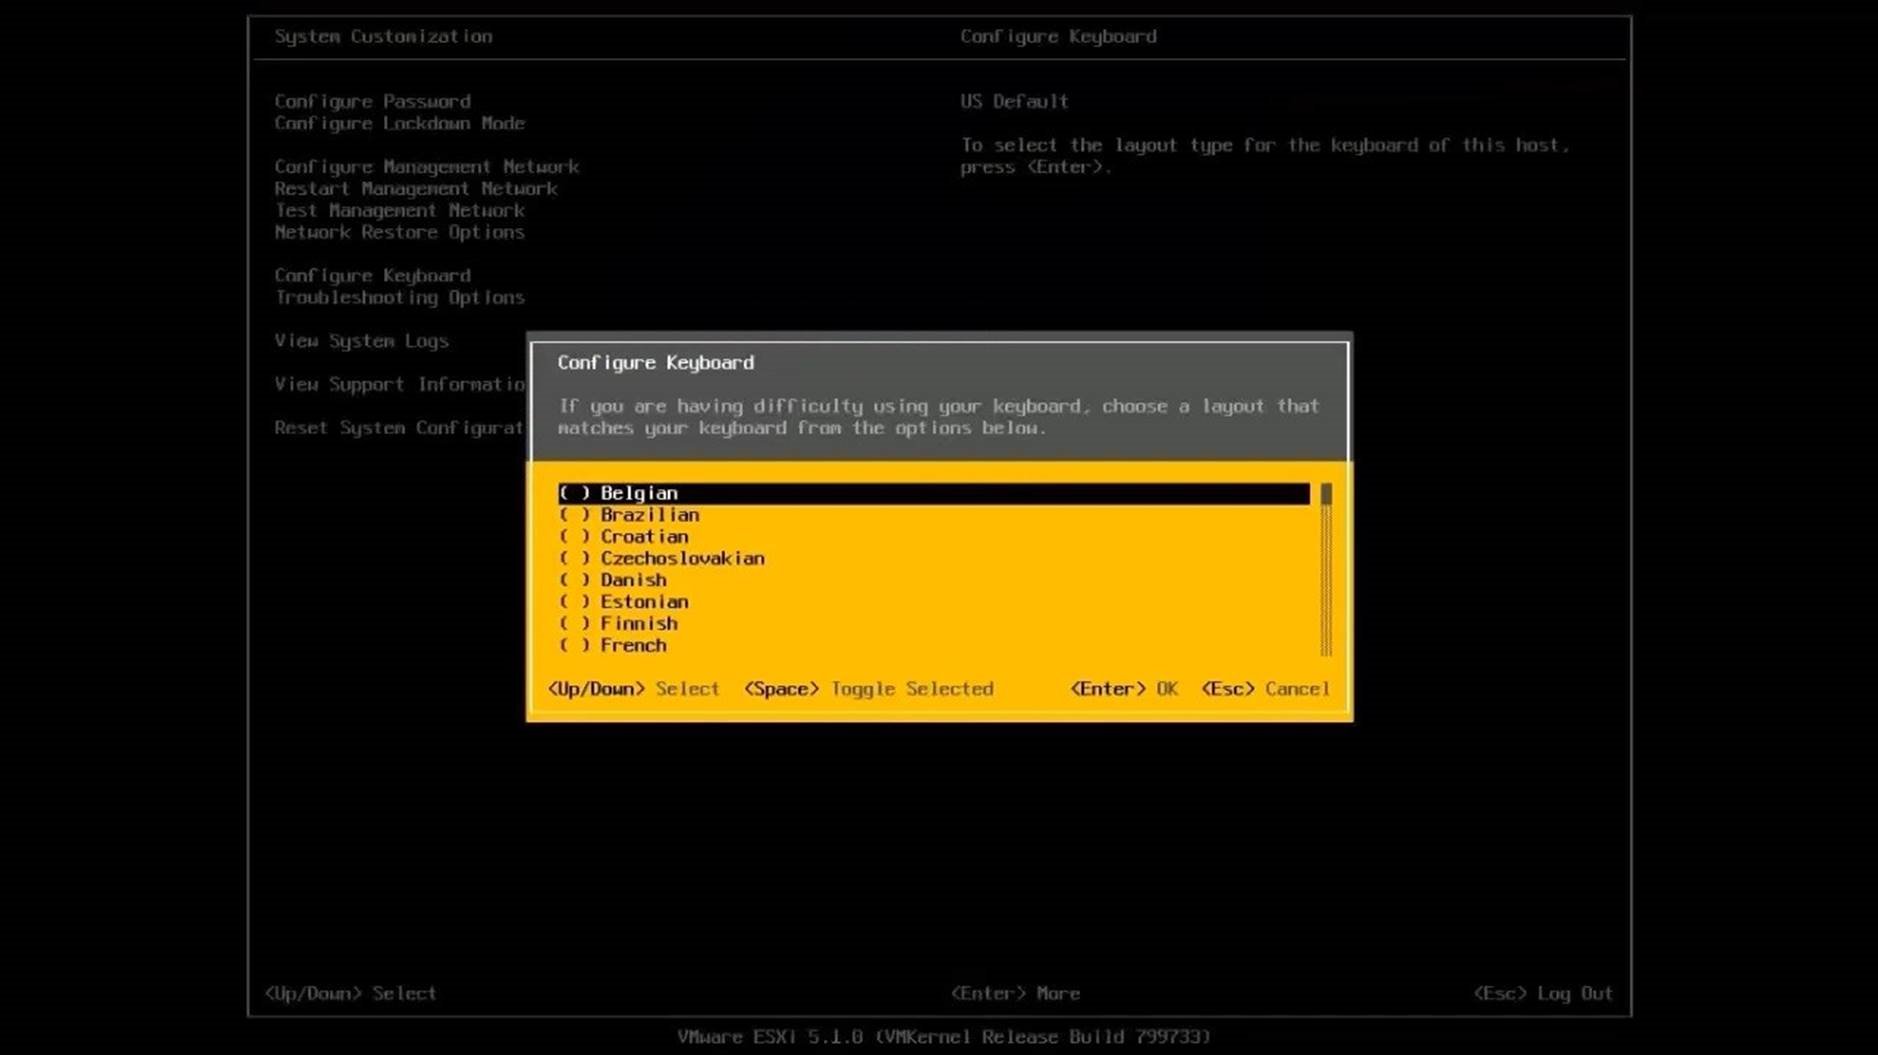
Select [Configure Keyboard]. Choose the desired layout and select [OK].
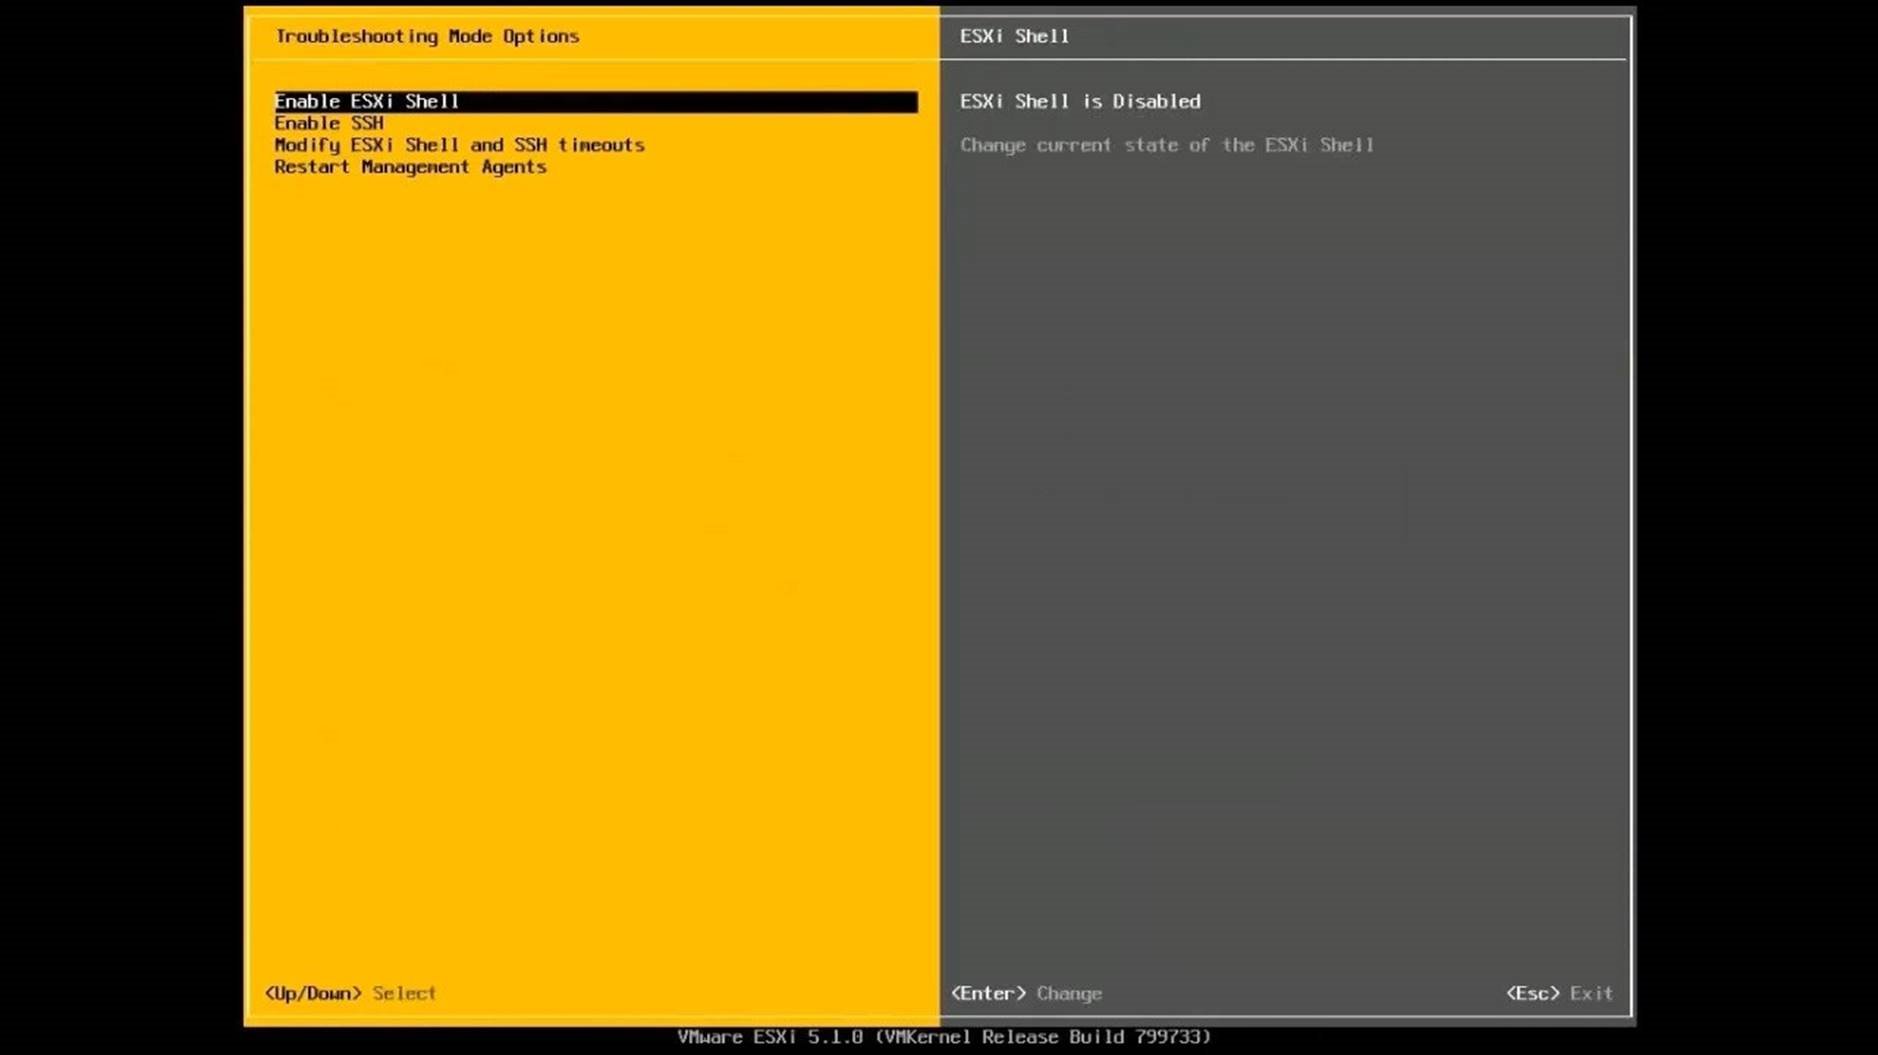
Select [Troubleshooting Options] from the list. In this screen, you can enable/disable ESXi shell and SSH service on the host.
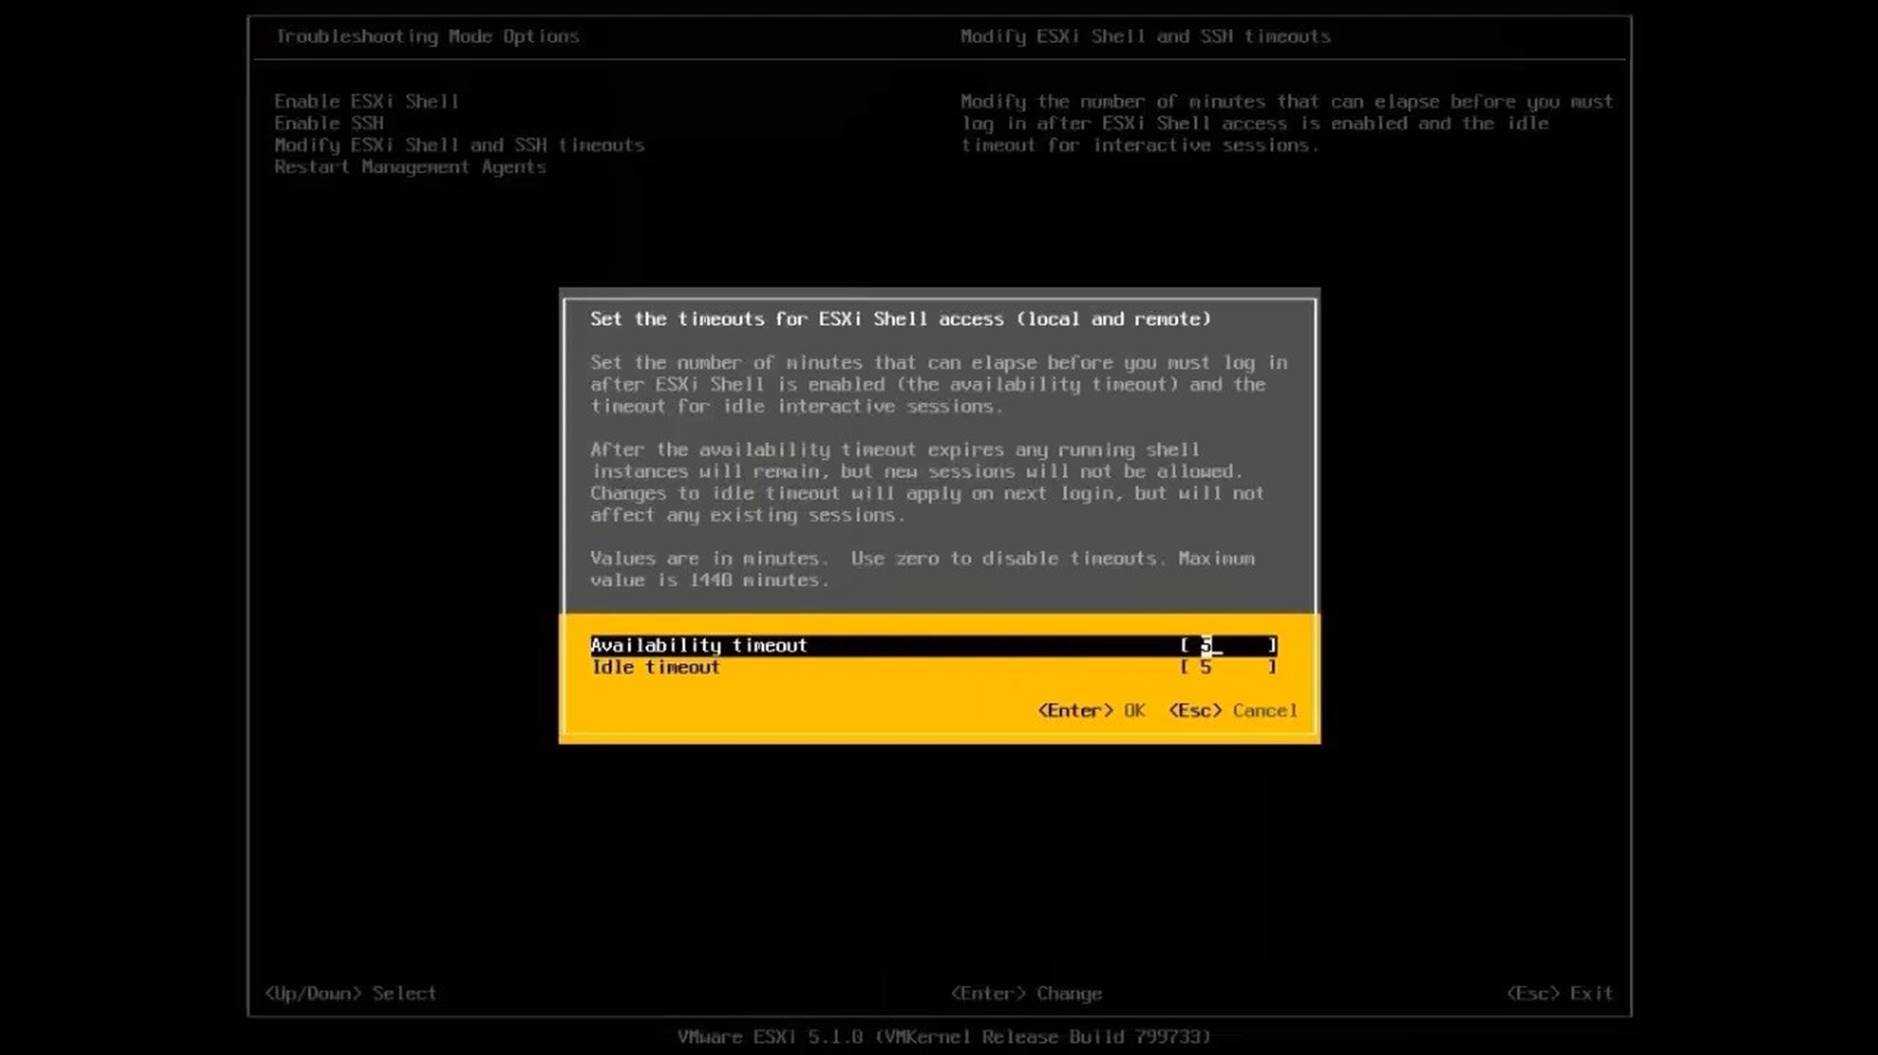
Select [Modify ESXi Shell and SSH Timeouts]. Set timeouts to ensure that the services are not left on indefinitely, and to automatically terminate unattended shell sessions. Select [OK] to continue.
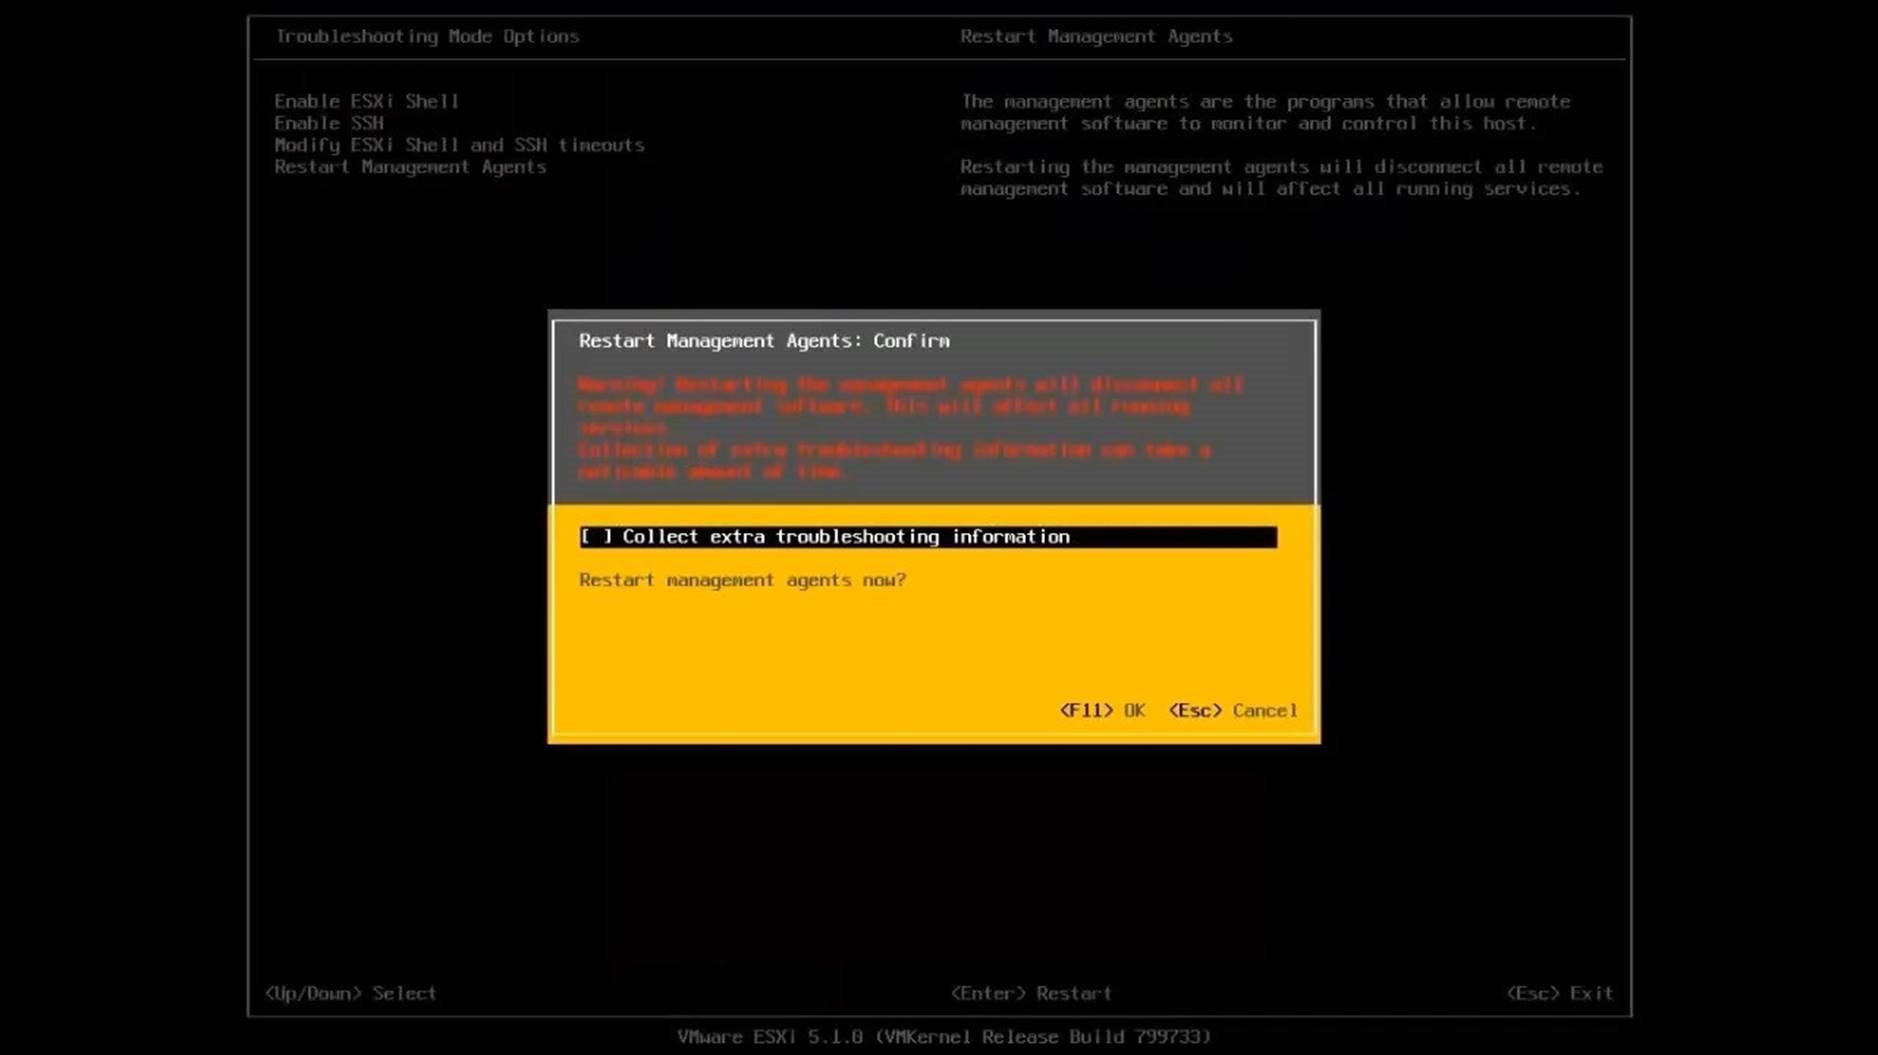
Select [Restart Management Agents]. Select [OK] to confirm or [Cancel] to abort and go back to the home screen.
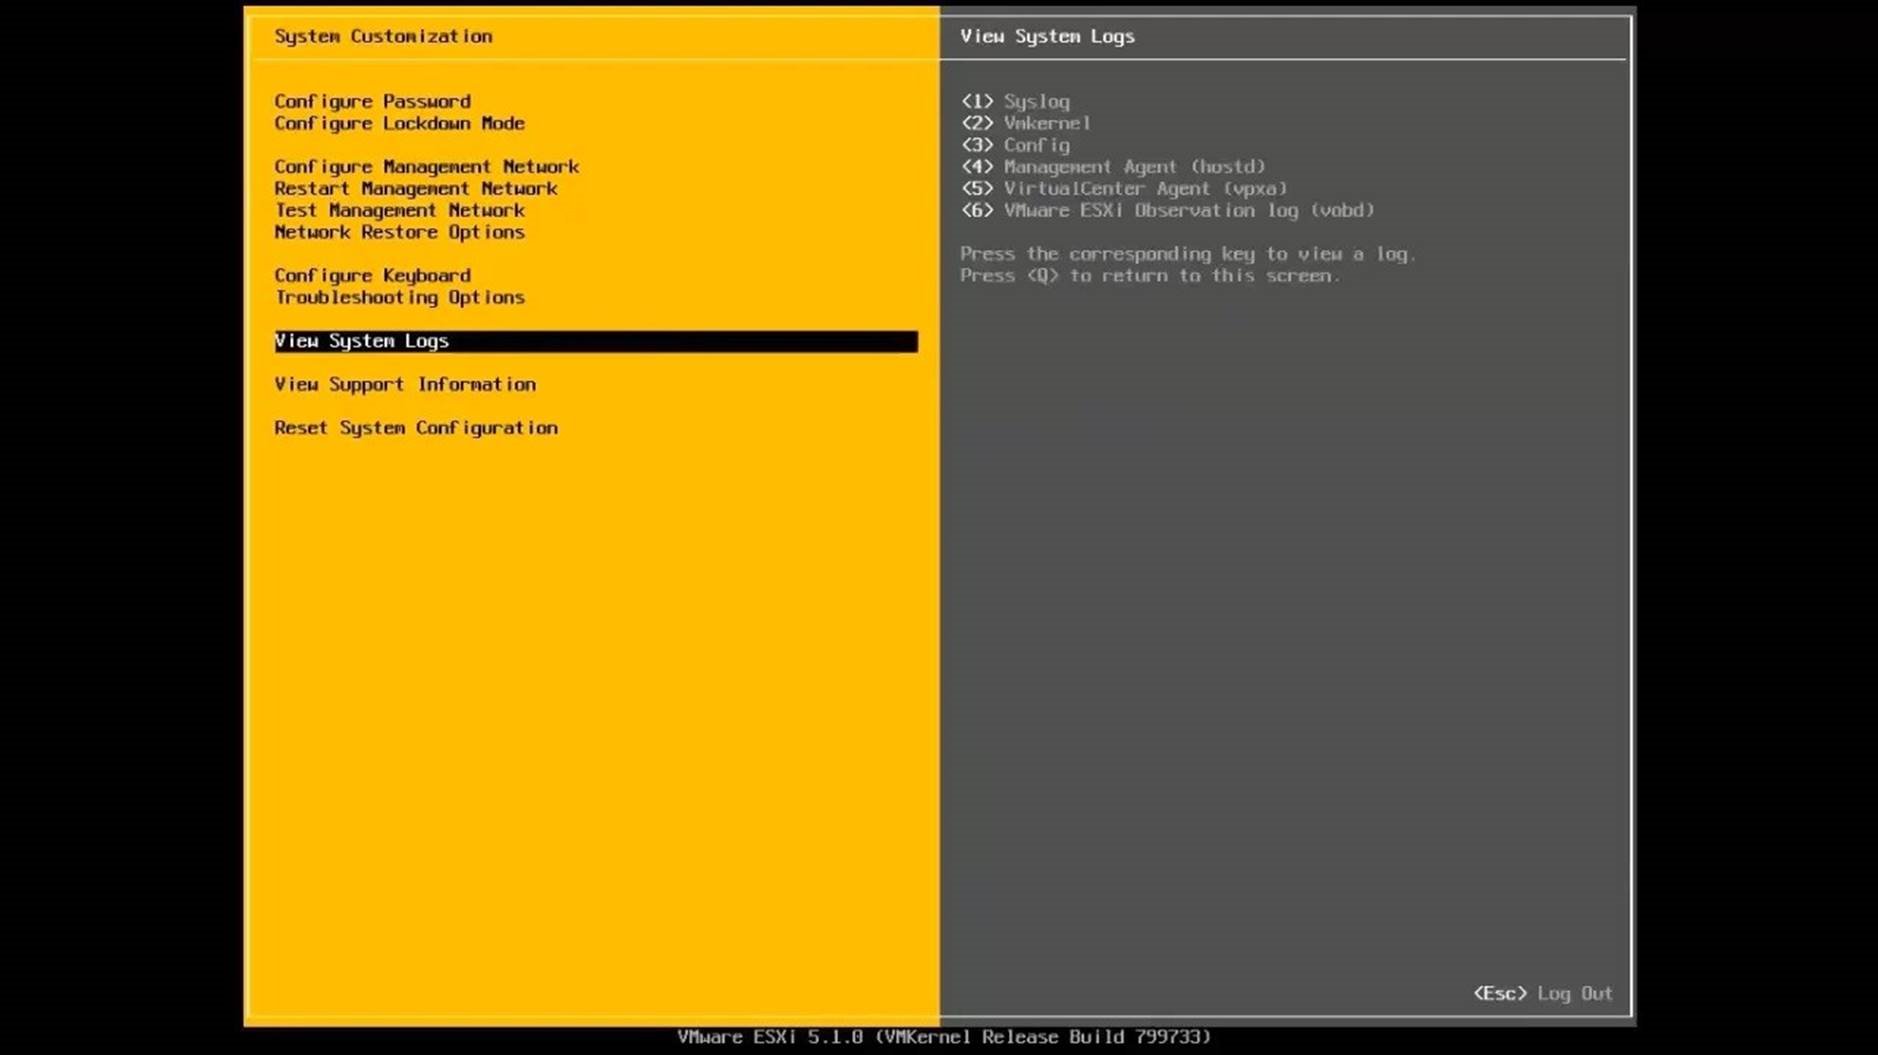
On the System Customization screen, select [Host Logs] to view log details on the right window pane.
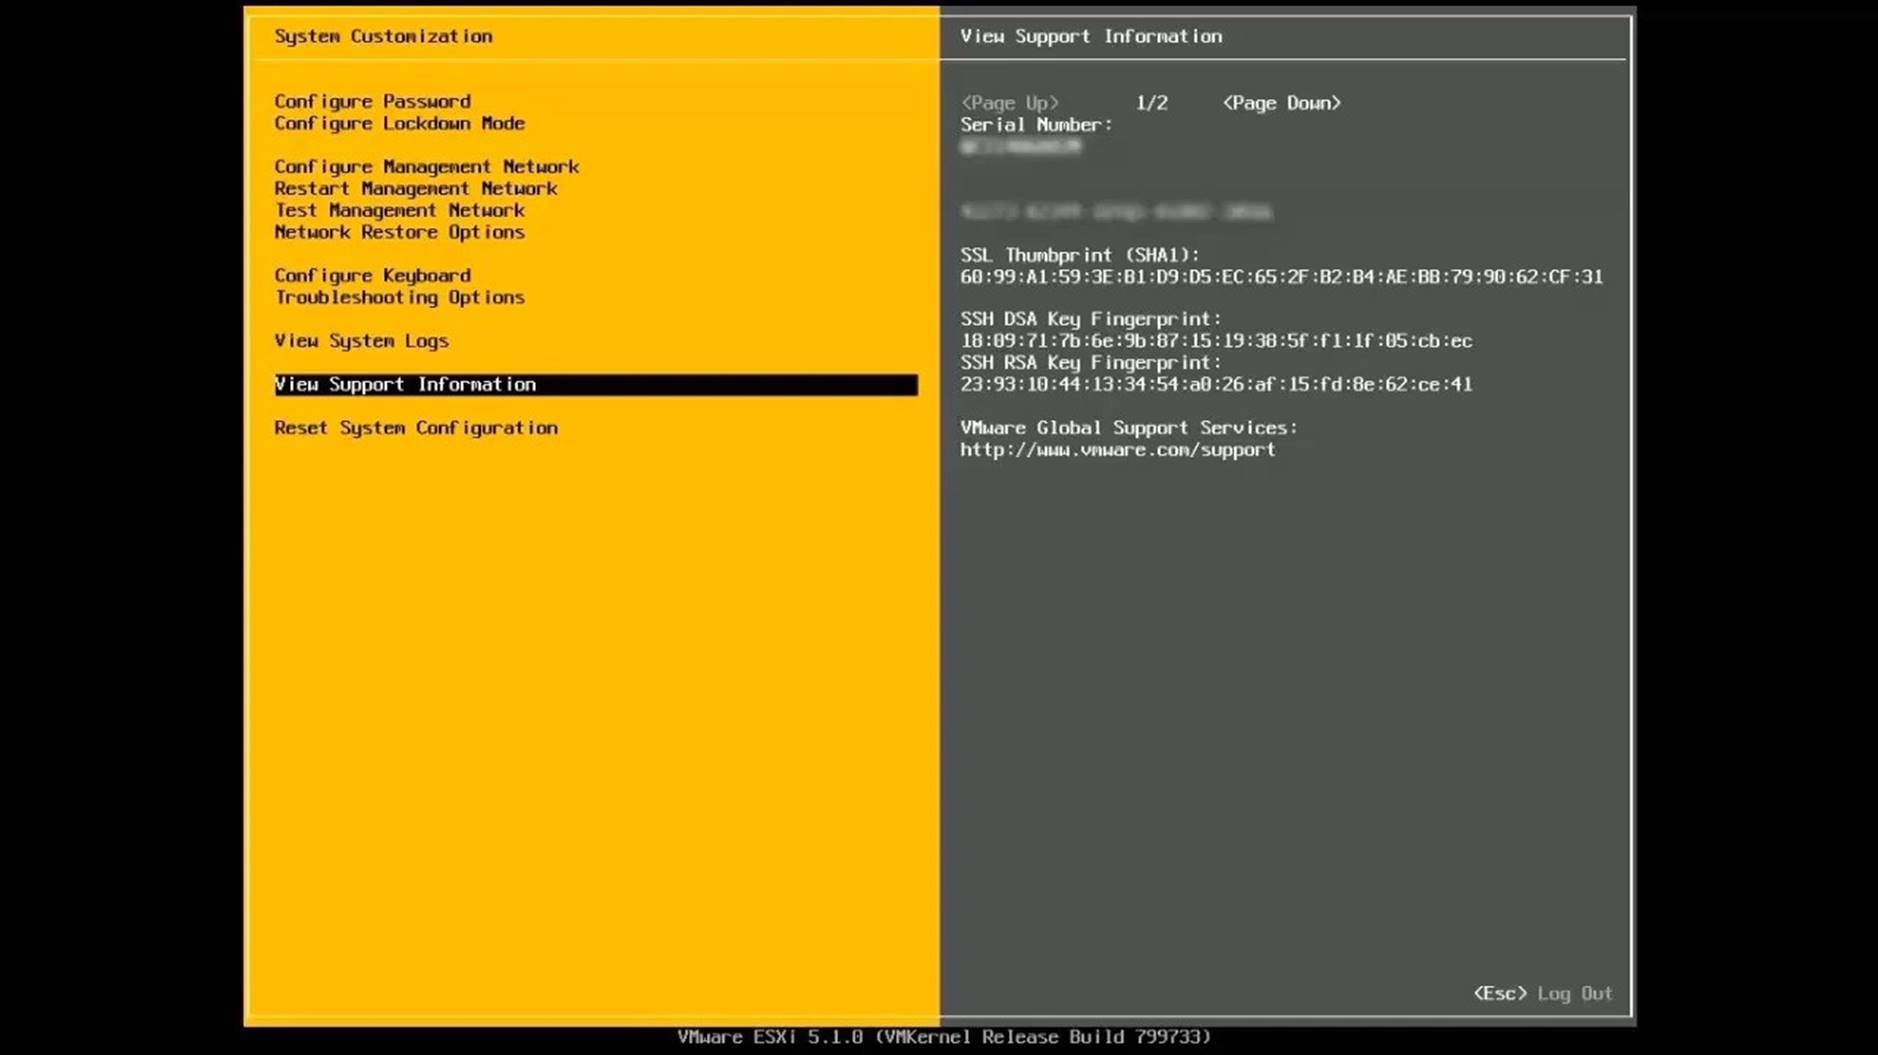
Select [View Support Information] from the list. This option presents details about the host serial number, license key, SSL and SSH keys on the right window pane.
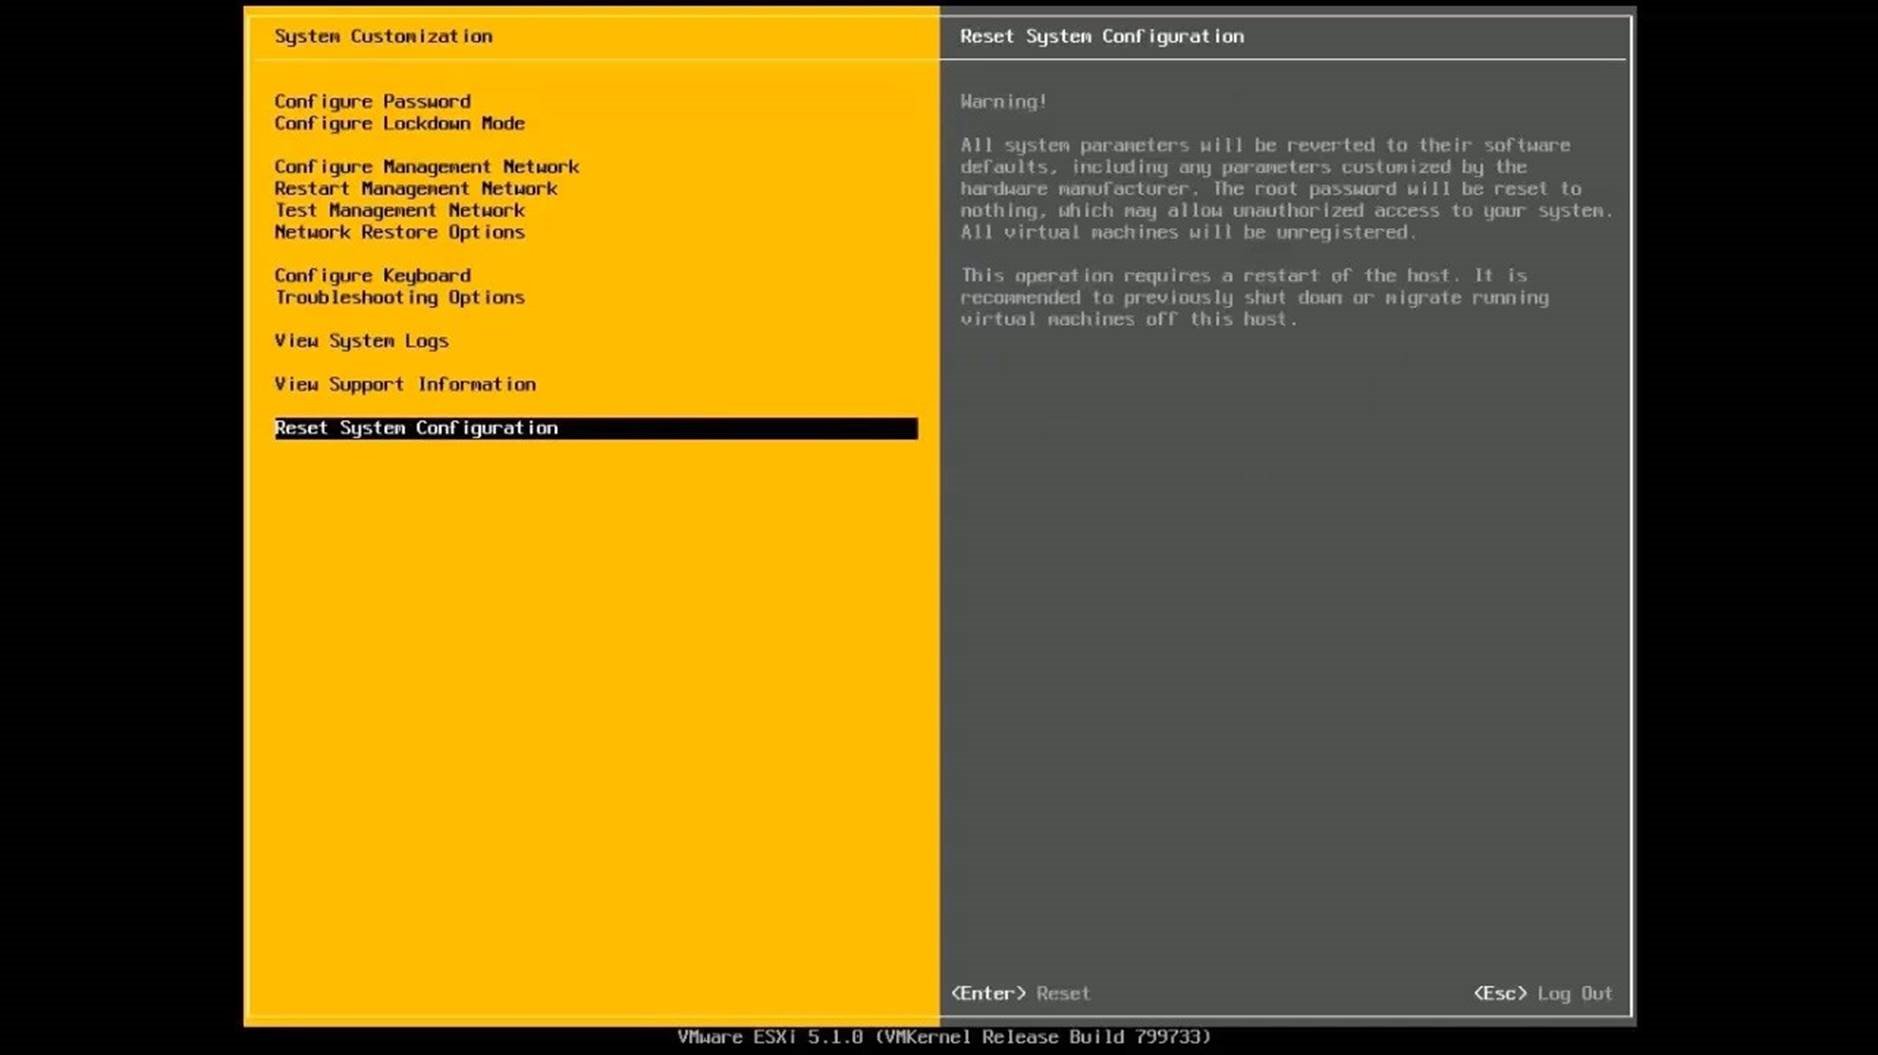
Select [Reset System Configuration] from the list to reset all the changes made. Select [Log Out] to go back.
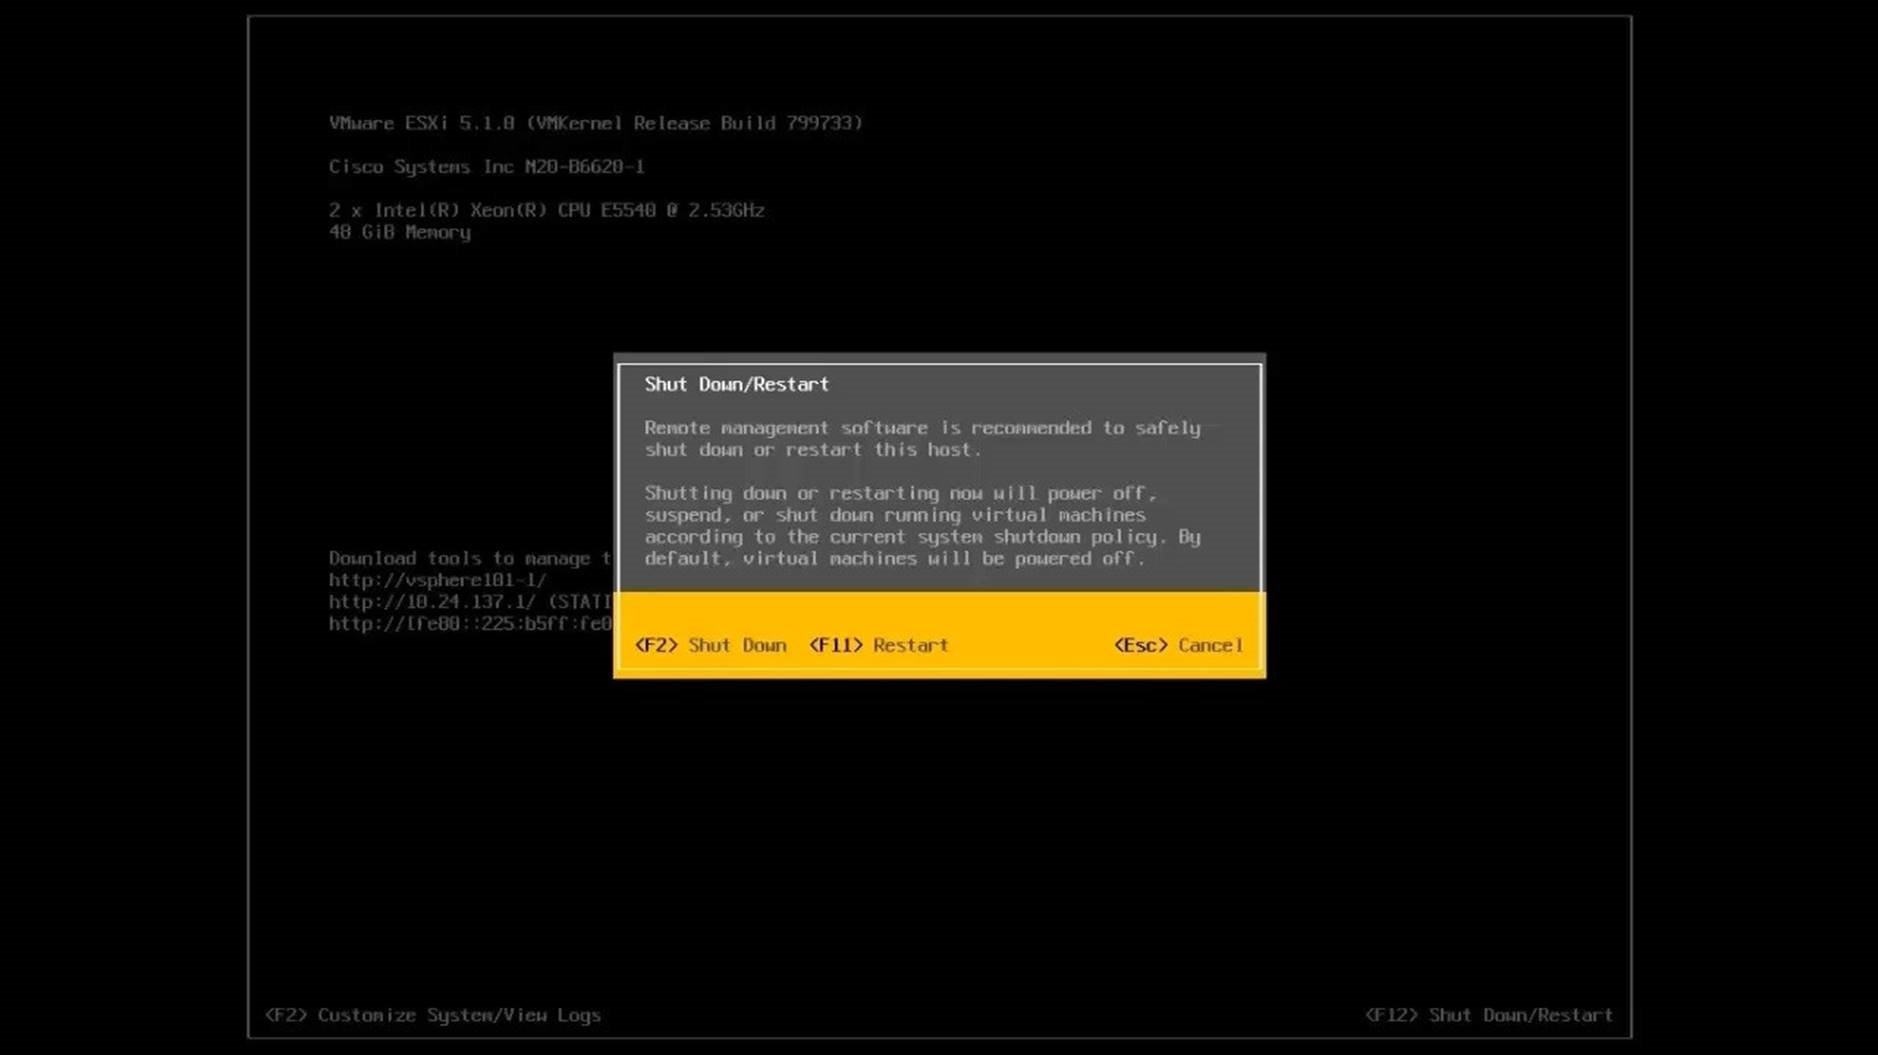
Select [Shut Down/Restart].
Login using the root account. Select [OK].
This concludes the walkthrough of managing the ESXi host using Direct
Control User Interface.Select the next walkthrough of your choice using the navigation panel.
ESXi Install
This walkthrough provides a step-by-step overview on how to install ESXi on a vSphere host. Use the arrow keys to navigate through the screens.
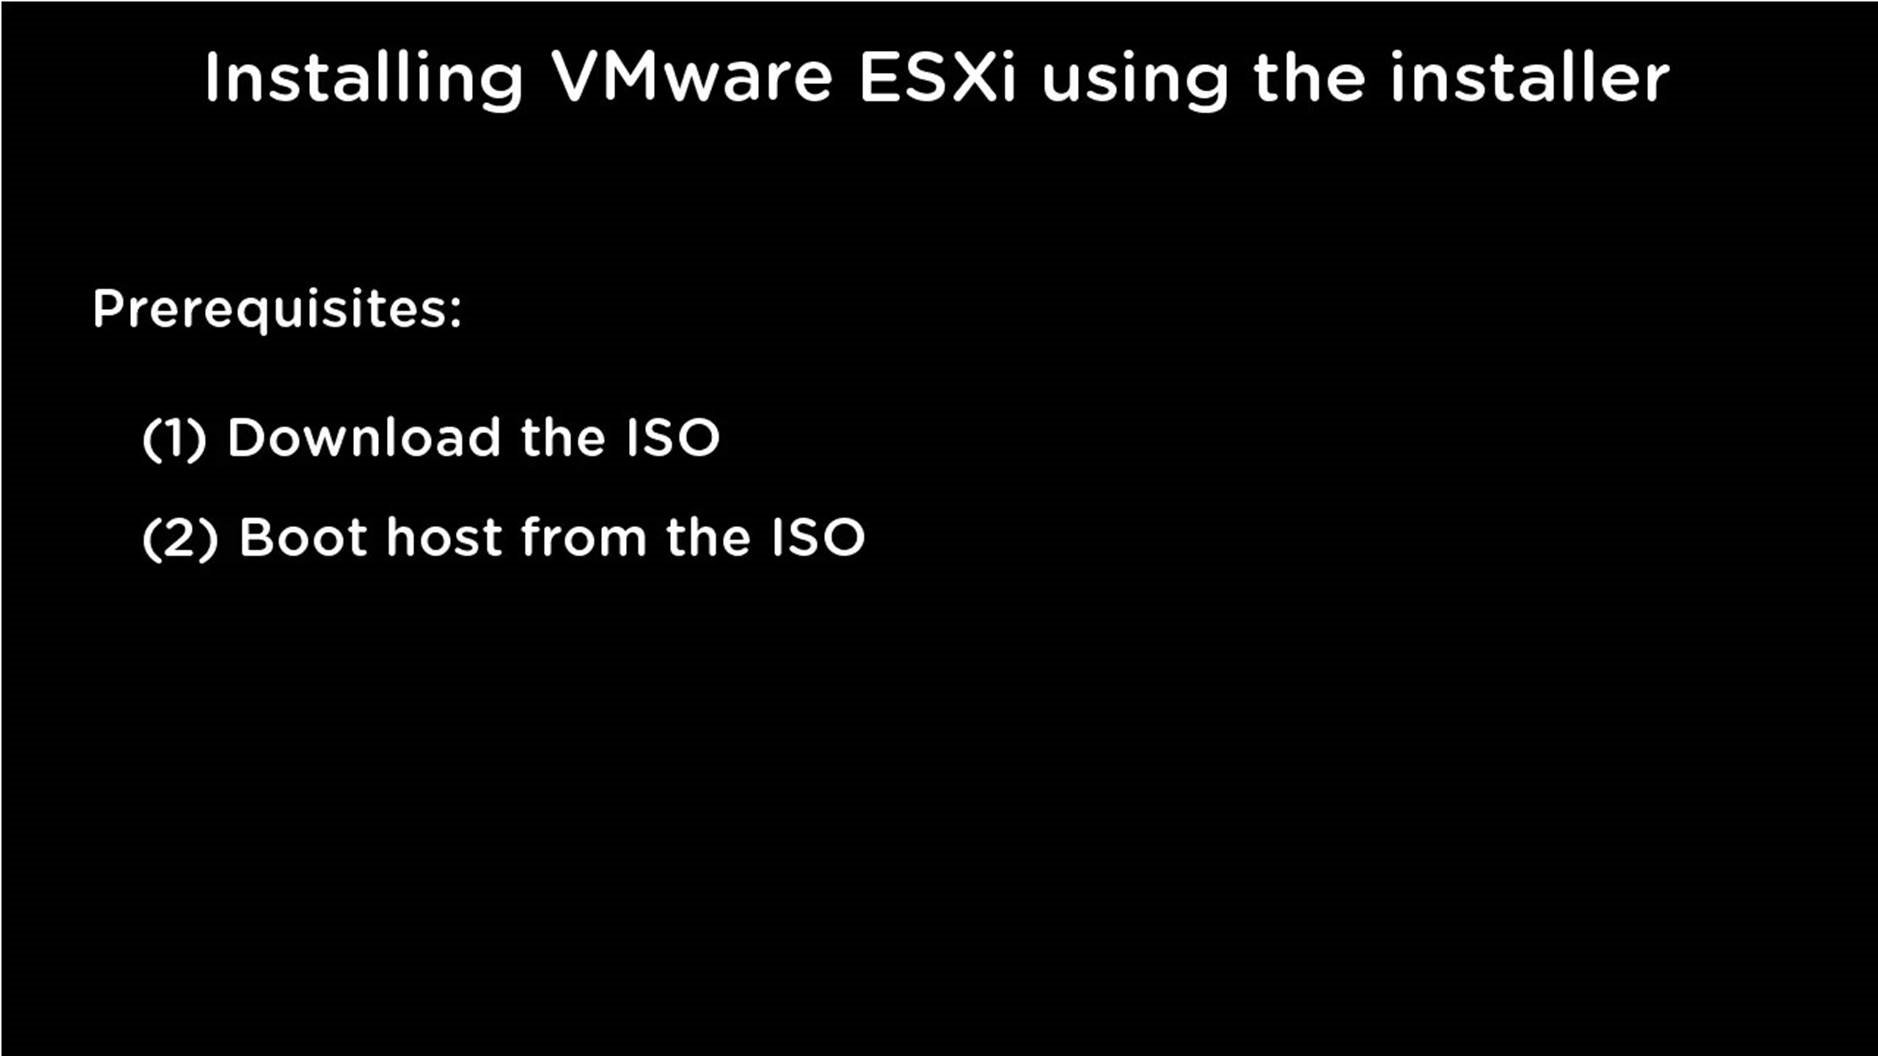
Begin by downloading the VMware ESXi installation media and inserting/mounting the ISO/Image into the server's CD-ROM/DVD drive.
Configure the host's BIOS to boot from CD-ROM/DVD and boot the host.
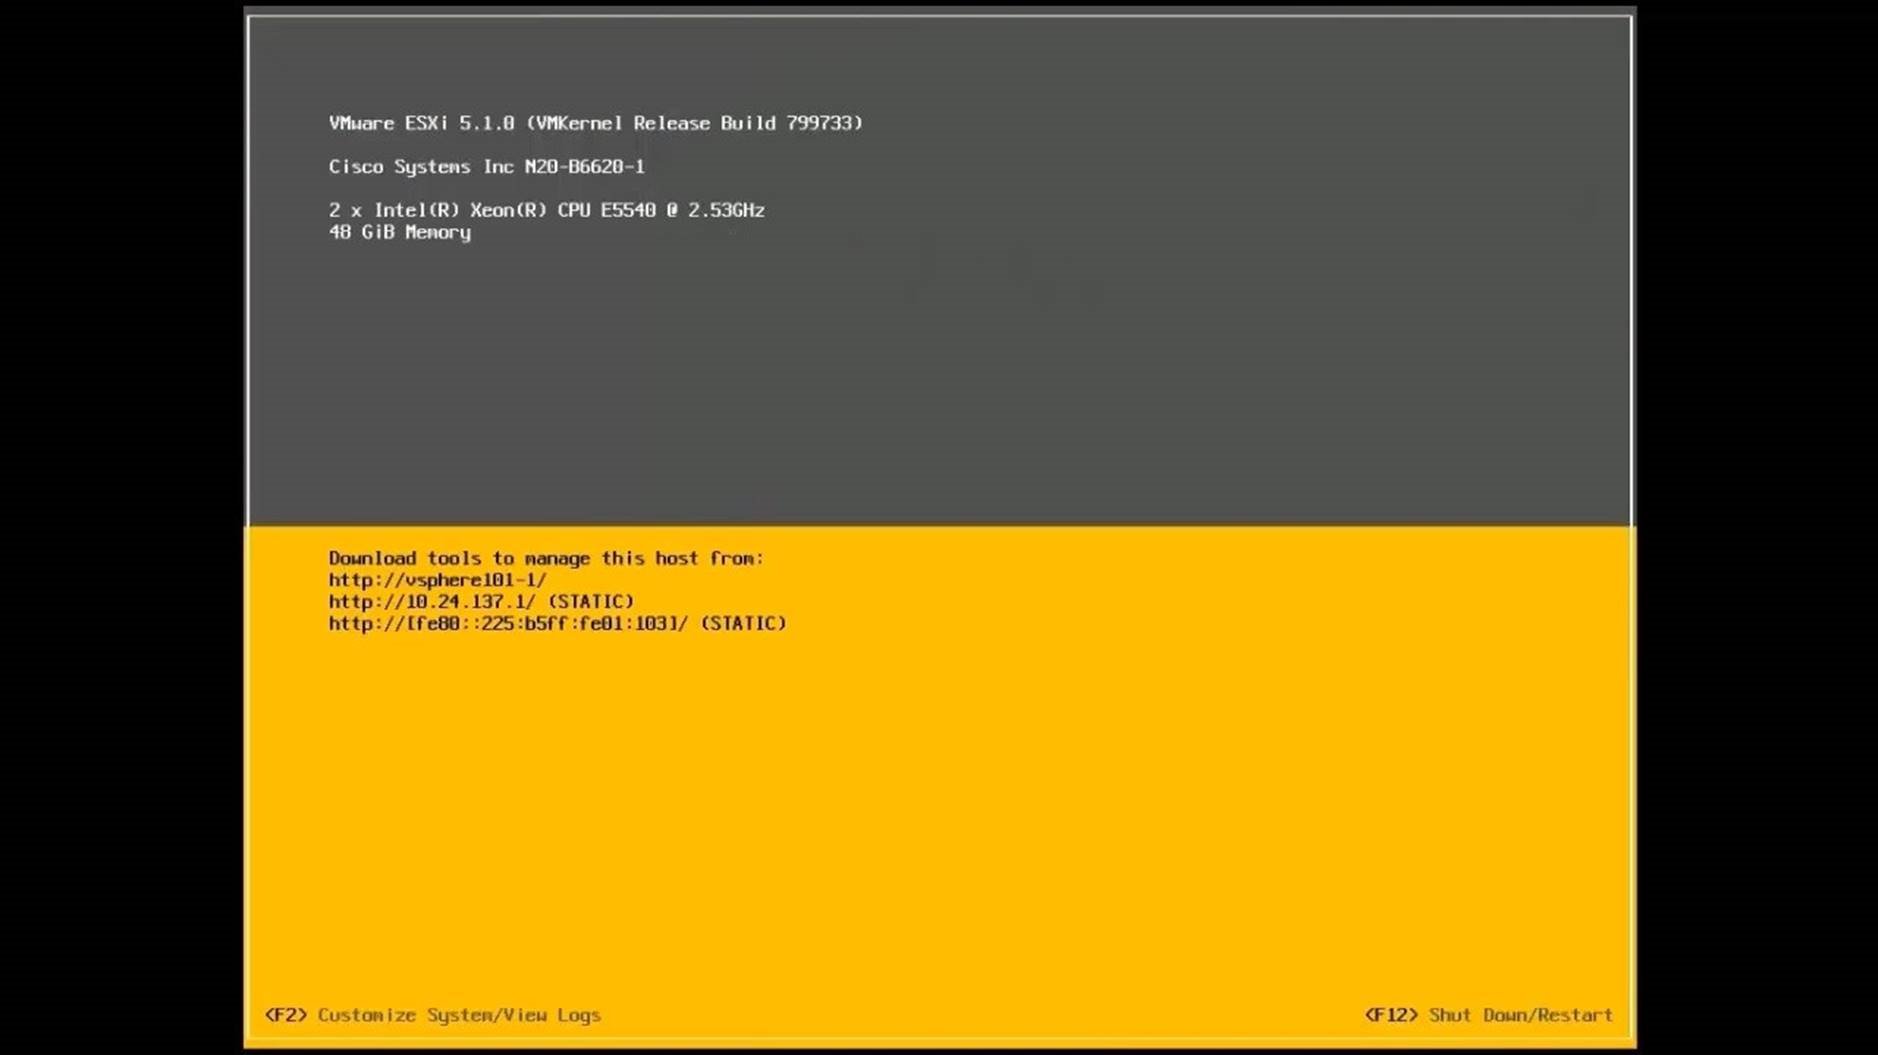
Following the boot the ESXi Installer will automatically load.
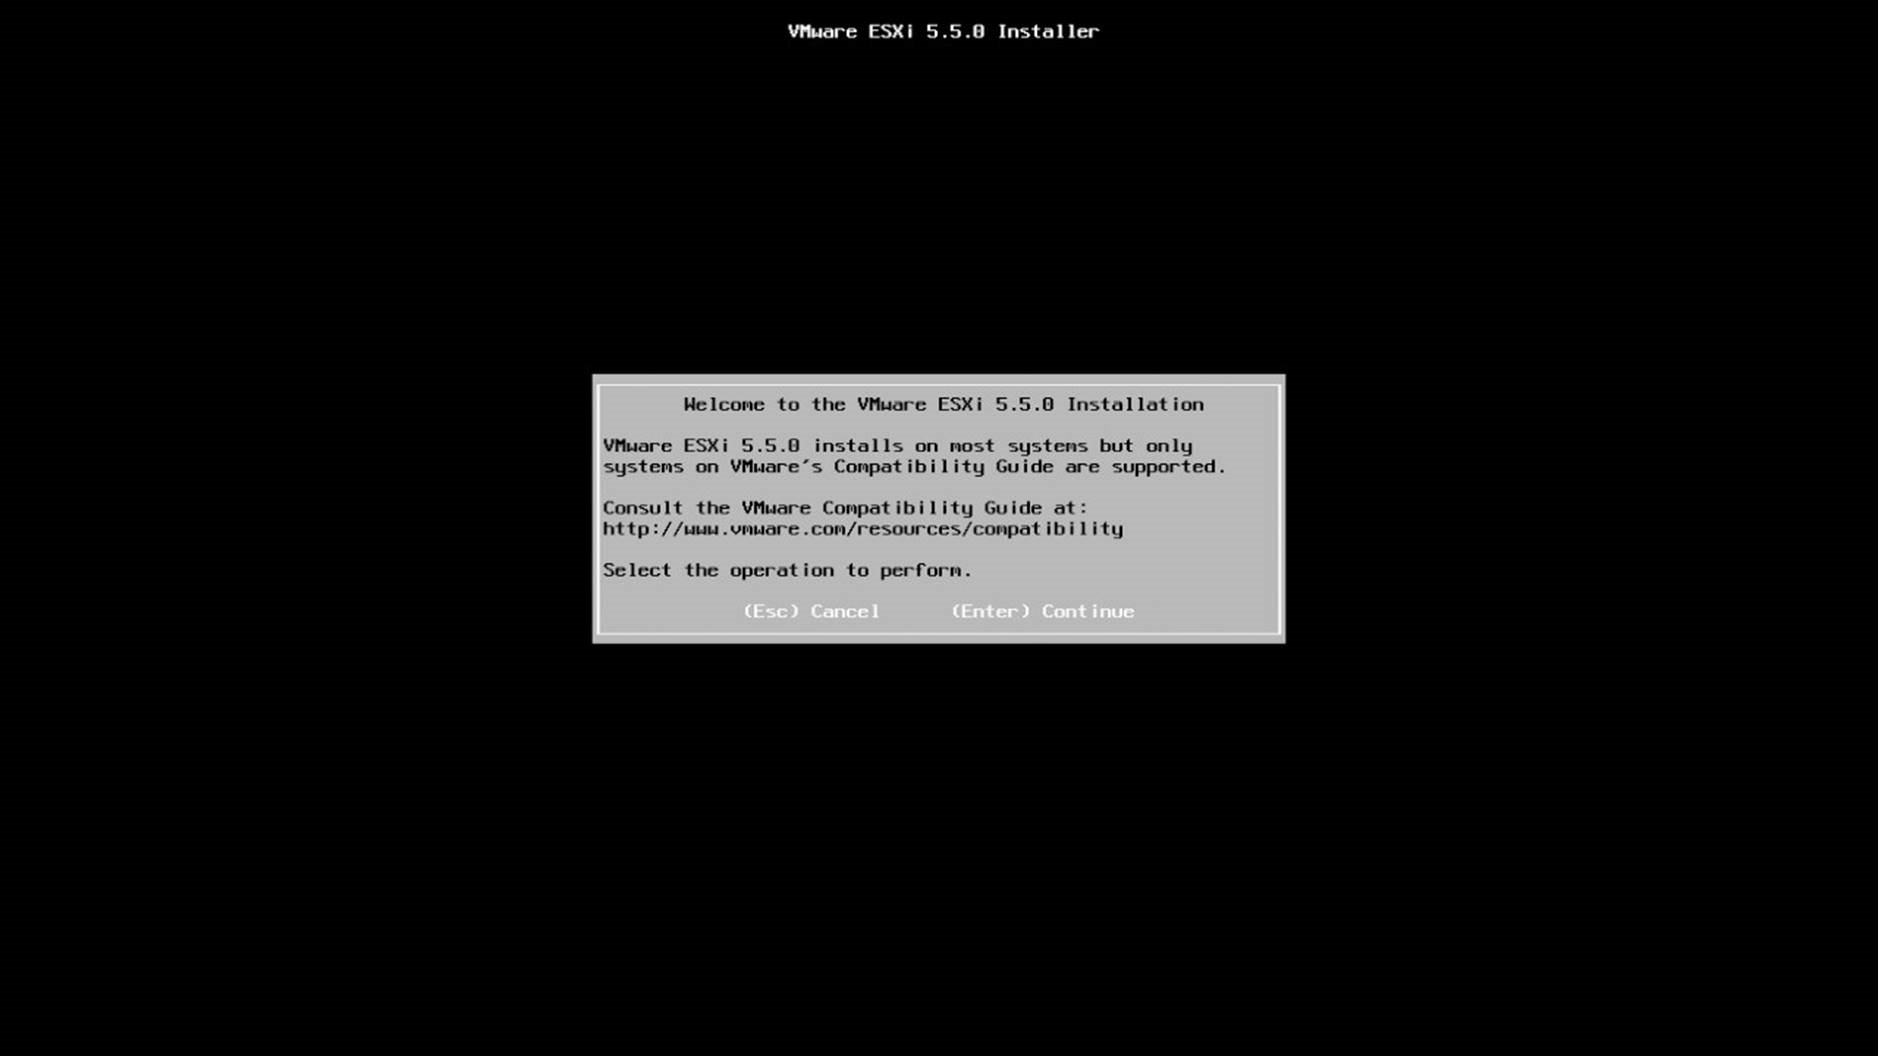
Begin the installation by pressing [Enter] at the ESXi Installer welcome screen.
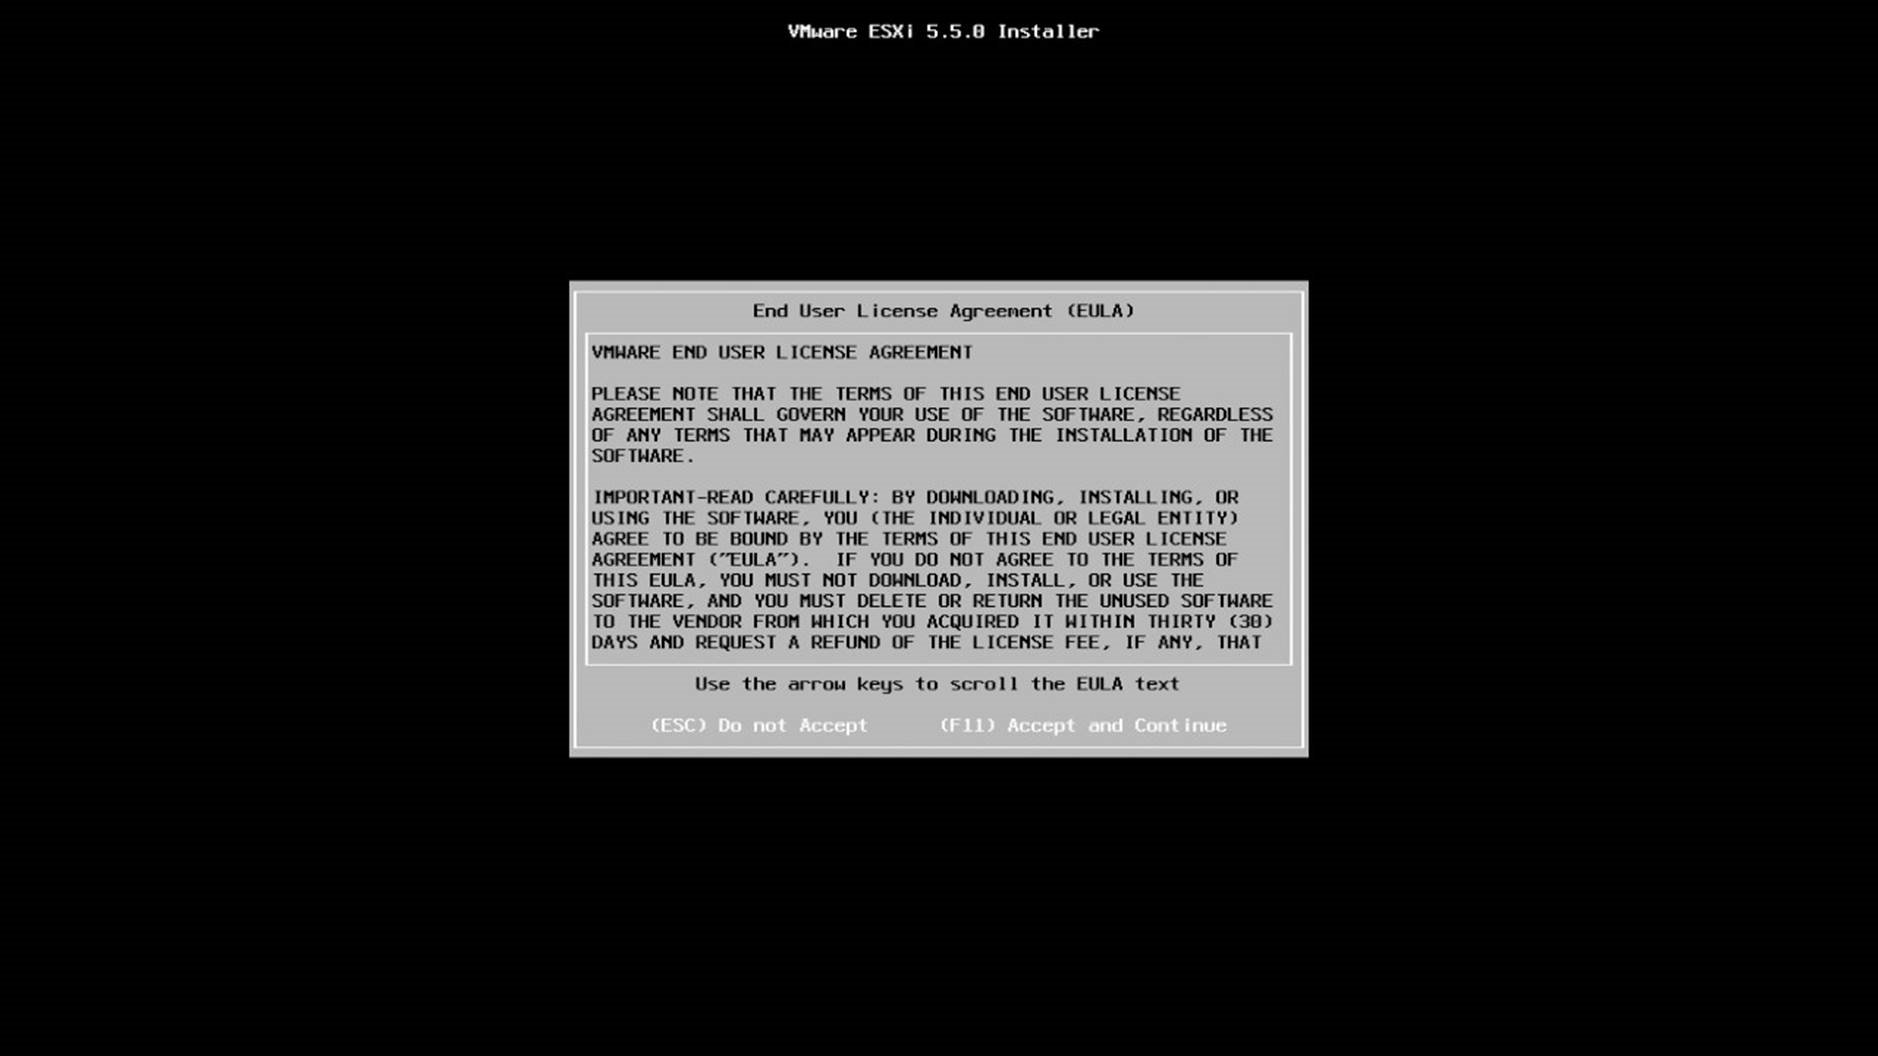
Press [F11] to accept the End User License Agreement. The installer will proceed to scan for available hard disks.
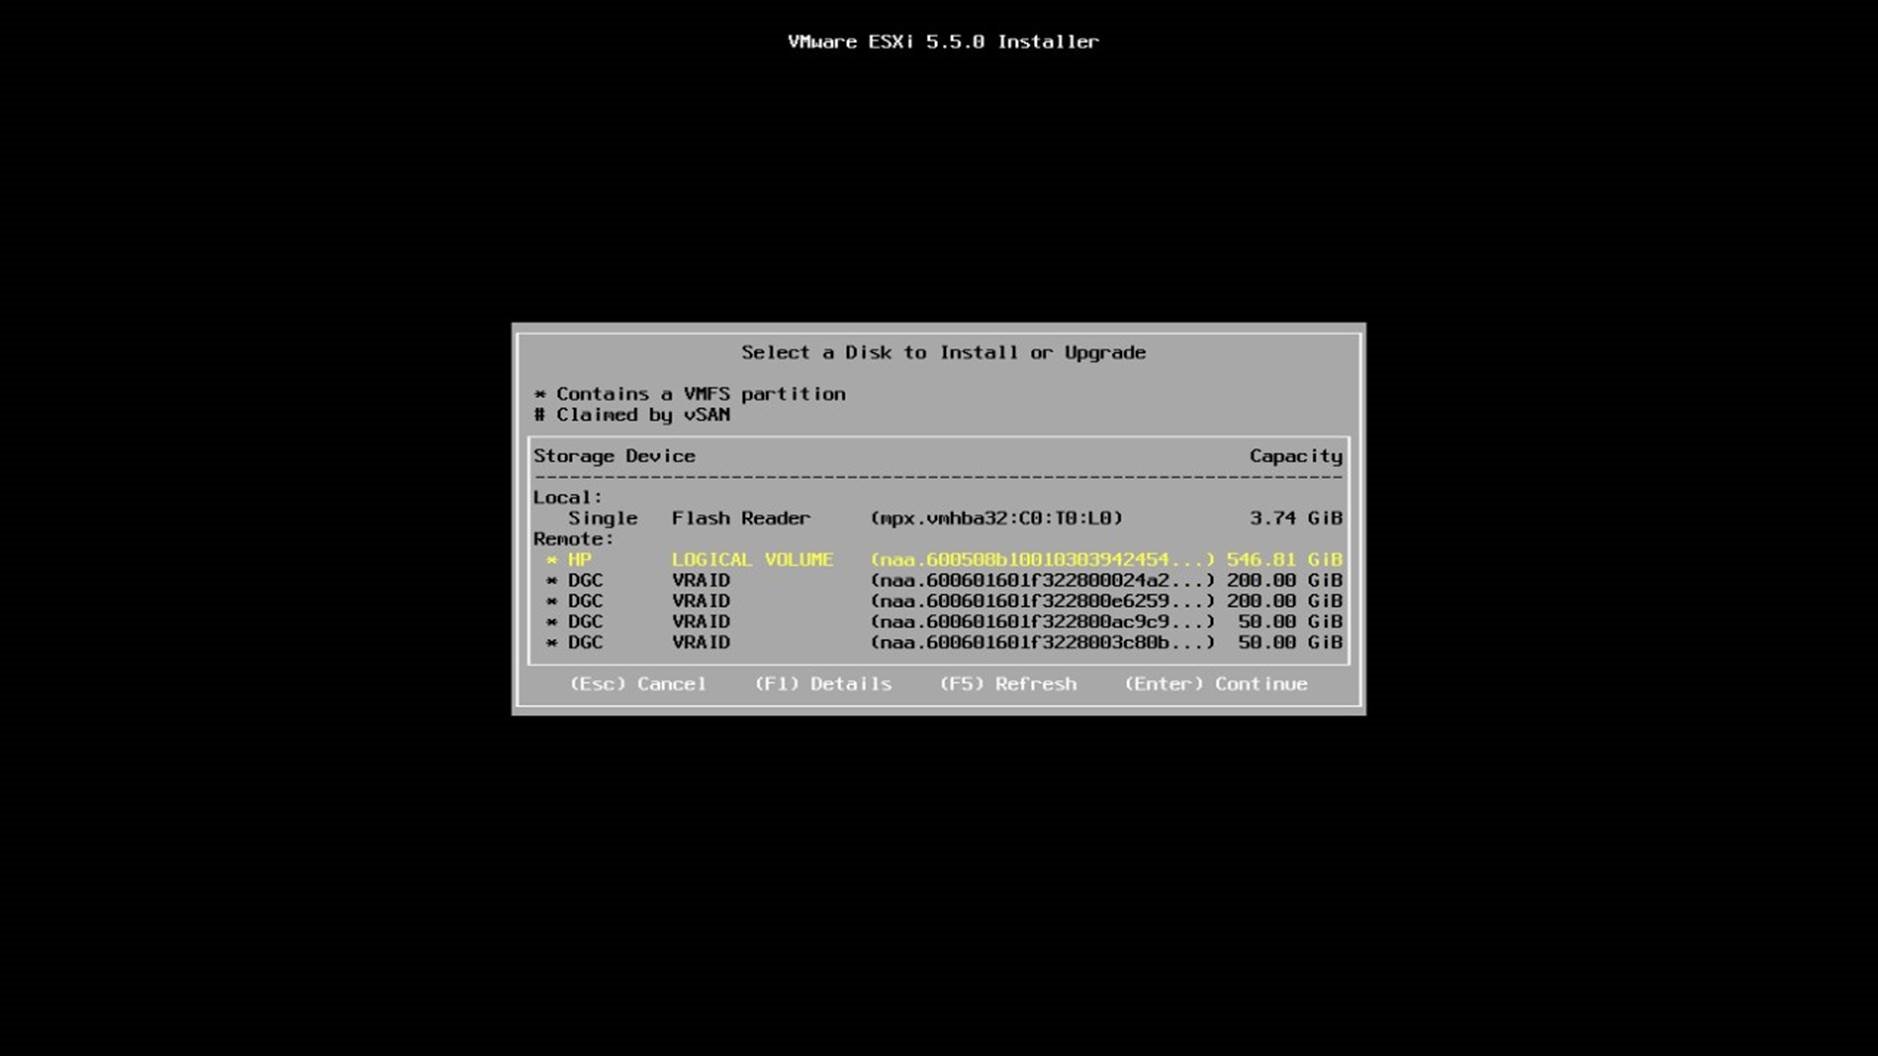
Use the arrow keys to highlight the boot disk where you will install ESXi and press [Enter].
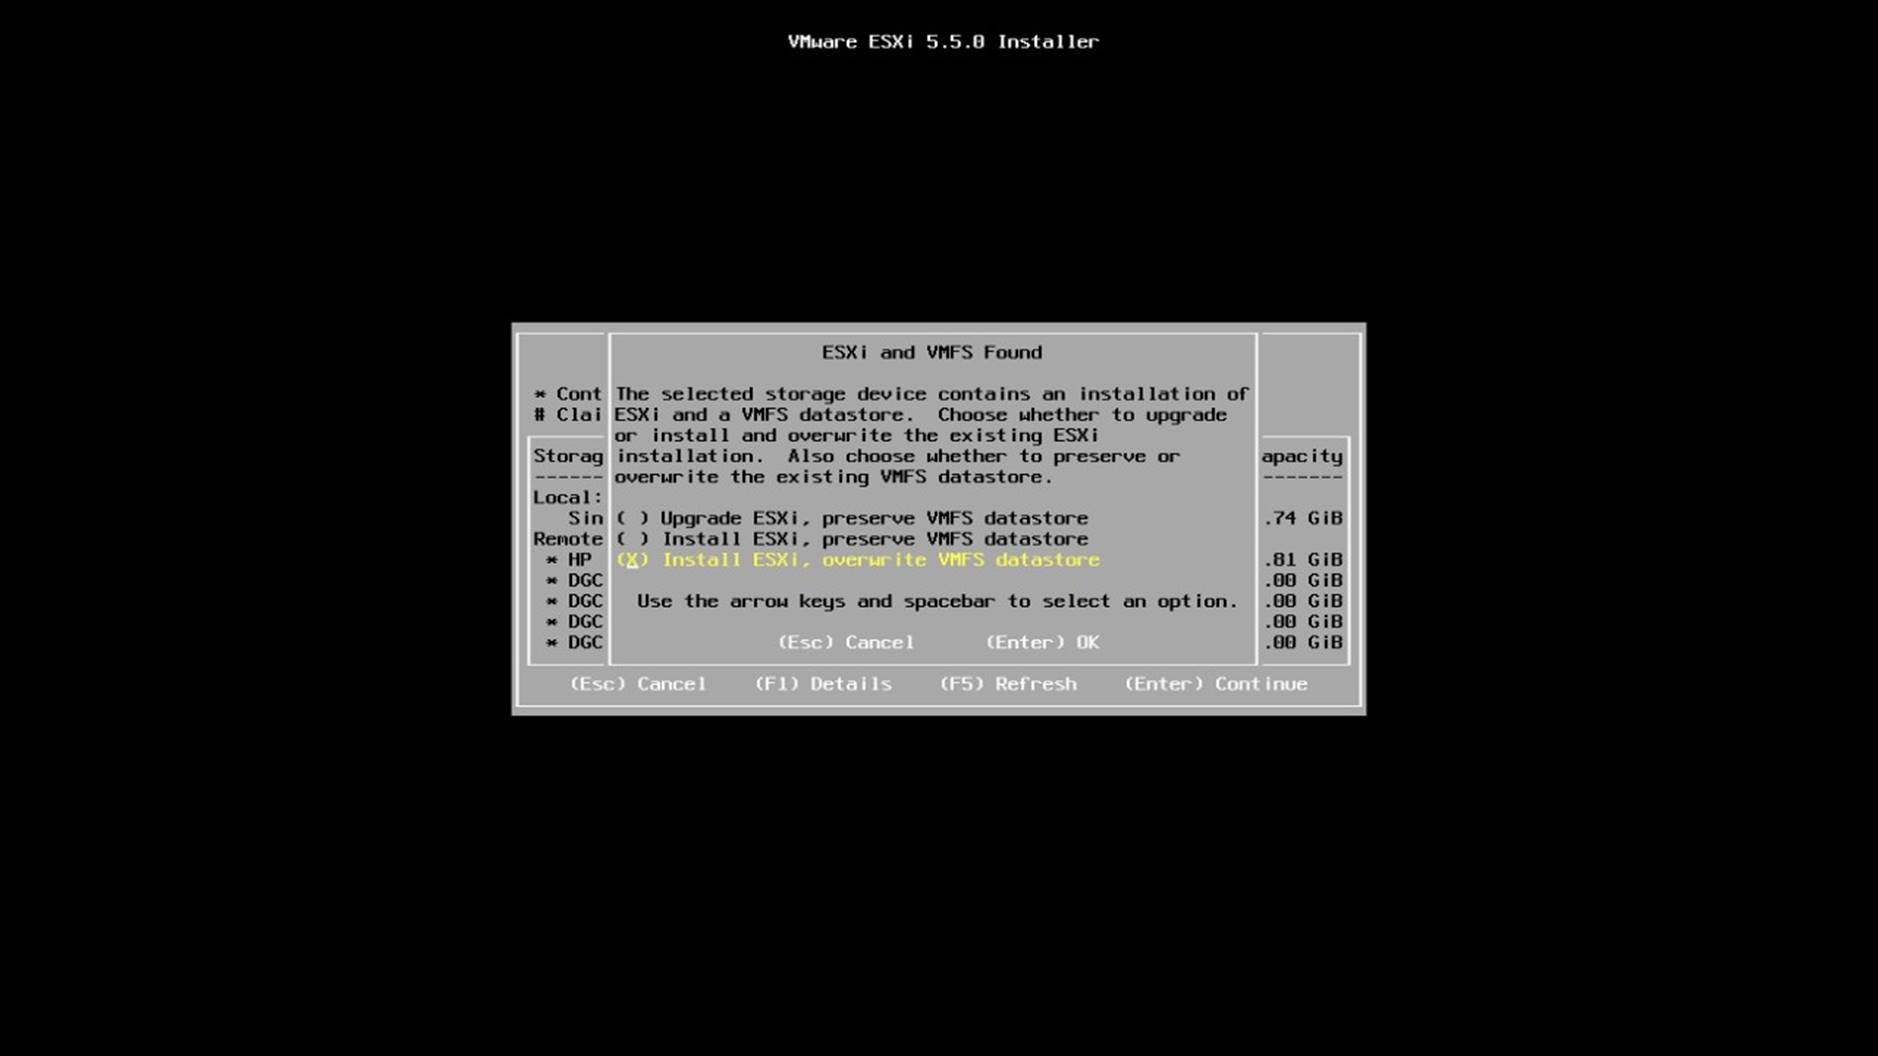
If an existing ESXi image is found on the disk, the installer ask if you want to upgrade or do a fresh install. Use the arrow keys to choose the type of install, press the [spacebar] to select, and press [Enter] to continue.
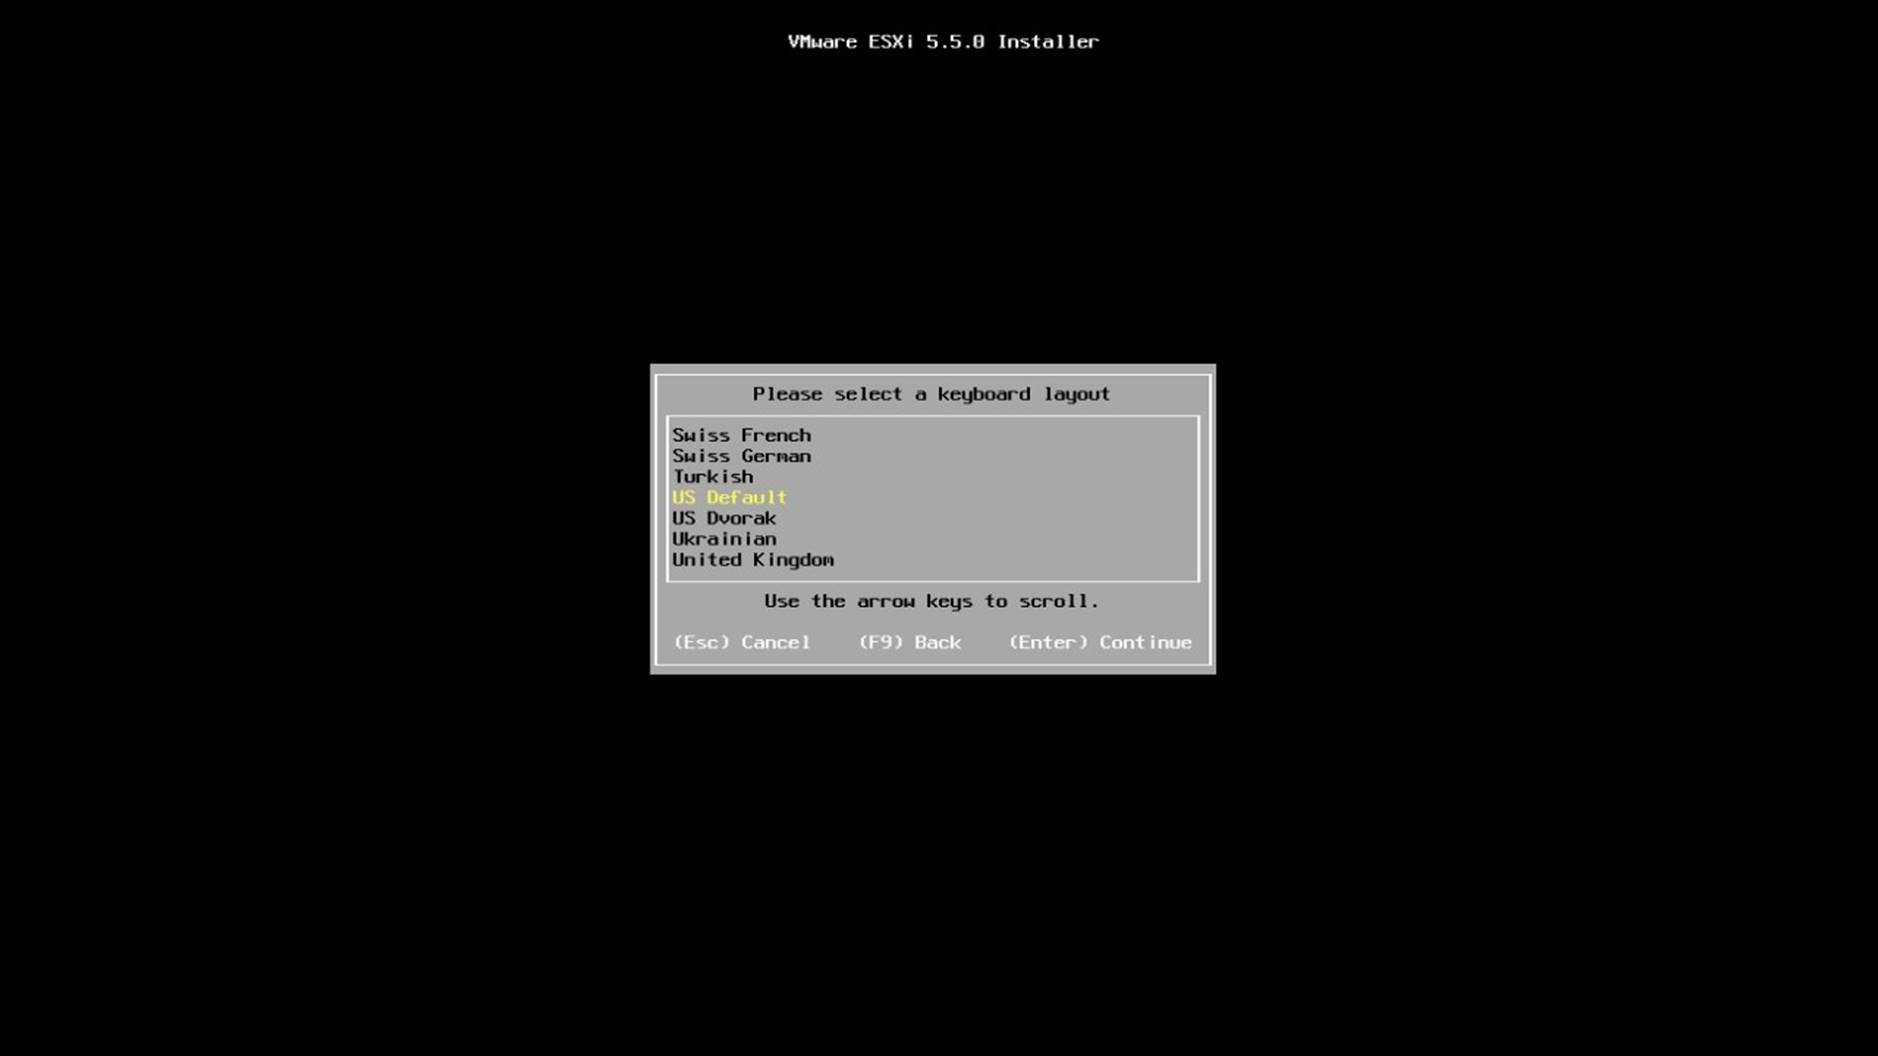
Use the arrow keys to highlight the desired keyboard layout and press [Enter] to continue.
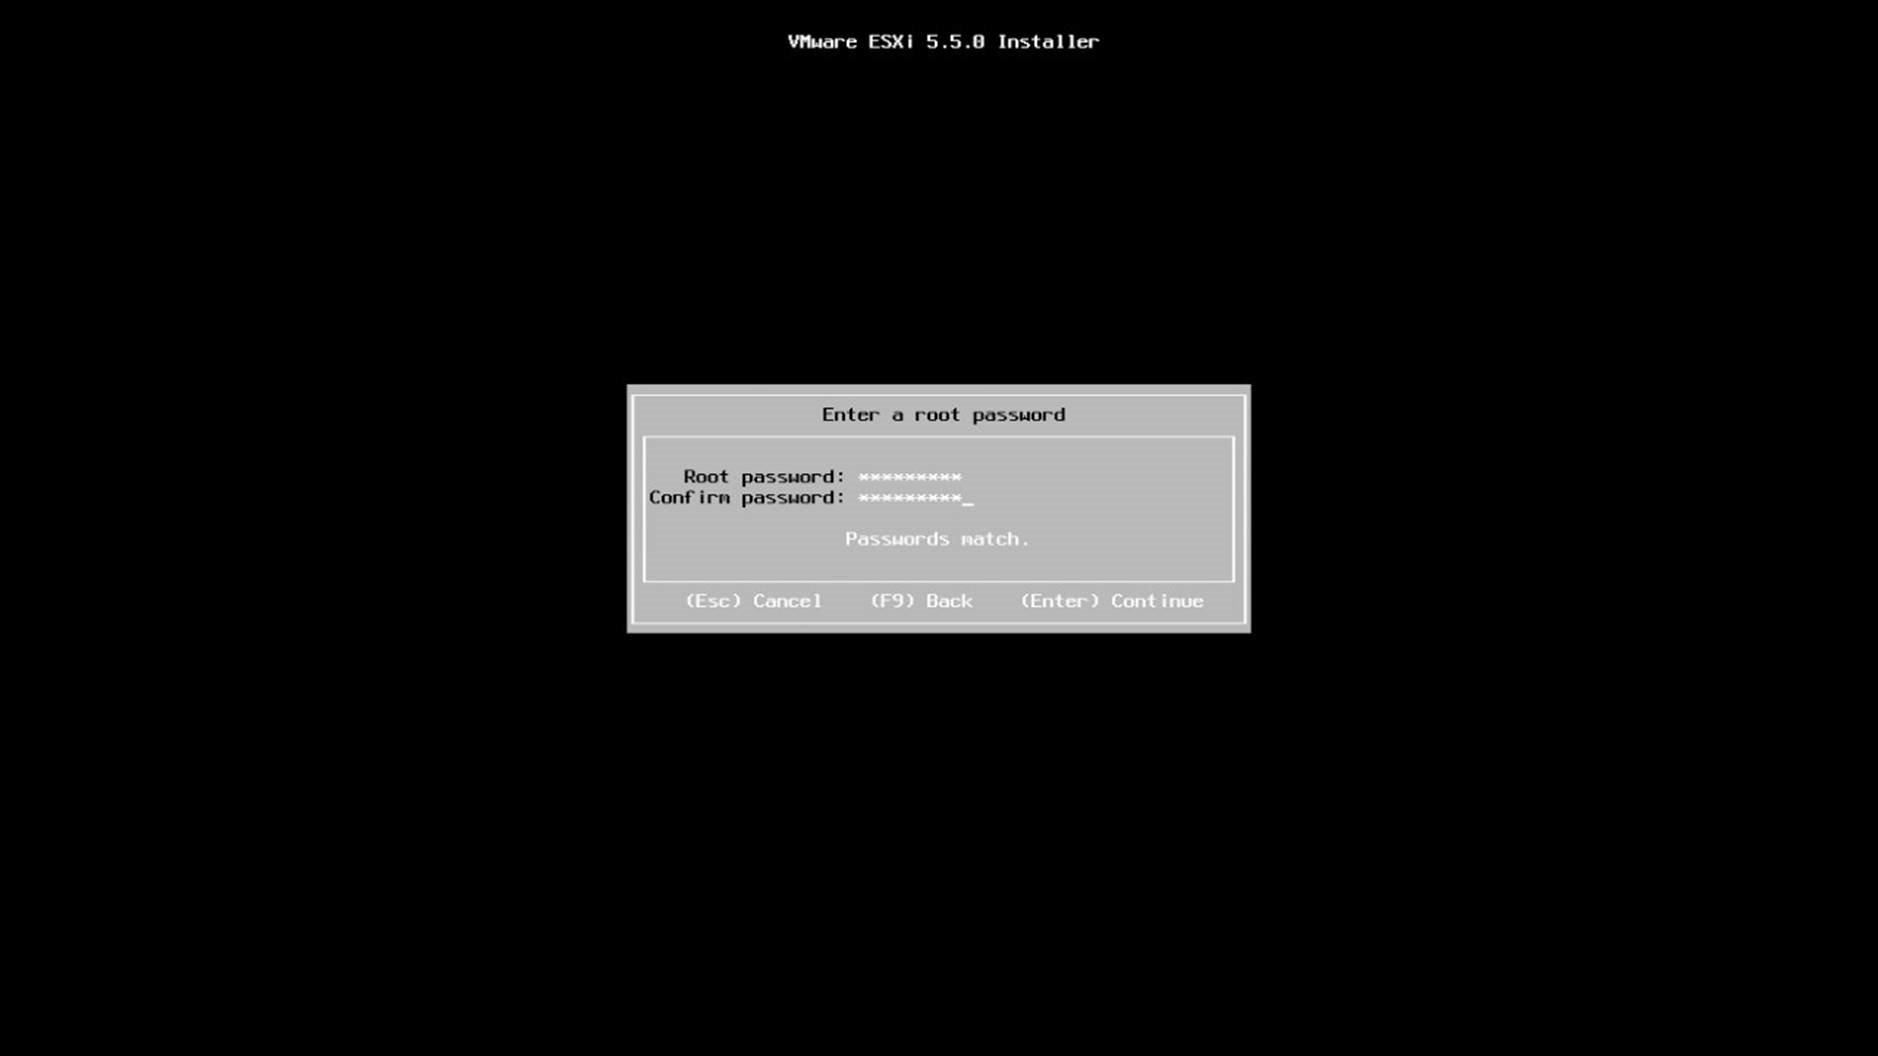
Set the root password and press [Enter] to continue.
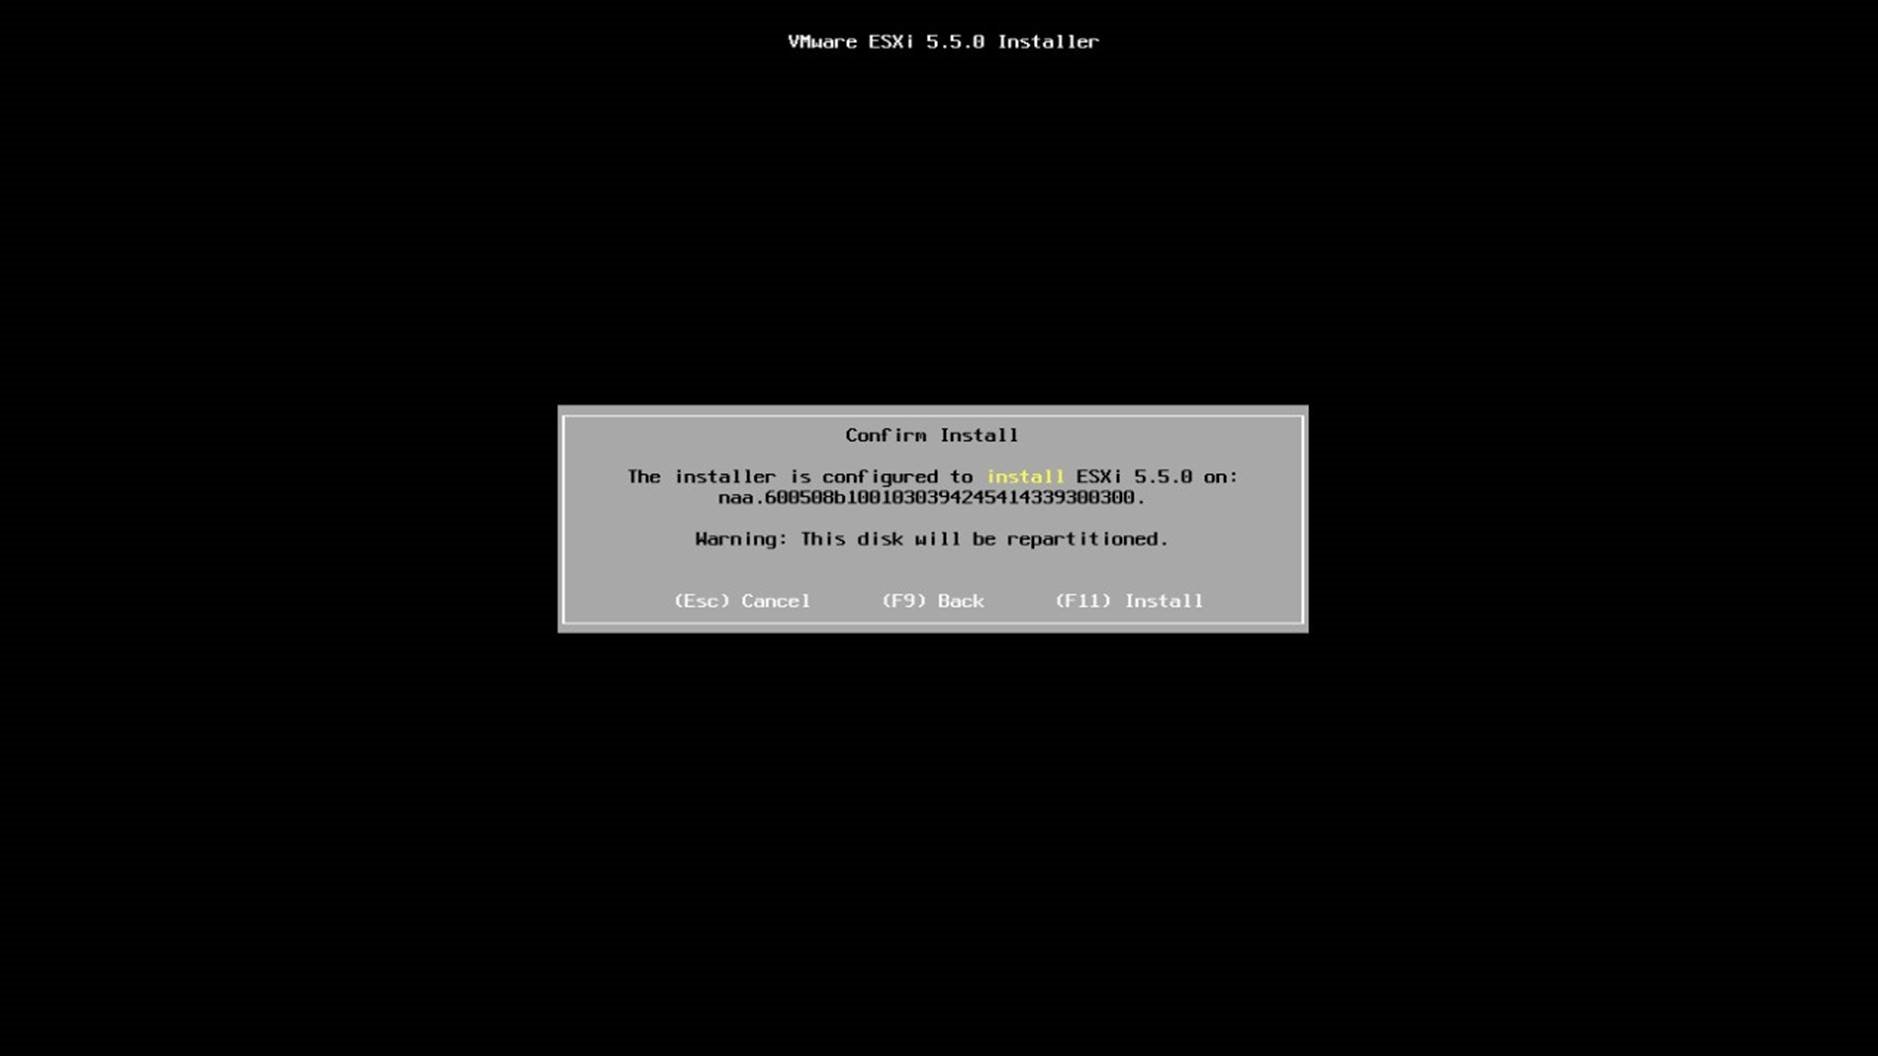
Press [F11] to confirm the install. The hard disk will be partitioned and ESXi will be installed on the host.
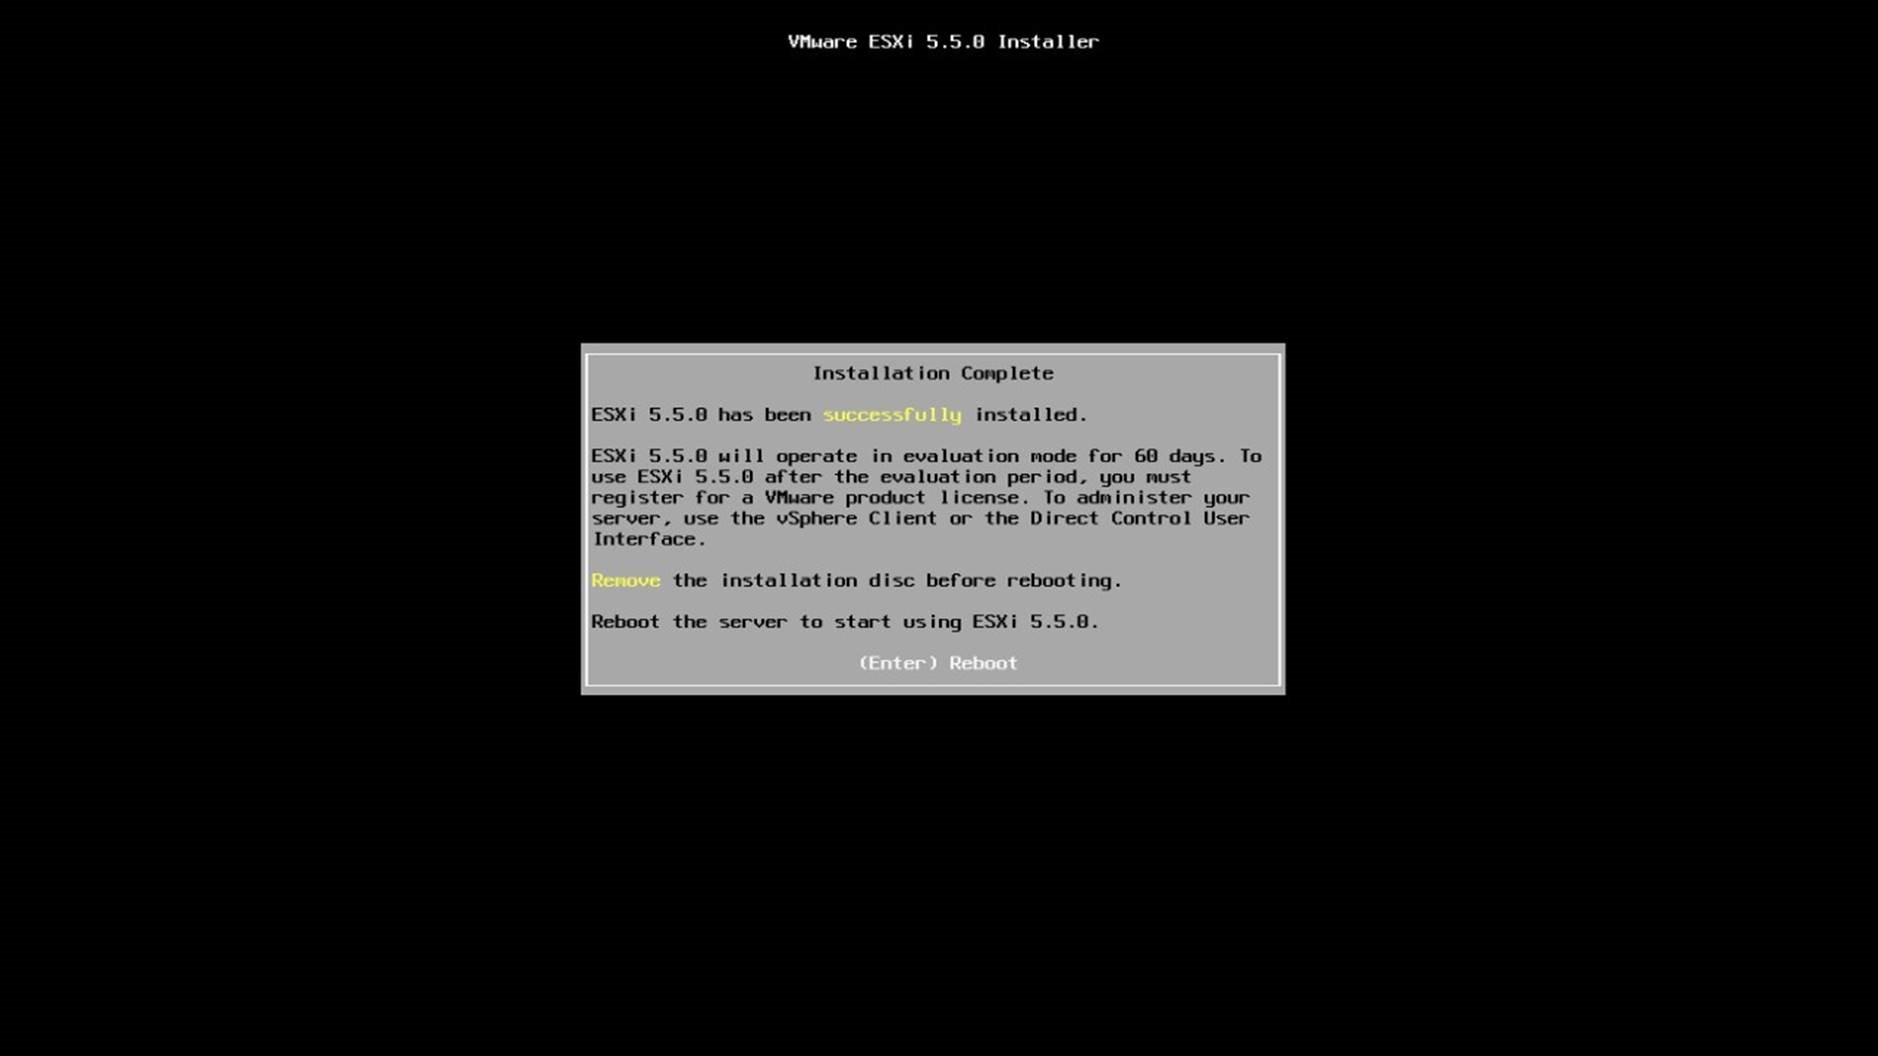
After the installation completes, eject/unmount the ESXi ISO from the server's
CD-ROM/DVD drive and press [Enter] to reboot.
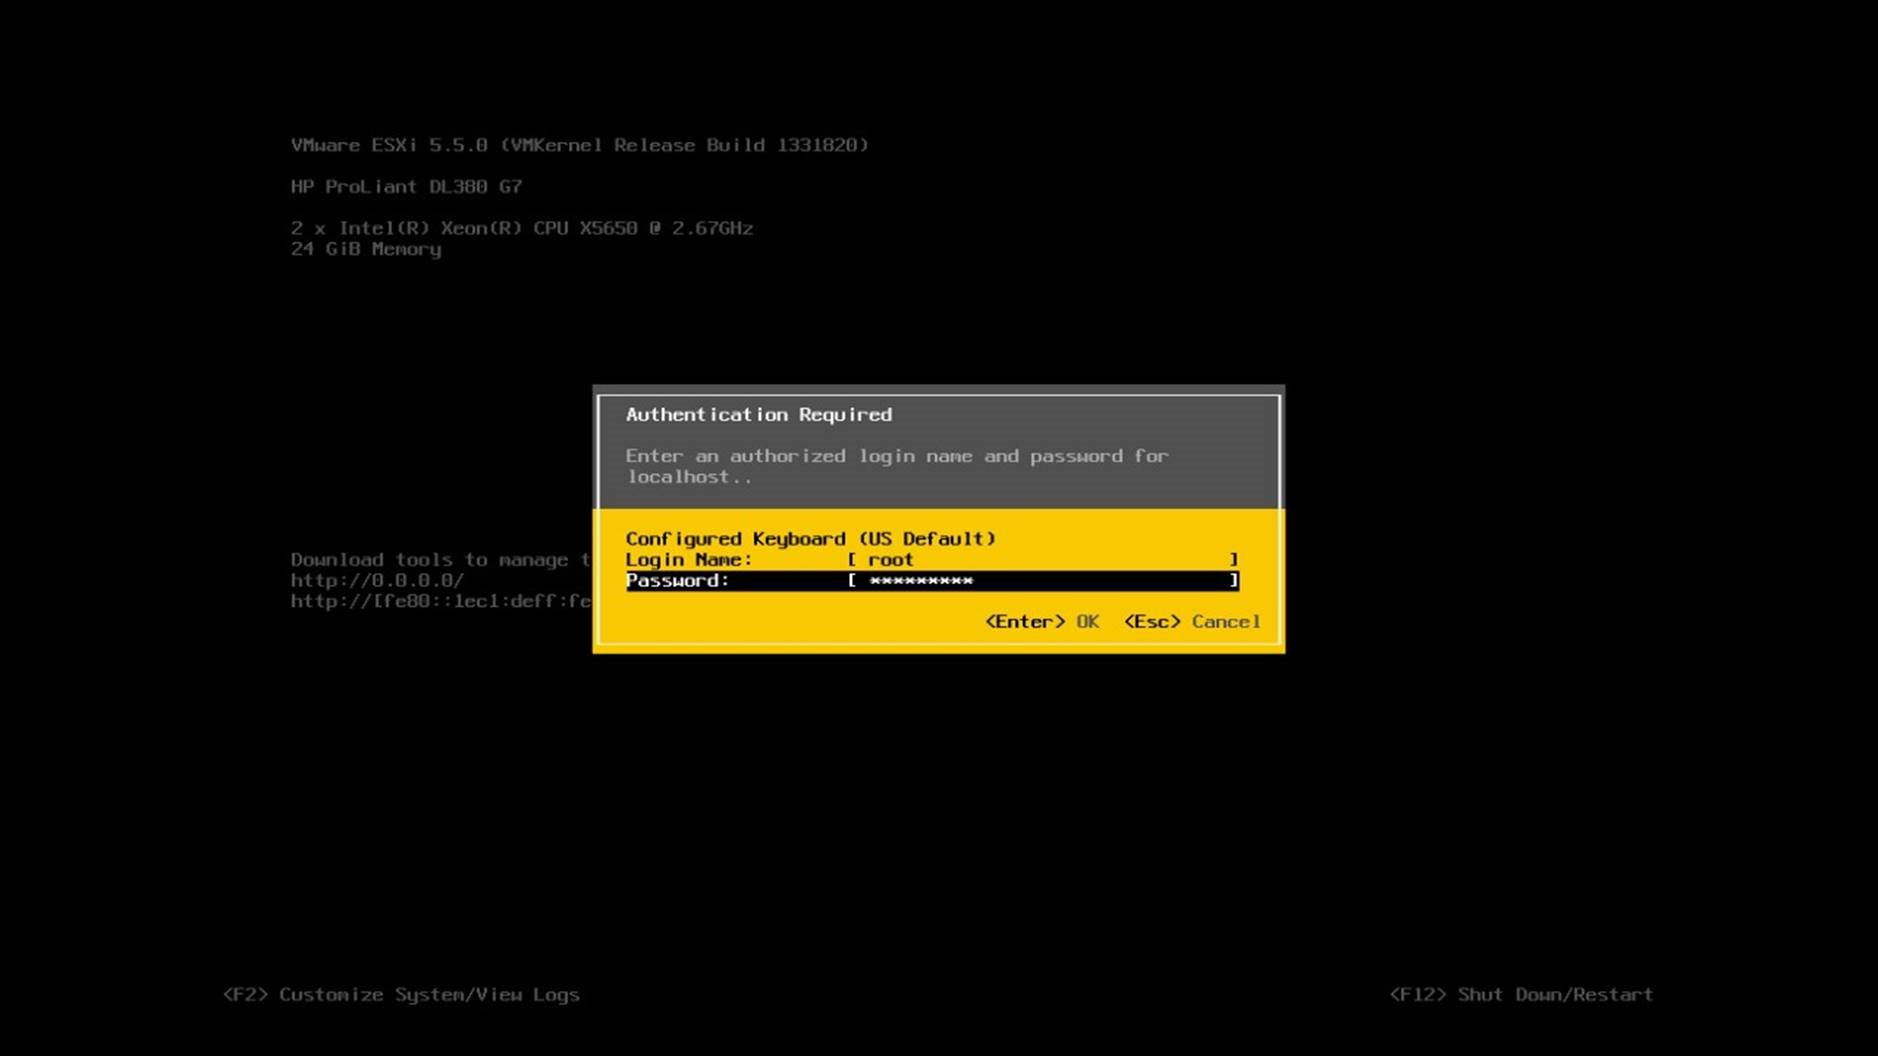
Following the reboot configure the host’s management network. From the console press [F2] to customize the system and login as "root" with the password you set during the install.
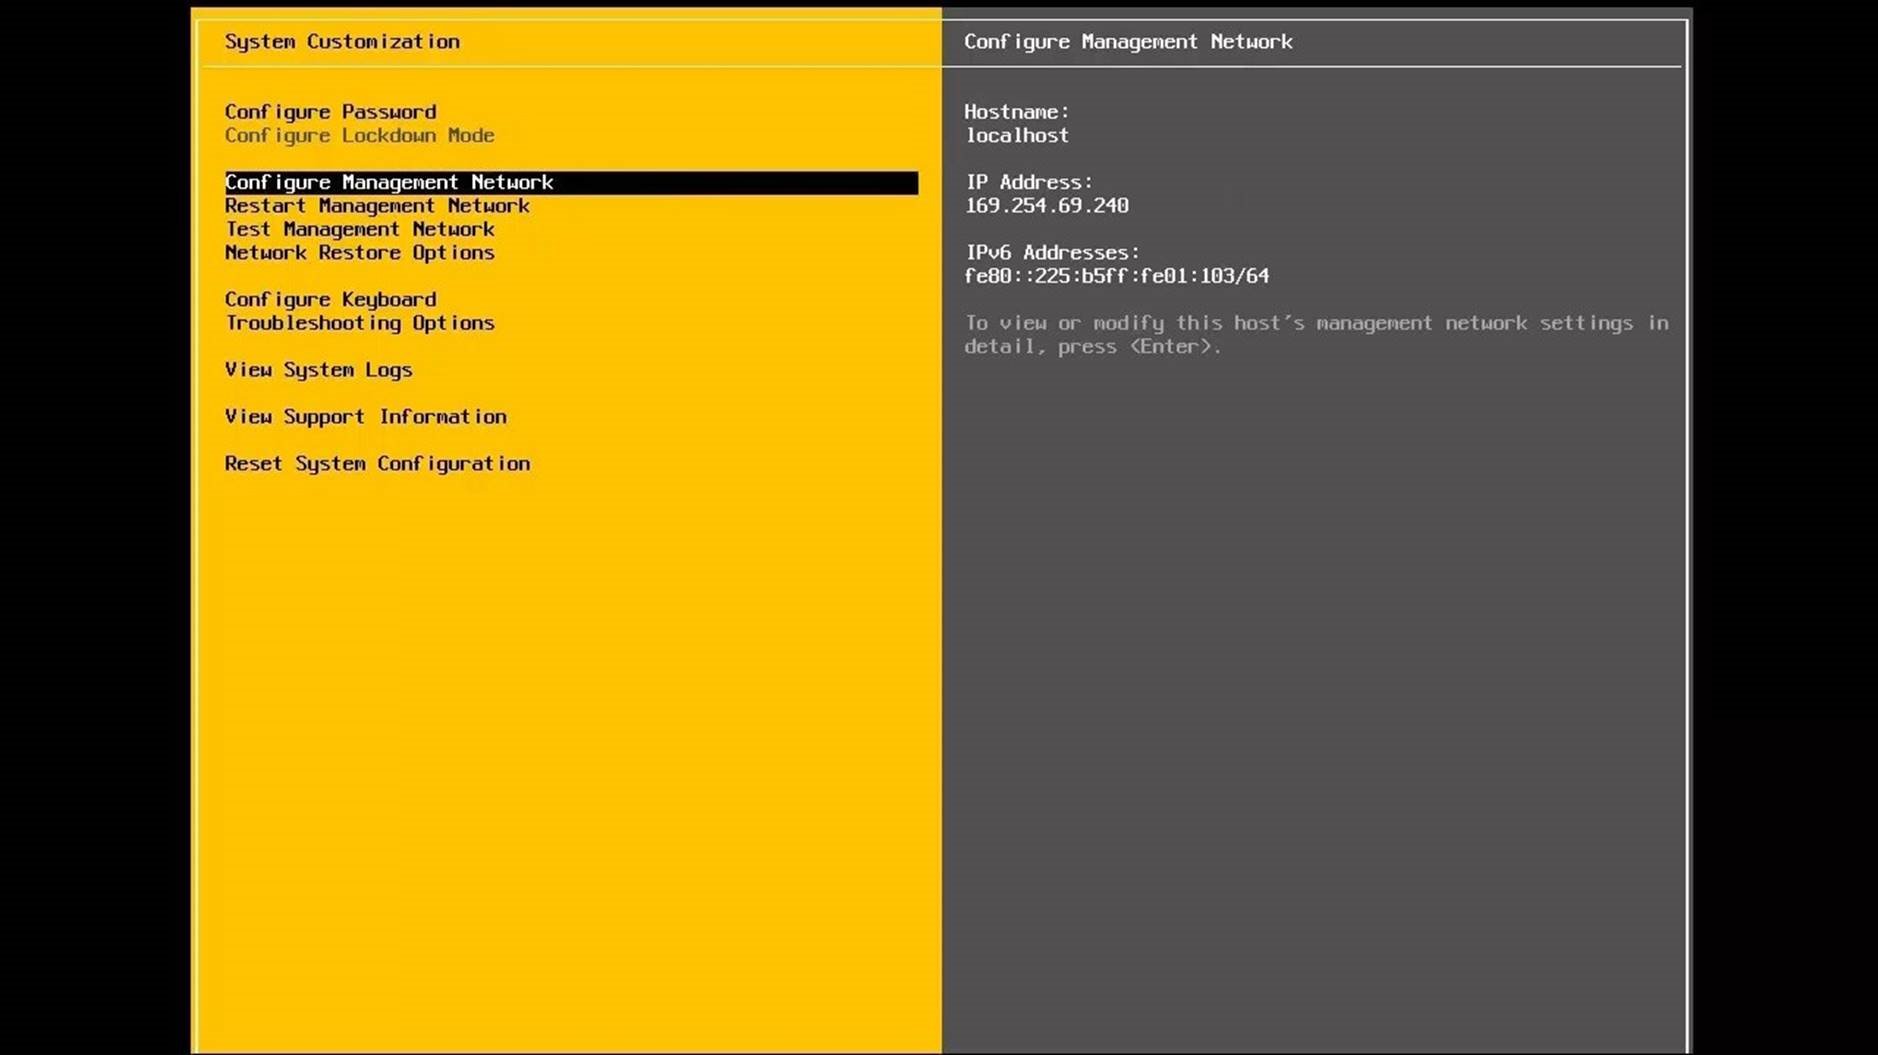
Use the arrow keys to highlight "Configure Management Network" and press [Enter].

Use the arrow keys to highlight "Network Adapters" and press [Enter].
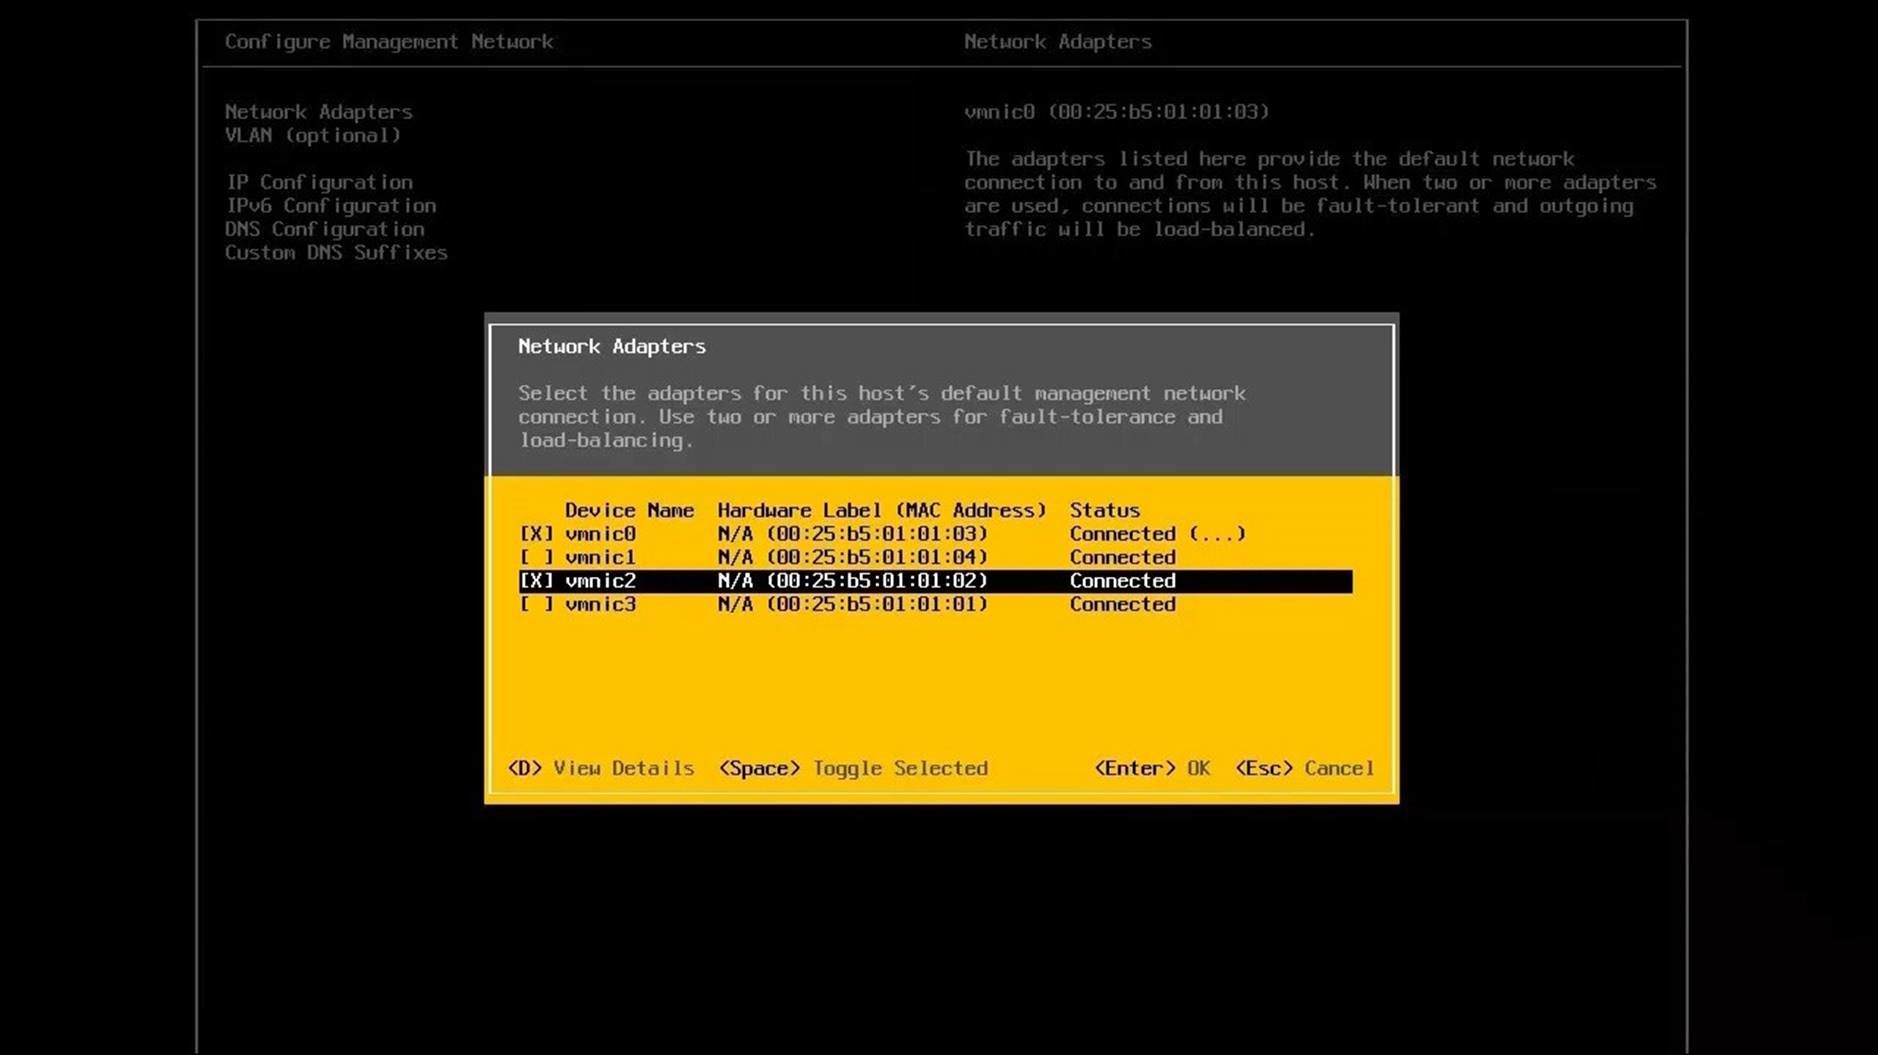
Use the arrow keys to highlight the network adapters that will be used for the management network and press the [spacebar] to select each adapter. After all the adapters have been selected press [Enter] to continue.
If you use VLAN tags set the VLAN-ID for the management network. Use the arrow keys to select "VLAN (optional)”, set the VLAN-ID for the management network and press [Enter]. If a VLAN-ID is not required skip this step.
Next, select "IP Configuration". Specify if the host will use a dynamic or static IP address. If using static IP address provide a host unique IP address along with the appropriate subnet mask and default gateway. Note, static IP addresses are recommended for vSphere hosts. Press [Enter] to continue.

Next, select "DNS Configuration". Specify if the host will use dynamic or static DNS settings. If using static DNS settings, provide the IP address for the primary and alternate DNS server along with the server's hostname. Press [Enter] to continue.
Next, select "Custom DNS Suffixes". Enter the DNS suffix for the vSphere host and press [Enter] to continue.
Press [Esc] to exit the "Configure Management Network" menu. When prompted to apply the changes press [Y].
Next, verify the network settings. Select "Test Management Network" and press [Enter].
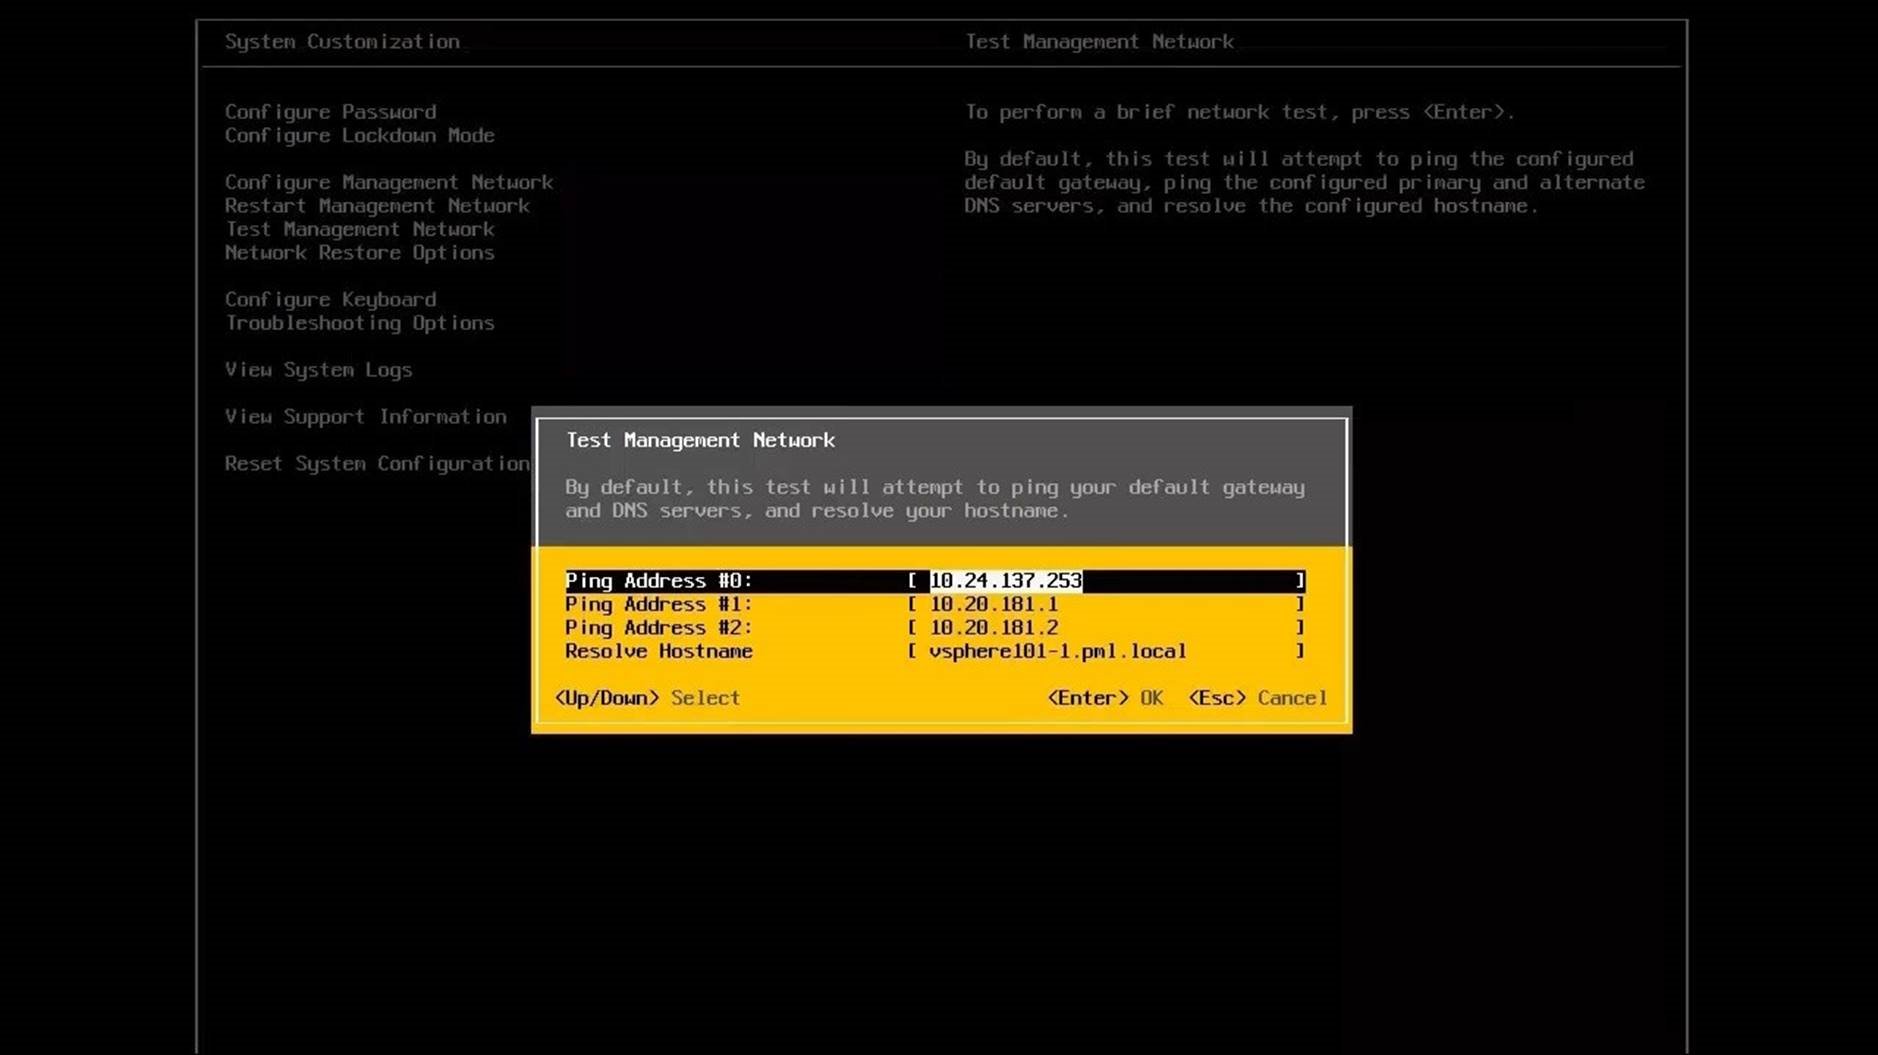
Press [Enter] to begin the test. The server will verify it has network connectivity by pinging its default gateway, the primary and alternate DNS servers, and by resolving the hostname.
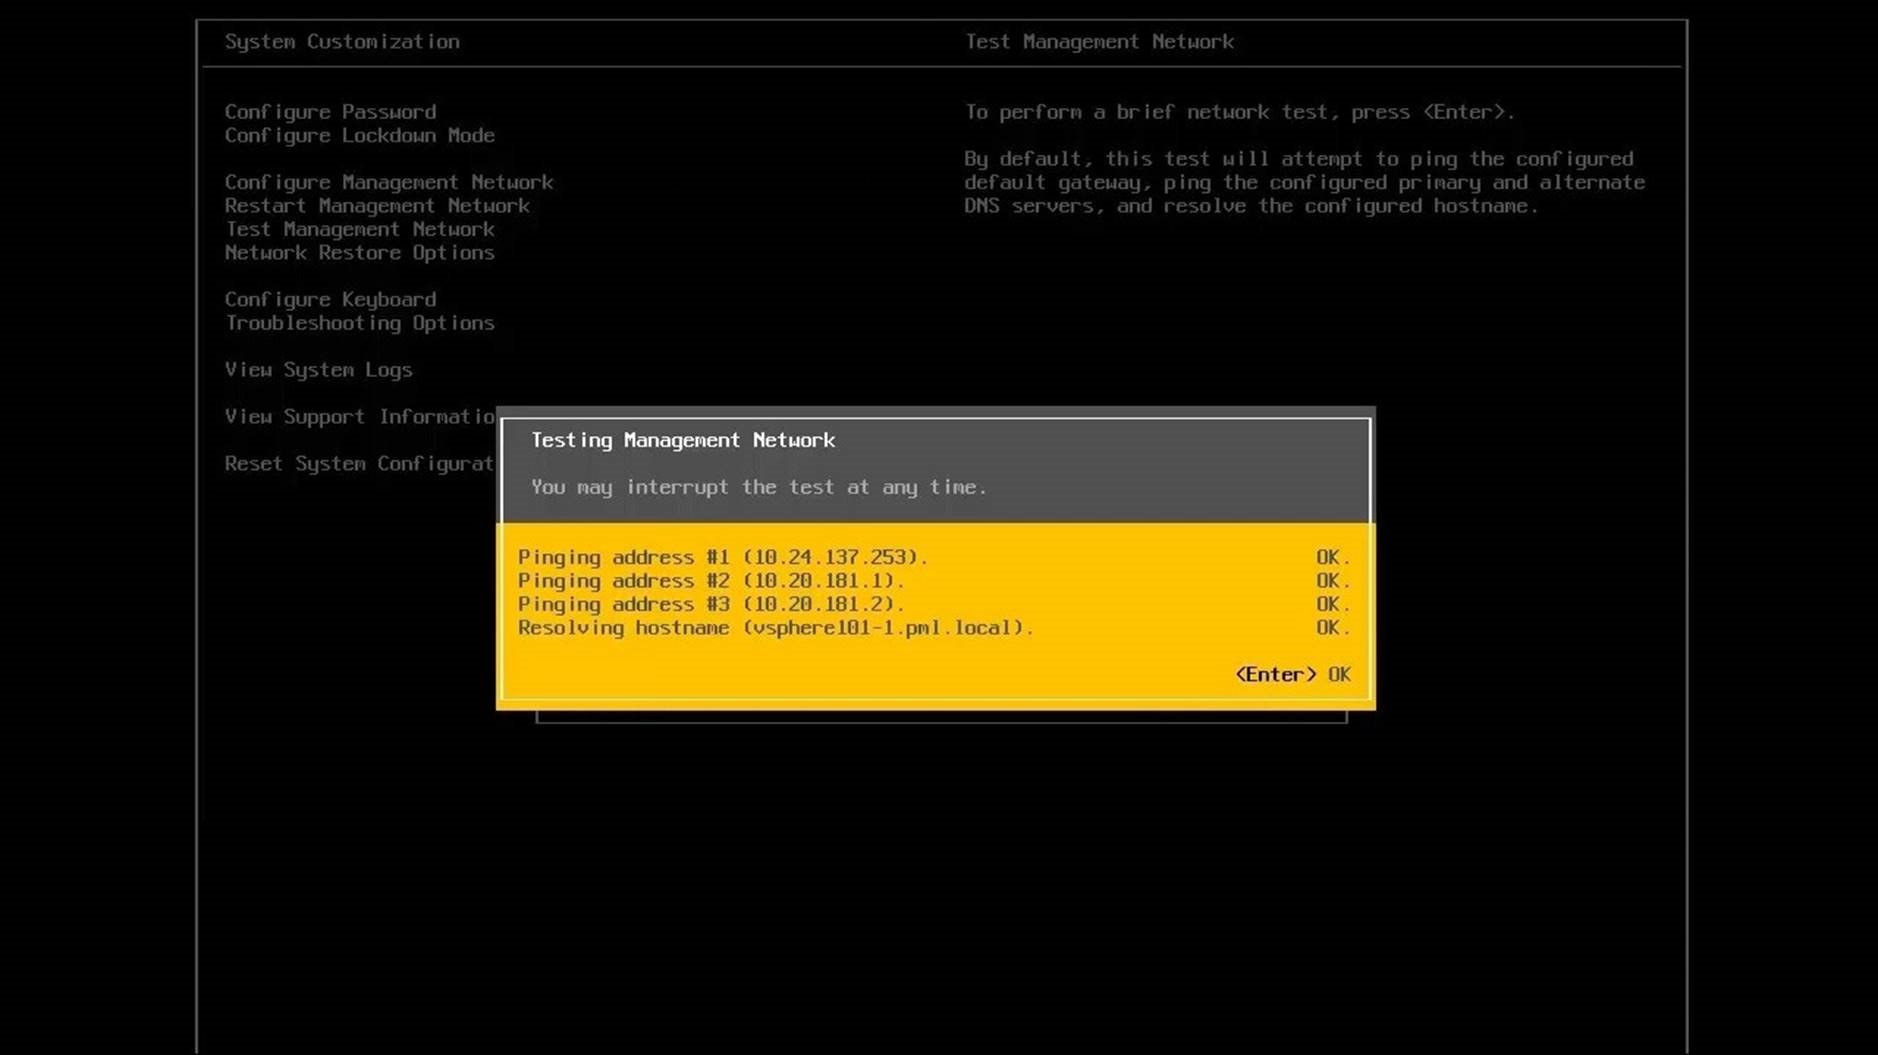
Verify all the tests complete with a status "OK". Press [Enter] to close the window and press [Esc] to exit out of the System Customization menu.
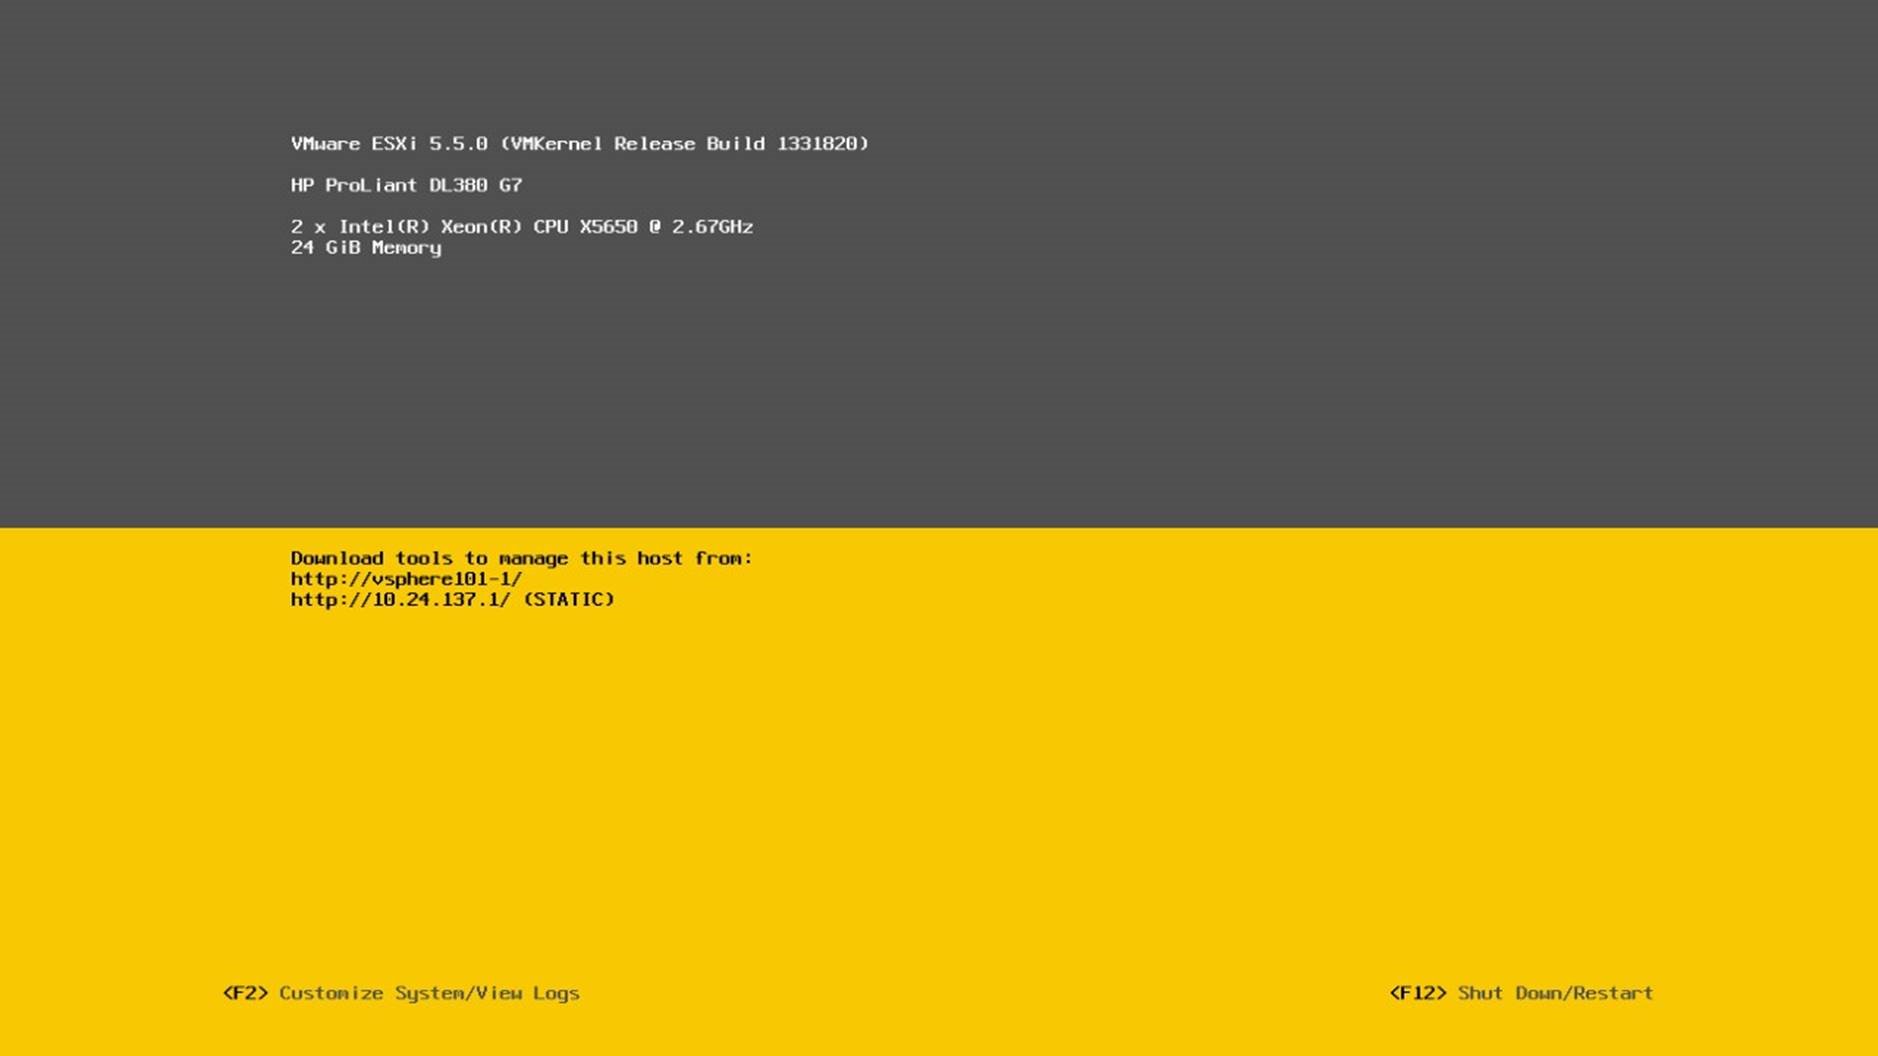
This concludes the walkthrough on installing and configuring vSphere ESXi on a vSphere host. Continue to the next PWT in the series to see how to add the vSphere host to vCenter Server.
vSphere Hosts Upgrade - ESXCLI Command
This walkthrough is designed to show how to upgrade a vSphere host using the "esxcli" command from within the ESXi Shell. Use the arrow keys to navigate through the screens.
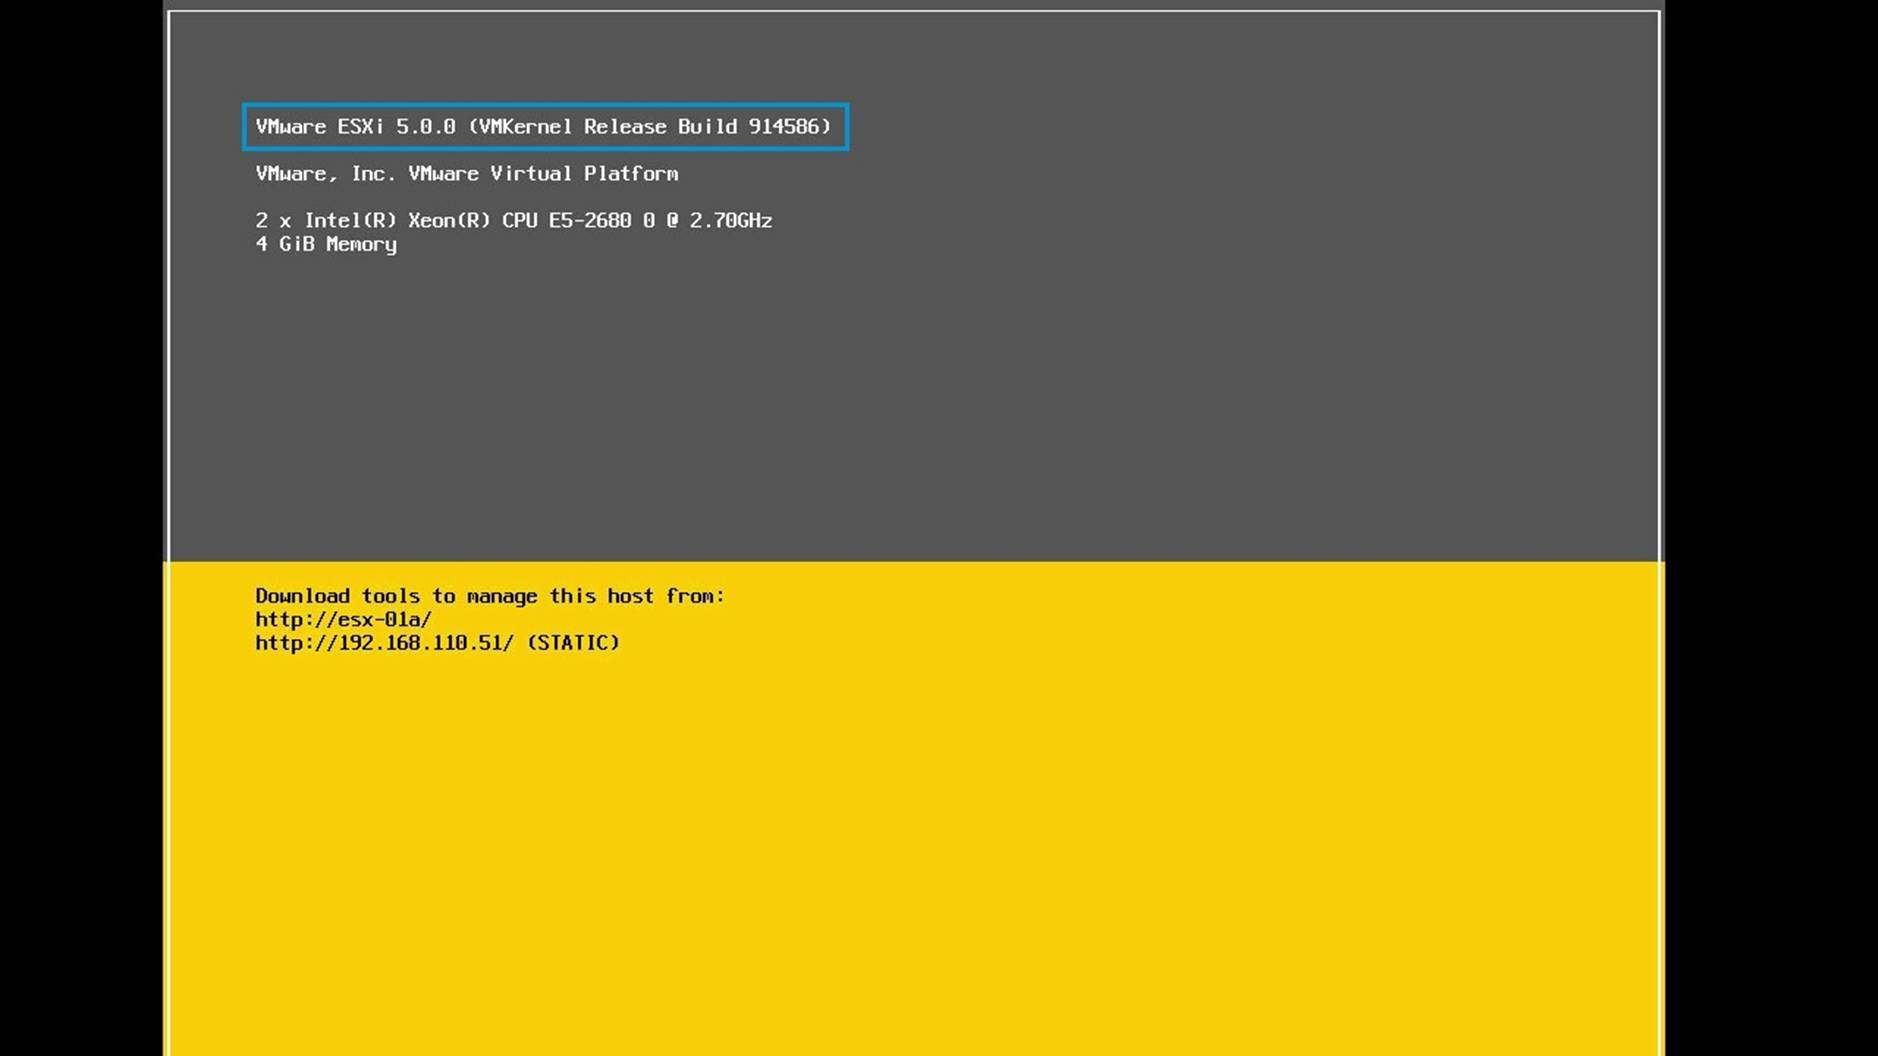
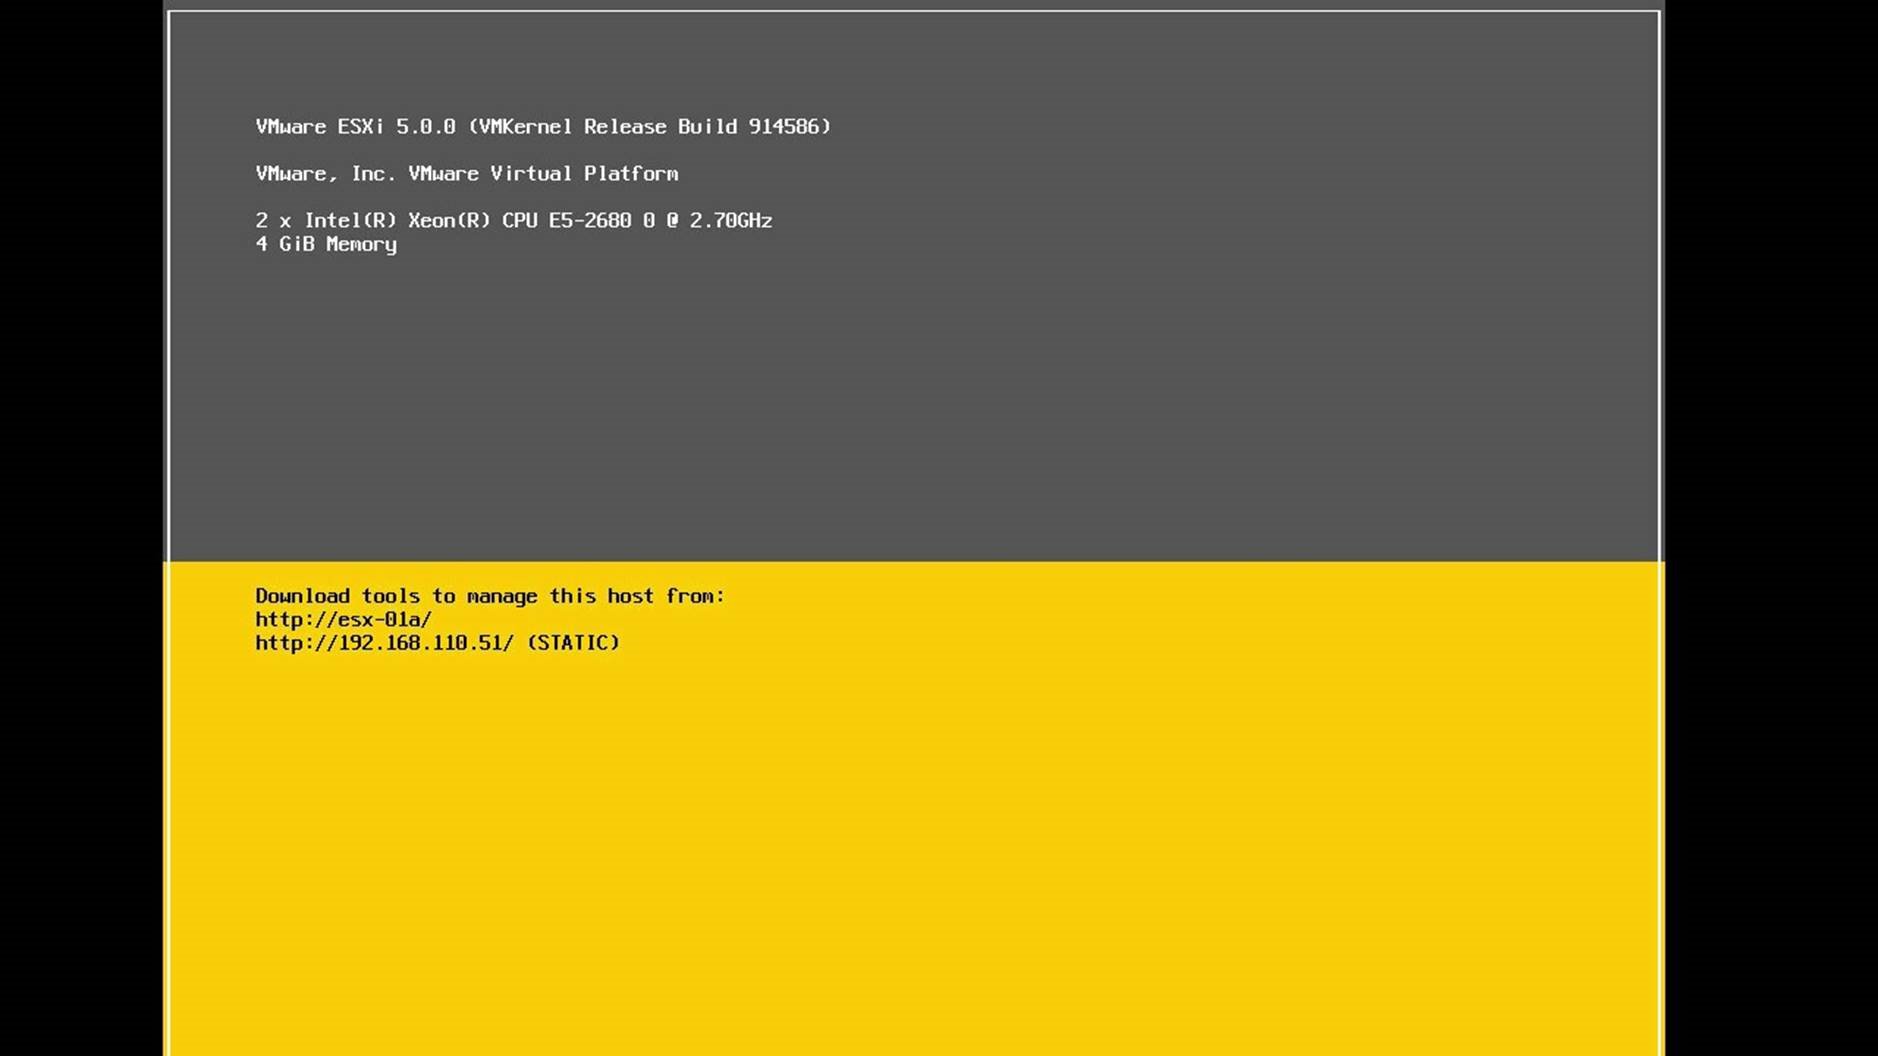
We begin by accessing the vSphere host's console. Here we see the host is currently running ESXi 5.0. We will upgrade this host to version 5.5 using the “esxcli” command.

At the host's console press [F2] to login as a full privileged administrative user.
In this example we are logging in as "root".
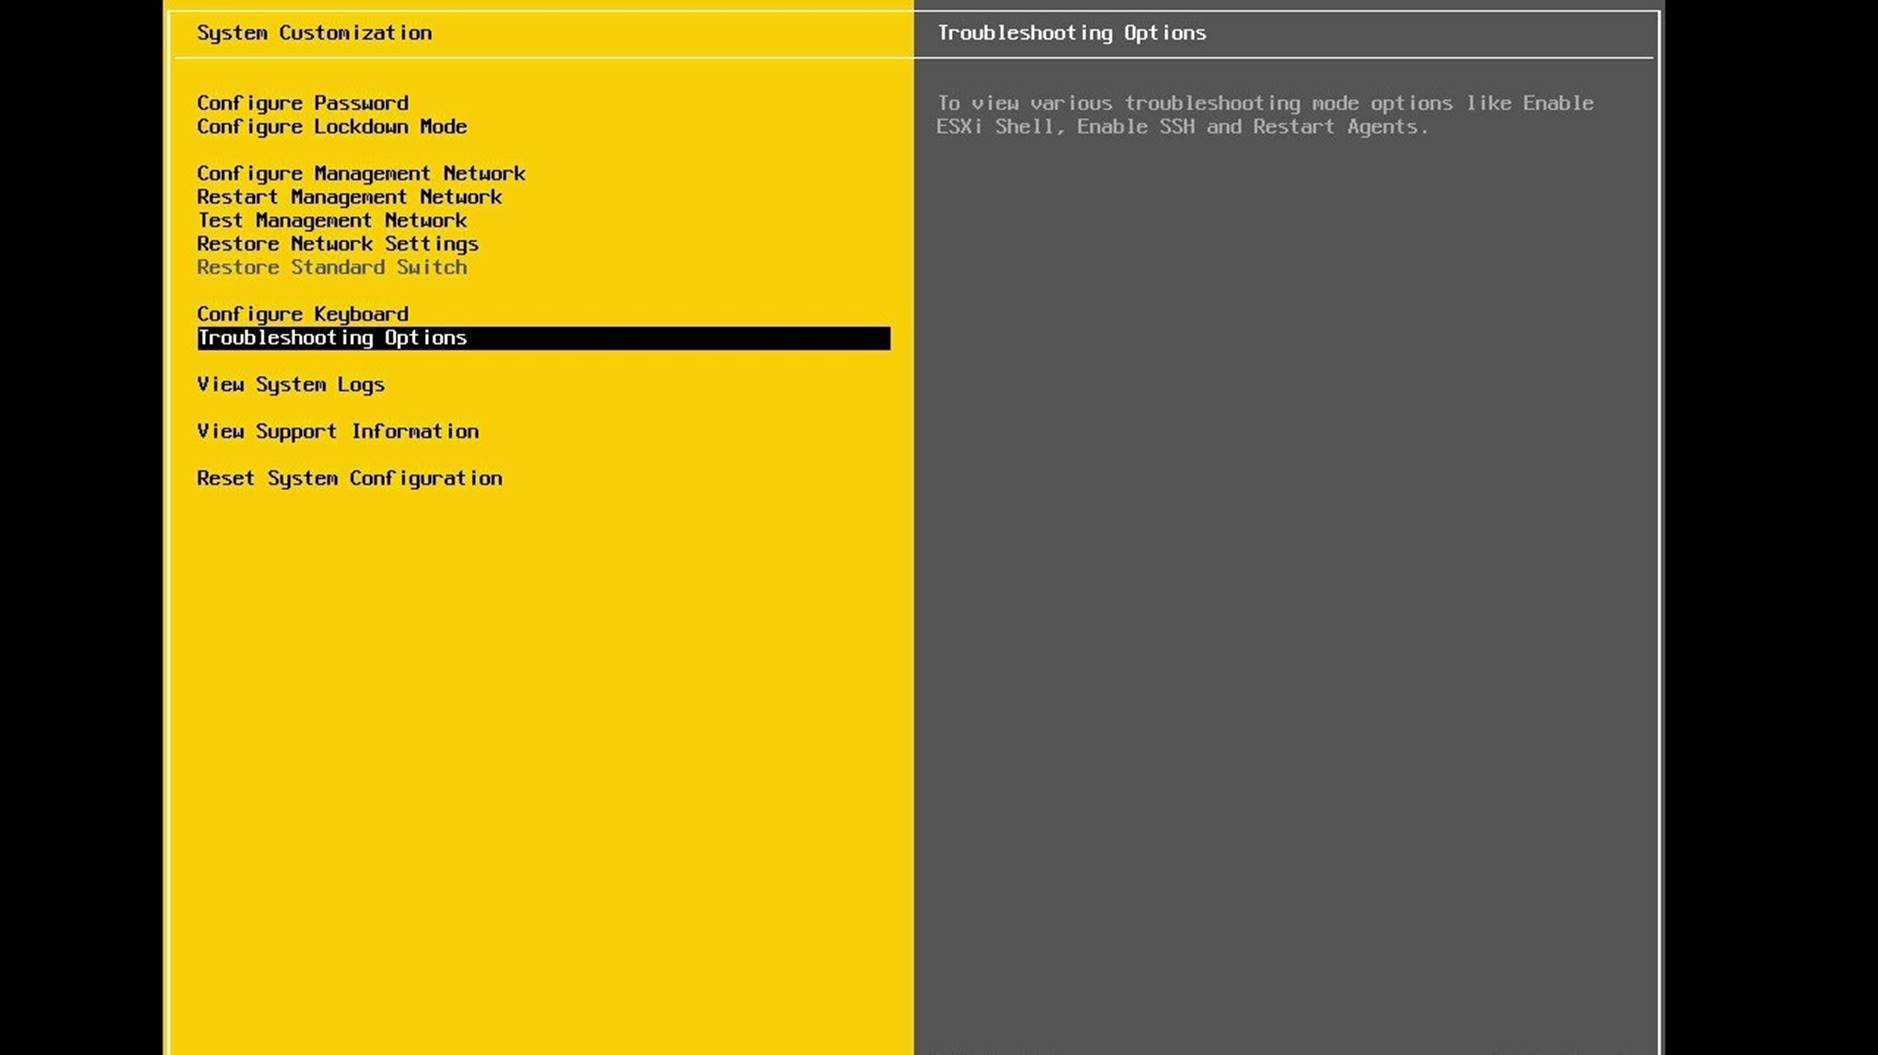
From the system customization menu, go to [Troubleshooting Options].

Select [Enable ESXi Shell] and press [Enter] to enable the shell. We need to enable the ESXi shell before we can logon to it and perform the upgrade.
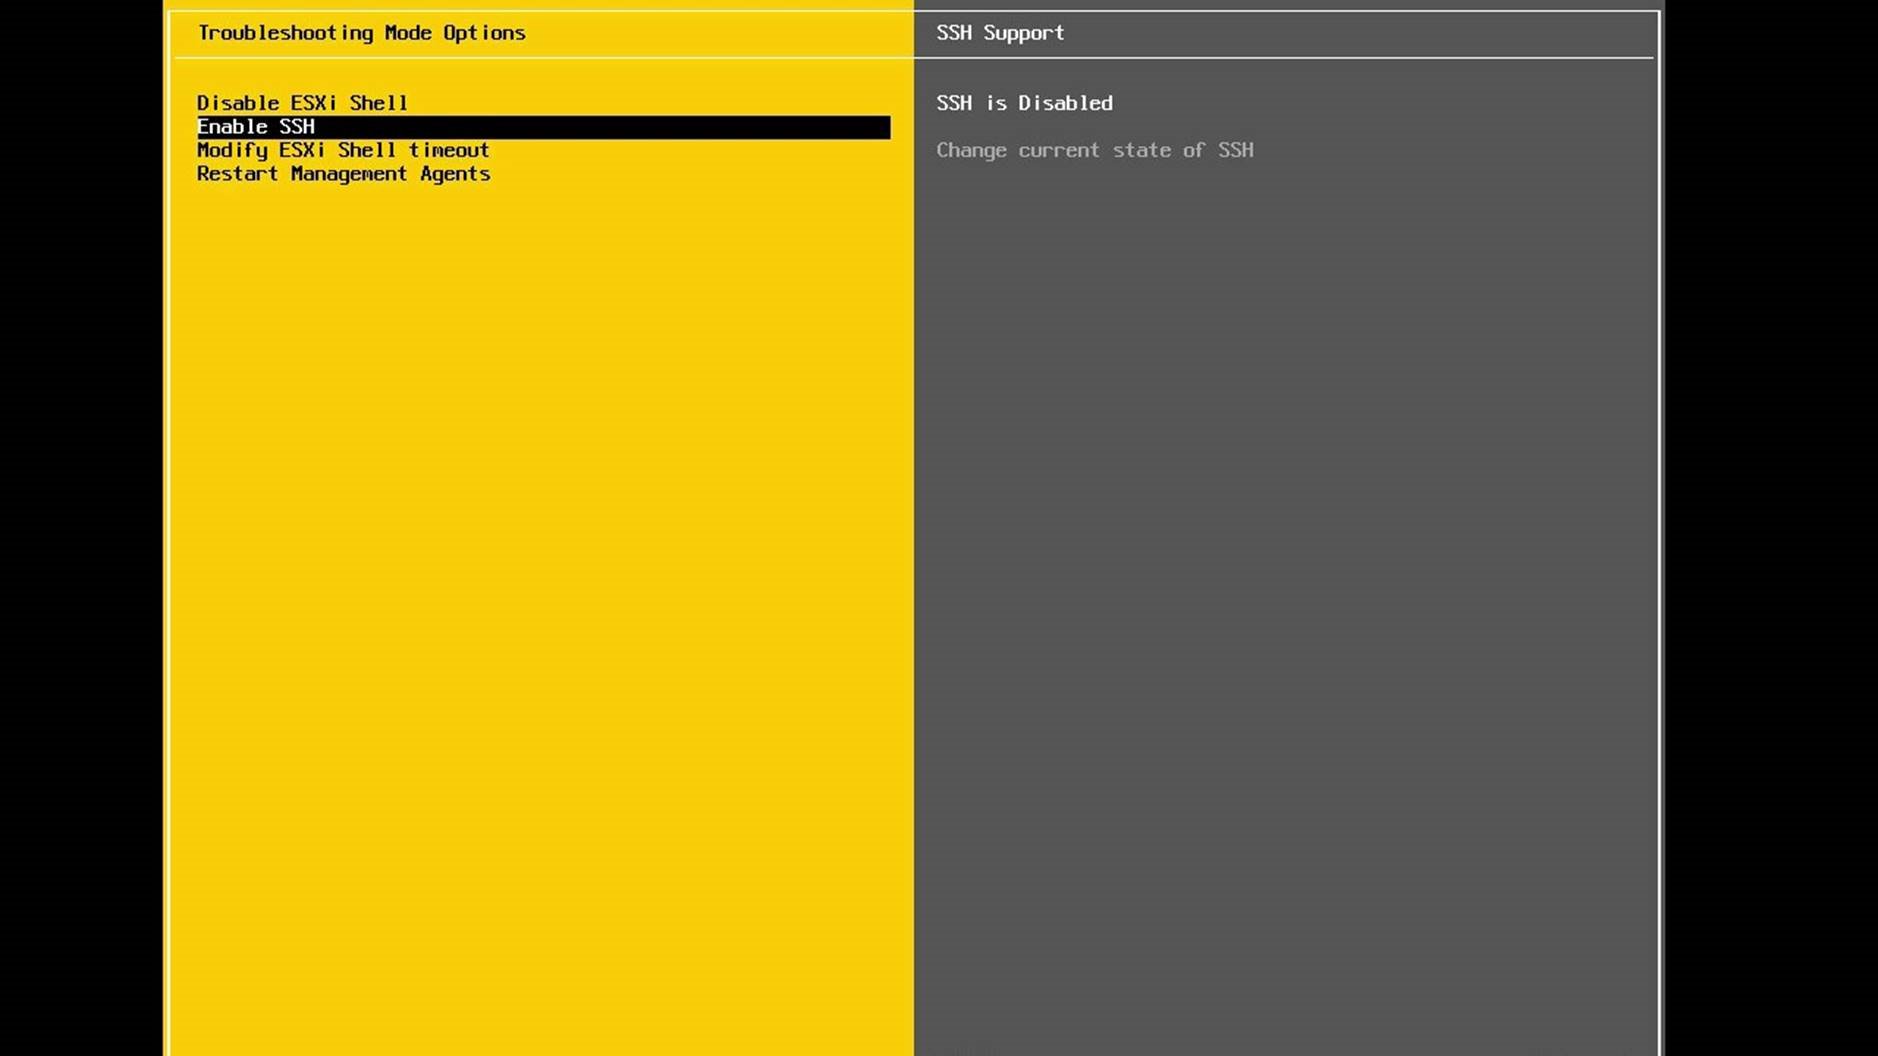
Next, select [Enable SSH] and press enter to enable the SSH service. In this example we will use SSH to copy the ESXi 5.5 software depot onto the host prior to the upgrade.
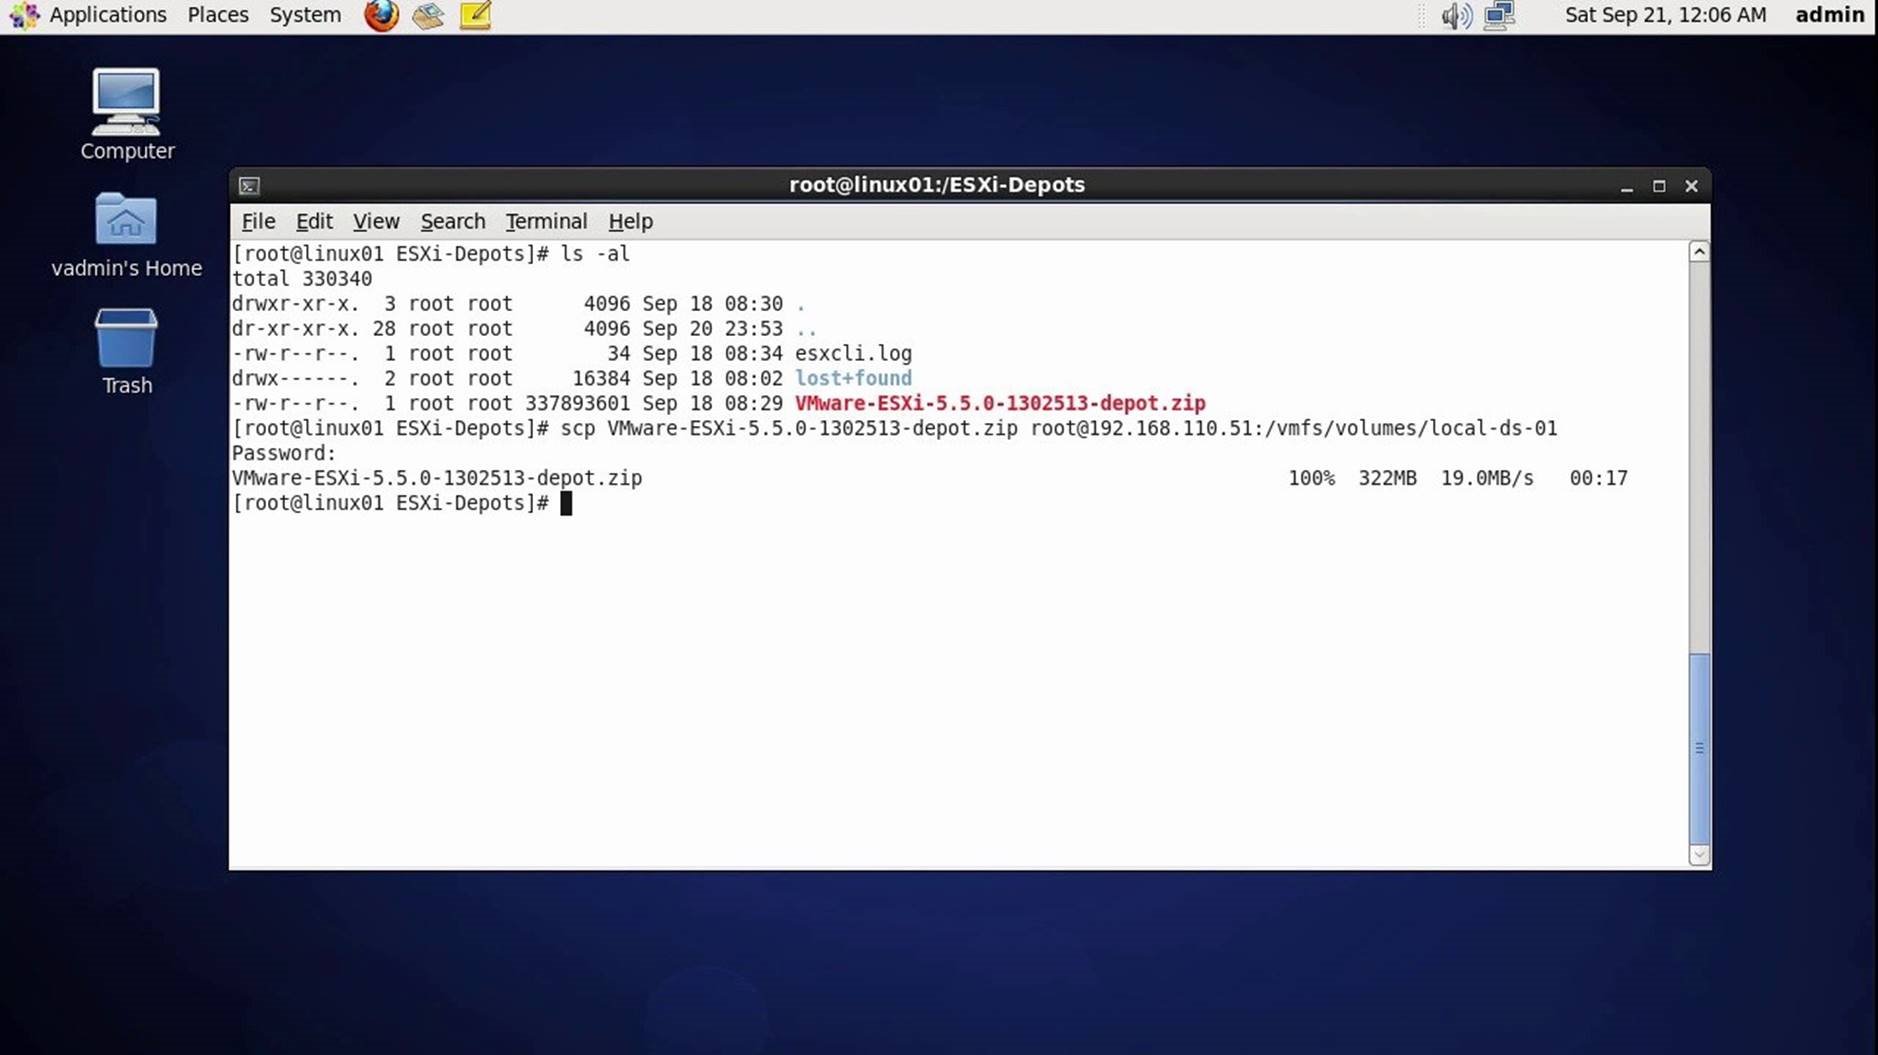
Before we can upgrade the host we need to copy the ESXi 5.5 upgrade image onto a datastore that is accessible from the host. Here we have saved a copy of the ESXi 5.5 software depot onto a Linux desktop. We then used the secure copy command (scp) to copy it to the local datastore [local-ds-01] on our ESXi host.
After copying the ESXi 5.5 software depot onto the host, we return to the host console and press Alt-F1 to access the ESXi Shell.

Login to the ESXi shell as an administrative user, in this example we have logged in as "root"
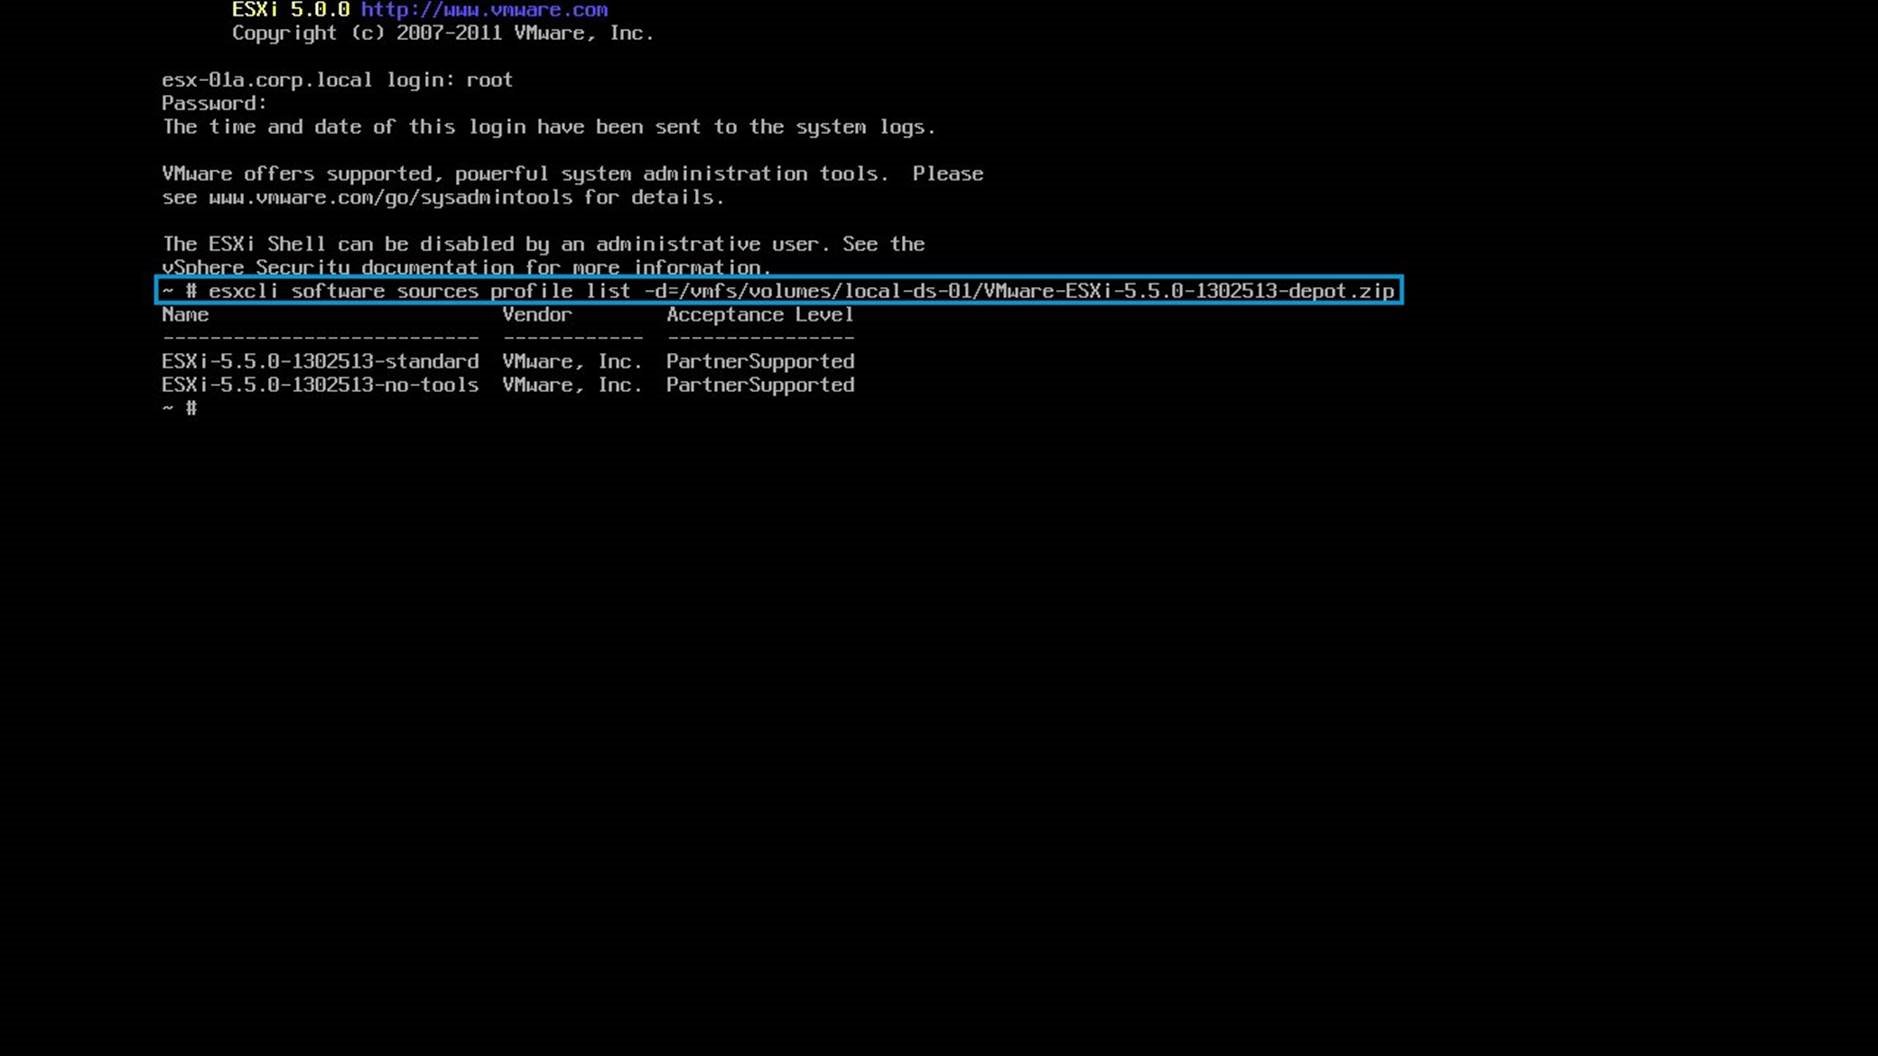
Next, we run the “esxcli software sources profile list” command and pass in the location of the 5.5 software depot. This command provides a list of the available 5.5 image profiles. Here we see that there are two image profiles: a “standard” profile and a “no-tools” profile. We will use the “Standard” profile.

Next we perform the upgrade by running the "esxcli software profile update command" and pass in the location of the offline depot along with the name of the image profile that we want to use. As this command will generate a lot of output we re-direct the output into the file /tmp/output.txt to make it easier to review following the upgrade.
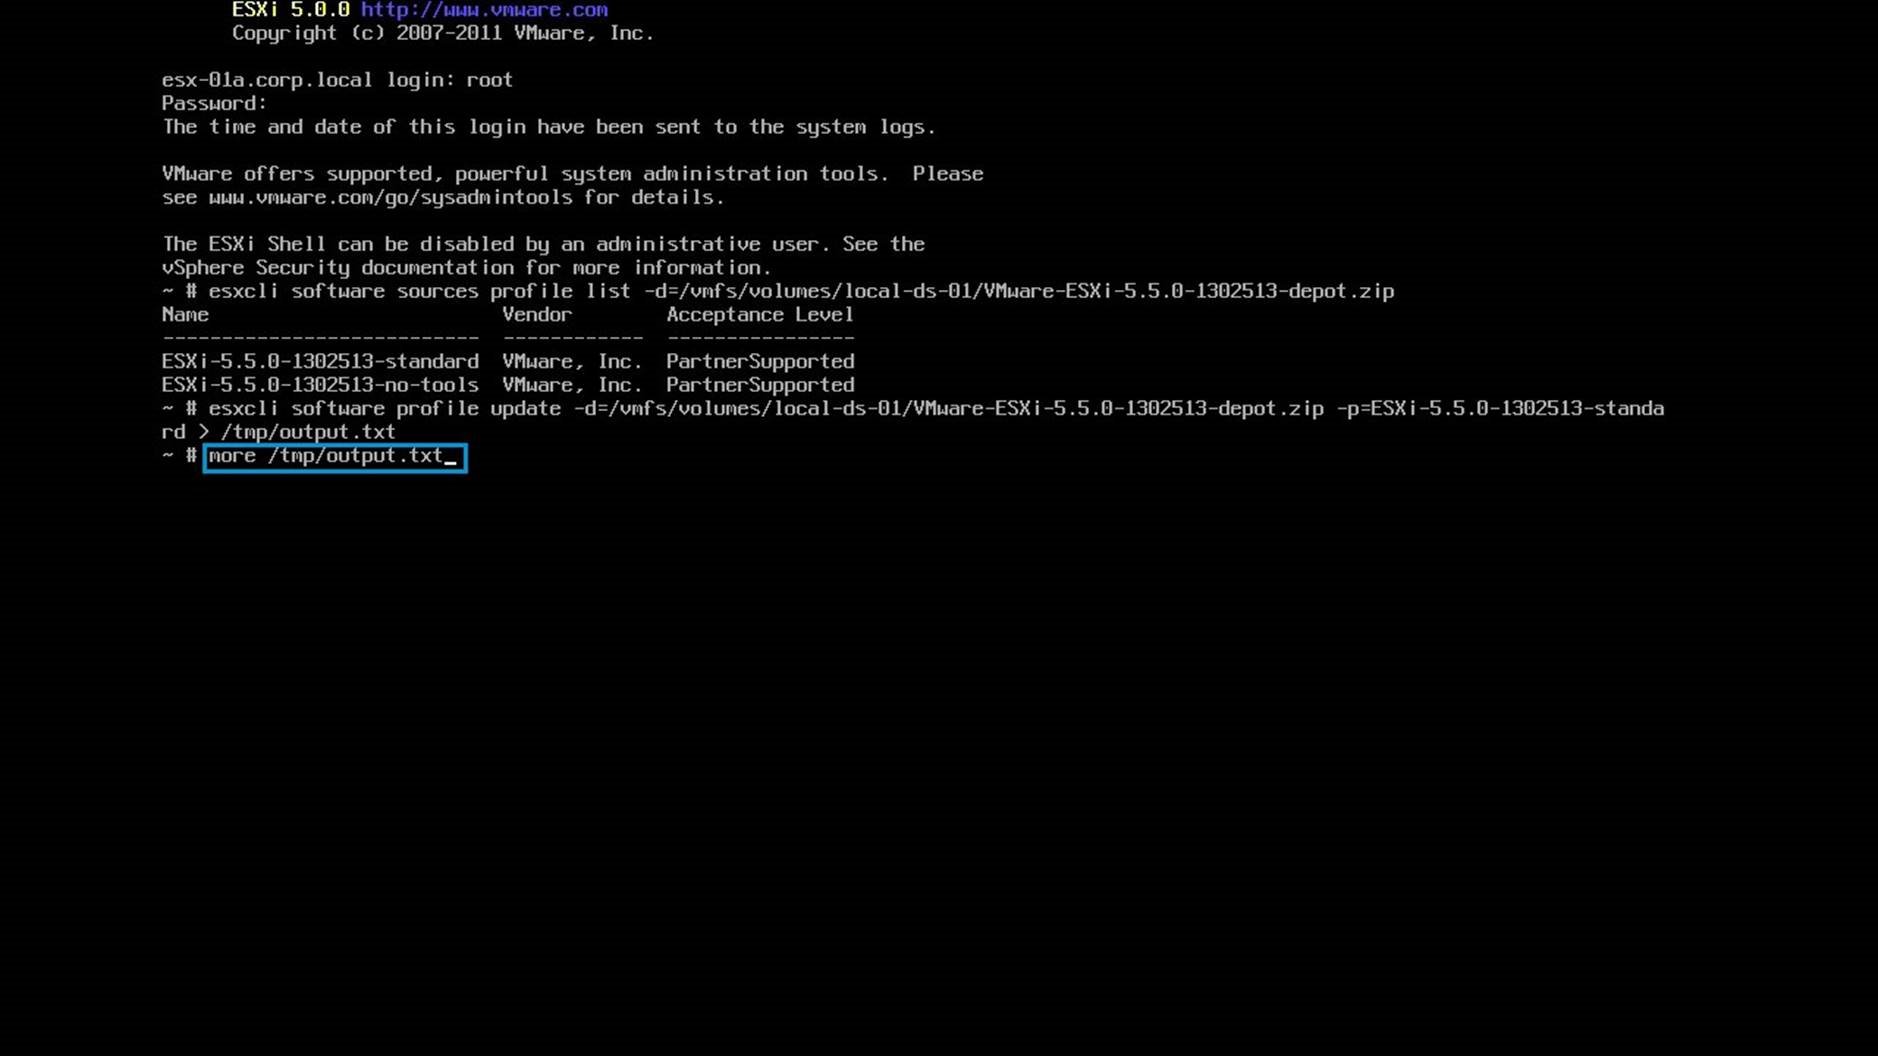
Following the upgrade we run the command "more /tmp/output.txt" to review the results.
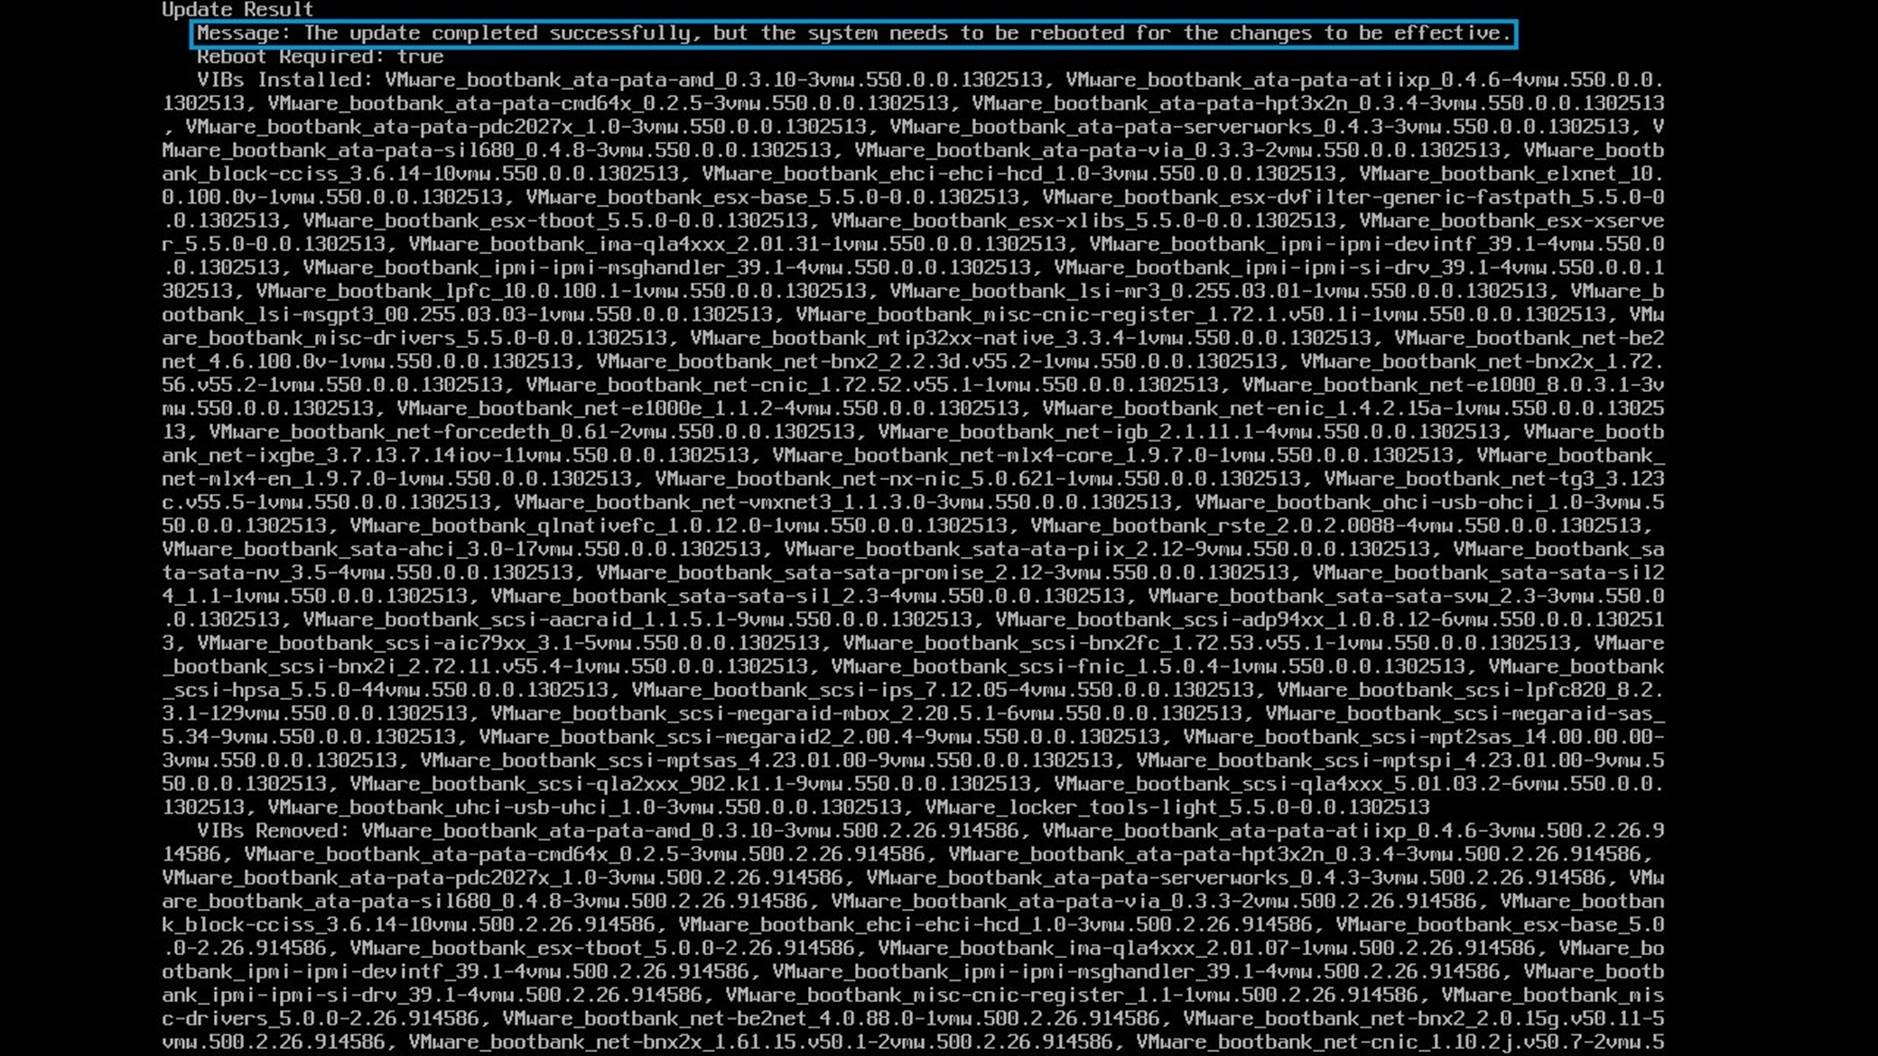
We see at the beginning of the output.txt file that the upgrade completed successfully and that a system reboot is needed for the upgrade to take affect.
The remaining information captured in the output.txt file is a summary of the VIBs that were installed as part of the upgrade. Reboot the host to complete the upgrade.
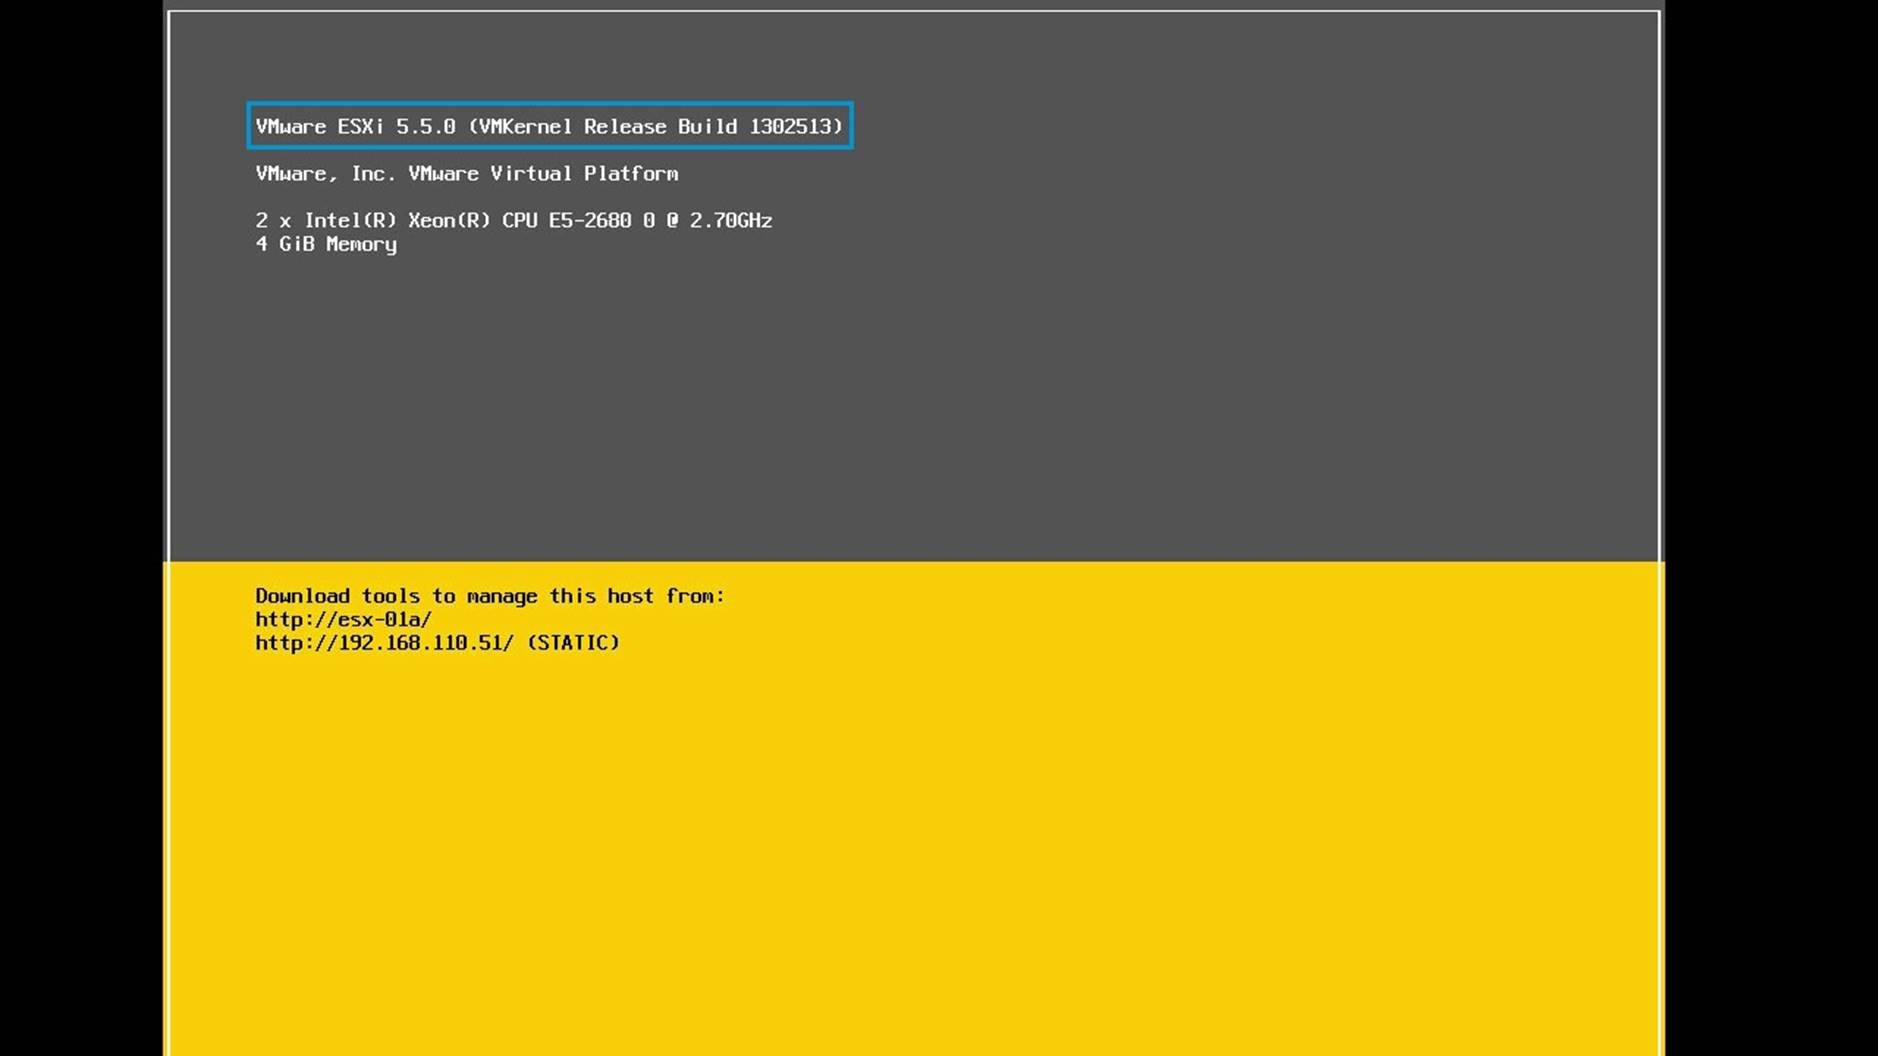
Following the reboot we see that the host is now running ESXi 5.5. This concludes the walkthrough on upgrading a vSphere host using the "esxcli" command from within the ESXi Shell. Use the navigation menu on the left to select the next walkthrough.