
Supervisor Series: Ep 1. Supervisor Enablement in vSphere 8
vSphere with Tanzu allows you to transform your existing vSphere infrastructure into a developer-ready Kubernetes platform capable of managing your traditional and modernised workloads.
In this series, we’ll dive into the world of the Supervisor and explore how this technology can transform your organisation's application deployment and management capabilities. We’ll show you how to enable a Supervisor, how to use Supervisor Services, VM Service, and Tanzu Kubernetes Grid to deploy a demo 3-tier application, and much more.
In this episode, we’ll start with the Supervisor enablement.
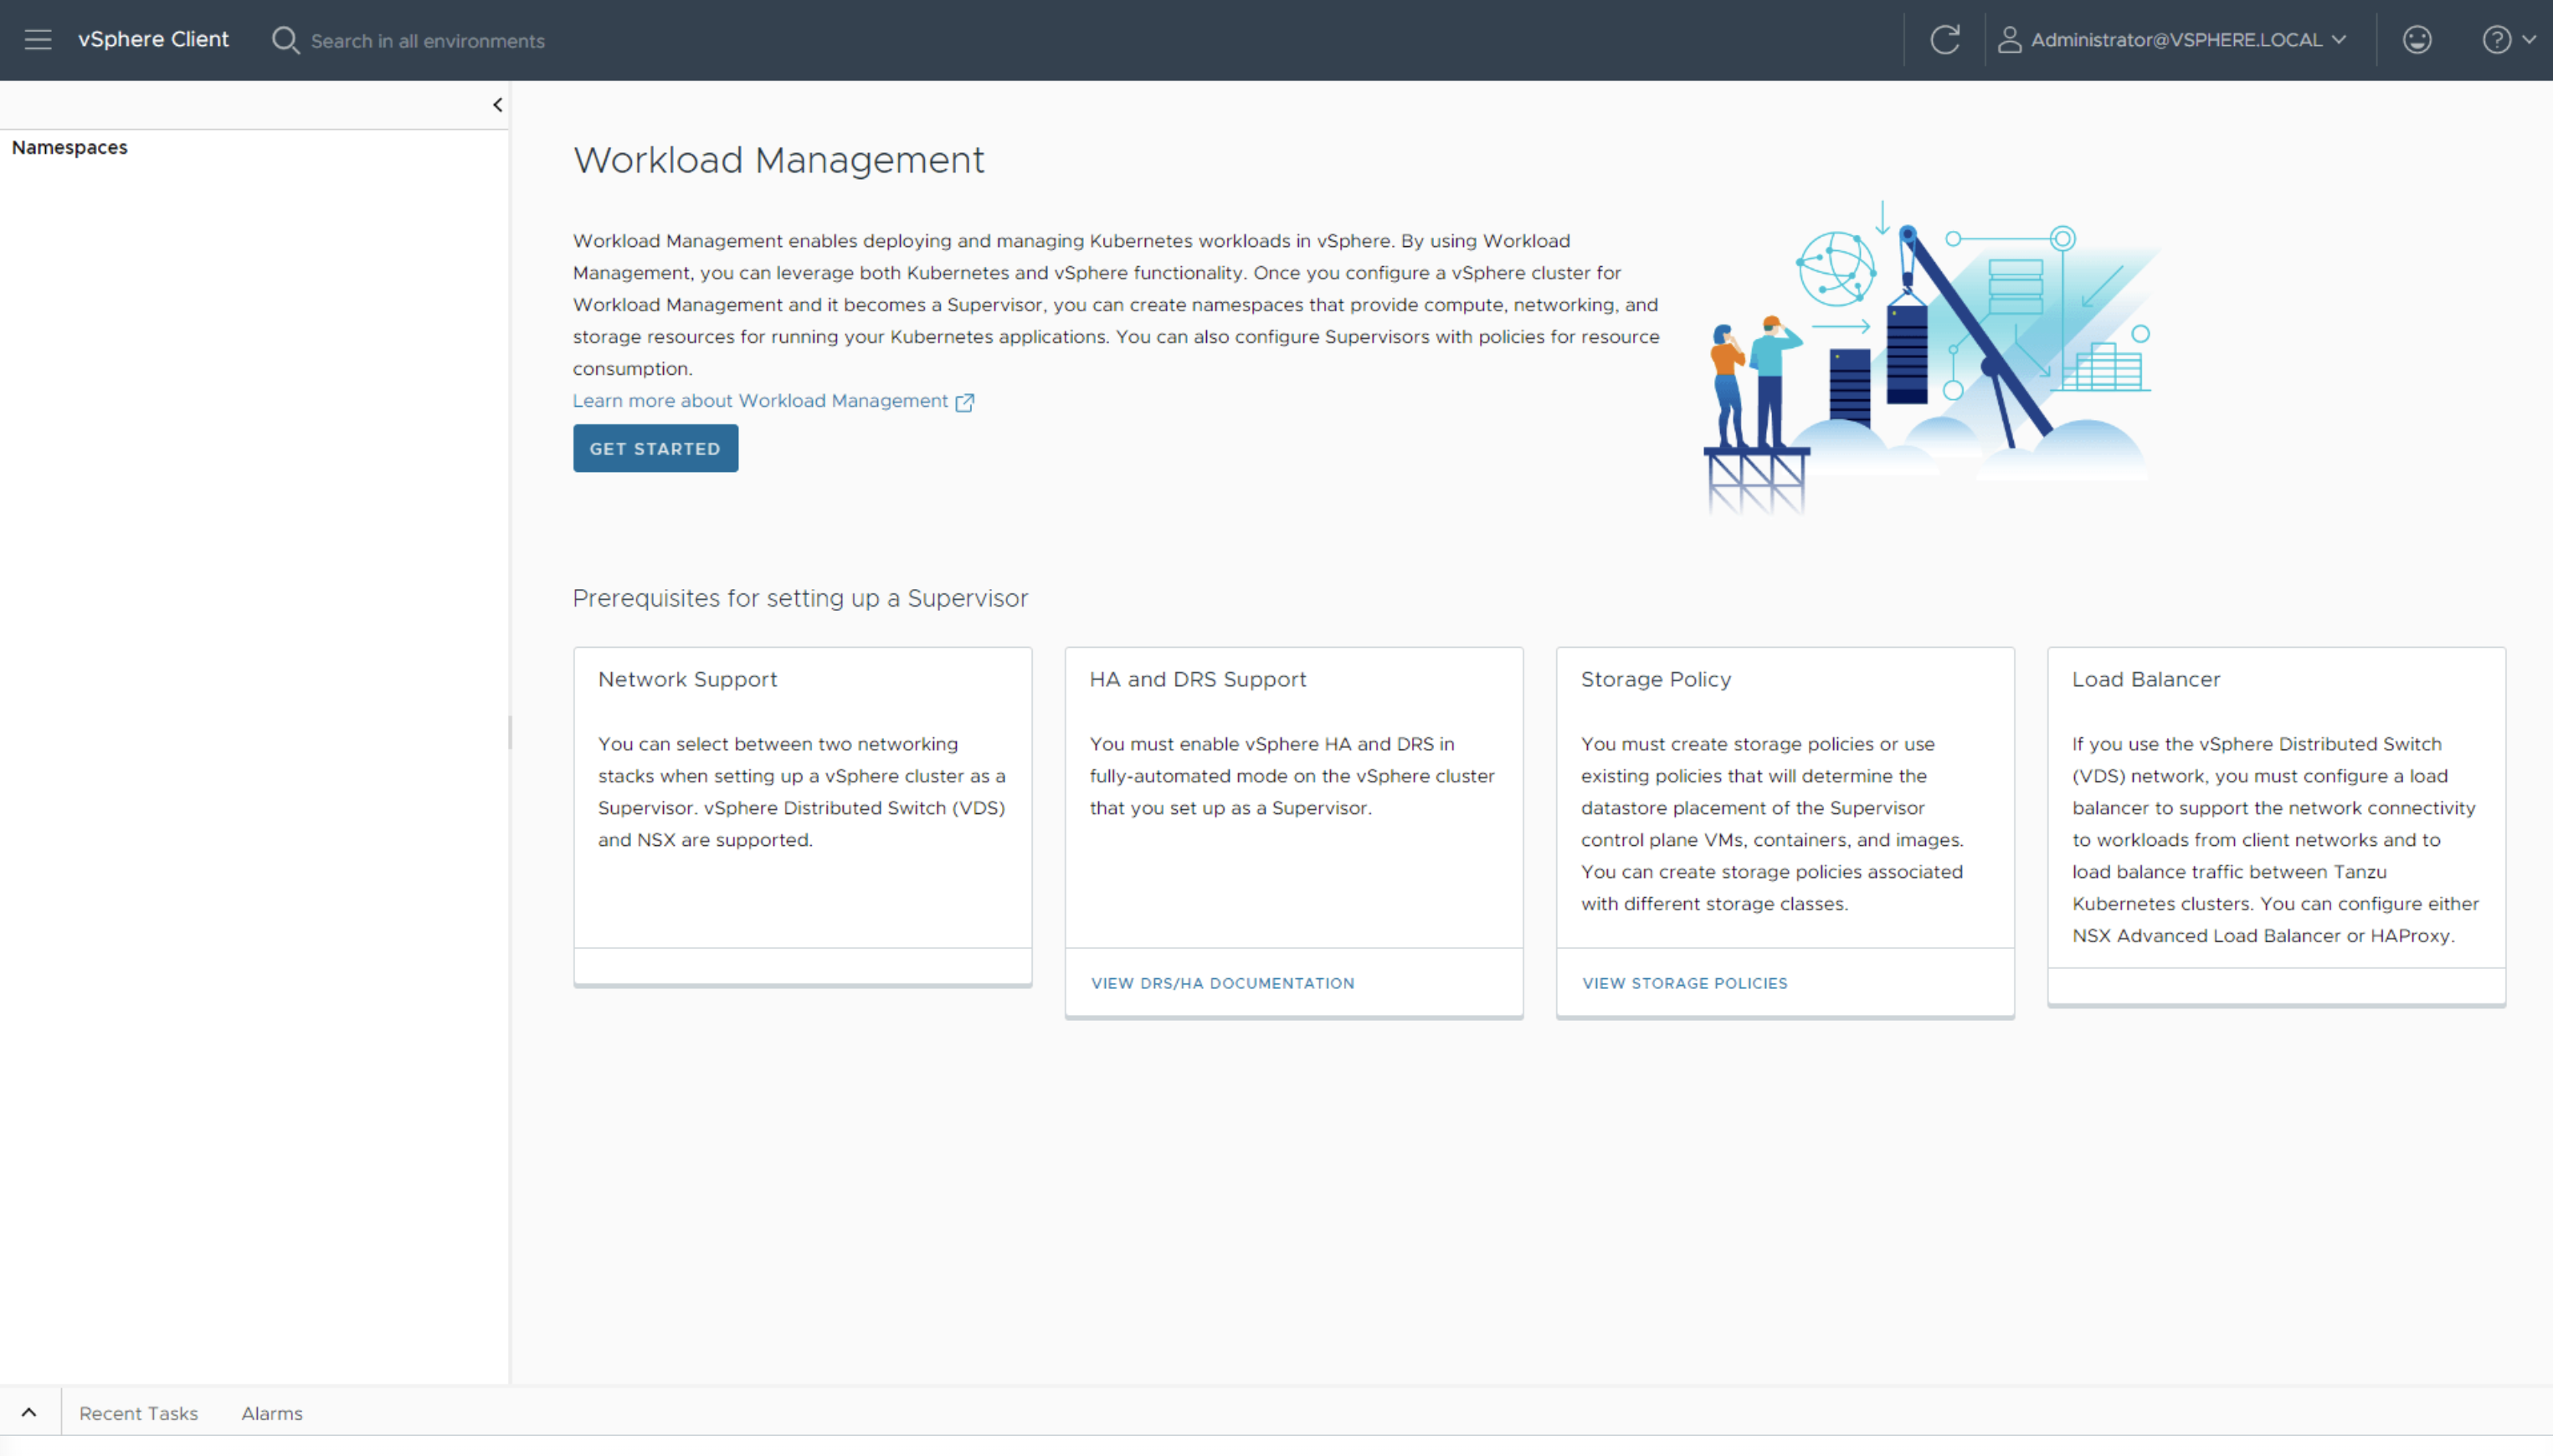
Supervisor enablement
Since its first introduction, the Supervisor enablement process has been significantly improved and can be completed in just few steps.
From the vSphere client menu, open Workload Management and click on Get Started.
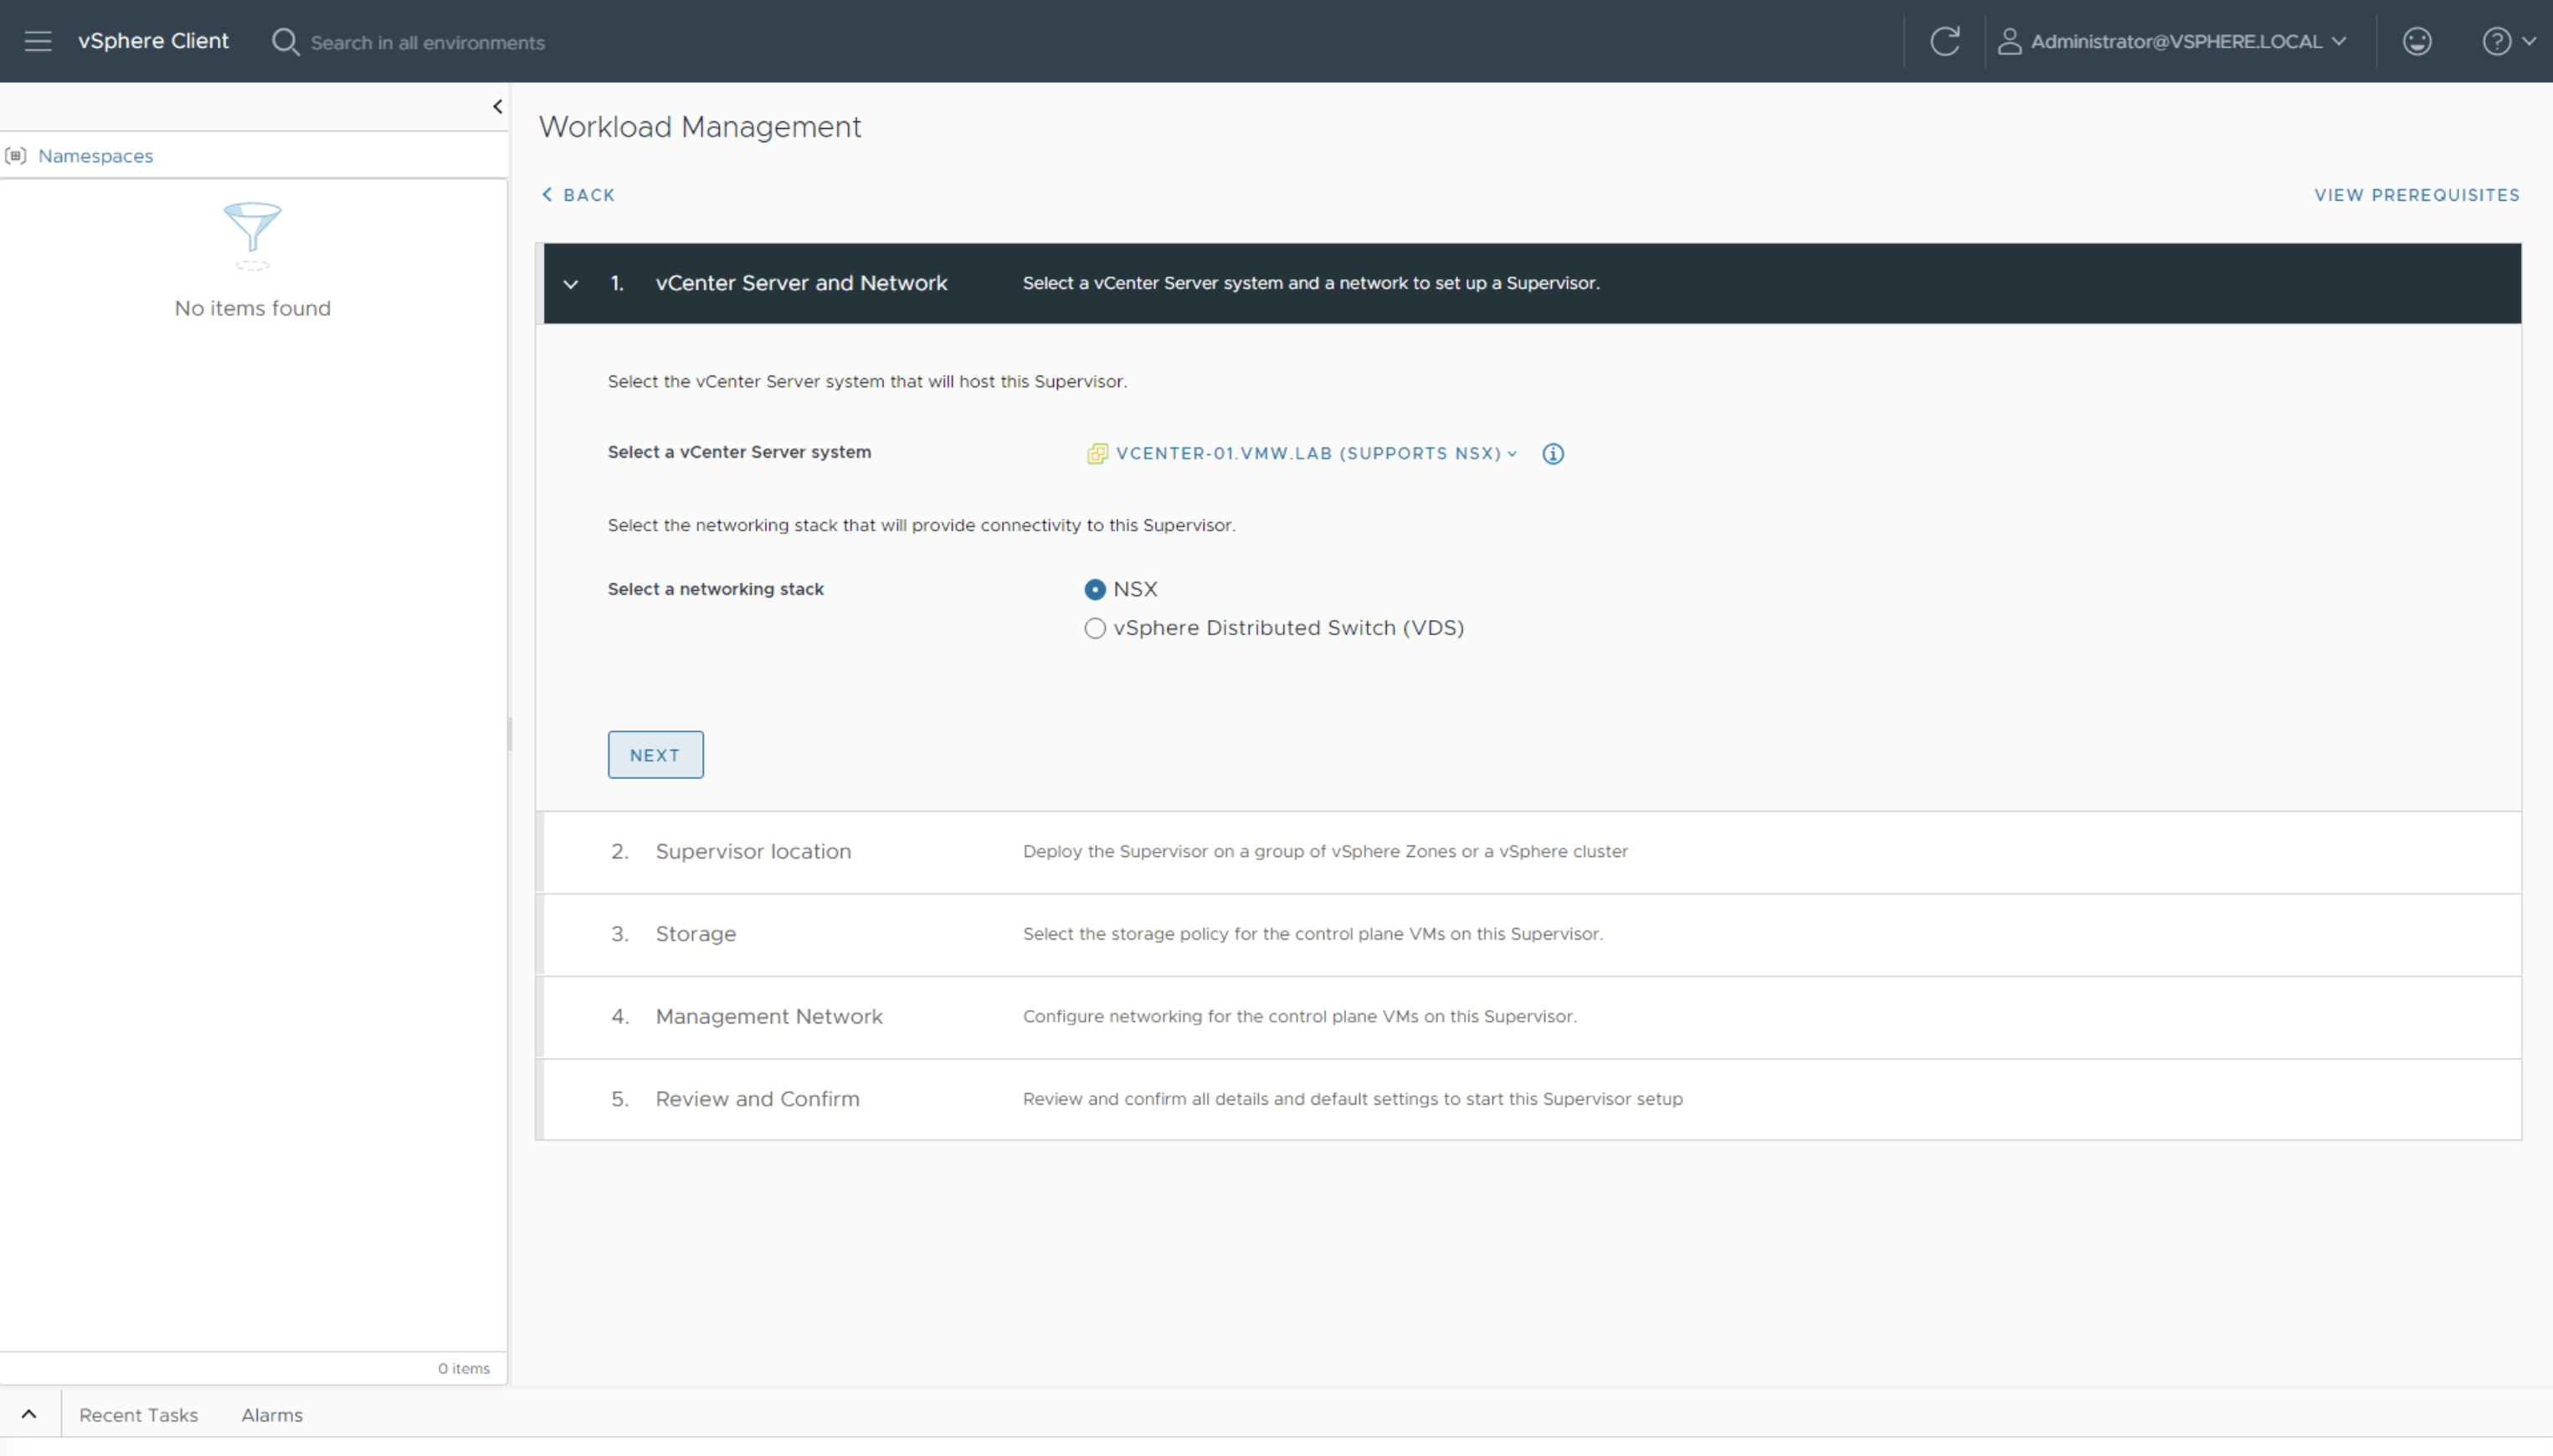
Select a networking stack. In this scenario, we will use NSX.
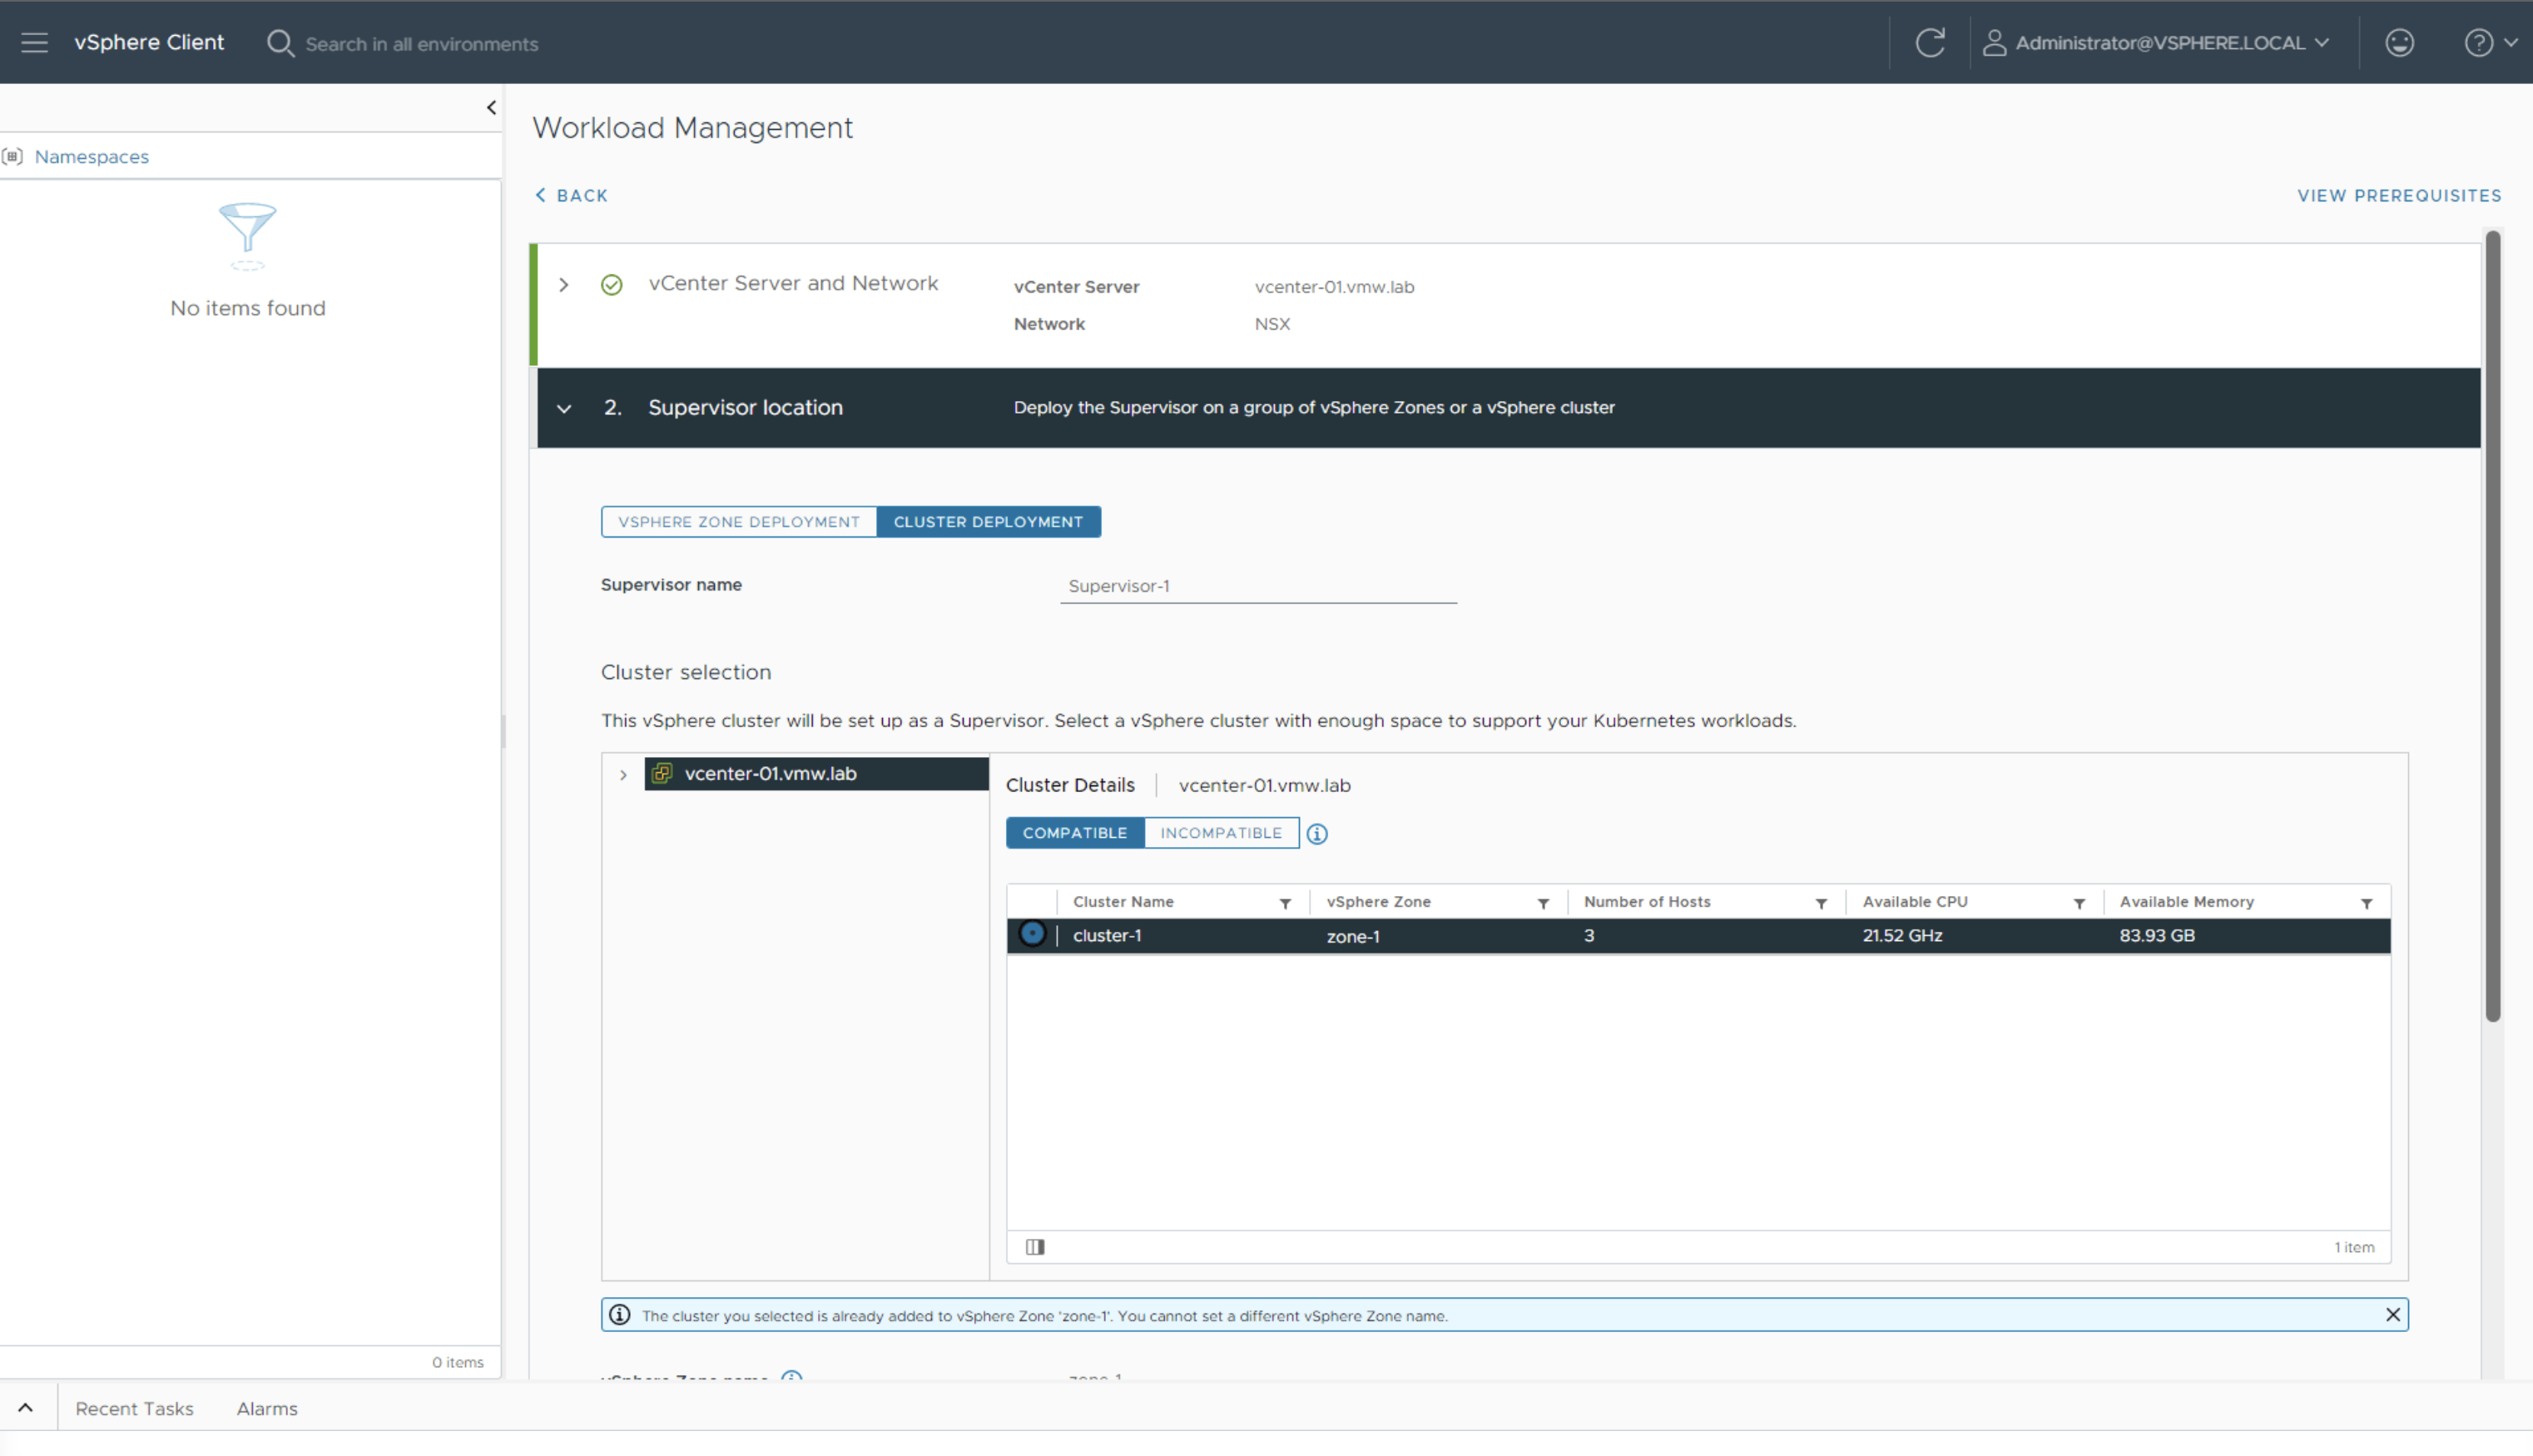
Select Cluster Deployment to deploy the Supervisor into a single vSphere zone, enter Supervisor-1 as Supervisor name, and select a compatible vSphere cluster, in our case cluster-1. As the cluster is already added to vSphere Zone zone-1, this information will be automatically populated.
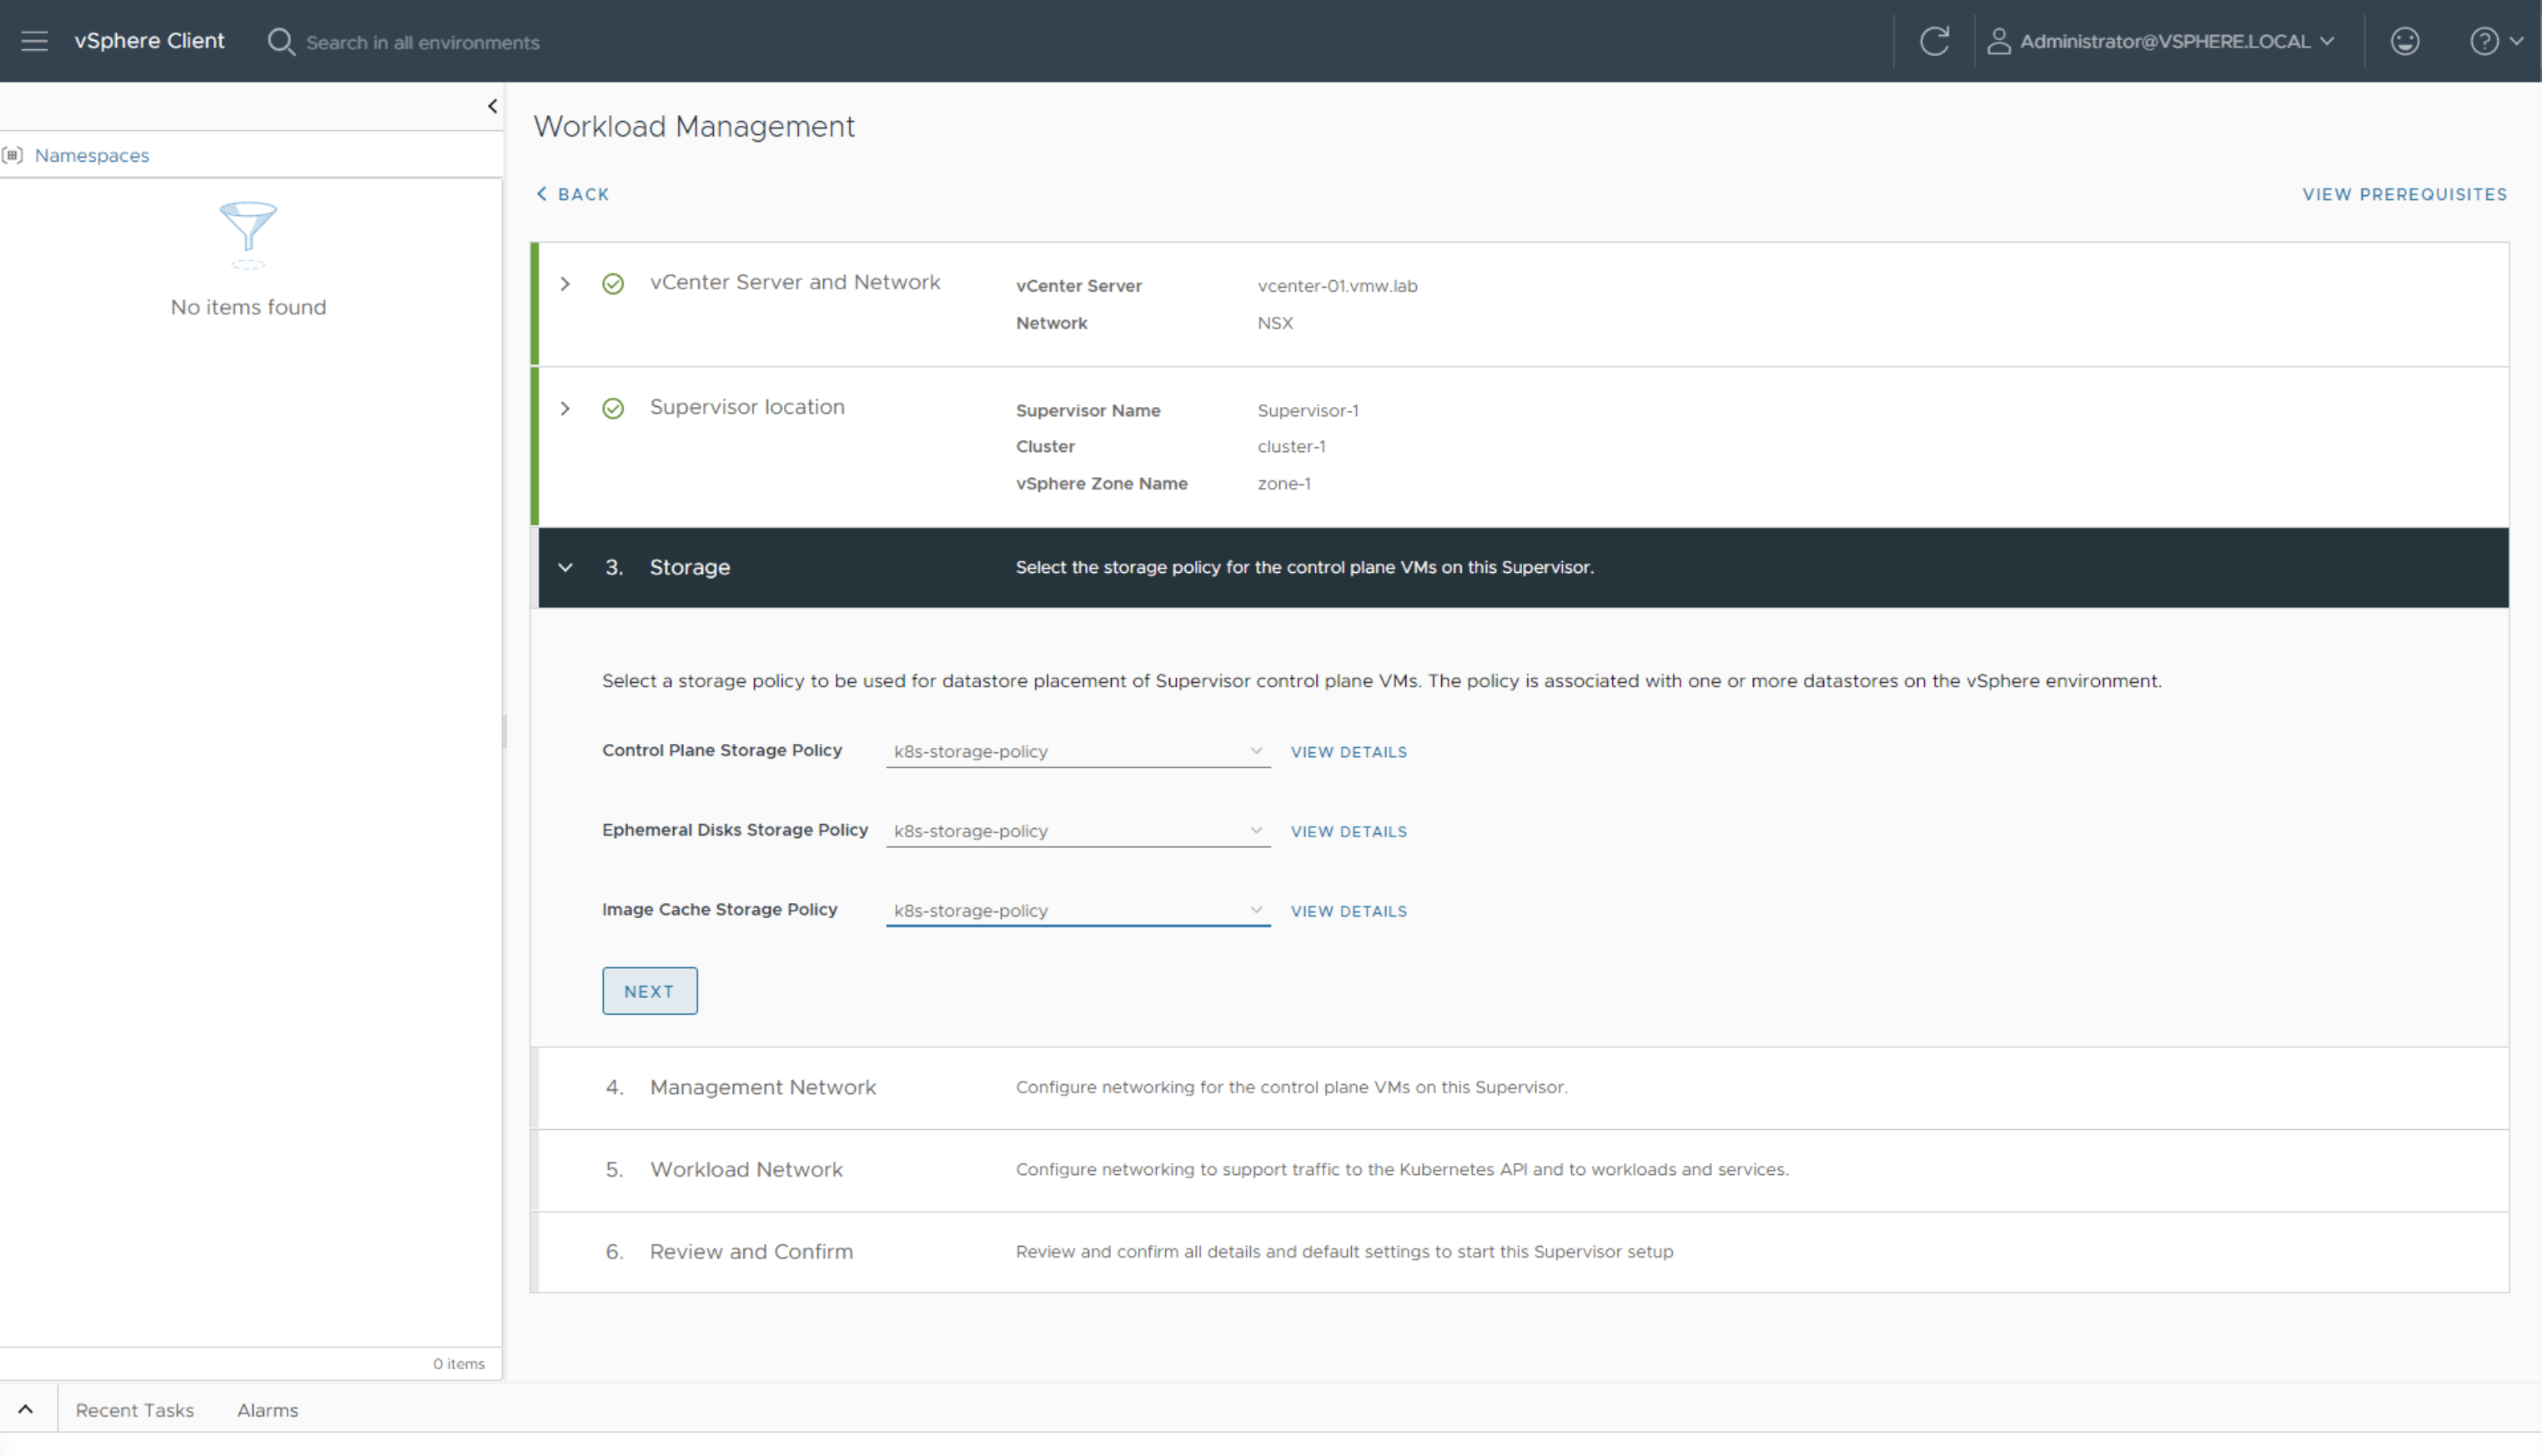
Select a Storage Policy to be used for datastore placement of Supervisor control plane VMs. We have created a tag-based storage policy called k8s-storage-policy.
Enter Management Network details. This is the network that control plane VMs will be deployed on and use to communicate to vCenter. 5 IP addresses are needed for the Kubernetes control plane; 1 for each of the 3 nodes, 1 for virtual IP, and 1 for rolling cluster upgrades.

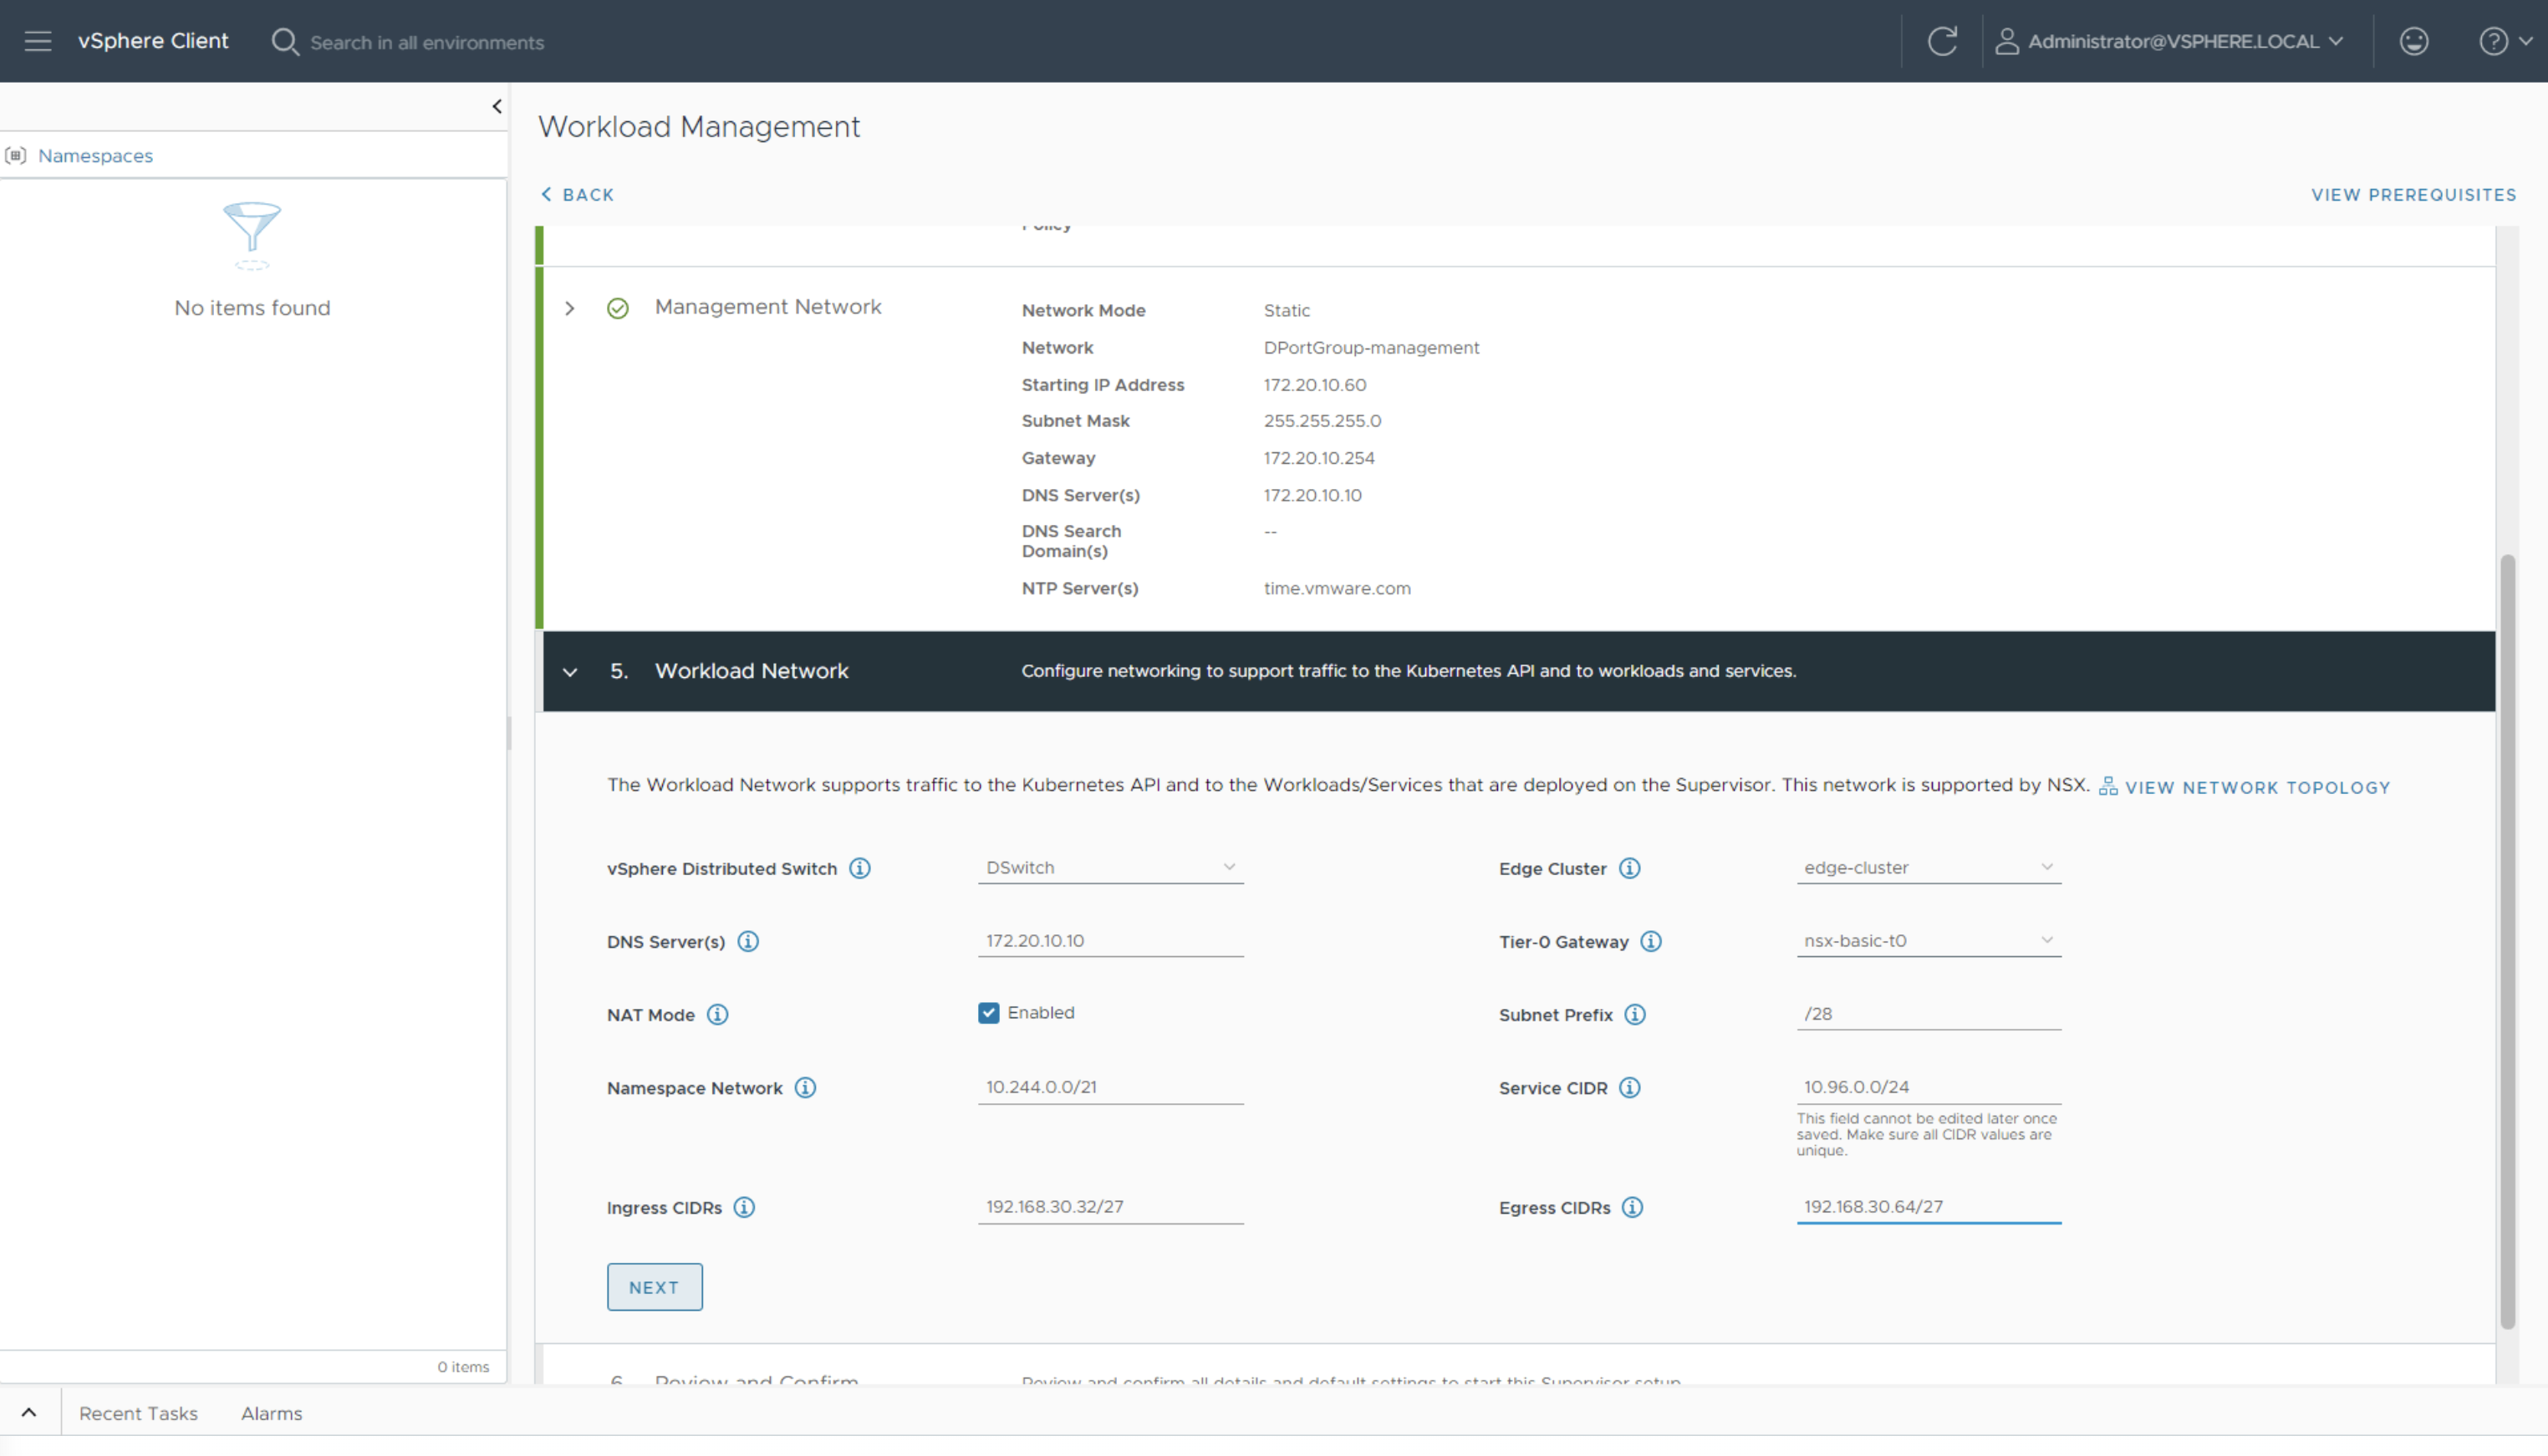
Enter Workload Network details to support traffic to the Kubernetes API and to workloads and services.
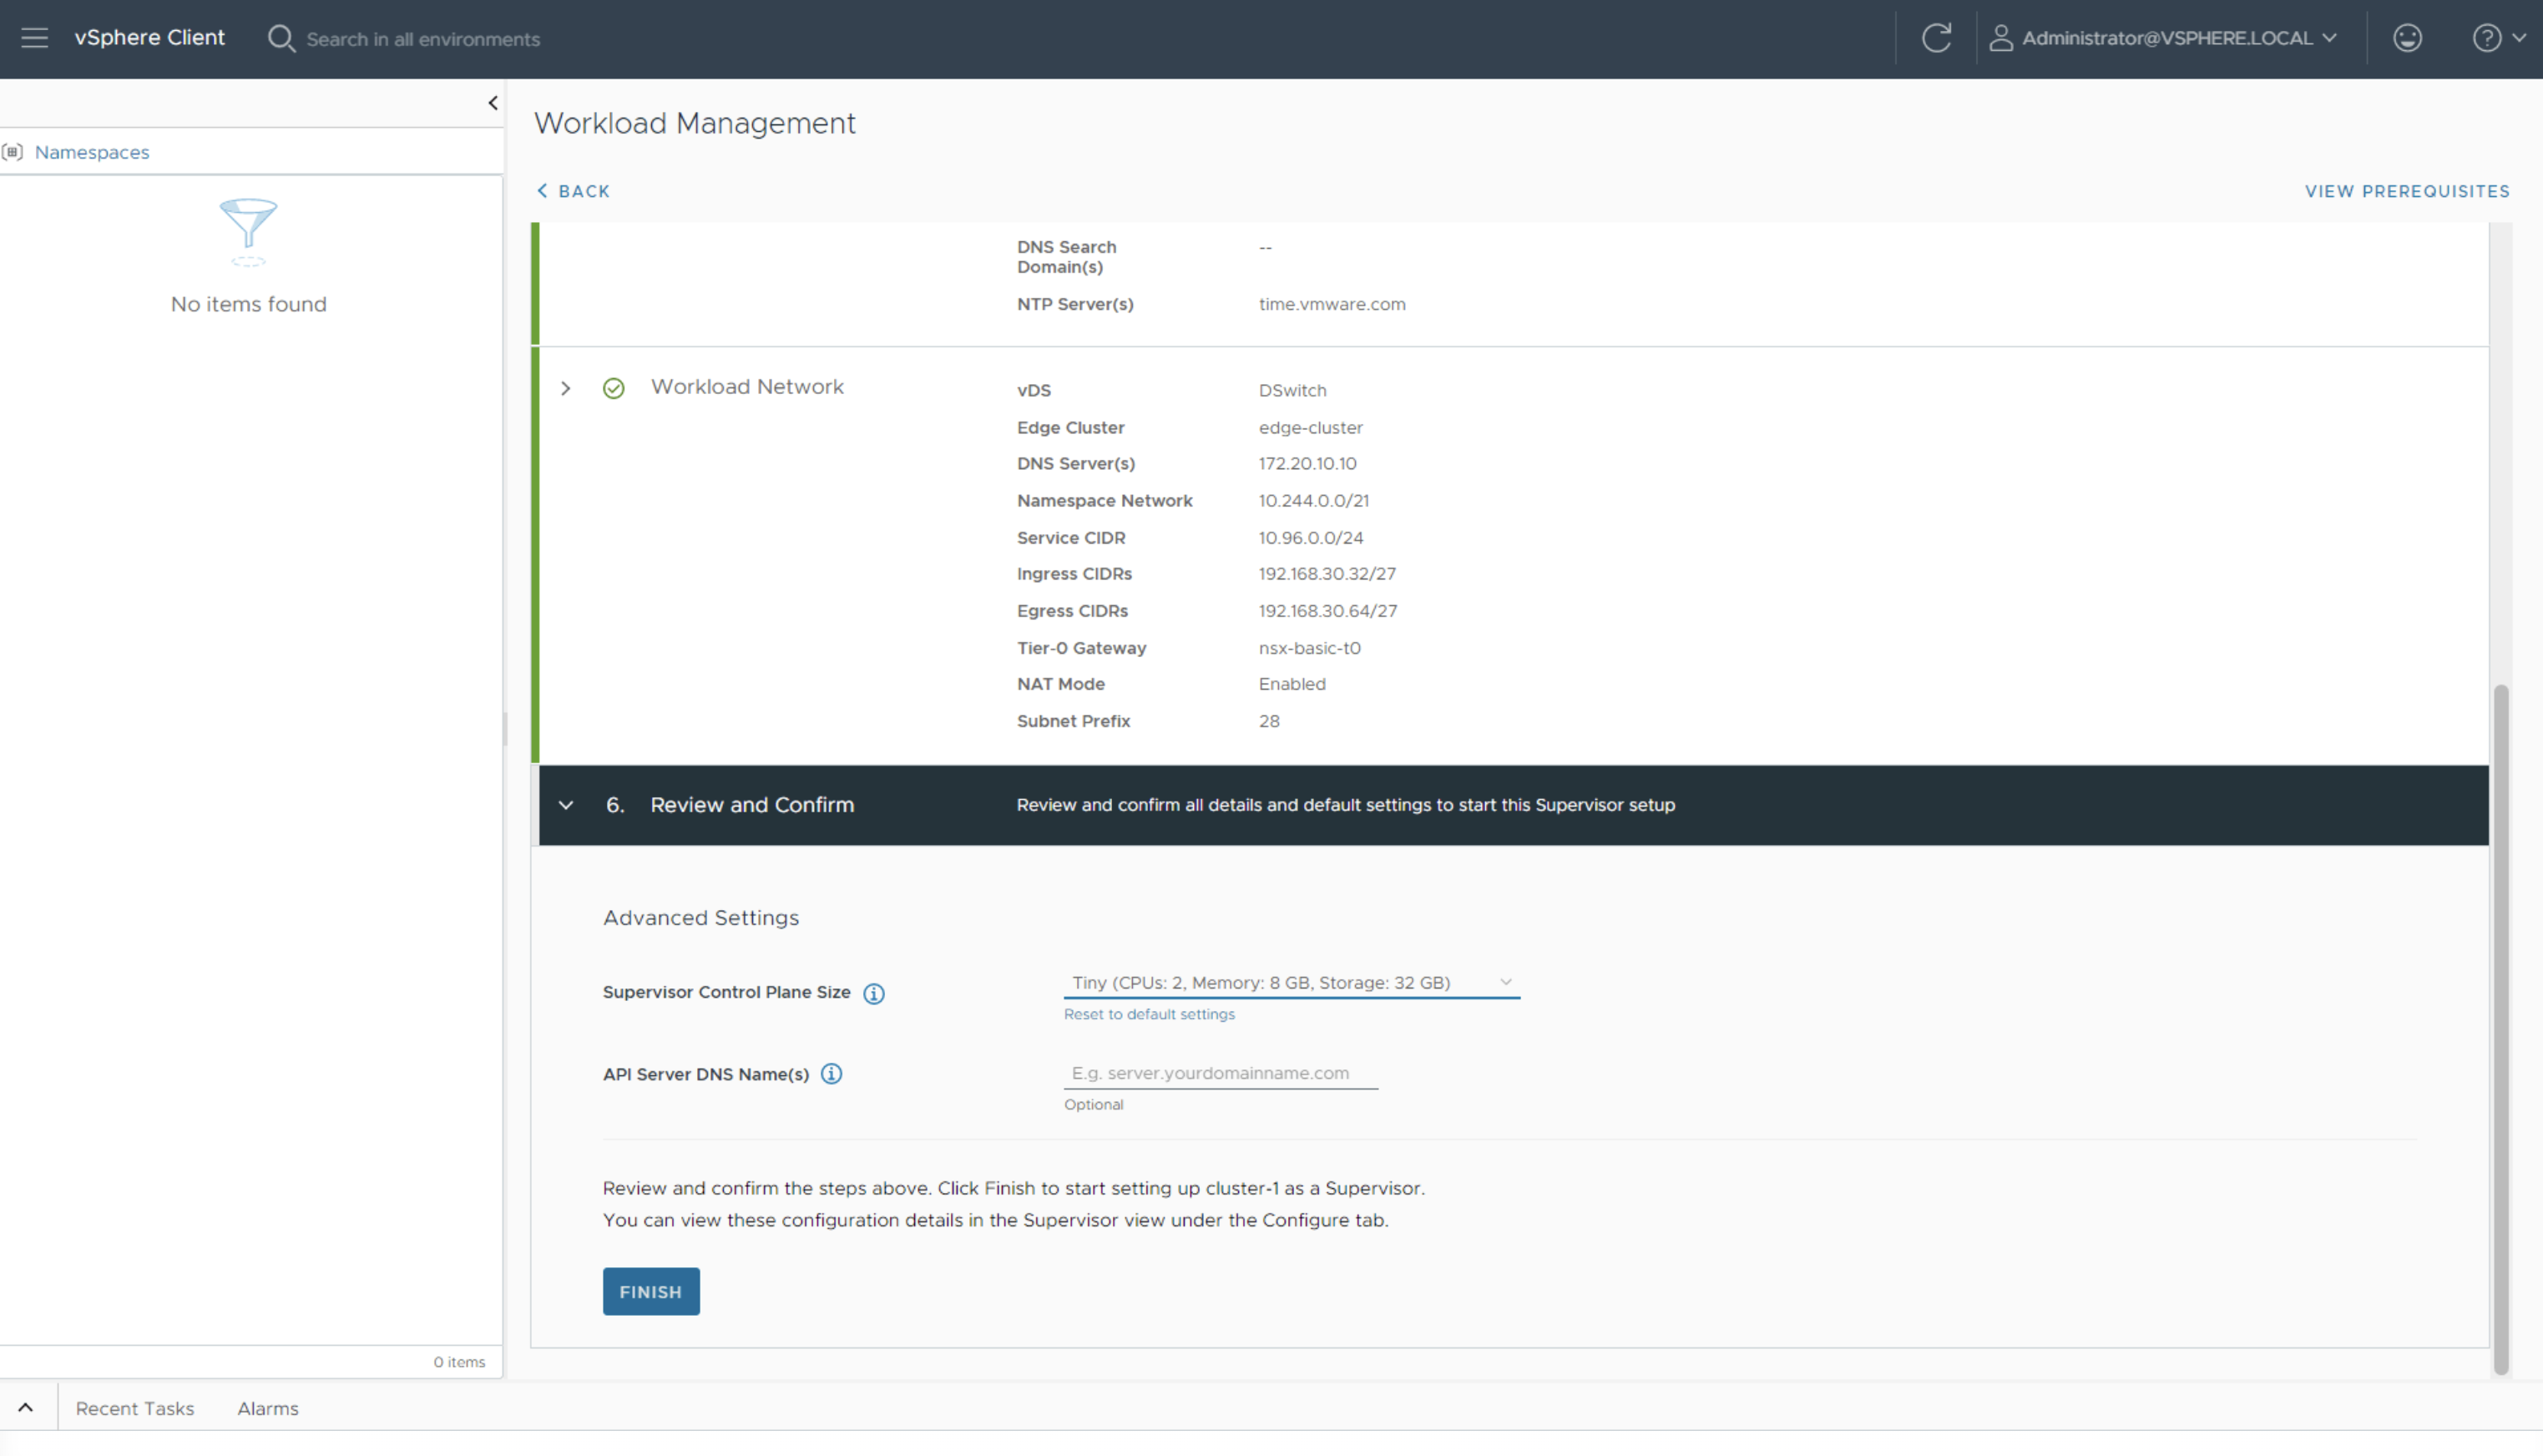
Select the size of your Supervisor Control Plane and click Finish.
One of the recent enhancements in the enablement process is the possibility to view details on the config and host config status. Simply click on the view button to see which actions have been completed,
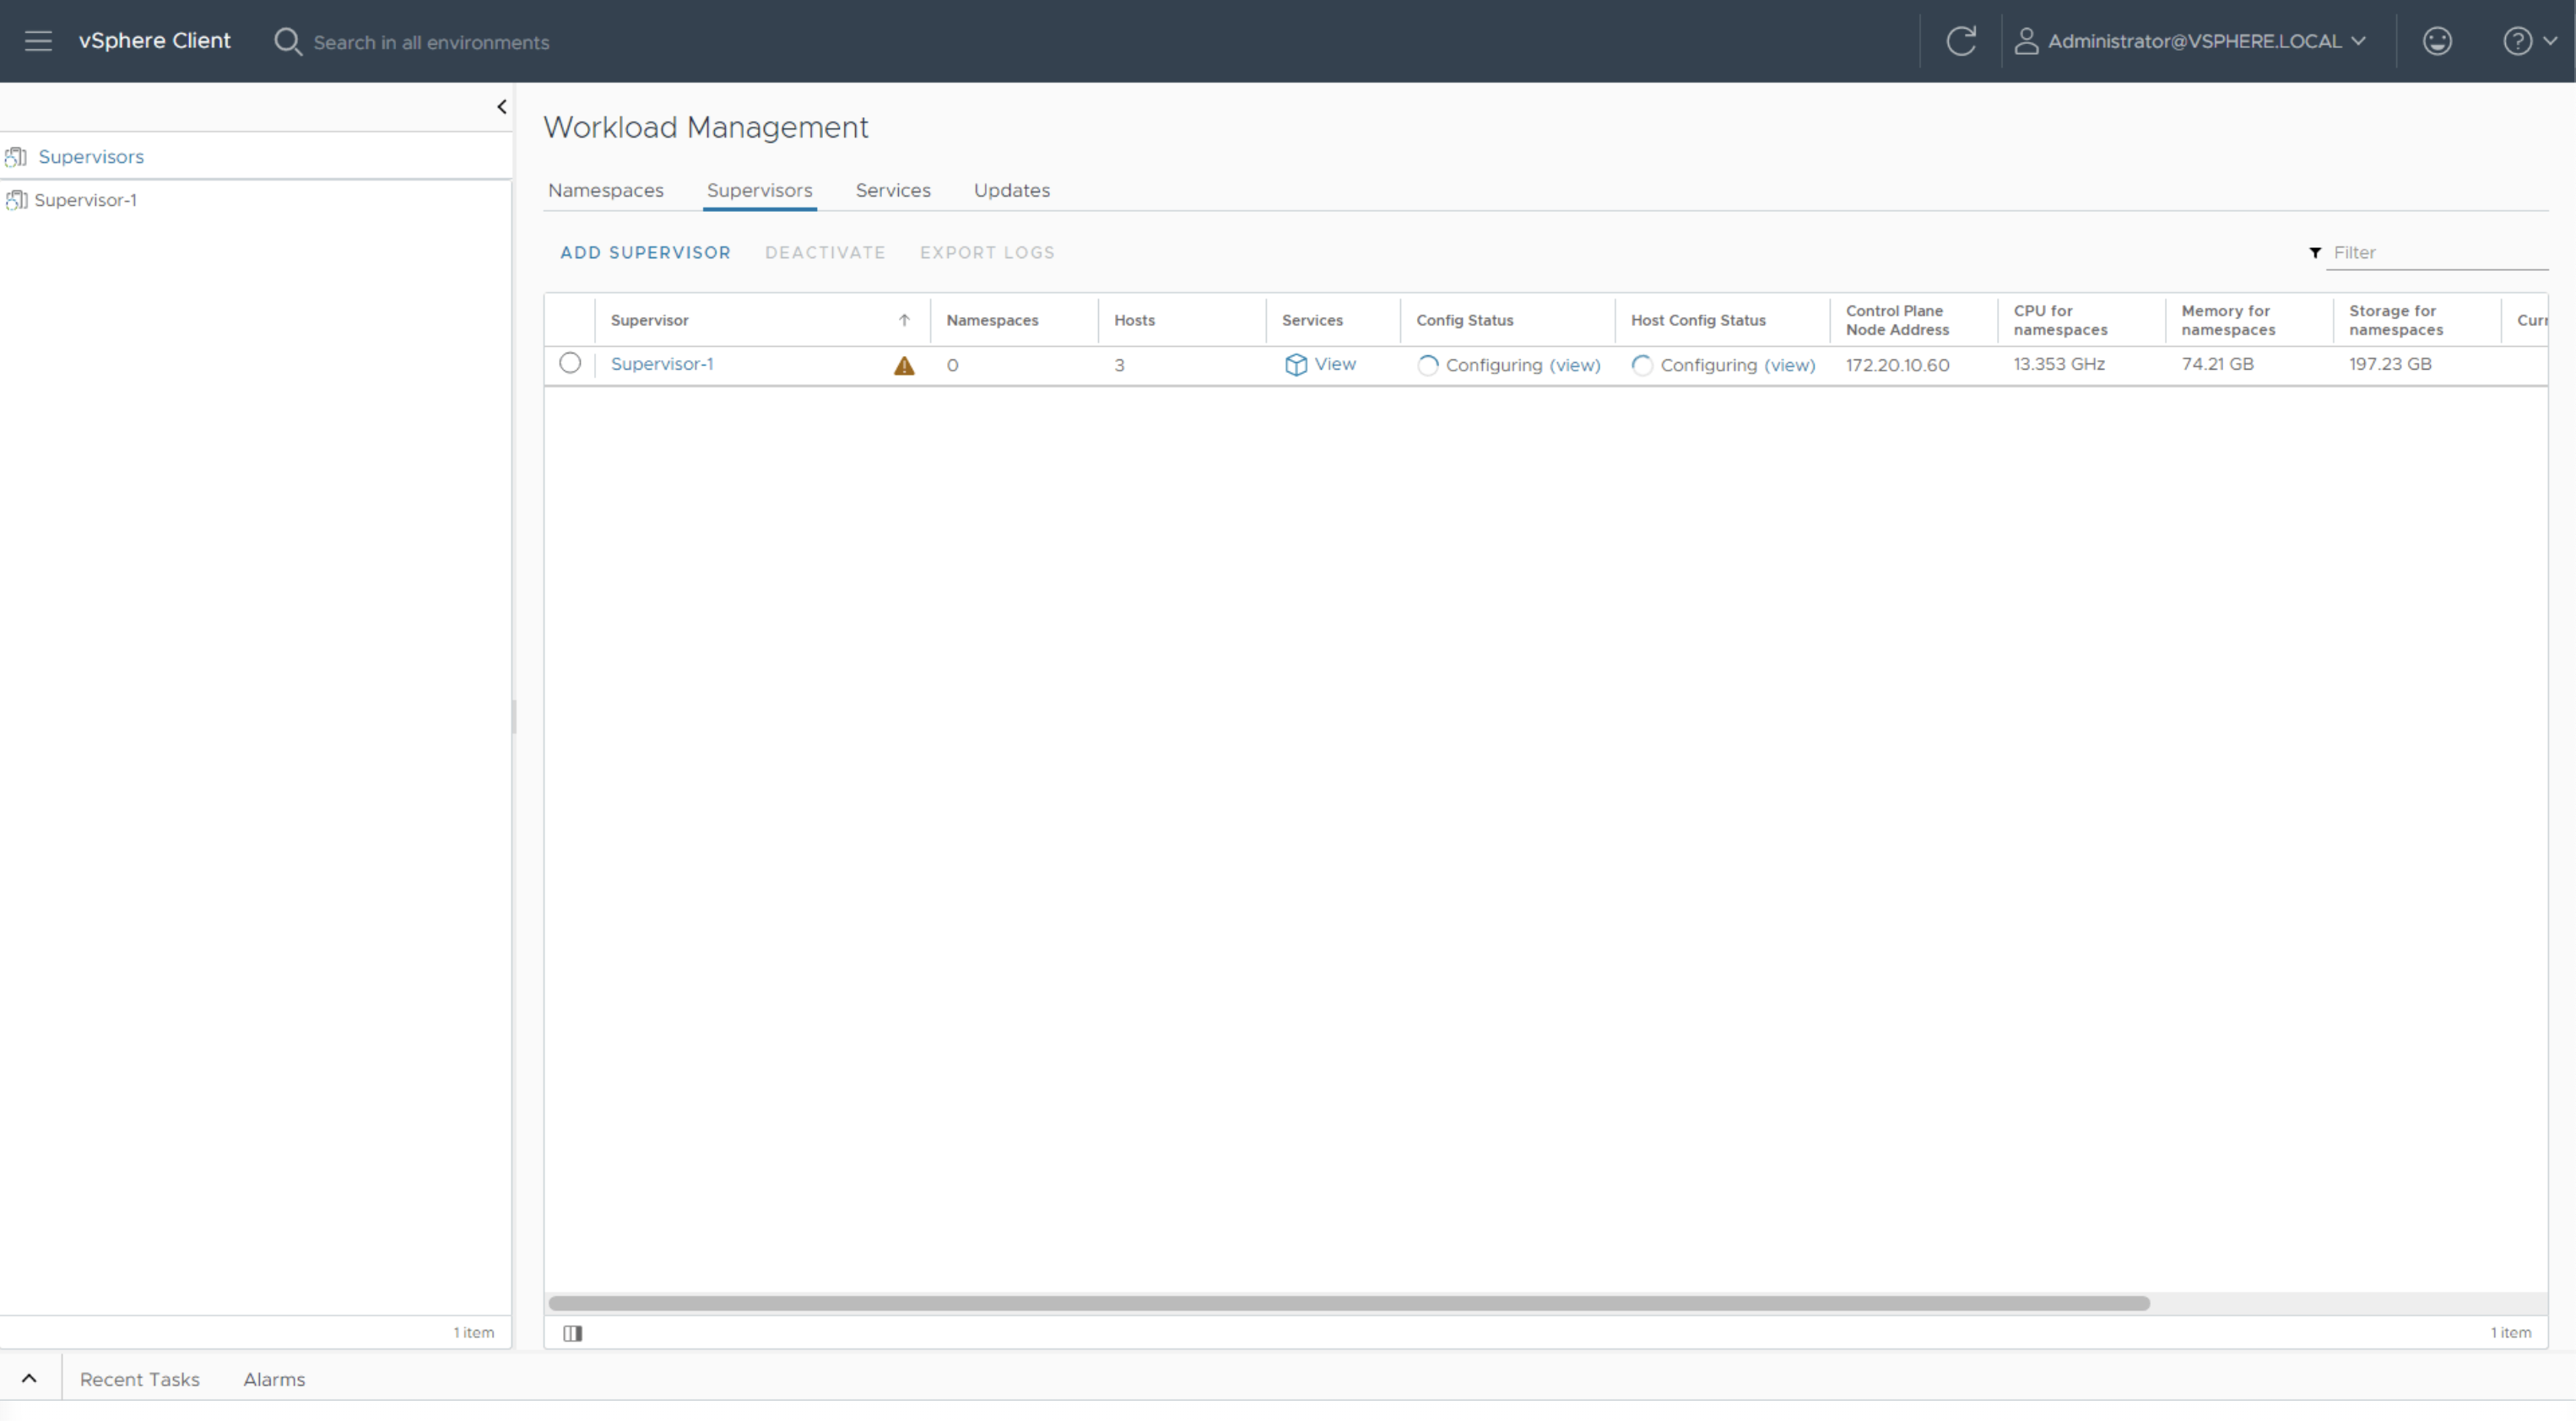
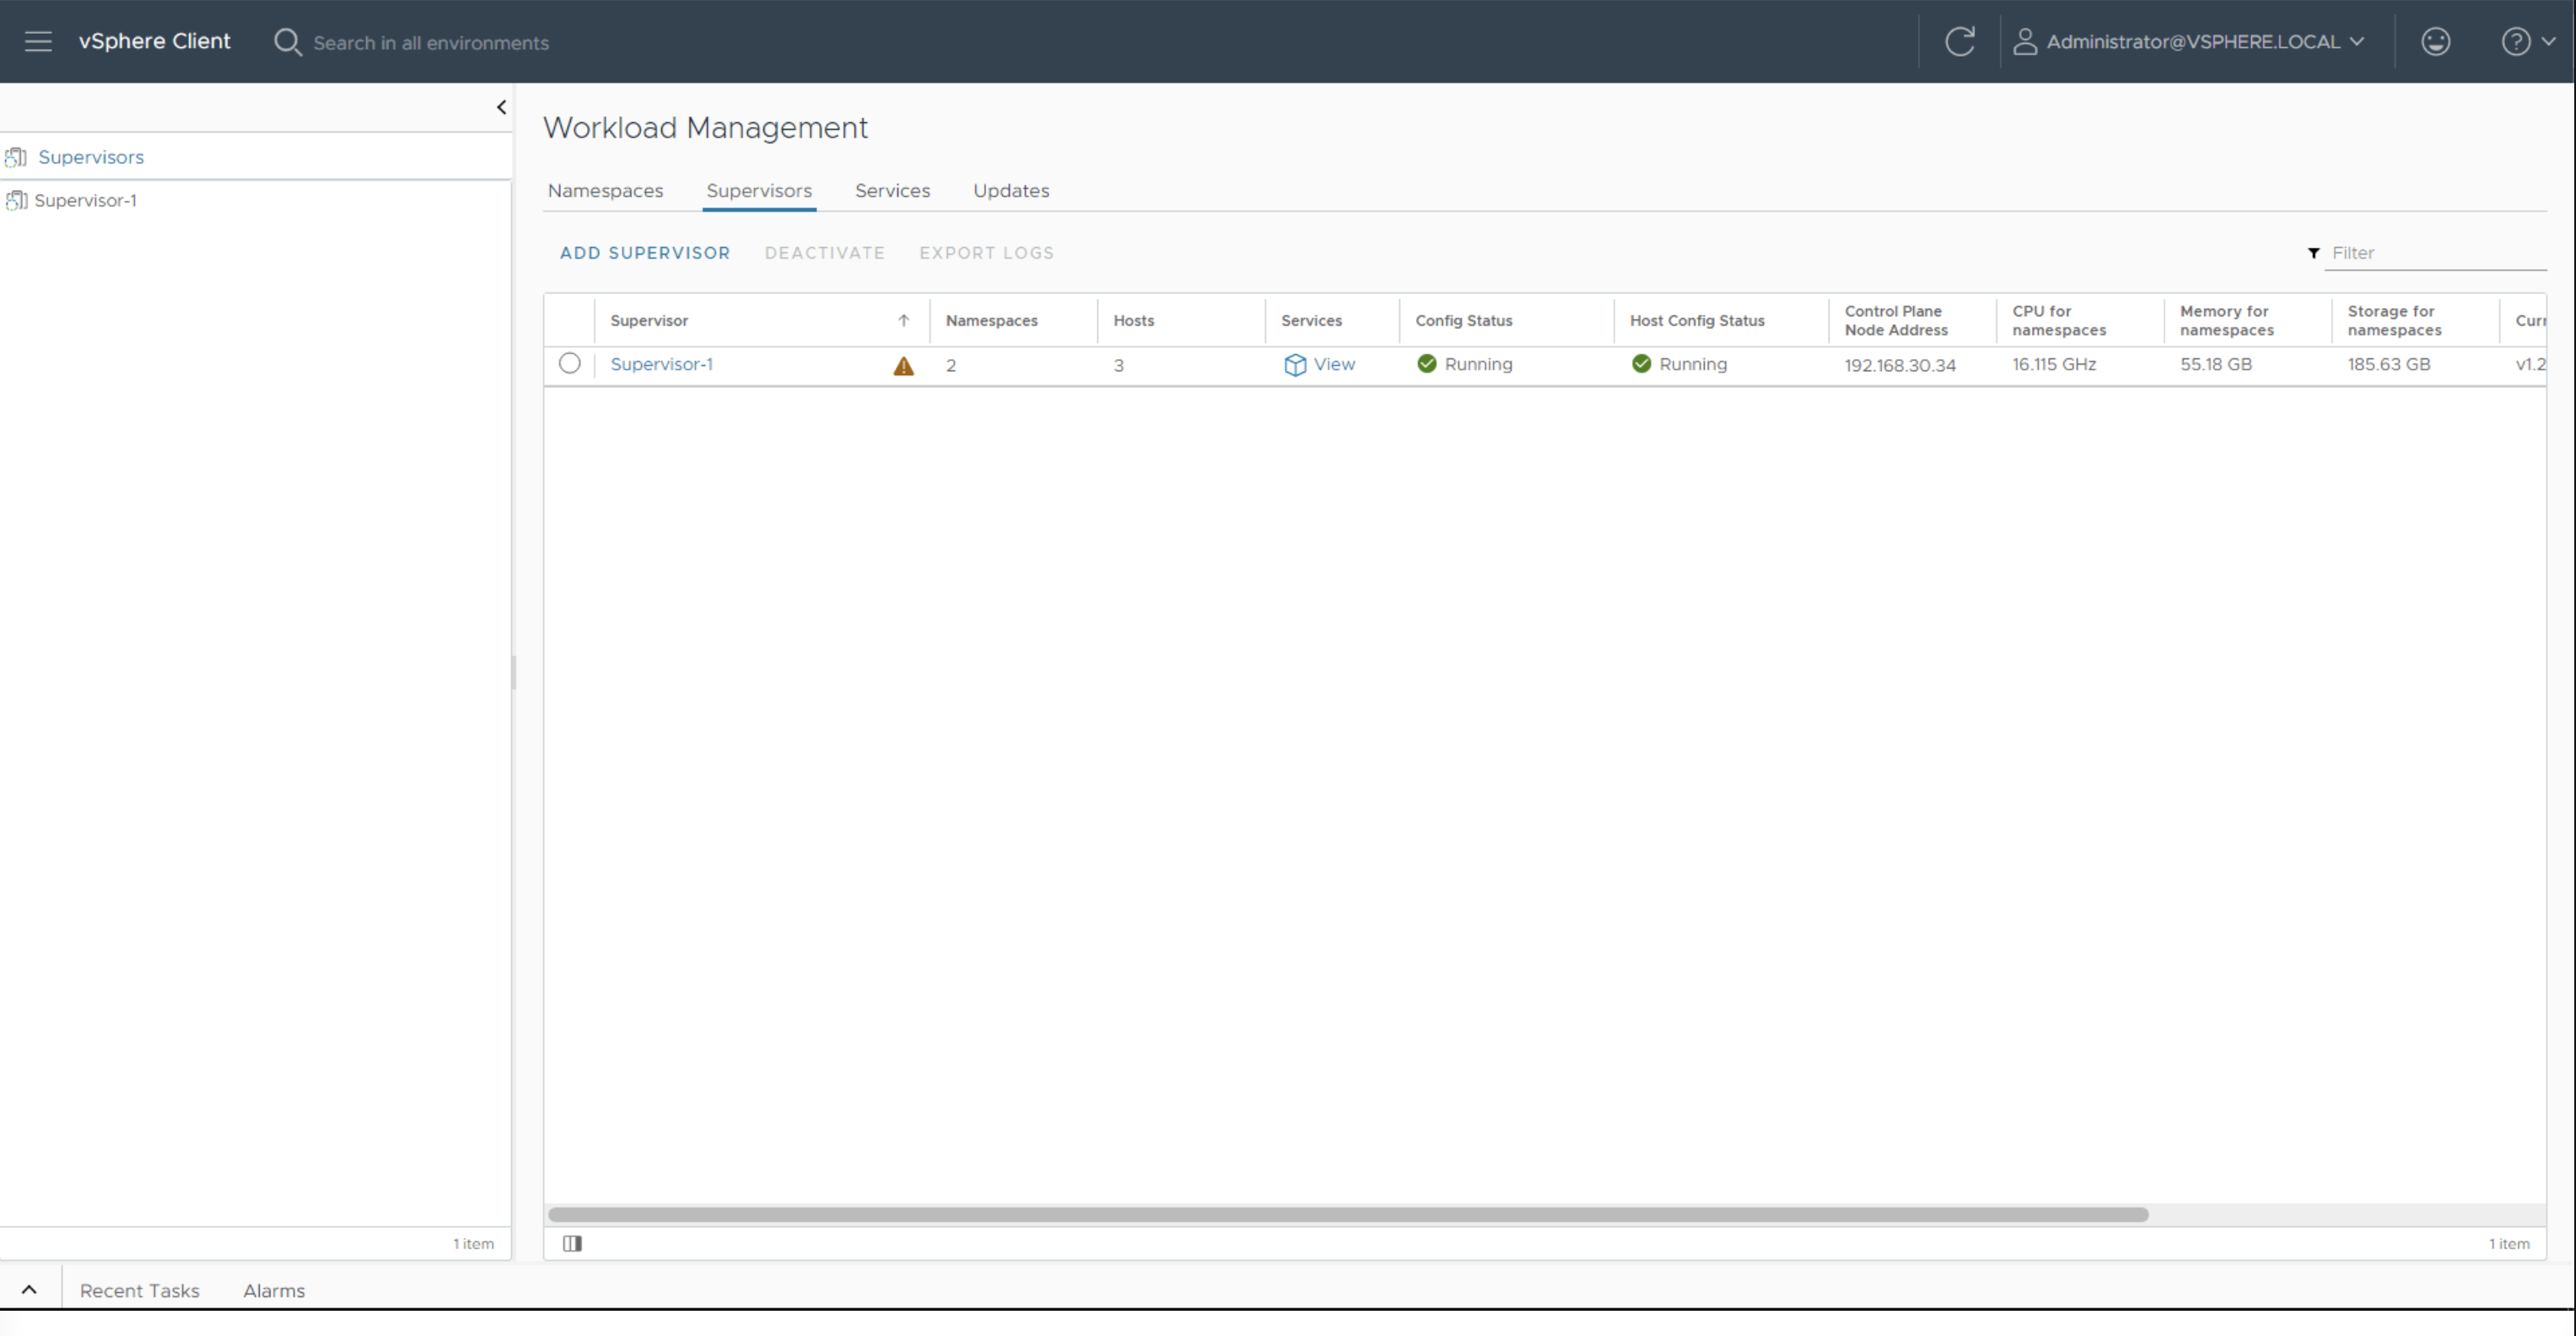
Wait for the Supervisor to show Config Status and Host Config Status as Running. Note down the Control Plane Node Address, this is the IP we will use to connect to the Supervisor.
See this episode in action
Before you go
In this first episode, we have shown you how you can configure Workload Management to transform your vSphere cluster into a Supervisor cluster. In next episodes we will look at Supervisor Services, VM Service, TKG and more.
For more episodes visit the Supervisor Series Activity Path.
Subscribe to our VMware vSphere YouTube channel to get notified as soon as we release new episodes.
Thank you and see you soon!