
Supervisor Series: Ep 2. Deploying Contour and Harbor as Supervisor Services
A private cloud platform requires more than just modern runtimes (VM and Kubernetes) to meet the needs of workloads. The number of both required services and value add services evolves as workloads and business needs change. Utilizing the Supervisor as a IaaS platform layer you can provide the required services directly through vCenter. Using the Supervisor Service framework, you can deploy and manage a set of curated services, such as S3, OCI Image registry, L7 Ingress, Backup and Recovery, and Certificate Management, or deploy your own in-house platform services to enable platform consumers to quickly meet their workload needs.
In this episode, we will deploy Contour - a L7 Ingress controller, and Harbor – an OCI Image registry, which we will use to store our application images.
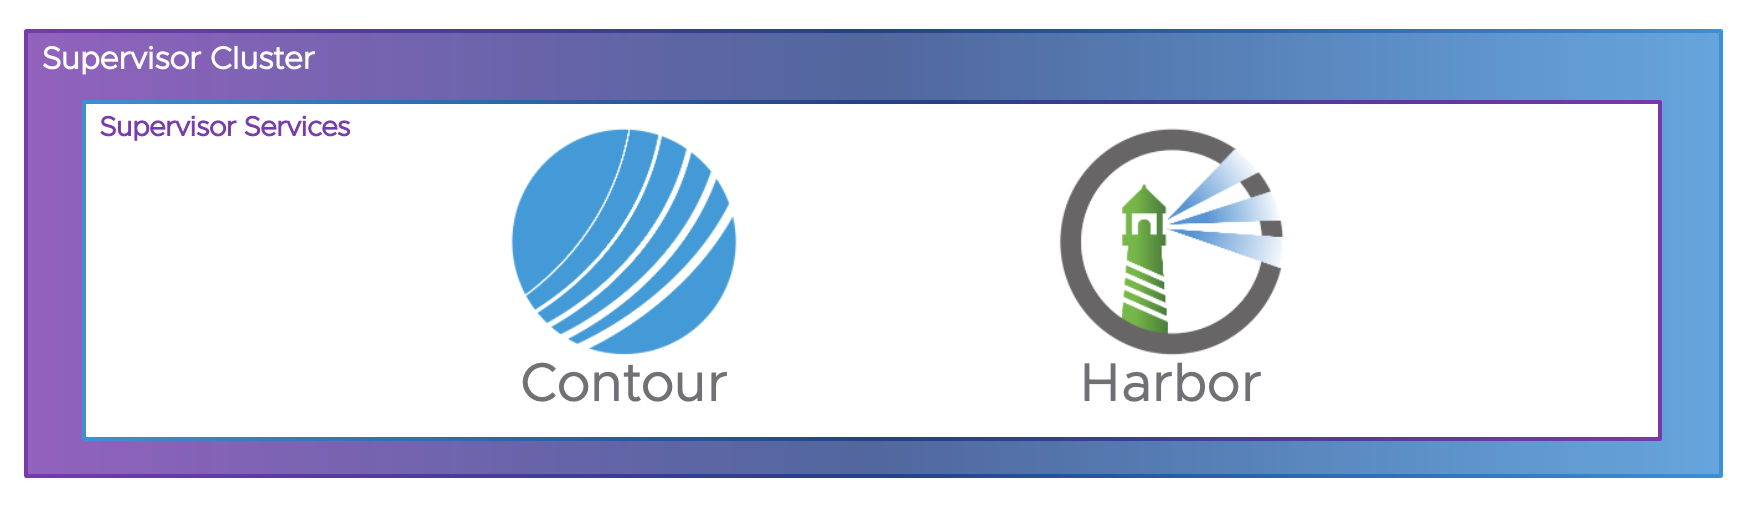
About Contour and Harbor
Contour is an Ingress controller for Kubernetes that works by deploying the Envoy proxy as a reverse proxy and load balancer. The contour package is a prerequisite for Harbor and must be installed first.
Harbor is an open source trusted cloud native registry project that stores, signs, and scans content. Harbor extends the open source Docker Distribution by adding the functionalities usually required by users such as security, identity and management. Having a registry closer to the build and run environment can improve the image transfer efficiency. Harbor supports replication of images between registries, and also offers advanced security features such as user management, access control and activity auditing.
You can download all installation packages and sample configuration files from https://github.com/vsphere-tmm/Supervisor-Services/blob/main/README.md
To complete this deployment, we will need following files:
- contour.yml
- controur-data-values.yml
- harbor.yml
- harbor-data-values.yml
Deploy Contour
In Workload Management view, click on Services.
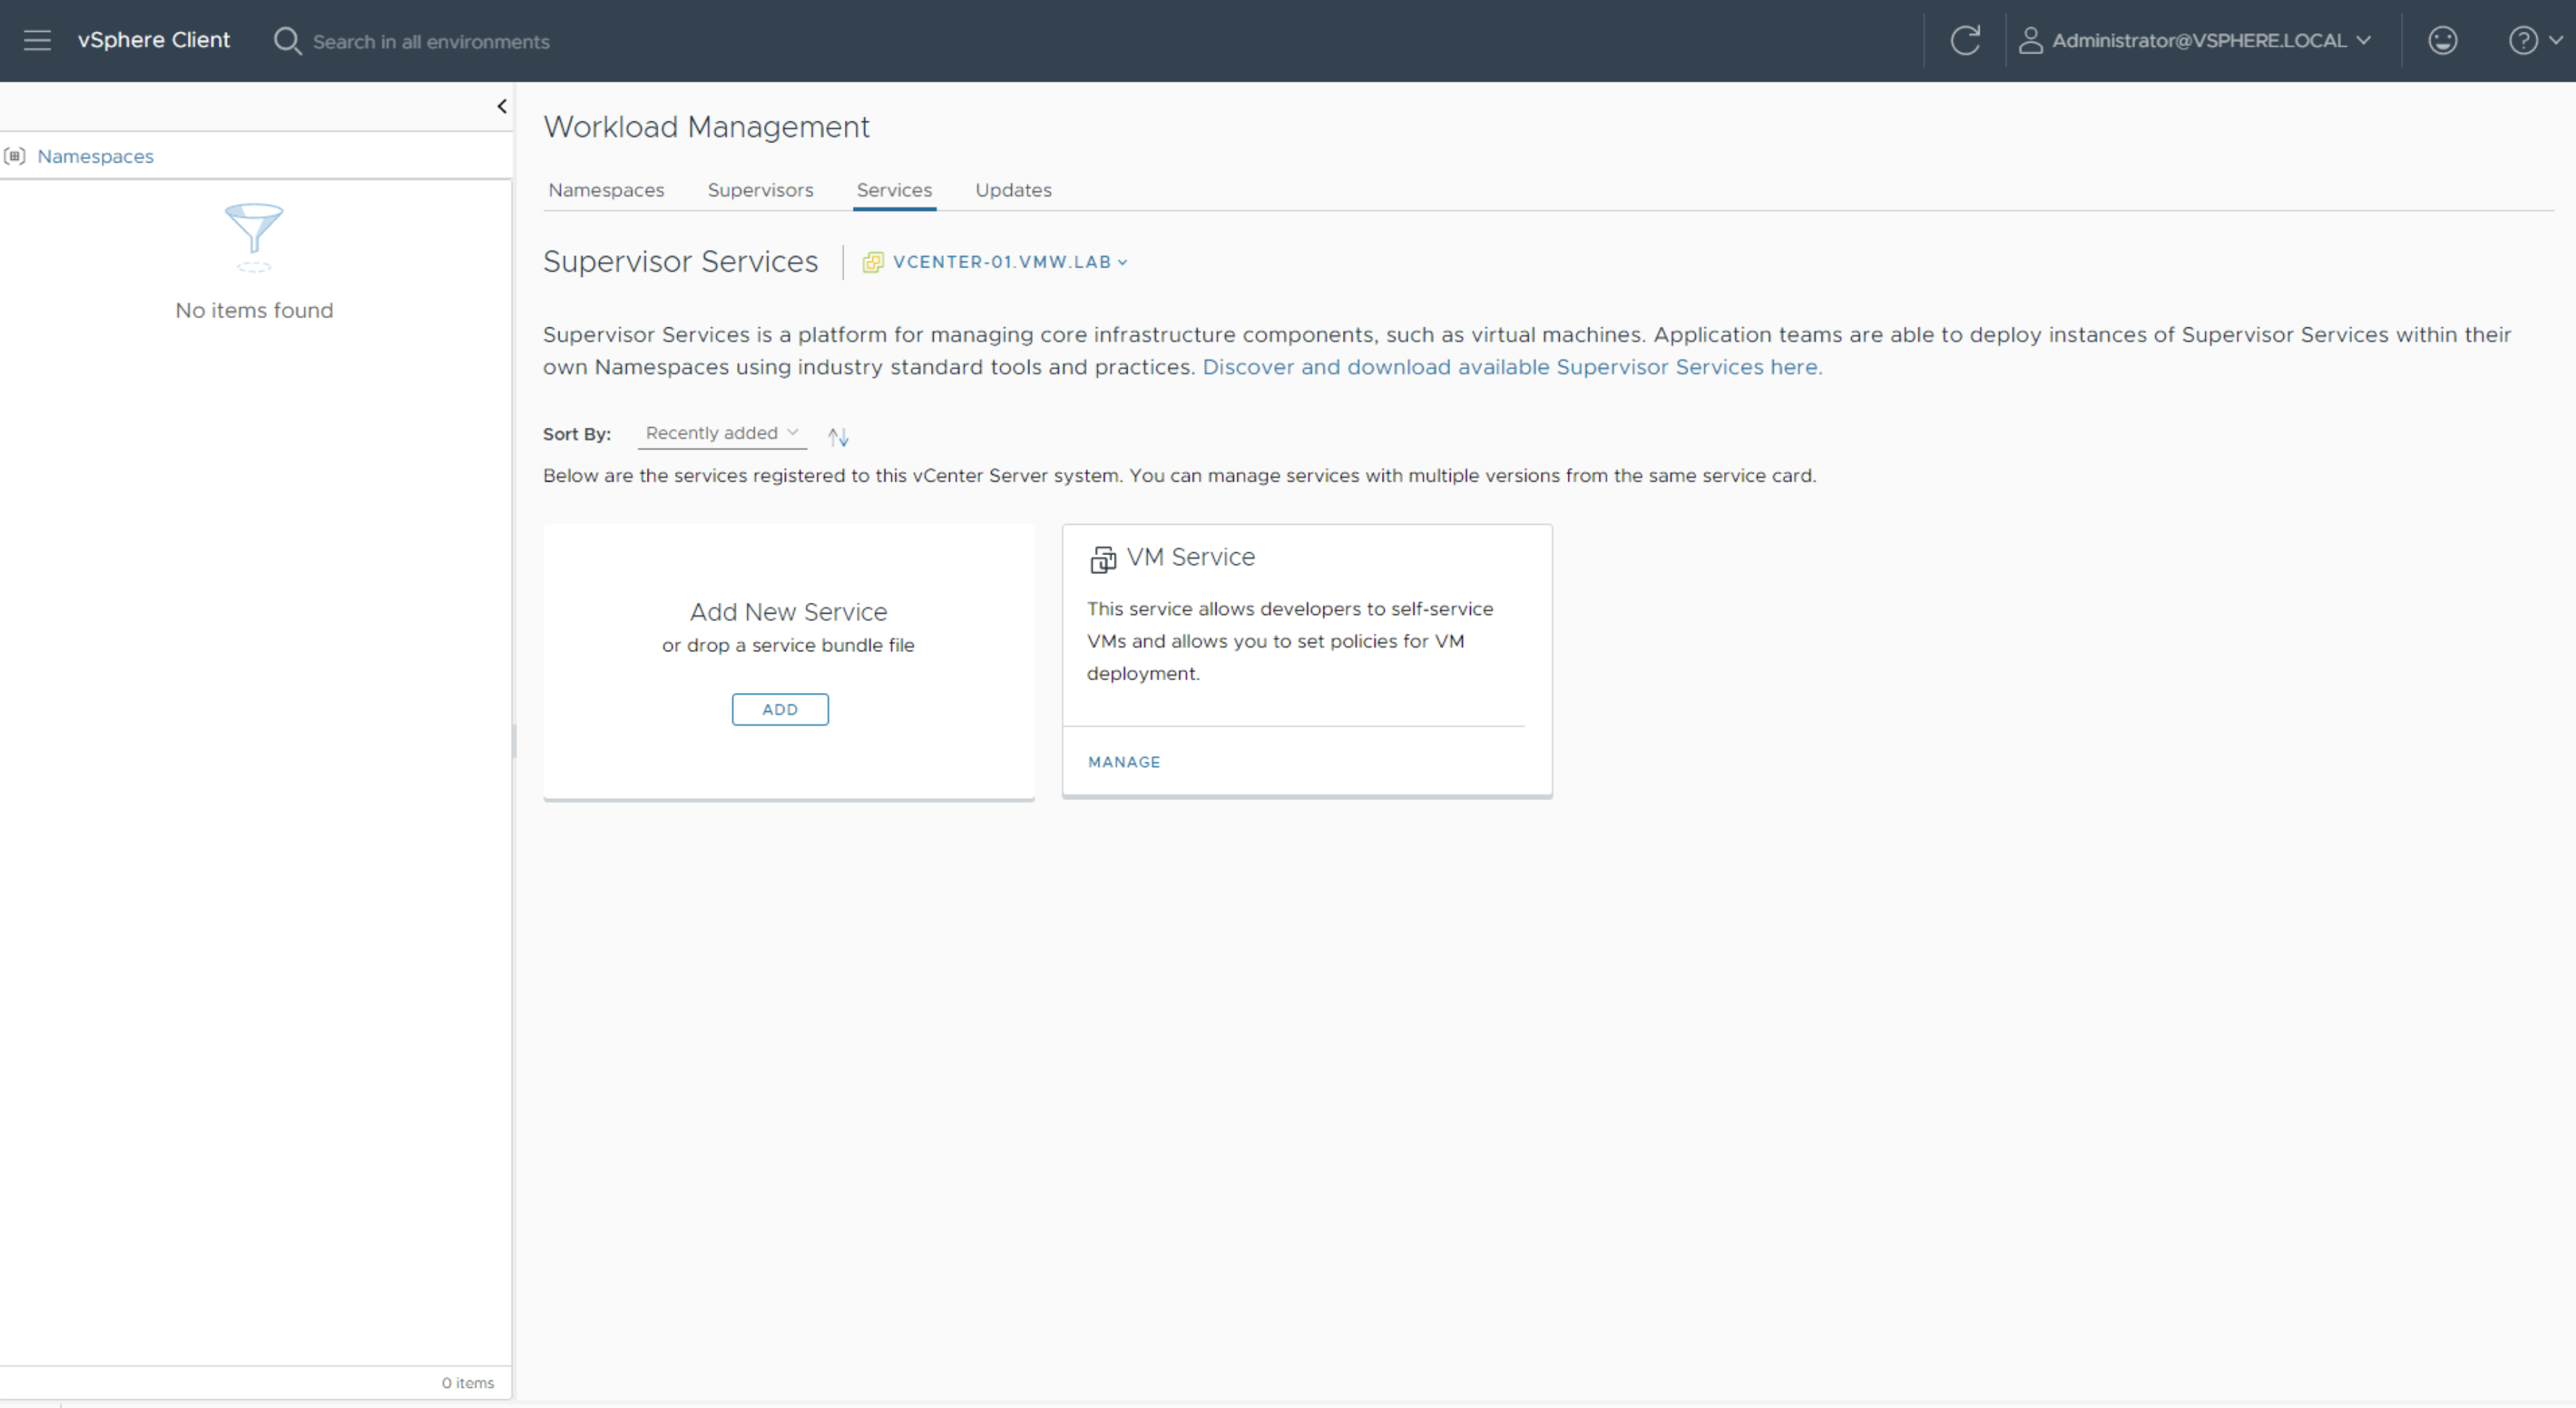
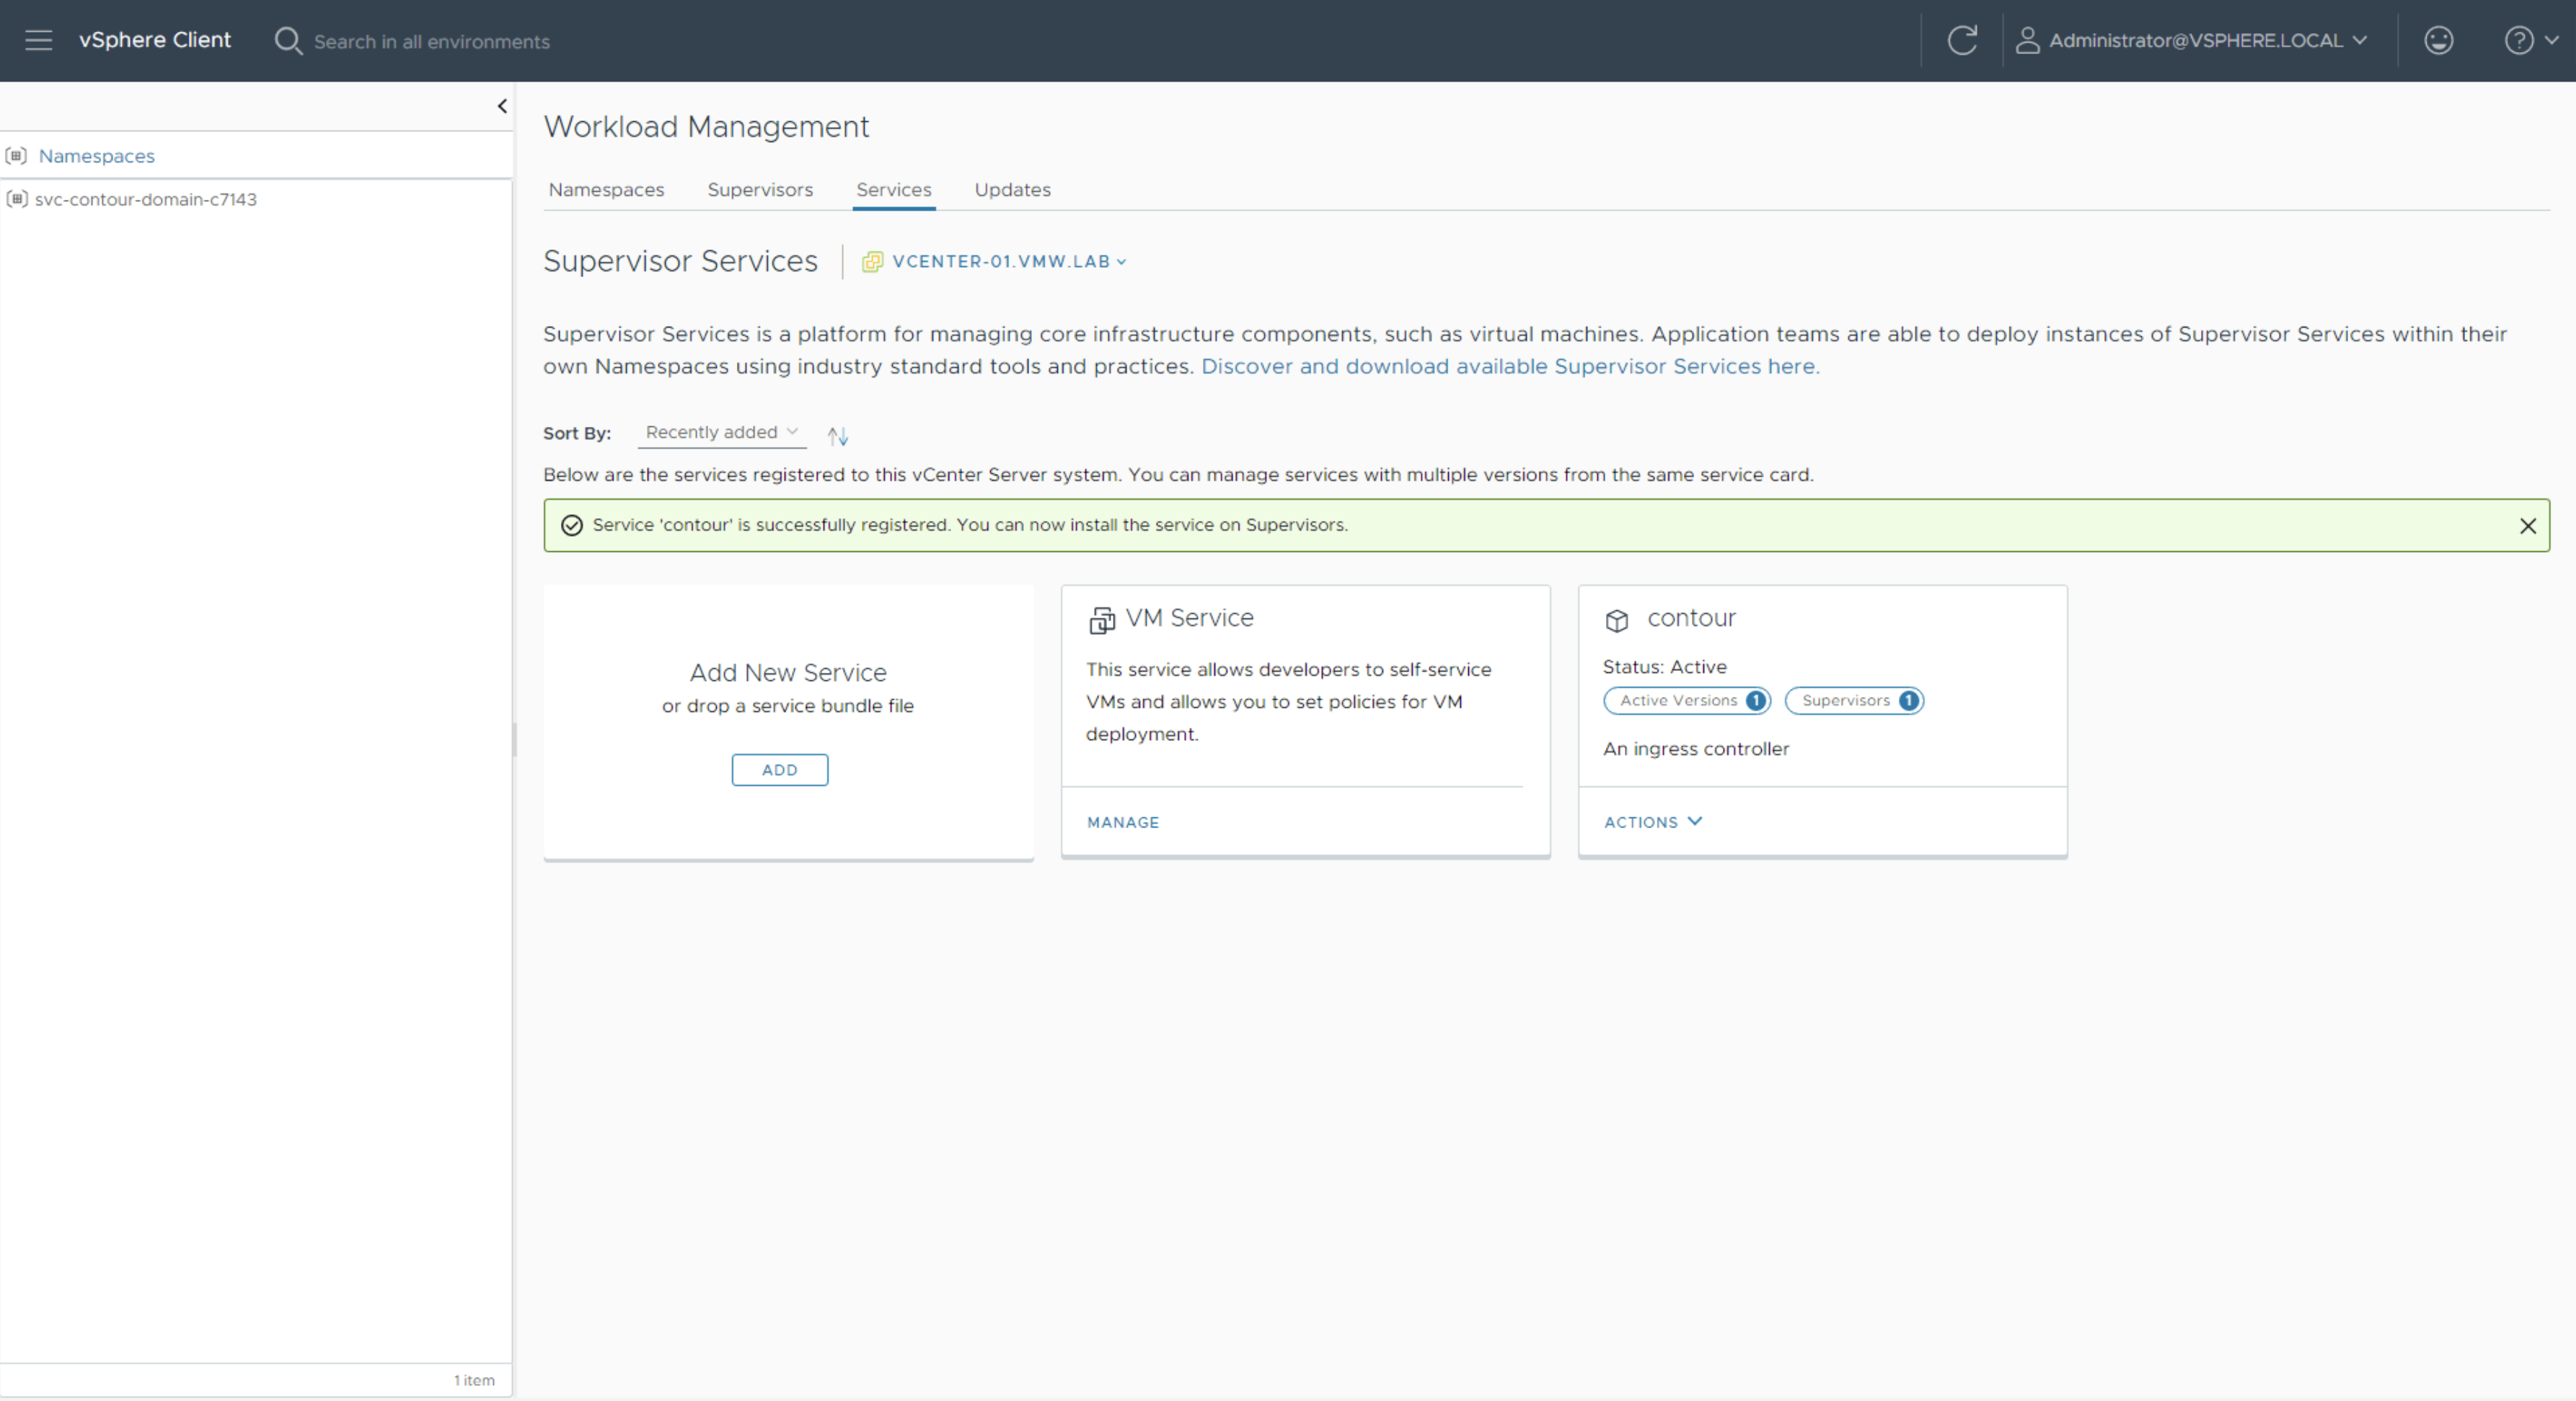
Click on Add New Service and select the contour.yml file to register the Contour package with vCenter.

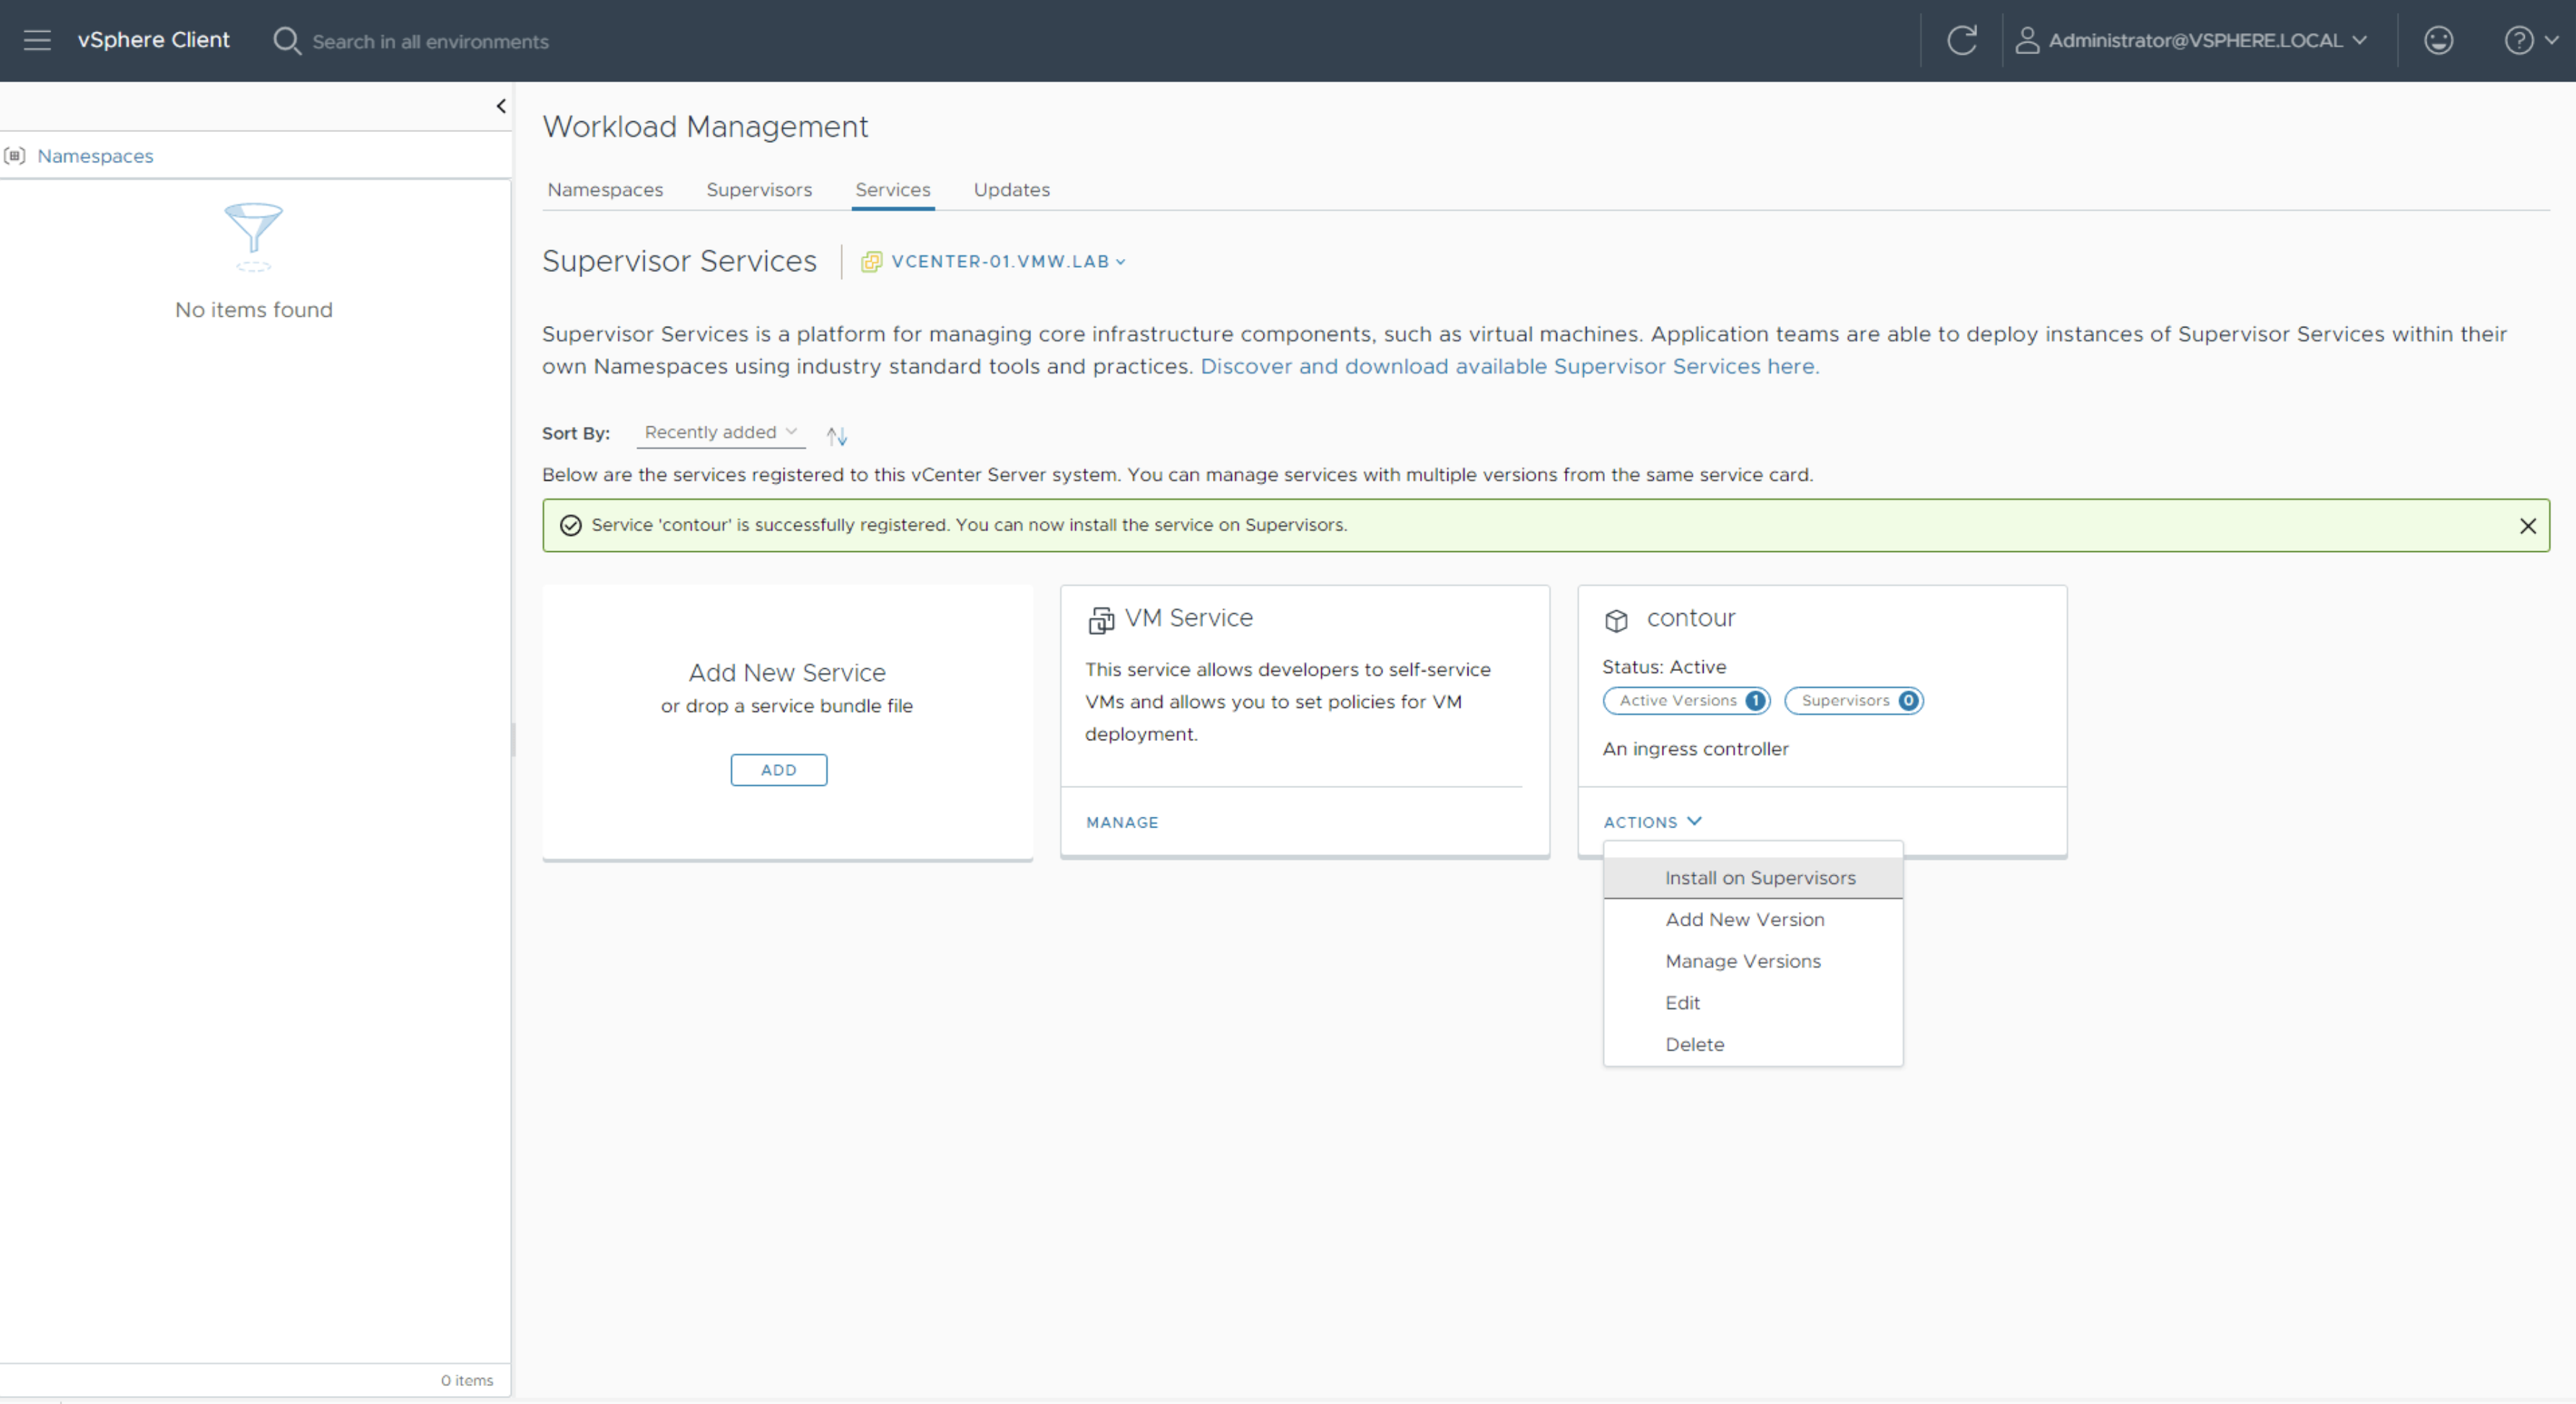
Once Contour is added, click on Actions and select Install on Supervisors.
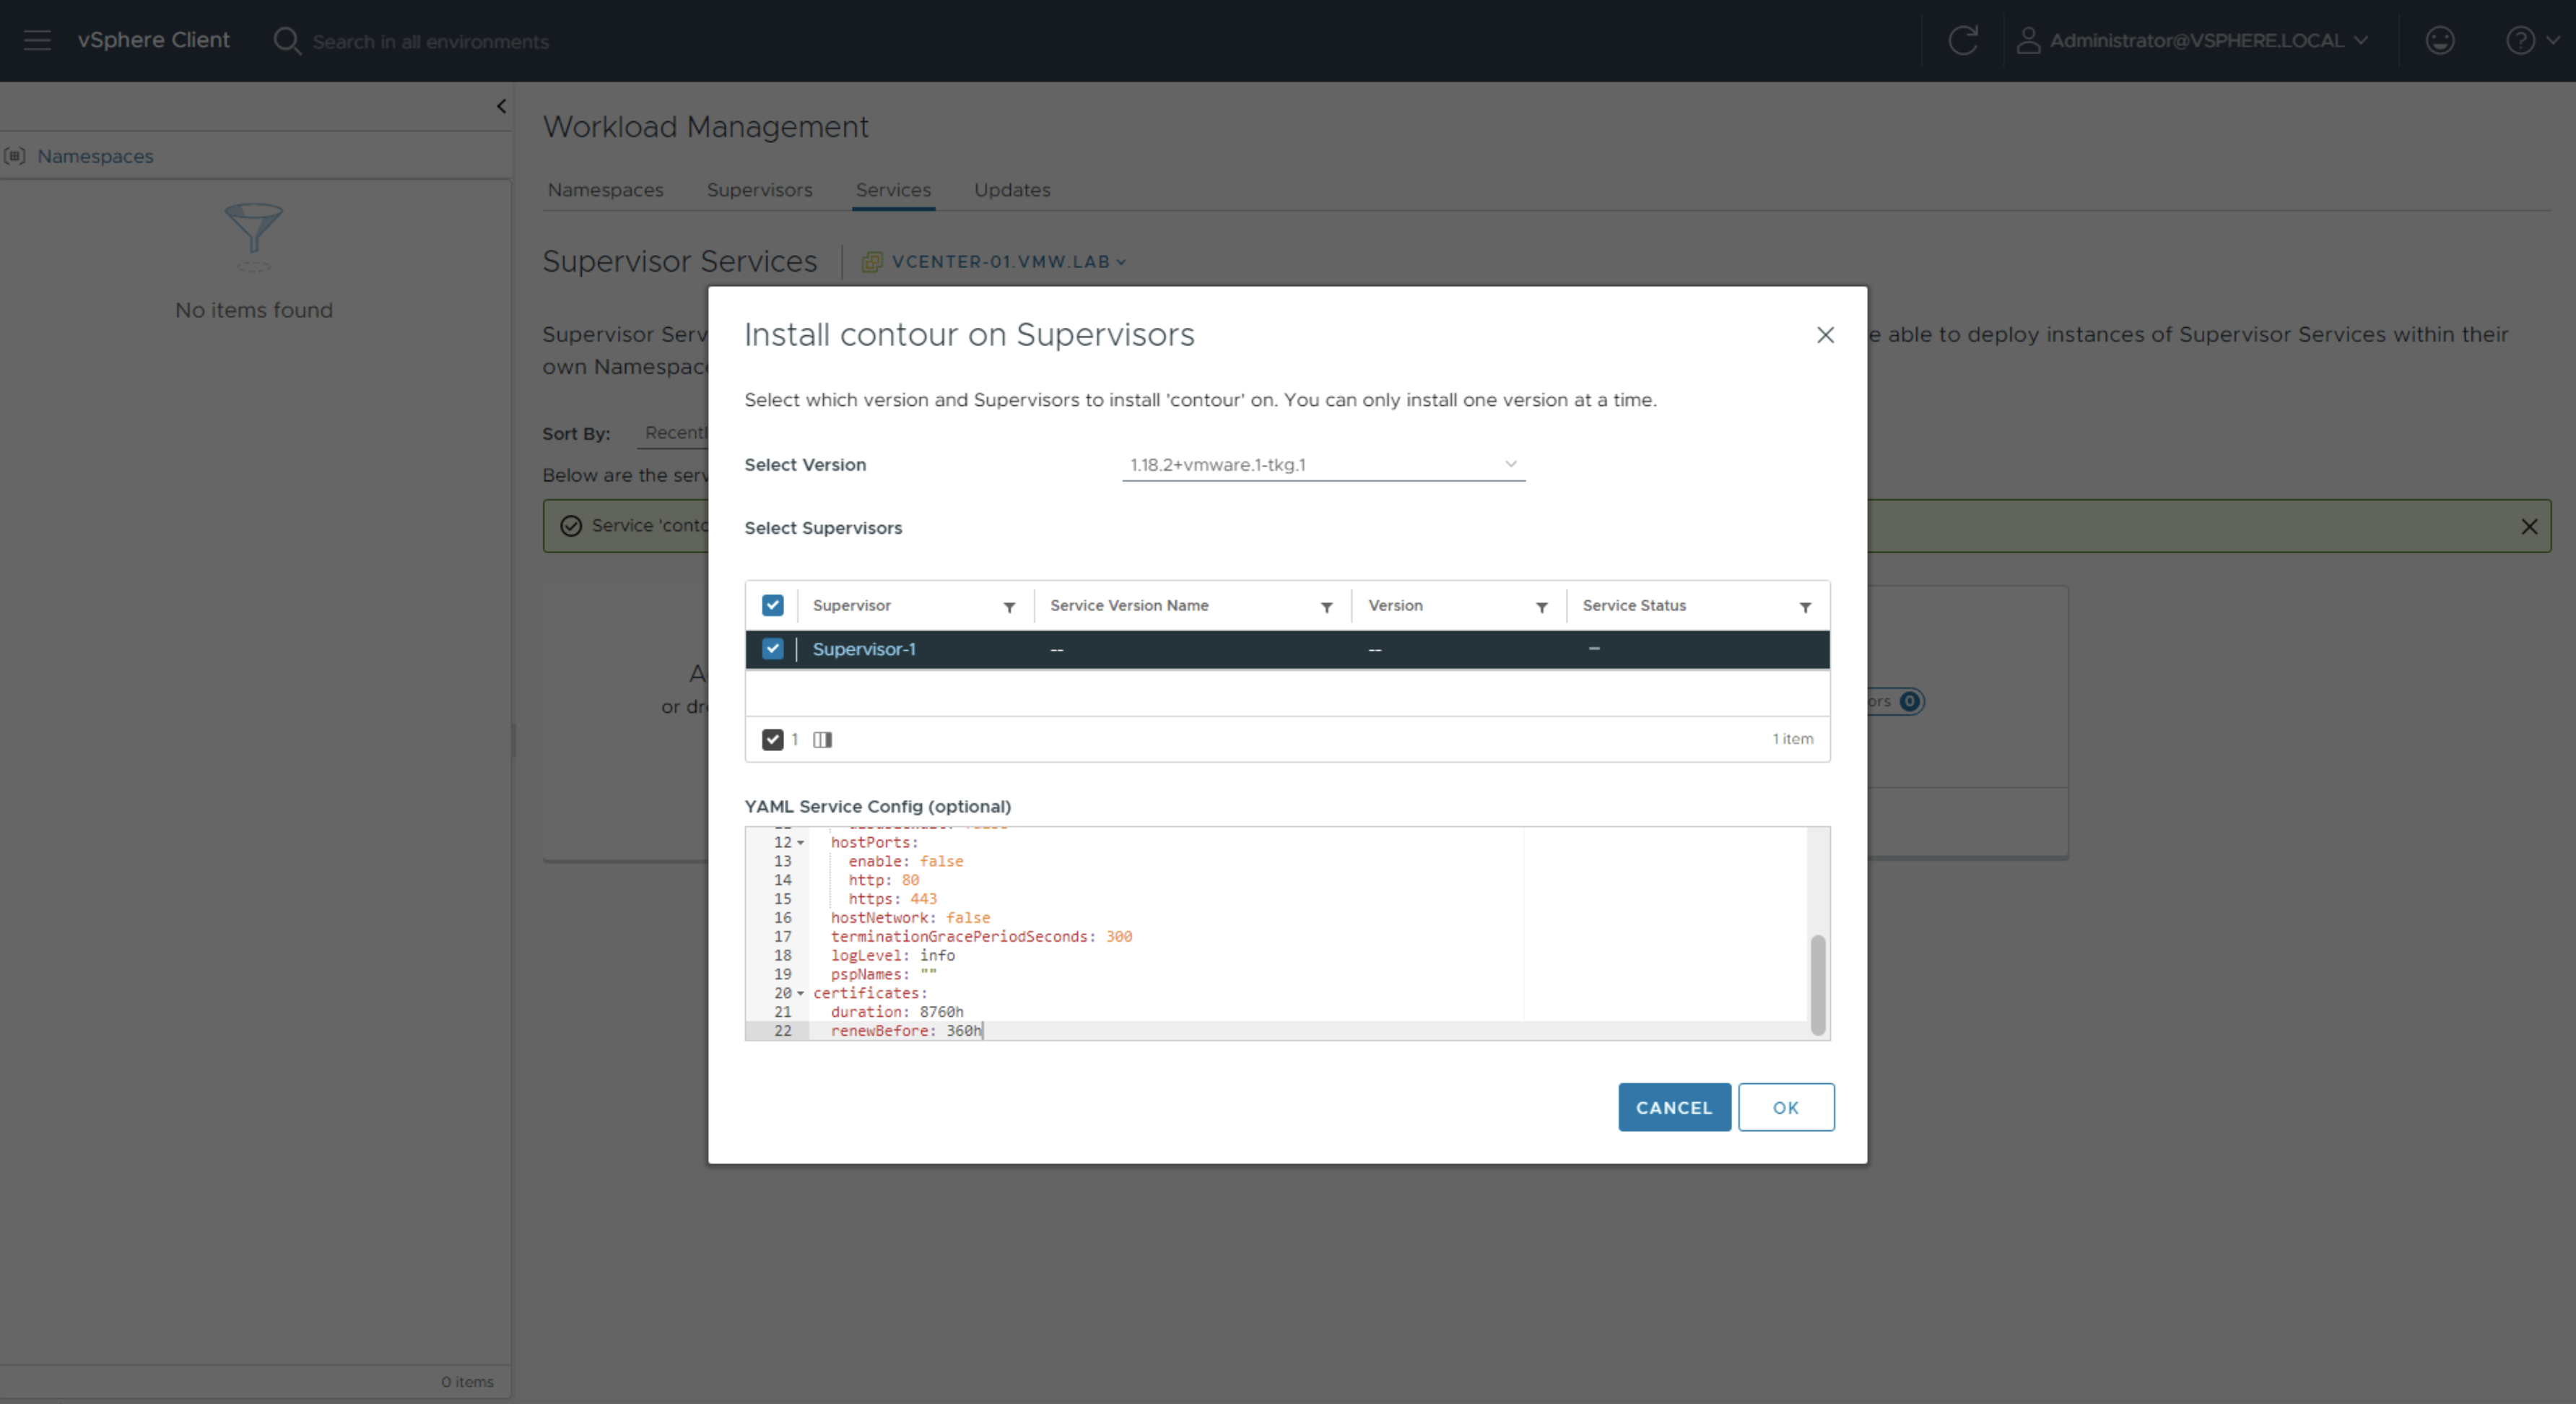
Check the box next to Supervisor-1 and paste in content of the contour-data-values.yml file into the YAML Service Config window. For demo purposes you can use the default values, these will be used for configuration of the service.
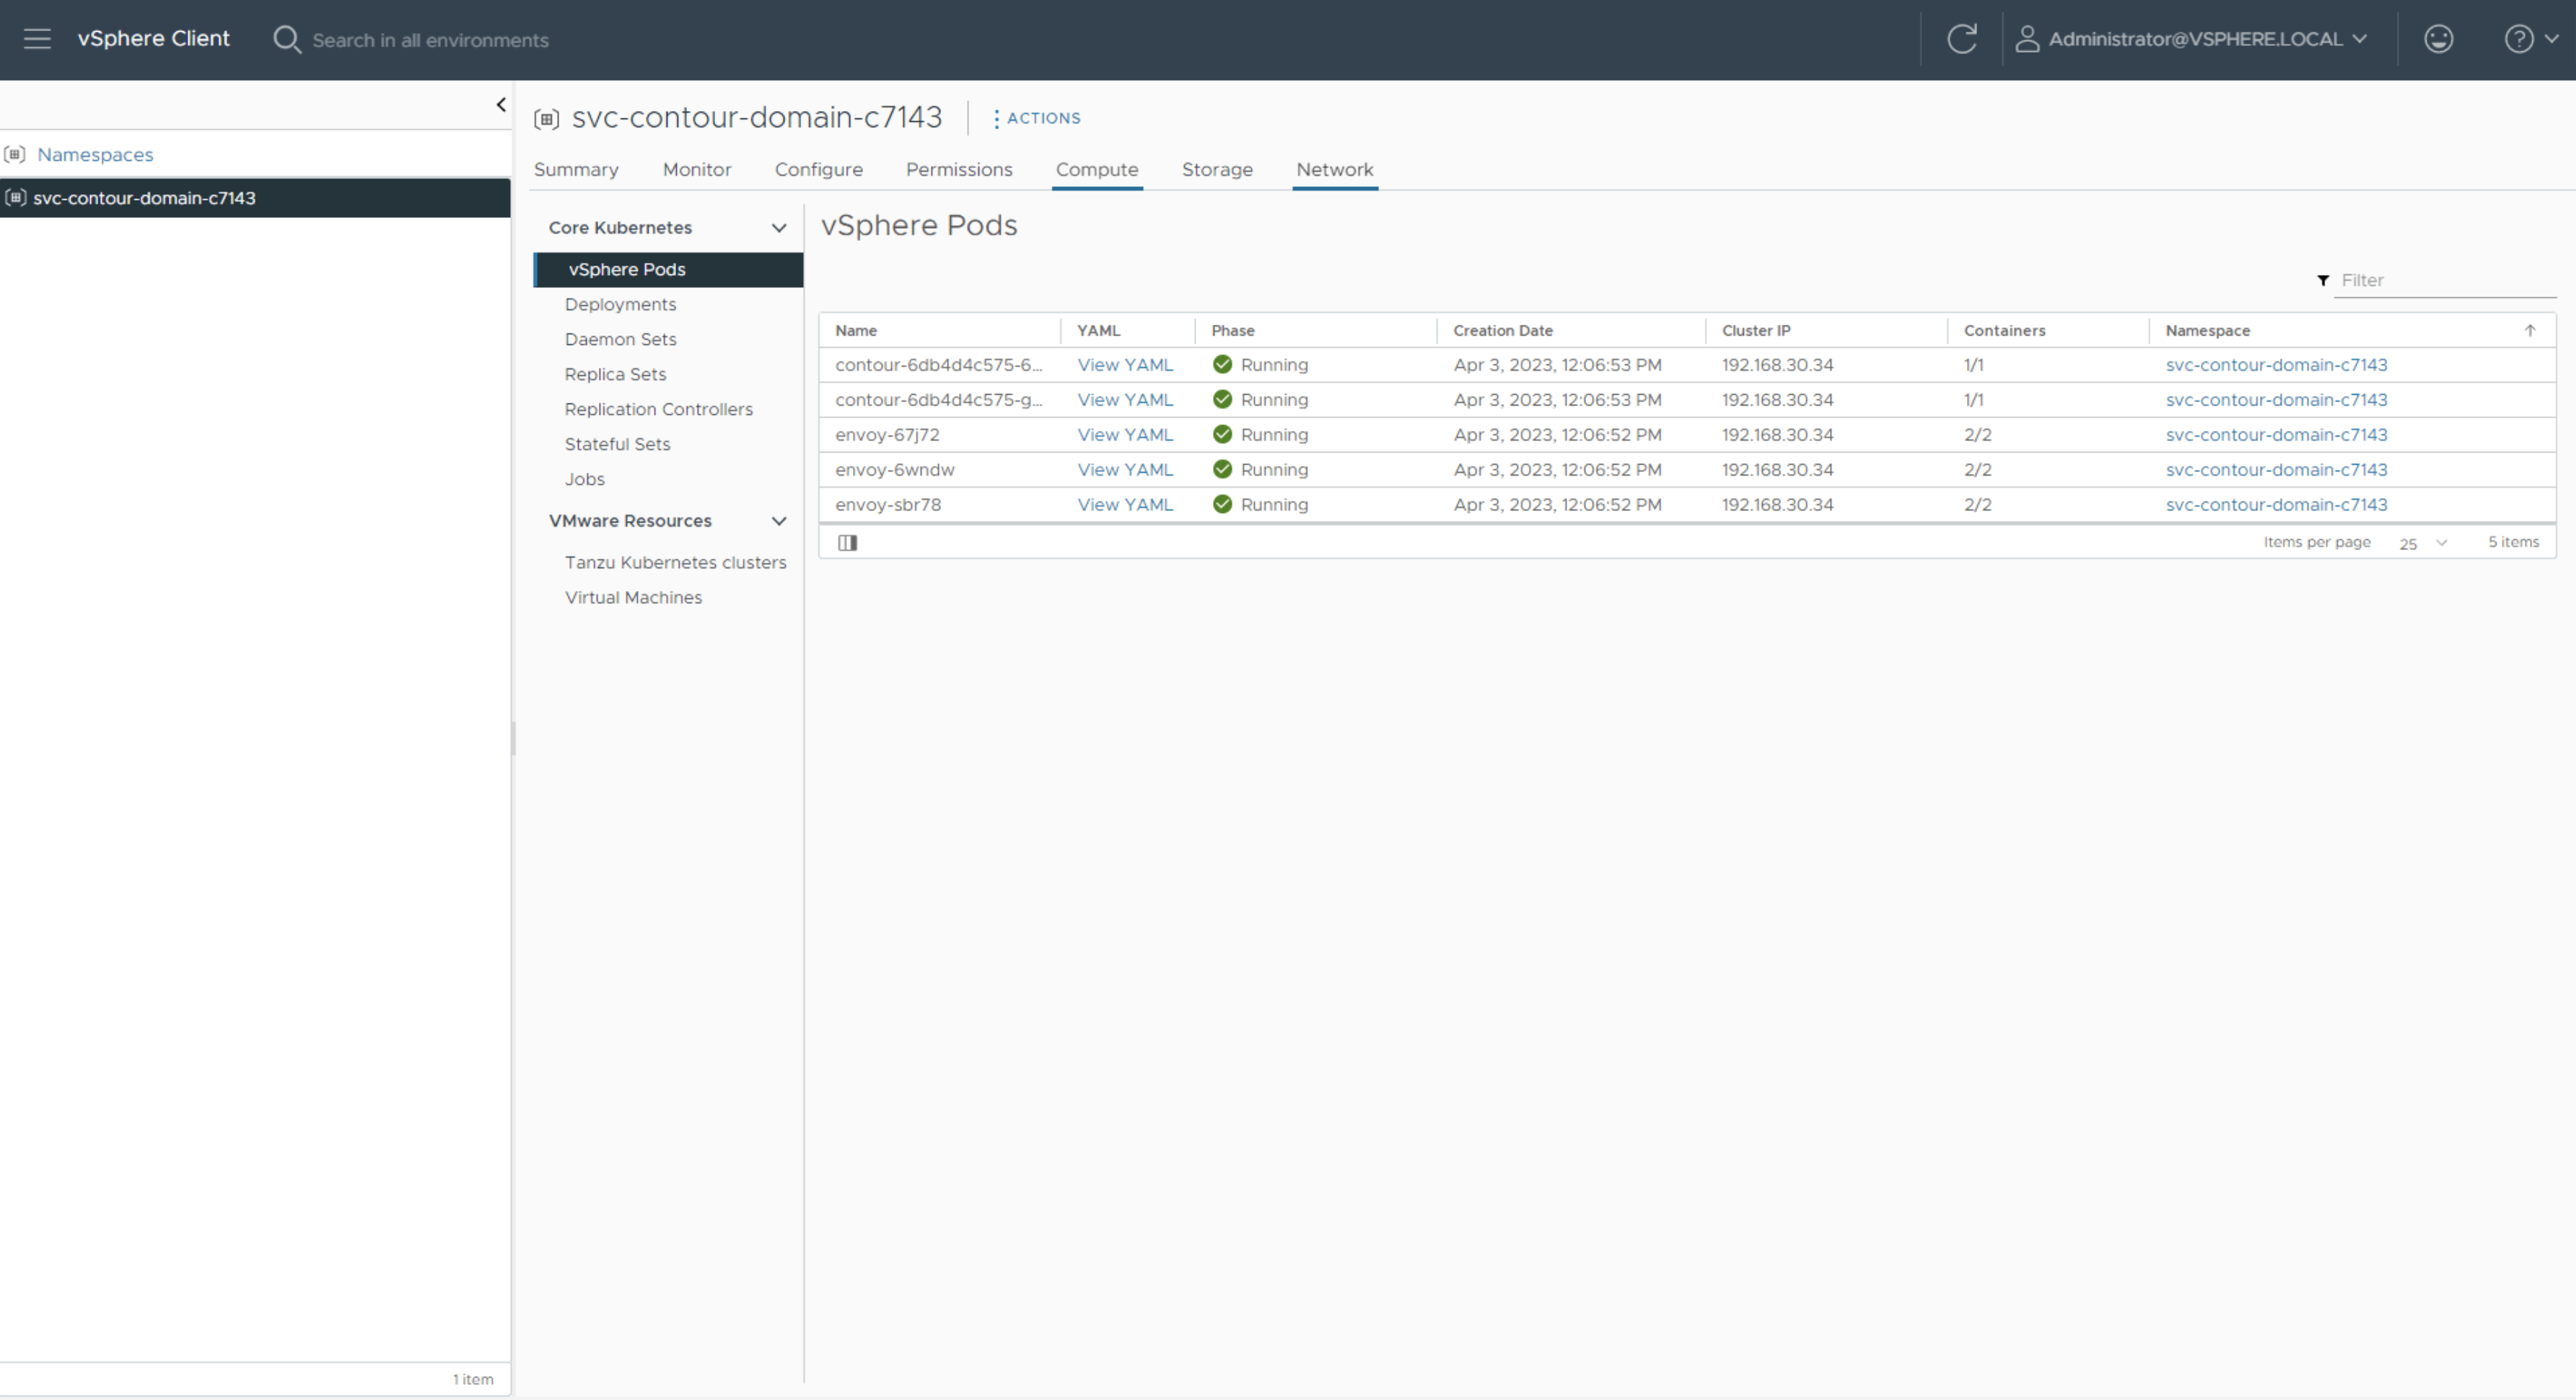
A new service namespace will be created for each Supervisor Service. Supervisor Services utilize vSphere Pods which will be visible in your inventory.
Click on the svc-contour namespace and select the Compute tab to verify that all vSphere pods are running.
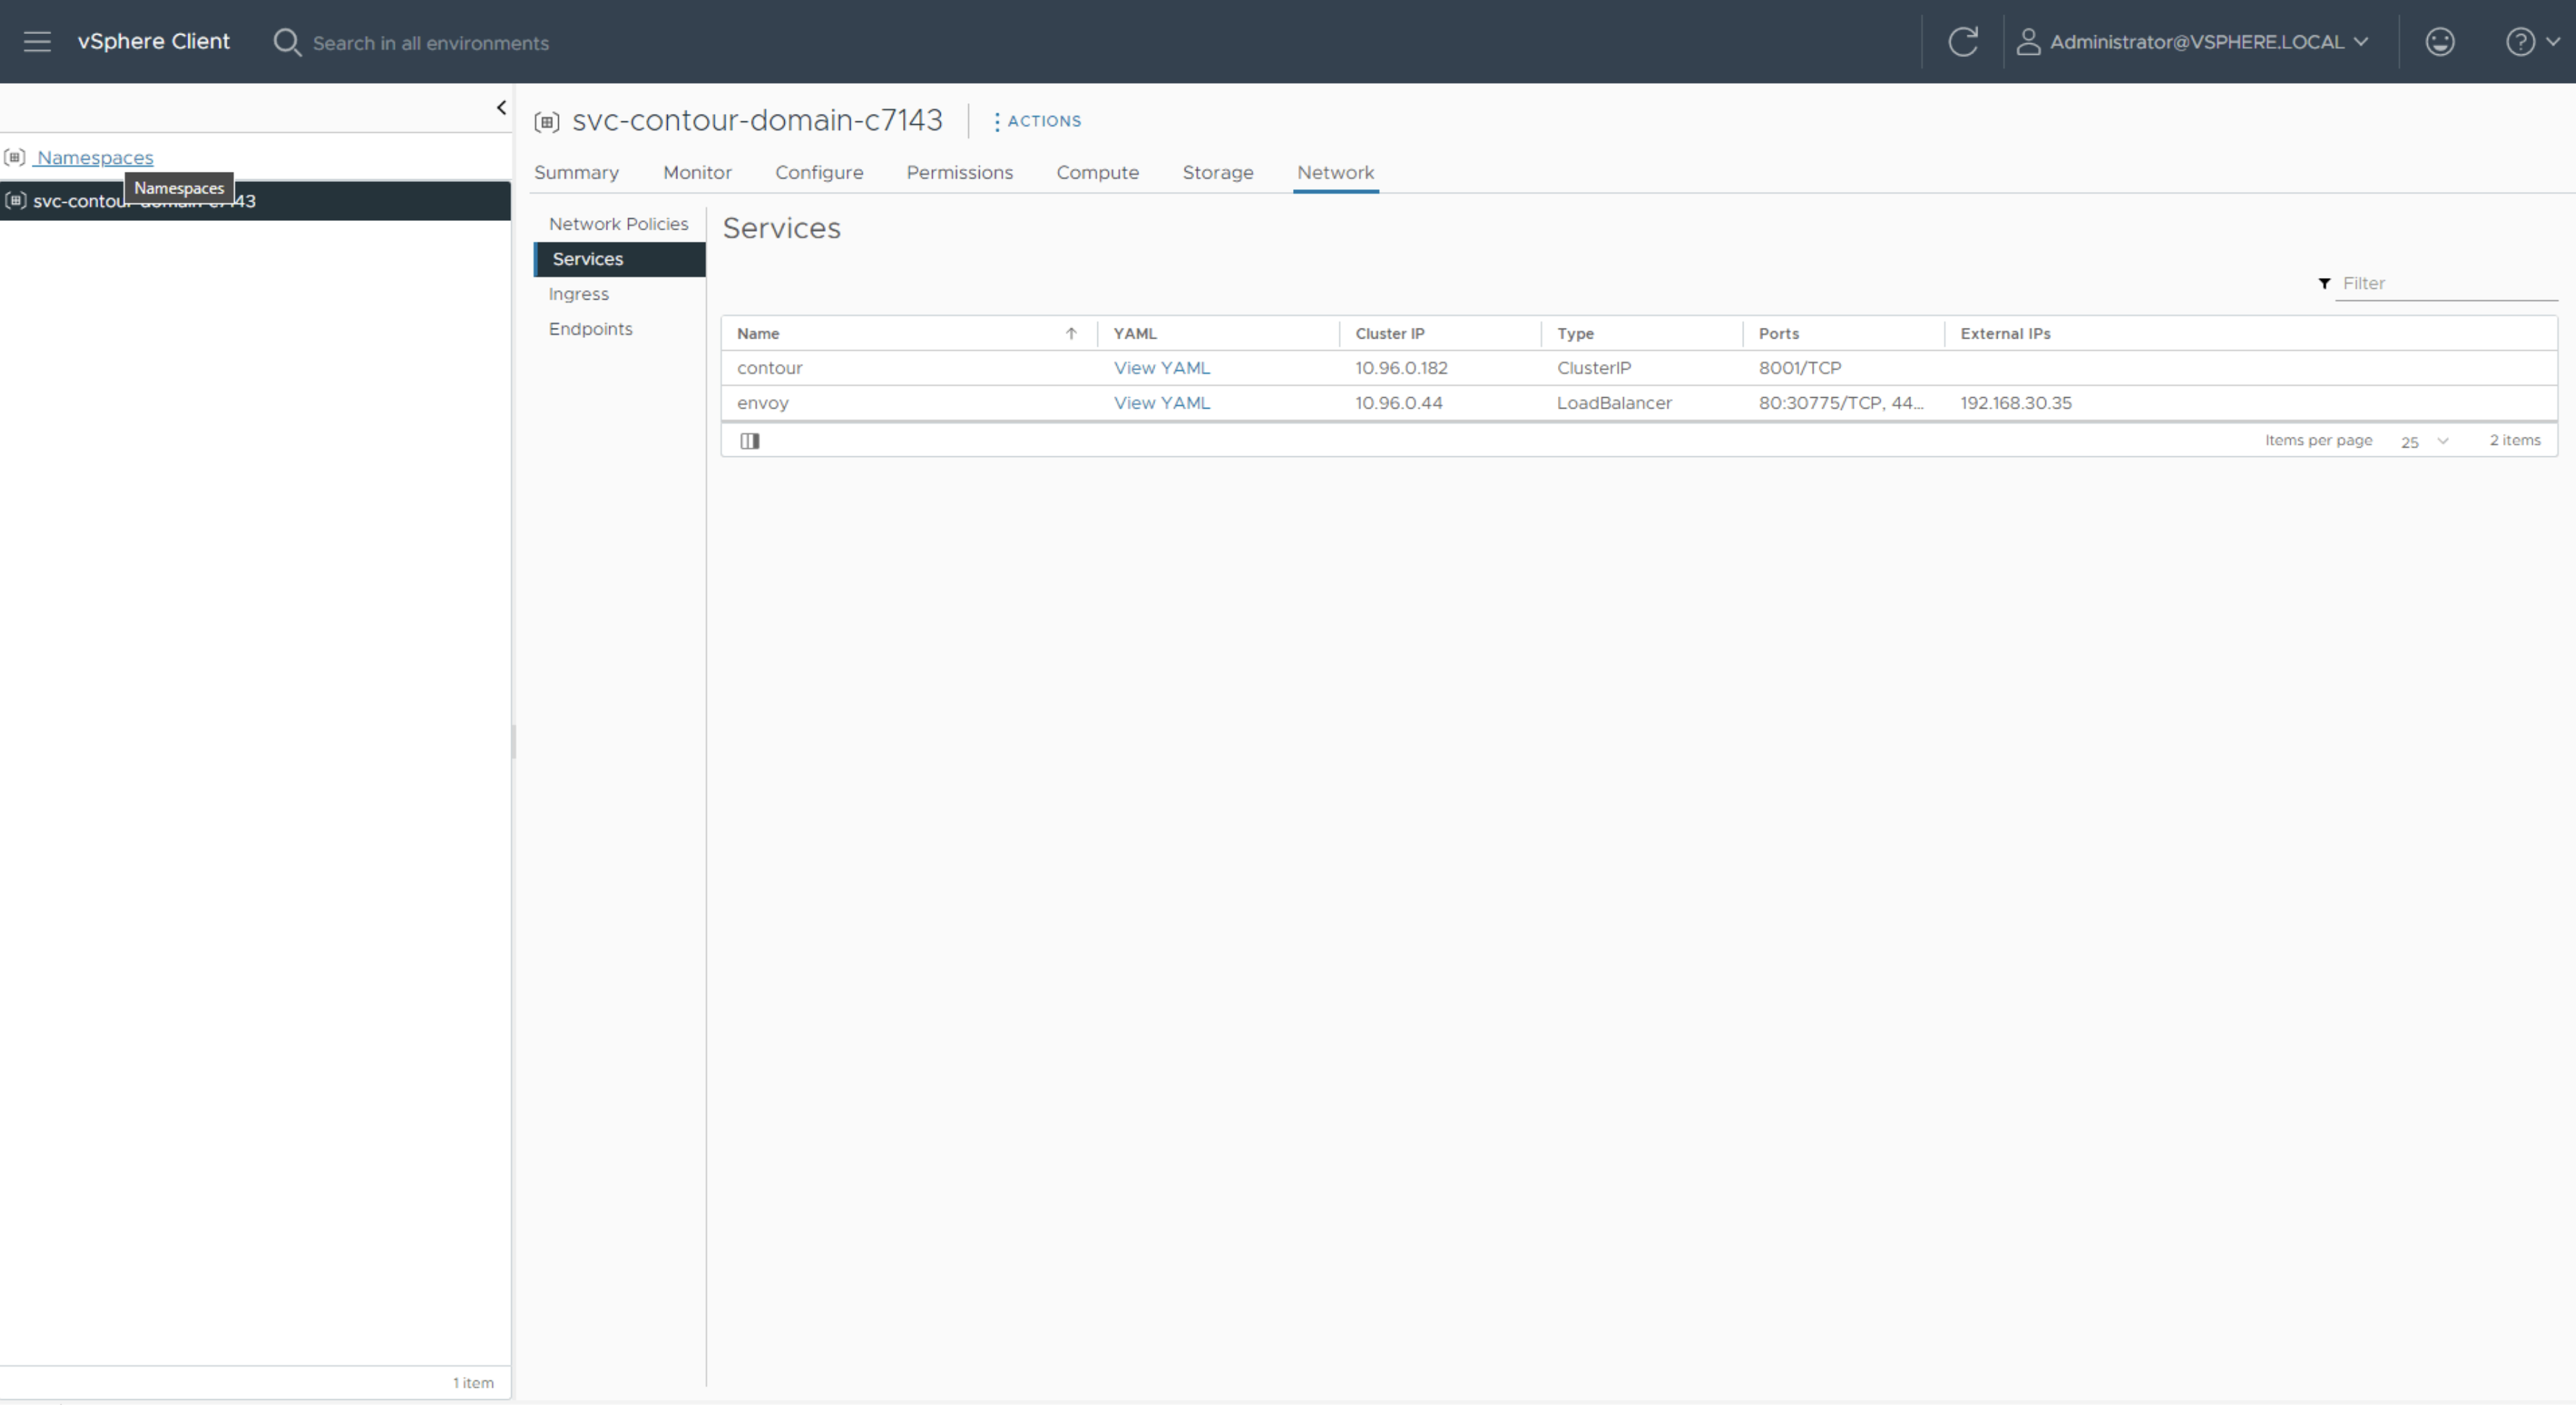
Click on the Network and select Services to obtain the External IP which will be used to access the Harbor repository. Add this IP address to your DNS server for the FQDN you will access Harbor on - for example harbor.vmw.lab. This FQDN will be specified in harbor-data-values.yaml file later.
Deploy Harbor Image Registry
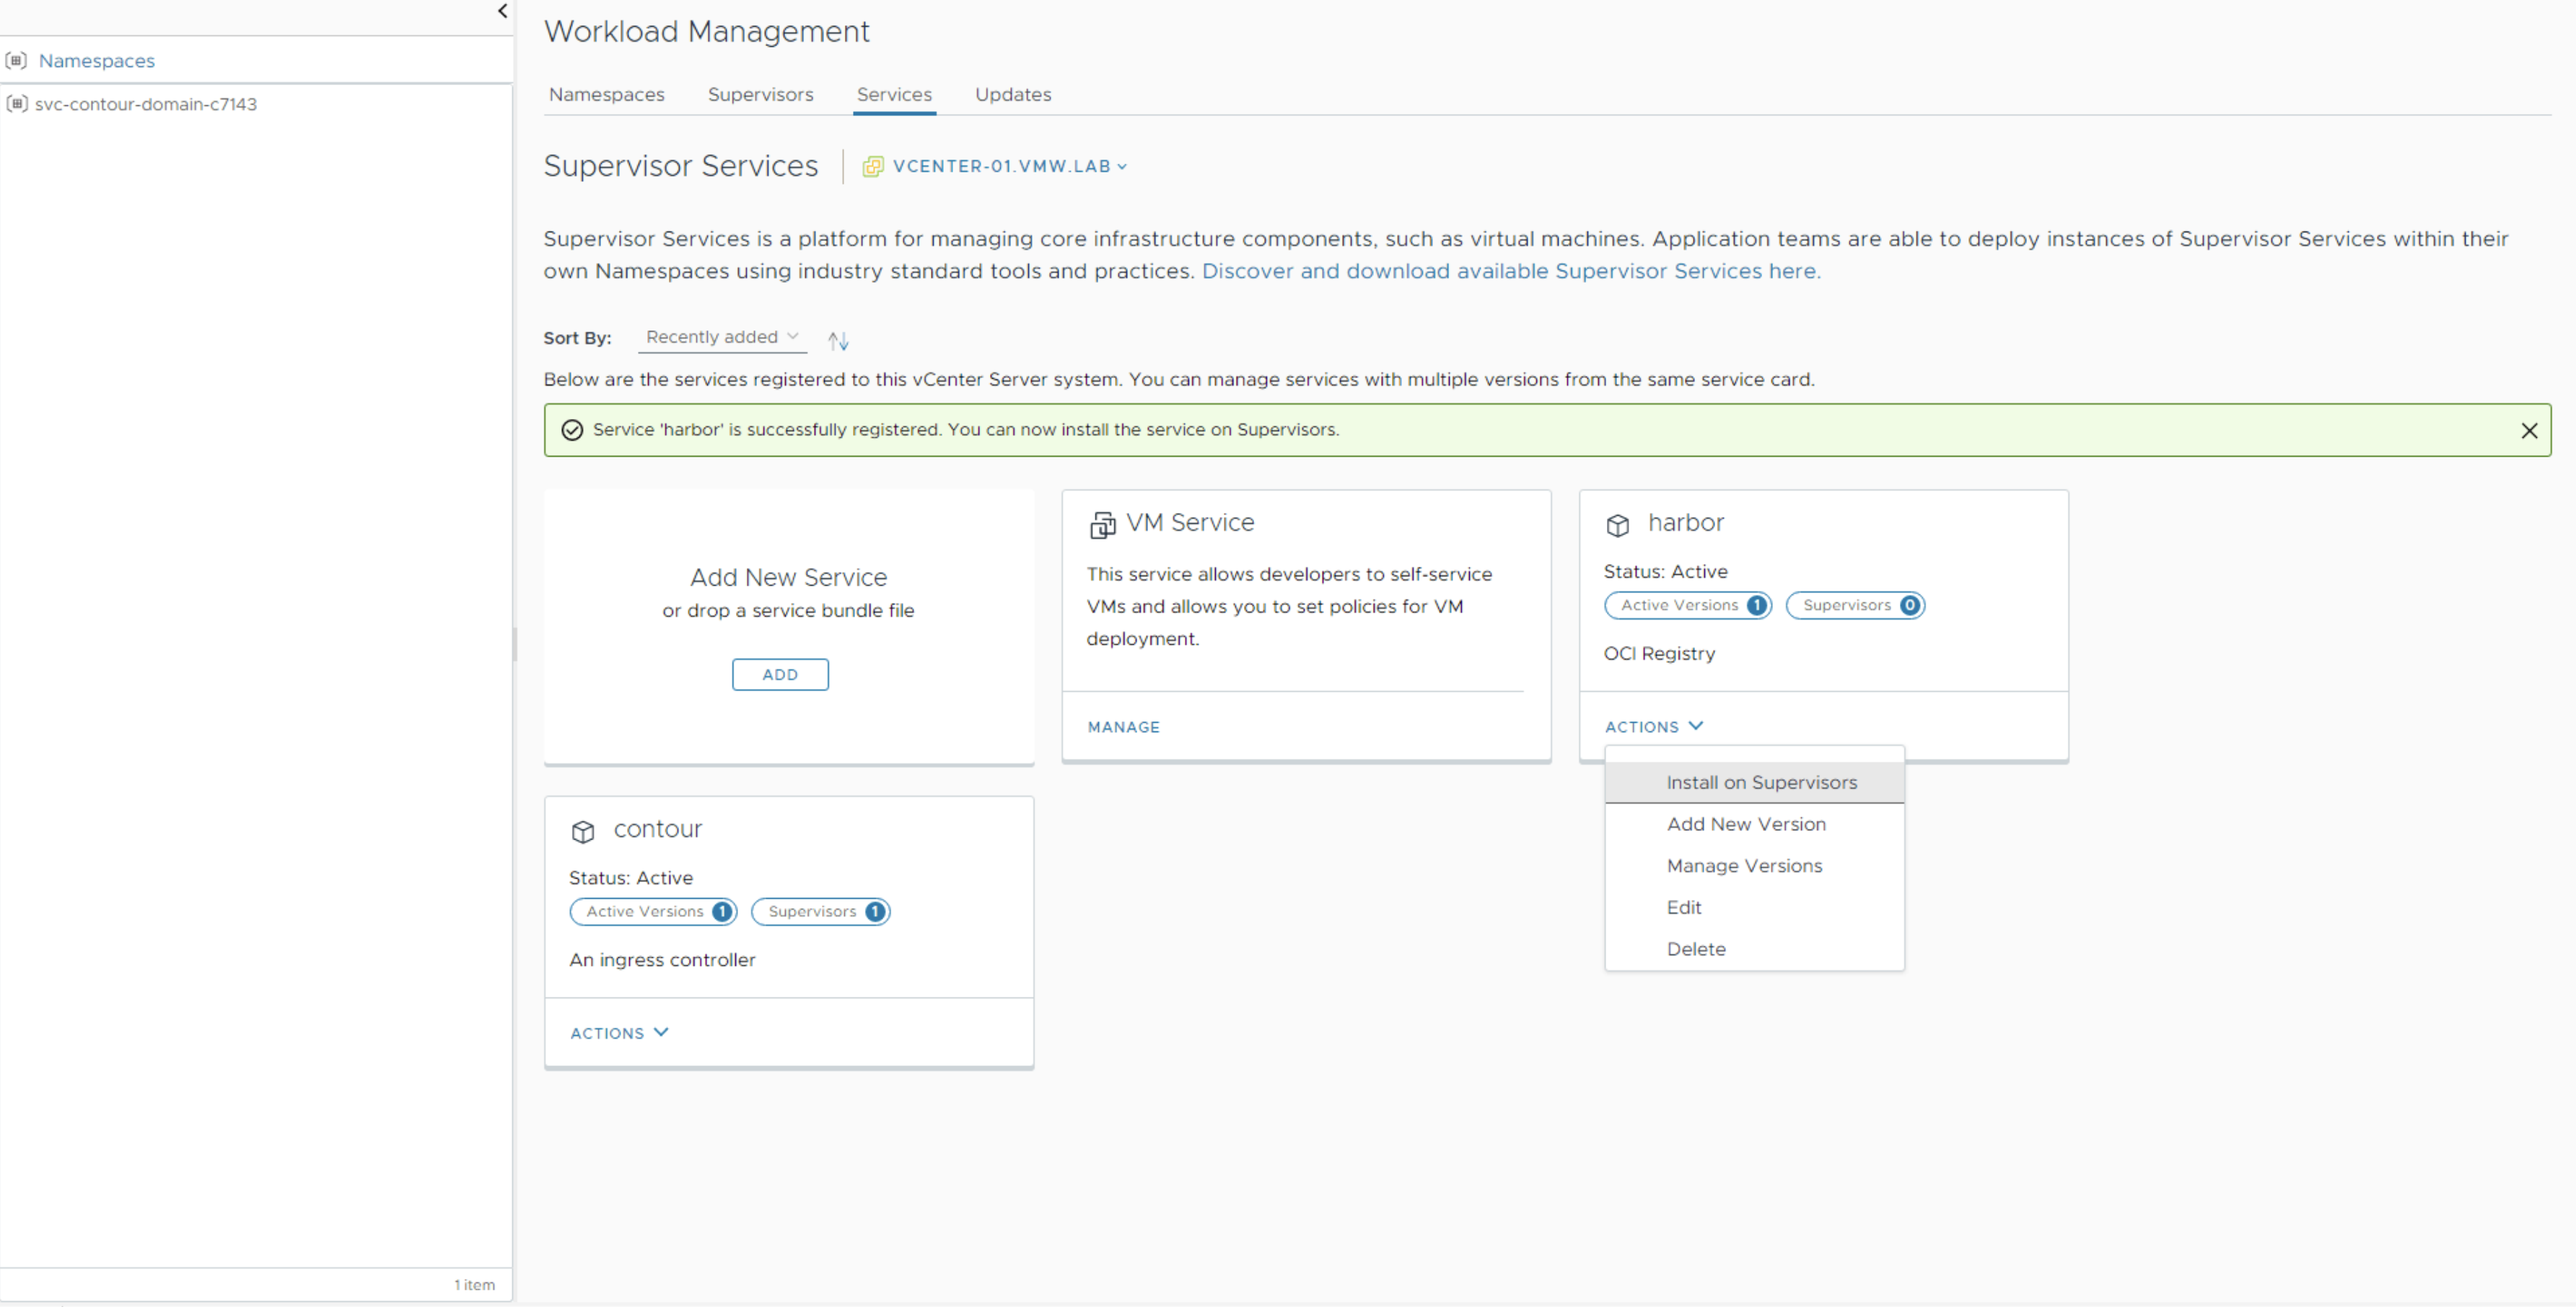
Return to Worklod Management, Services and click on Add New Service.
Select harbor.yml to upload the Harbor package and register it with vCenter.

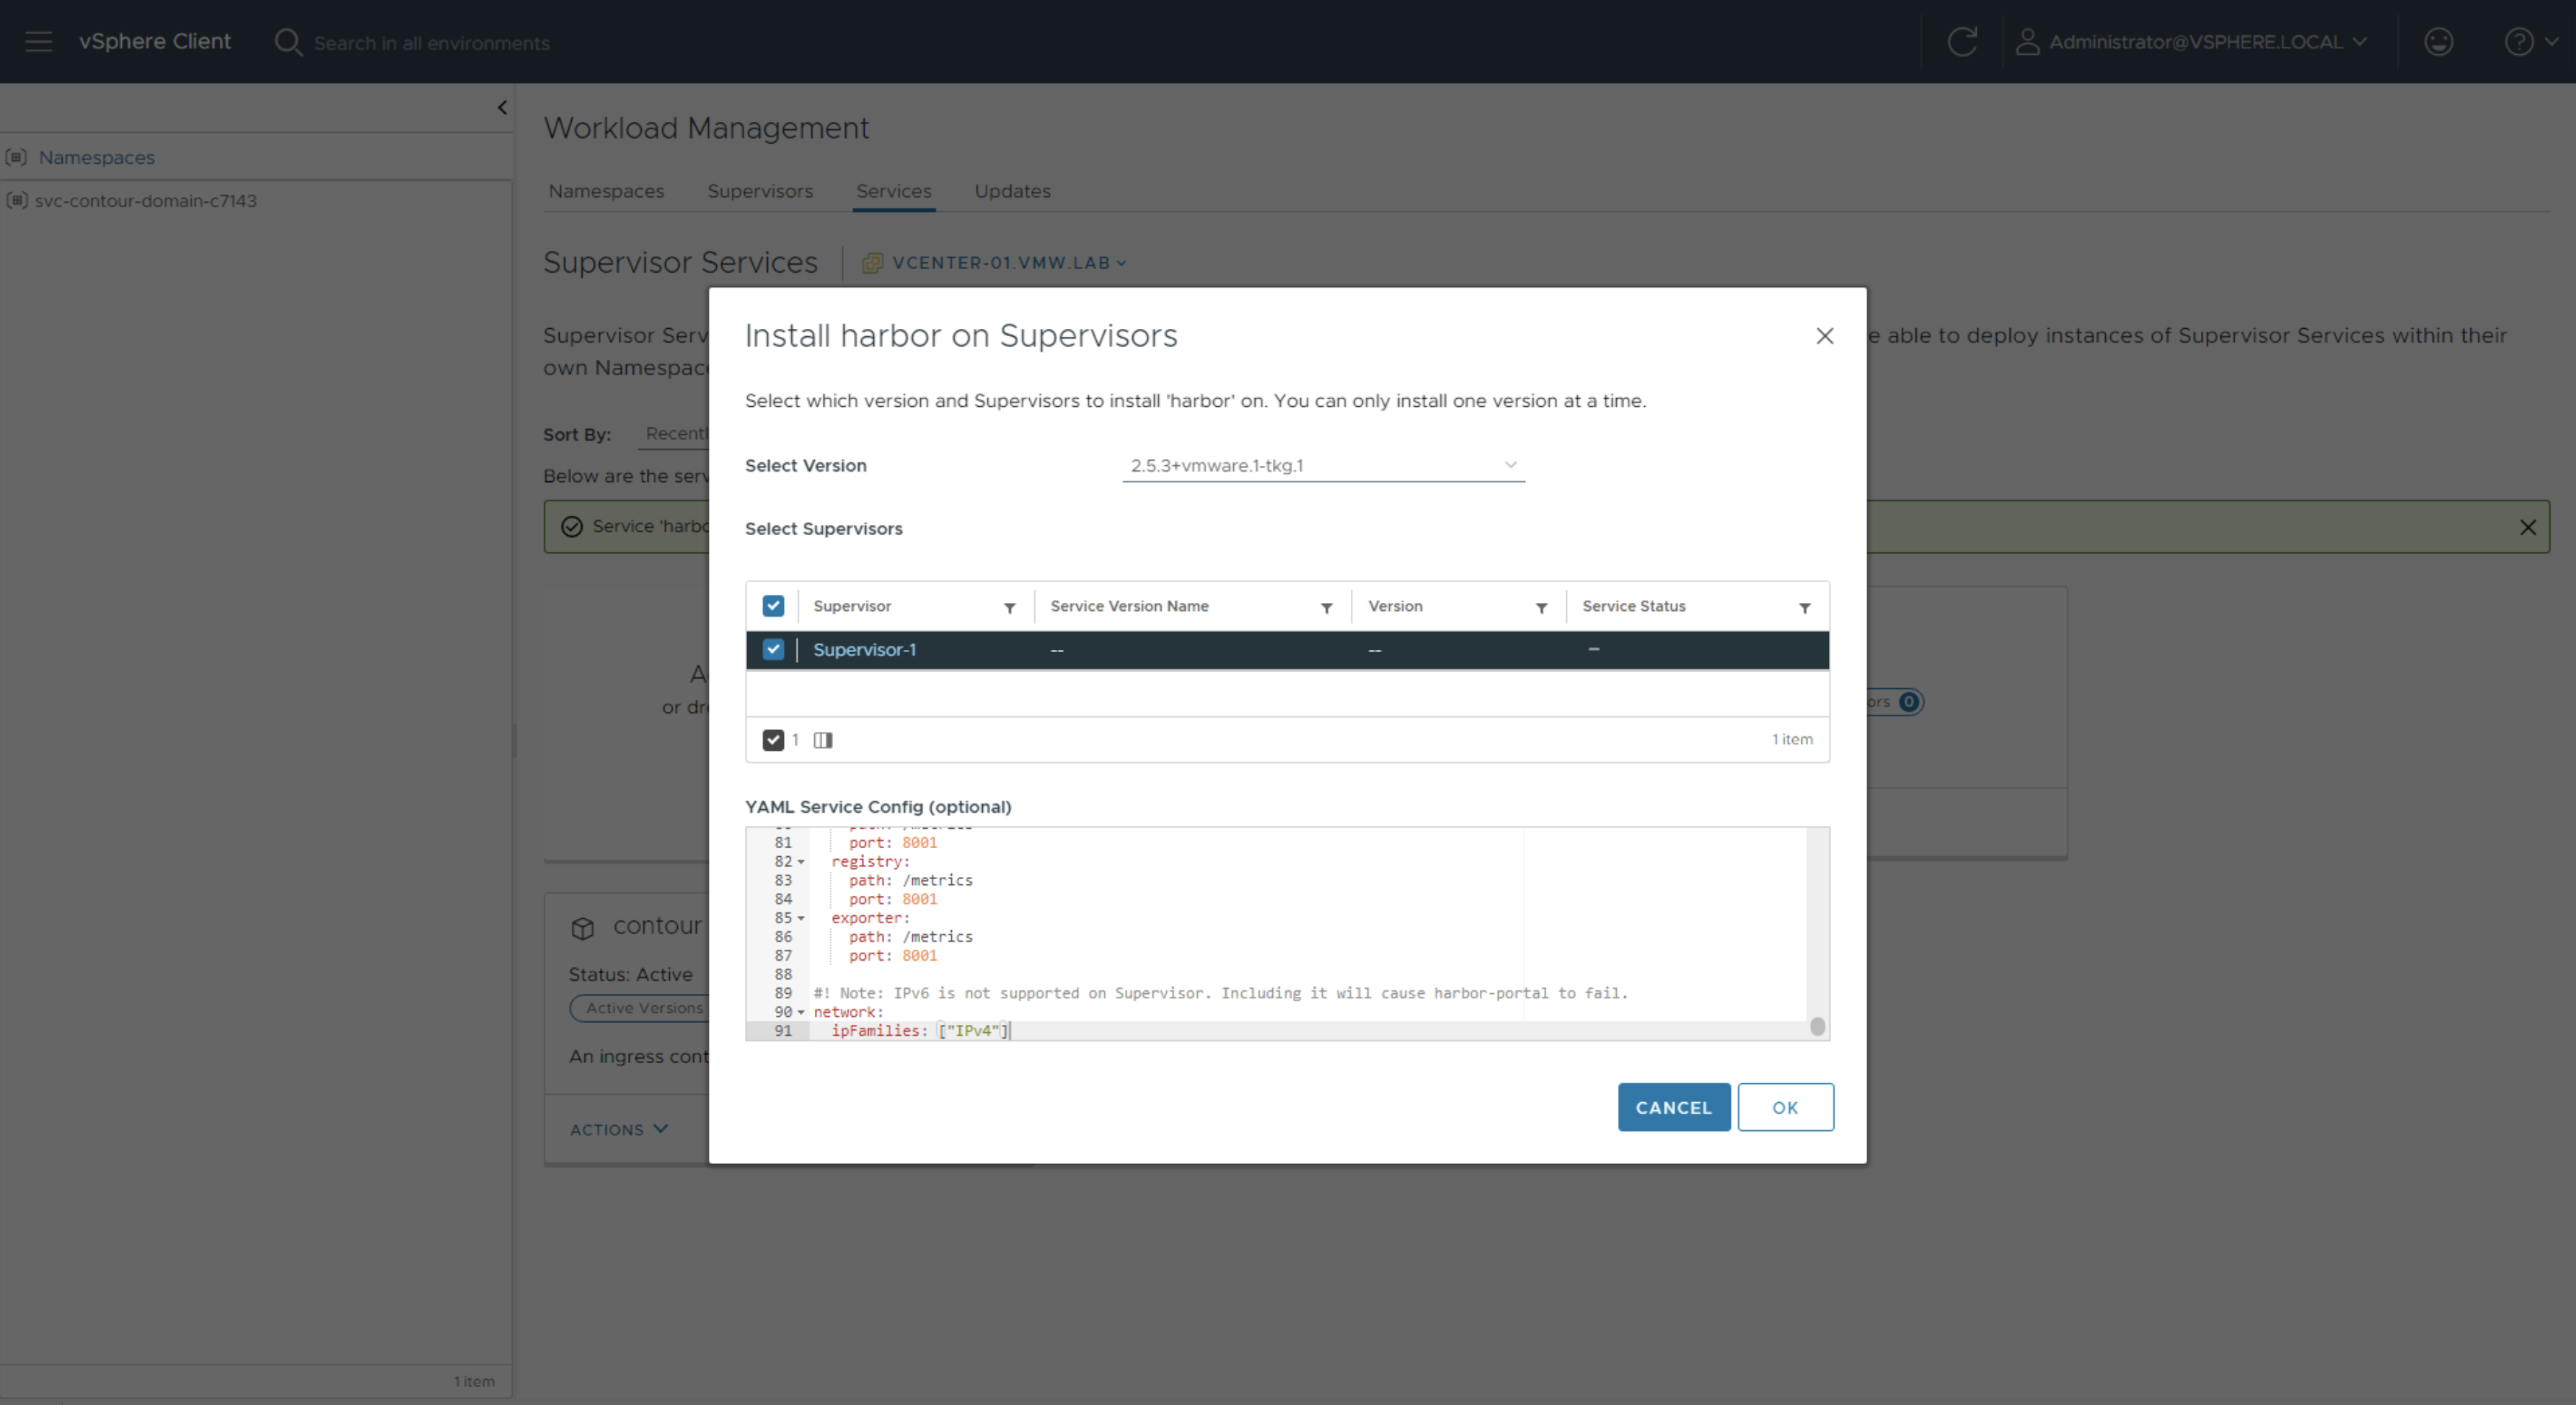
Open harbor-data-values.yml and modify the following values at minimum:
- hostname – enter a hostname that will be used to access the registry, we will use harbor.vmw.lab in this demo. This has to match the DNS record we created earlier.
- harborAdminPassword – change the admin password
- storageClass – change the storage class name to match your environment in all 5 PersistentVolumeClaims, in this demo we use k8s-storage-policy
harbor-data-values.yml:
#! The FQDN for accessing Harbor admin UI and Registry service.
hostname: harbor.vmw.lab

#! The network port of the Envoy service in Contour or other Ingress Controller.
port:
  https: 443

#! Do not change tlsSecretLabels. It is required for TKG  integration to work.
tlsCertificate:
  tlsSecretLabels: {"managed-by": "vmware-vRegistry"}

#! [Required] The initial password for the Harbor admin account. This is applied
#! only during installation. Future updates to the password should be done
#! using the Harbor UI or API.
harborAdminPassword: Harbor12345

#! [Required] The secret key used for encryption. Must be a string of 16 chars.
secretKey: 0123456789ABCDEF

database:
  #! [Required] The initial password of the postgres database.
  password: change-it

core:
  replicas: 1
  #! [Required] Secret is used when core server communicates with other components.
  secret: change-it
  #! [Required] The XSRF key. Must be a string of 32 chars.
  xsrfKey: 0123456789ABCDEF0123456789ABCDEF
jobservice:
  replicas: 1
  #! [Required] Secret is used when job service communicates with other components.
  secret: change-it
registry:
  replicas: 1
  #! [Required] Secret is used to secure the upload state from client
  #! and registry storage backend.
  #! See: https://github.com/docker/distribution/blob/master/docs/configuration.md#http
  secret: change-it
notary:
  #! Notary is unsupported on vSphere Supervisor Clusters.
  enabled: false

#! Specify another StorageClass in the "storageClass" or set "existingClaim"
#! if you have already existing persistent volumes to use
persistence:
  persistentVolumeClaim:
    registry:
      #! Specify the "storageClass" used to provision the volume.
      #! Please use what is available in your environment.
      storageClass: "k8s-storage-policy"
      subPath: ""
      accessMode: ReadWriteOnce
      size: 10Gi
    jobservice:
      storageClass: "k8s-storage-policy"
      subPath: ""
      accessMode: ReadWriteOnce
      size: 1Gi
    database:
      storageClass: "k8s-storage-policy"
      subPath: ""
      accessMode: ReadWriteOnce
      size: 1Gi
    redis:
      storageClass: "k8s-storage-policy"
      subPath: ""
      accessMode: ReadWriteOnce
      size: 1Gi
    trivy:
      storageClass: "k8s-storage-policy"
      subPath: ""
      accessMode: ReadWriteOnce
      size: 5Gi

#! The metrics used by core, registry and exporter
metrics:
  enabled: true
  core:
    path: /metrics
    port: 8001
  registry:
    path: /metrics
    port: 8001
  exporter:
    path: /metrics
    port: 8001

#! Note: IPv6 is not supported on Supervisor. Including it will cause harbor-portal to fail.
network:
  ipFamilies: ["IPv4"]
Once Harbor is added, click on Actions and select Install on Supervisors.
Check the box next to Supervisor-1 and paste in the content of the modified harbor-data-values.yml.
Click into the svc-harbor namespace and wait until all vSphere Pods are in running state.
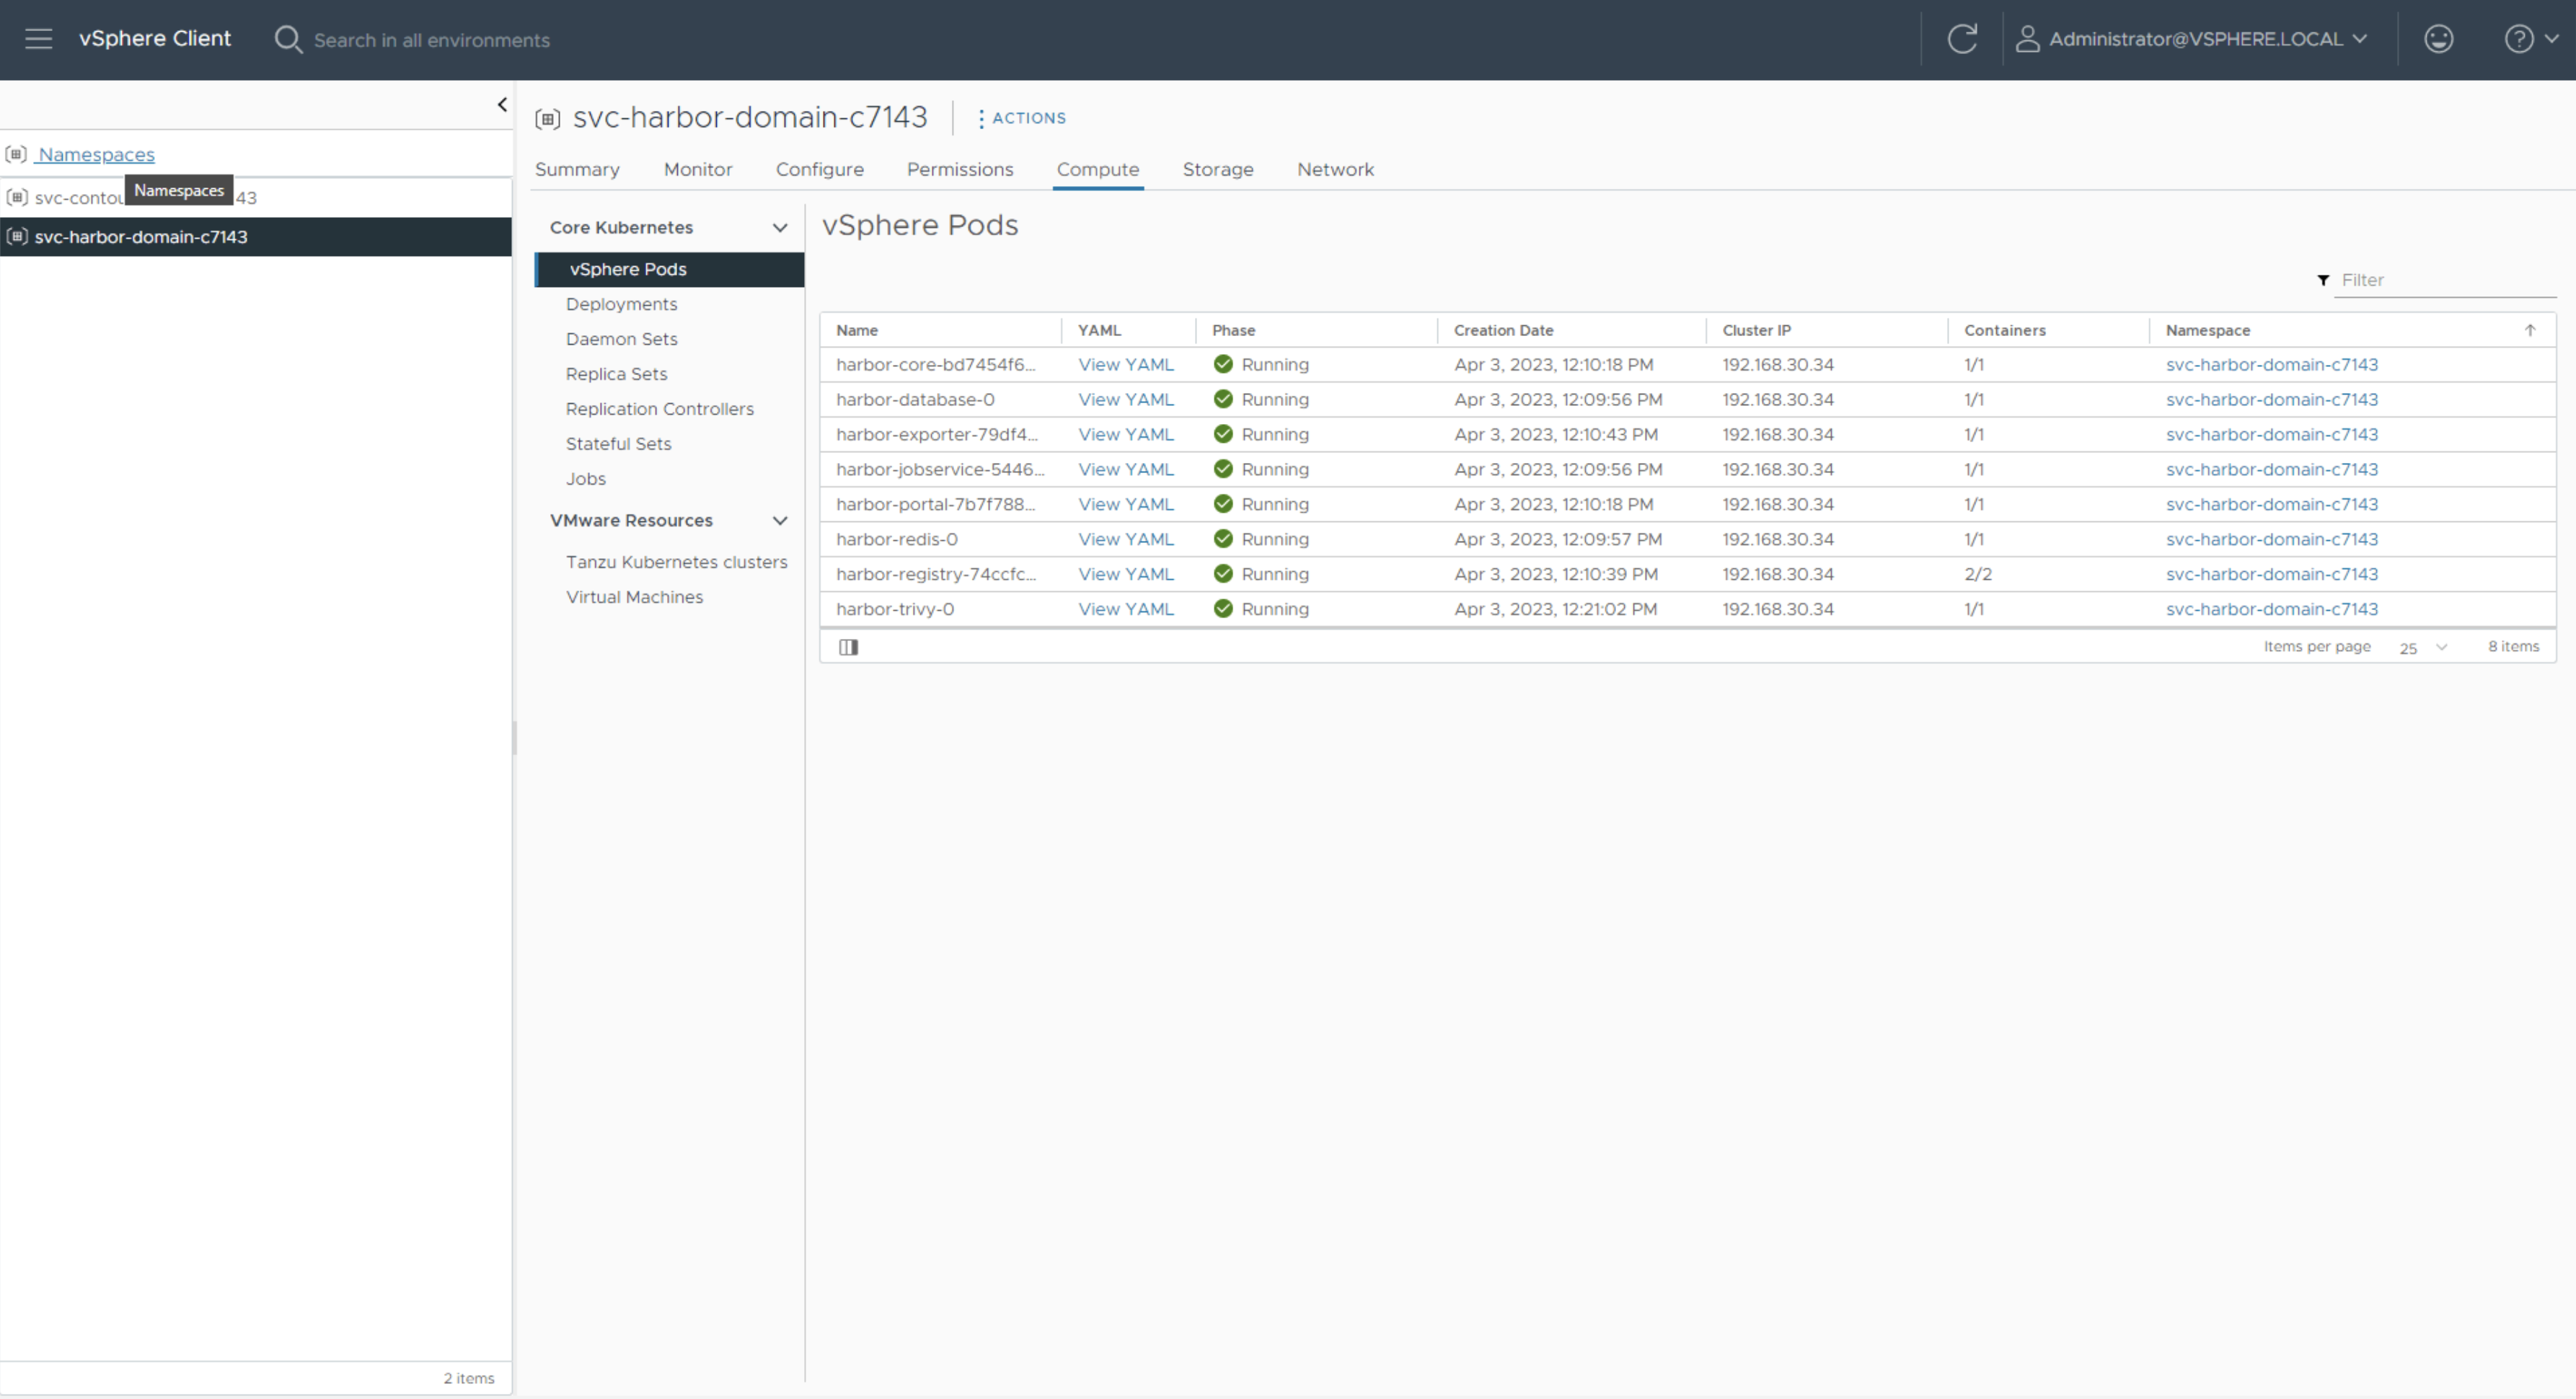
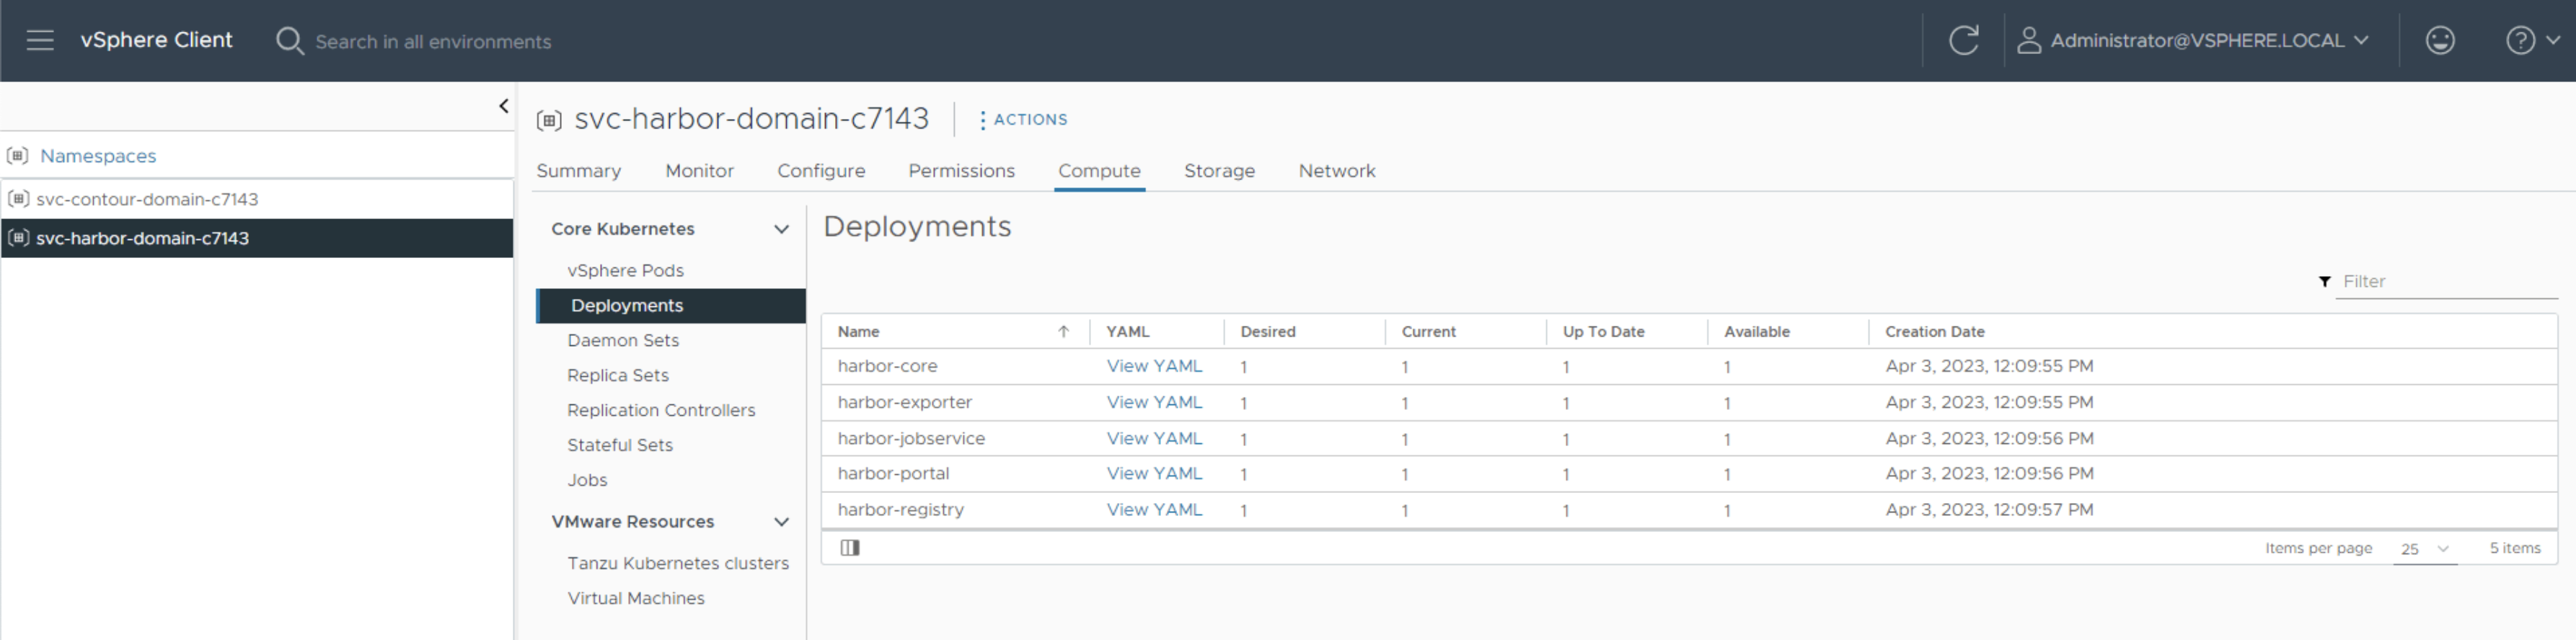
Note: some pods may fail during the deployment and get automatically recreated, this is a standard Kubernetes behaviour. You can verify the deployment is fully finished by looking at Deployments and making sure Available matches Desired state.
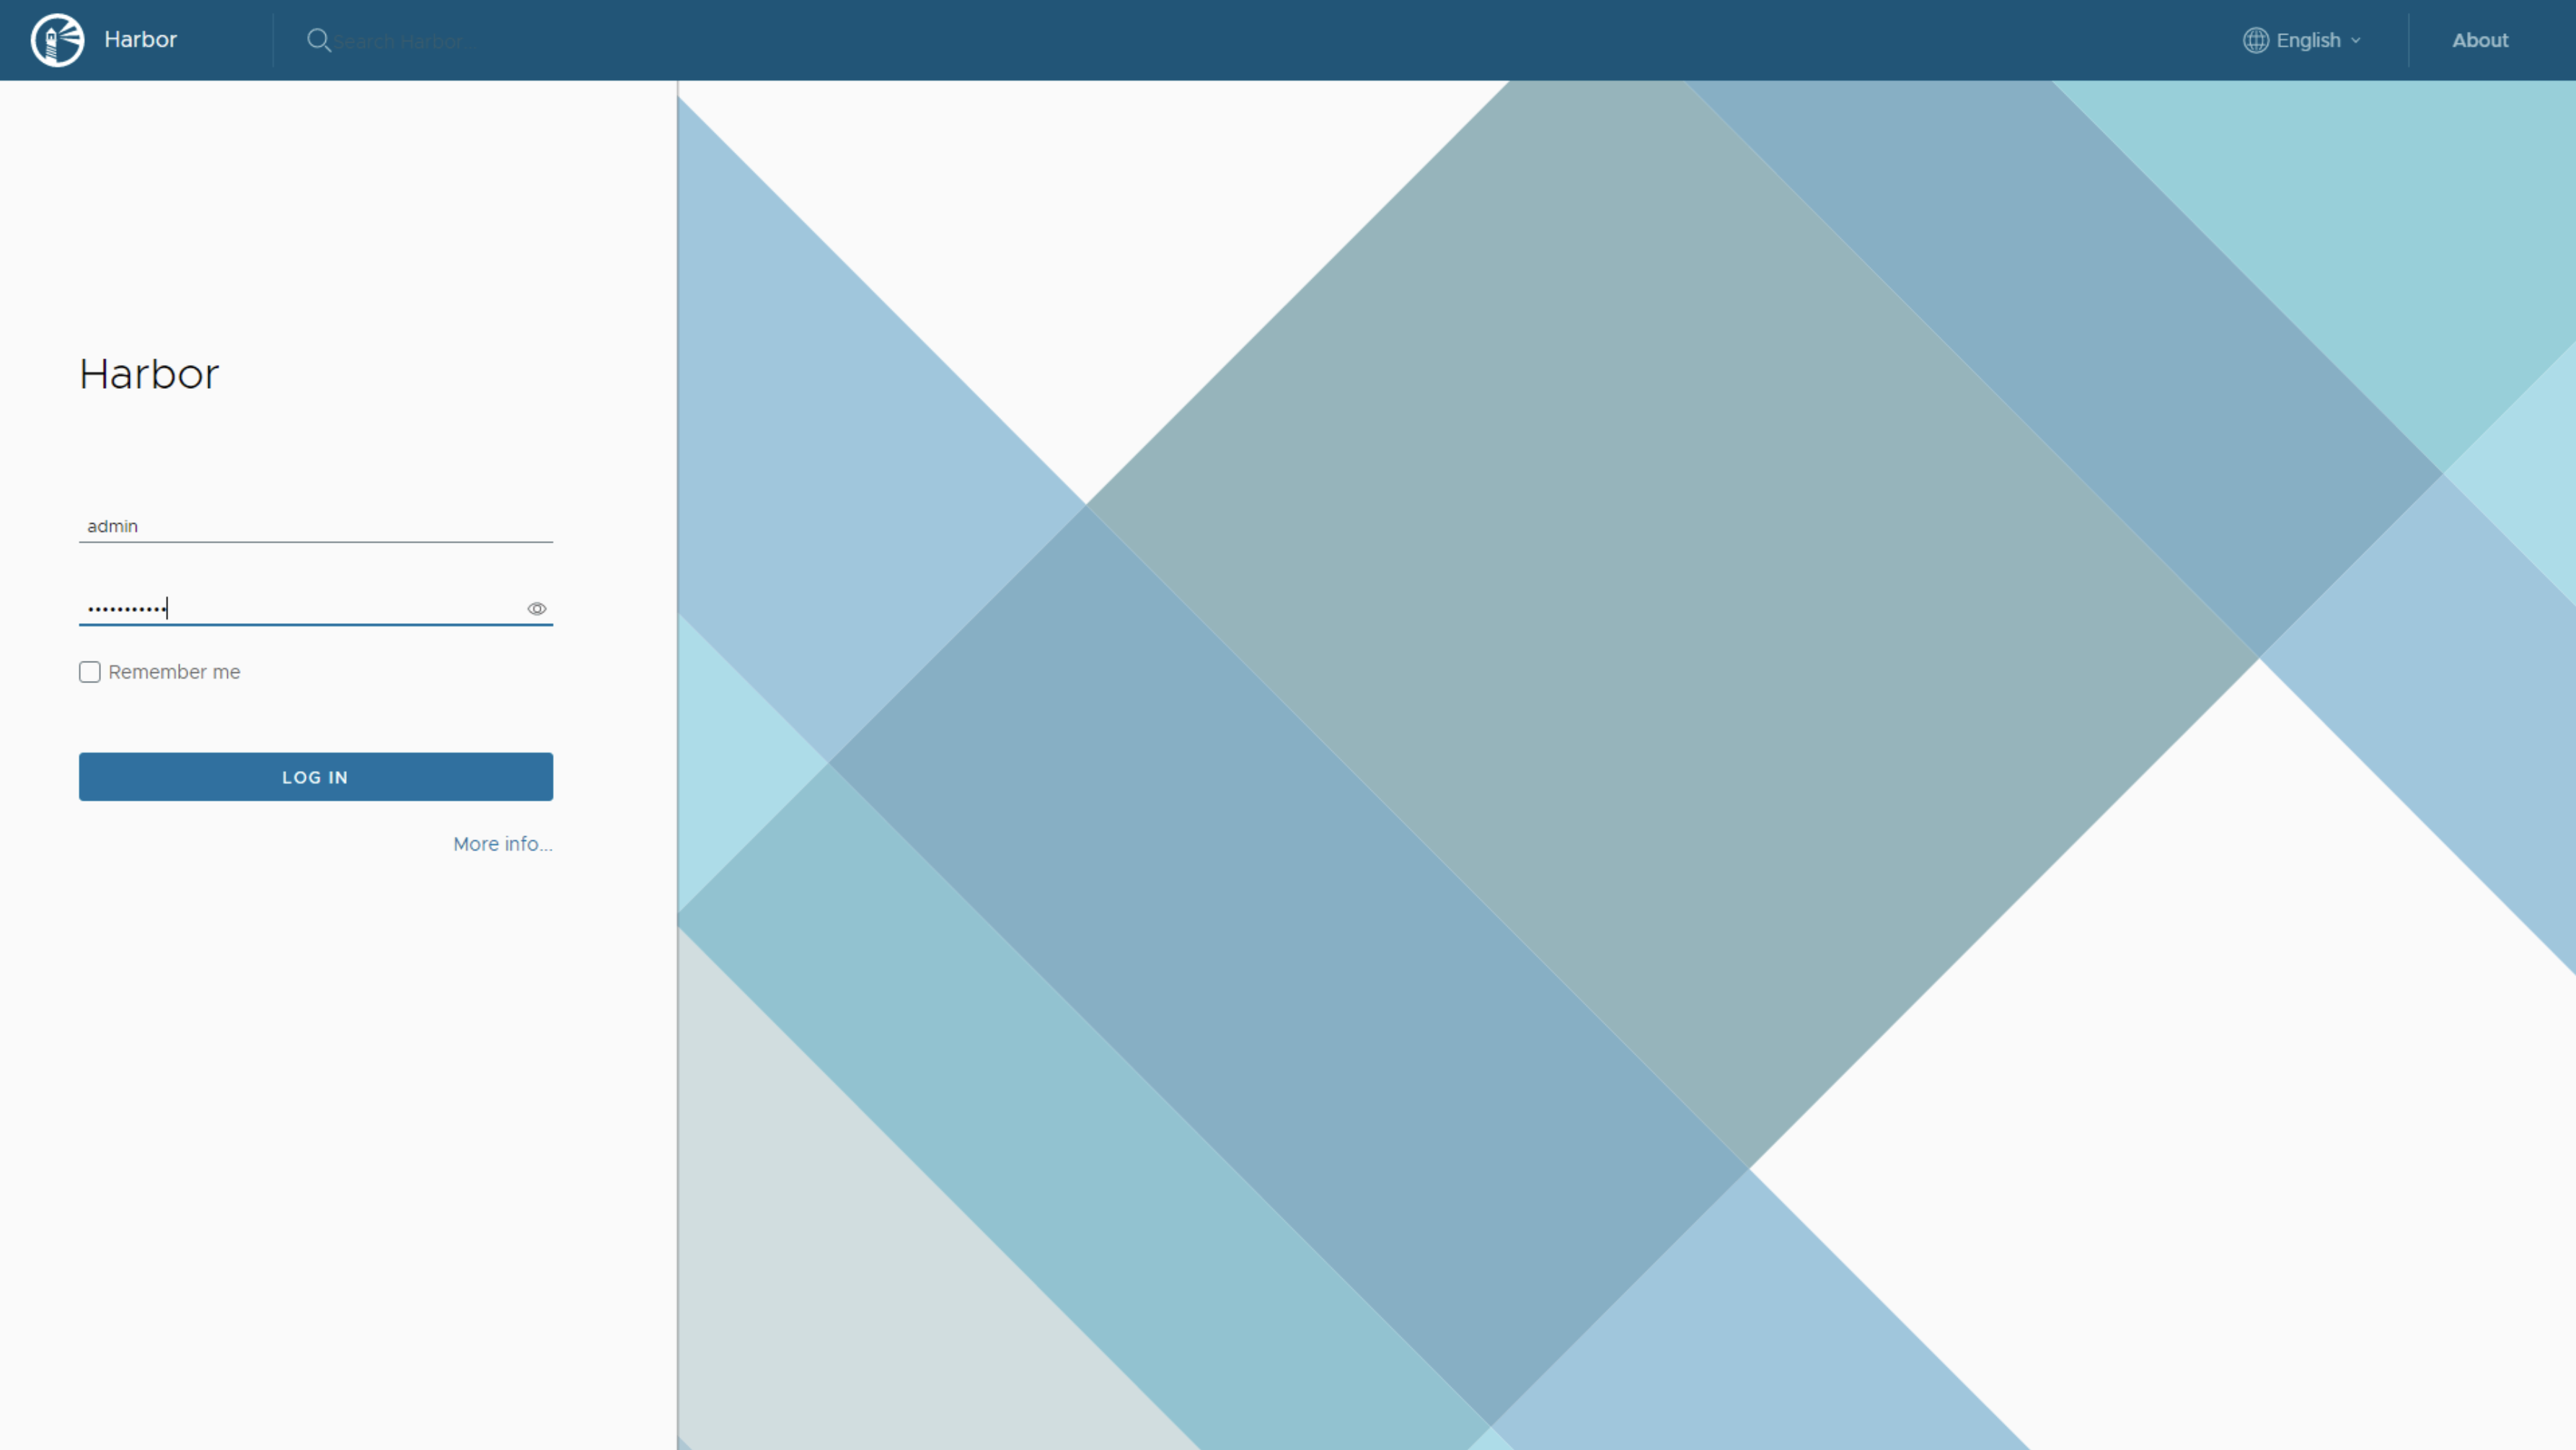
You can now login to your Harbor instance using the FQDN, username, and password defined in harbor-data-values.yml.
To obtain the Registry certificate, click into Library and download the certificate.
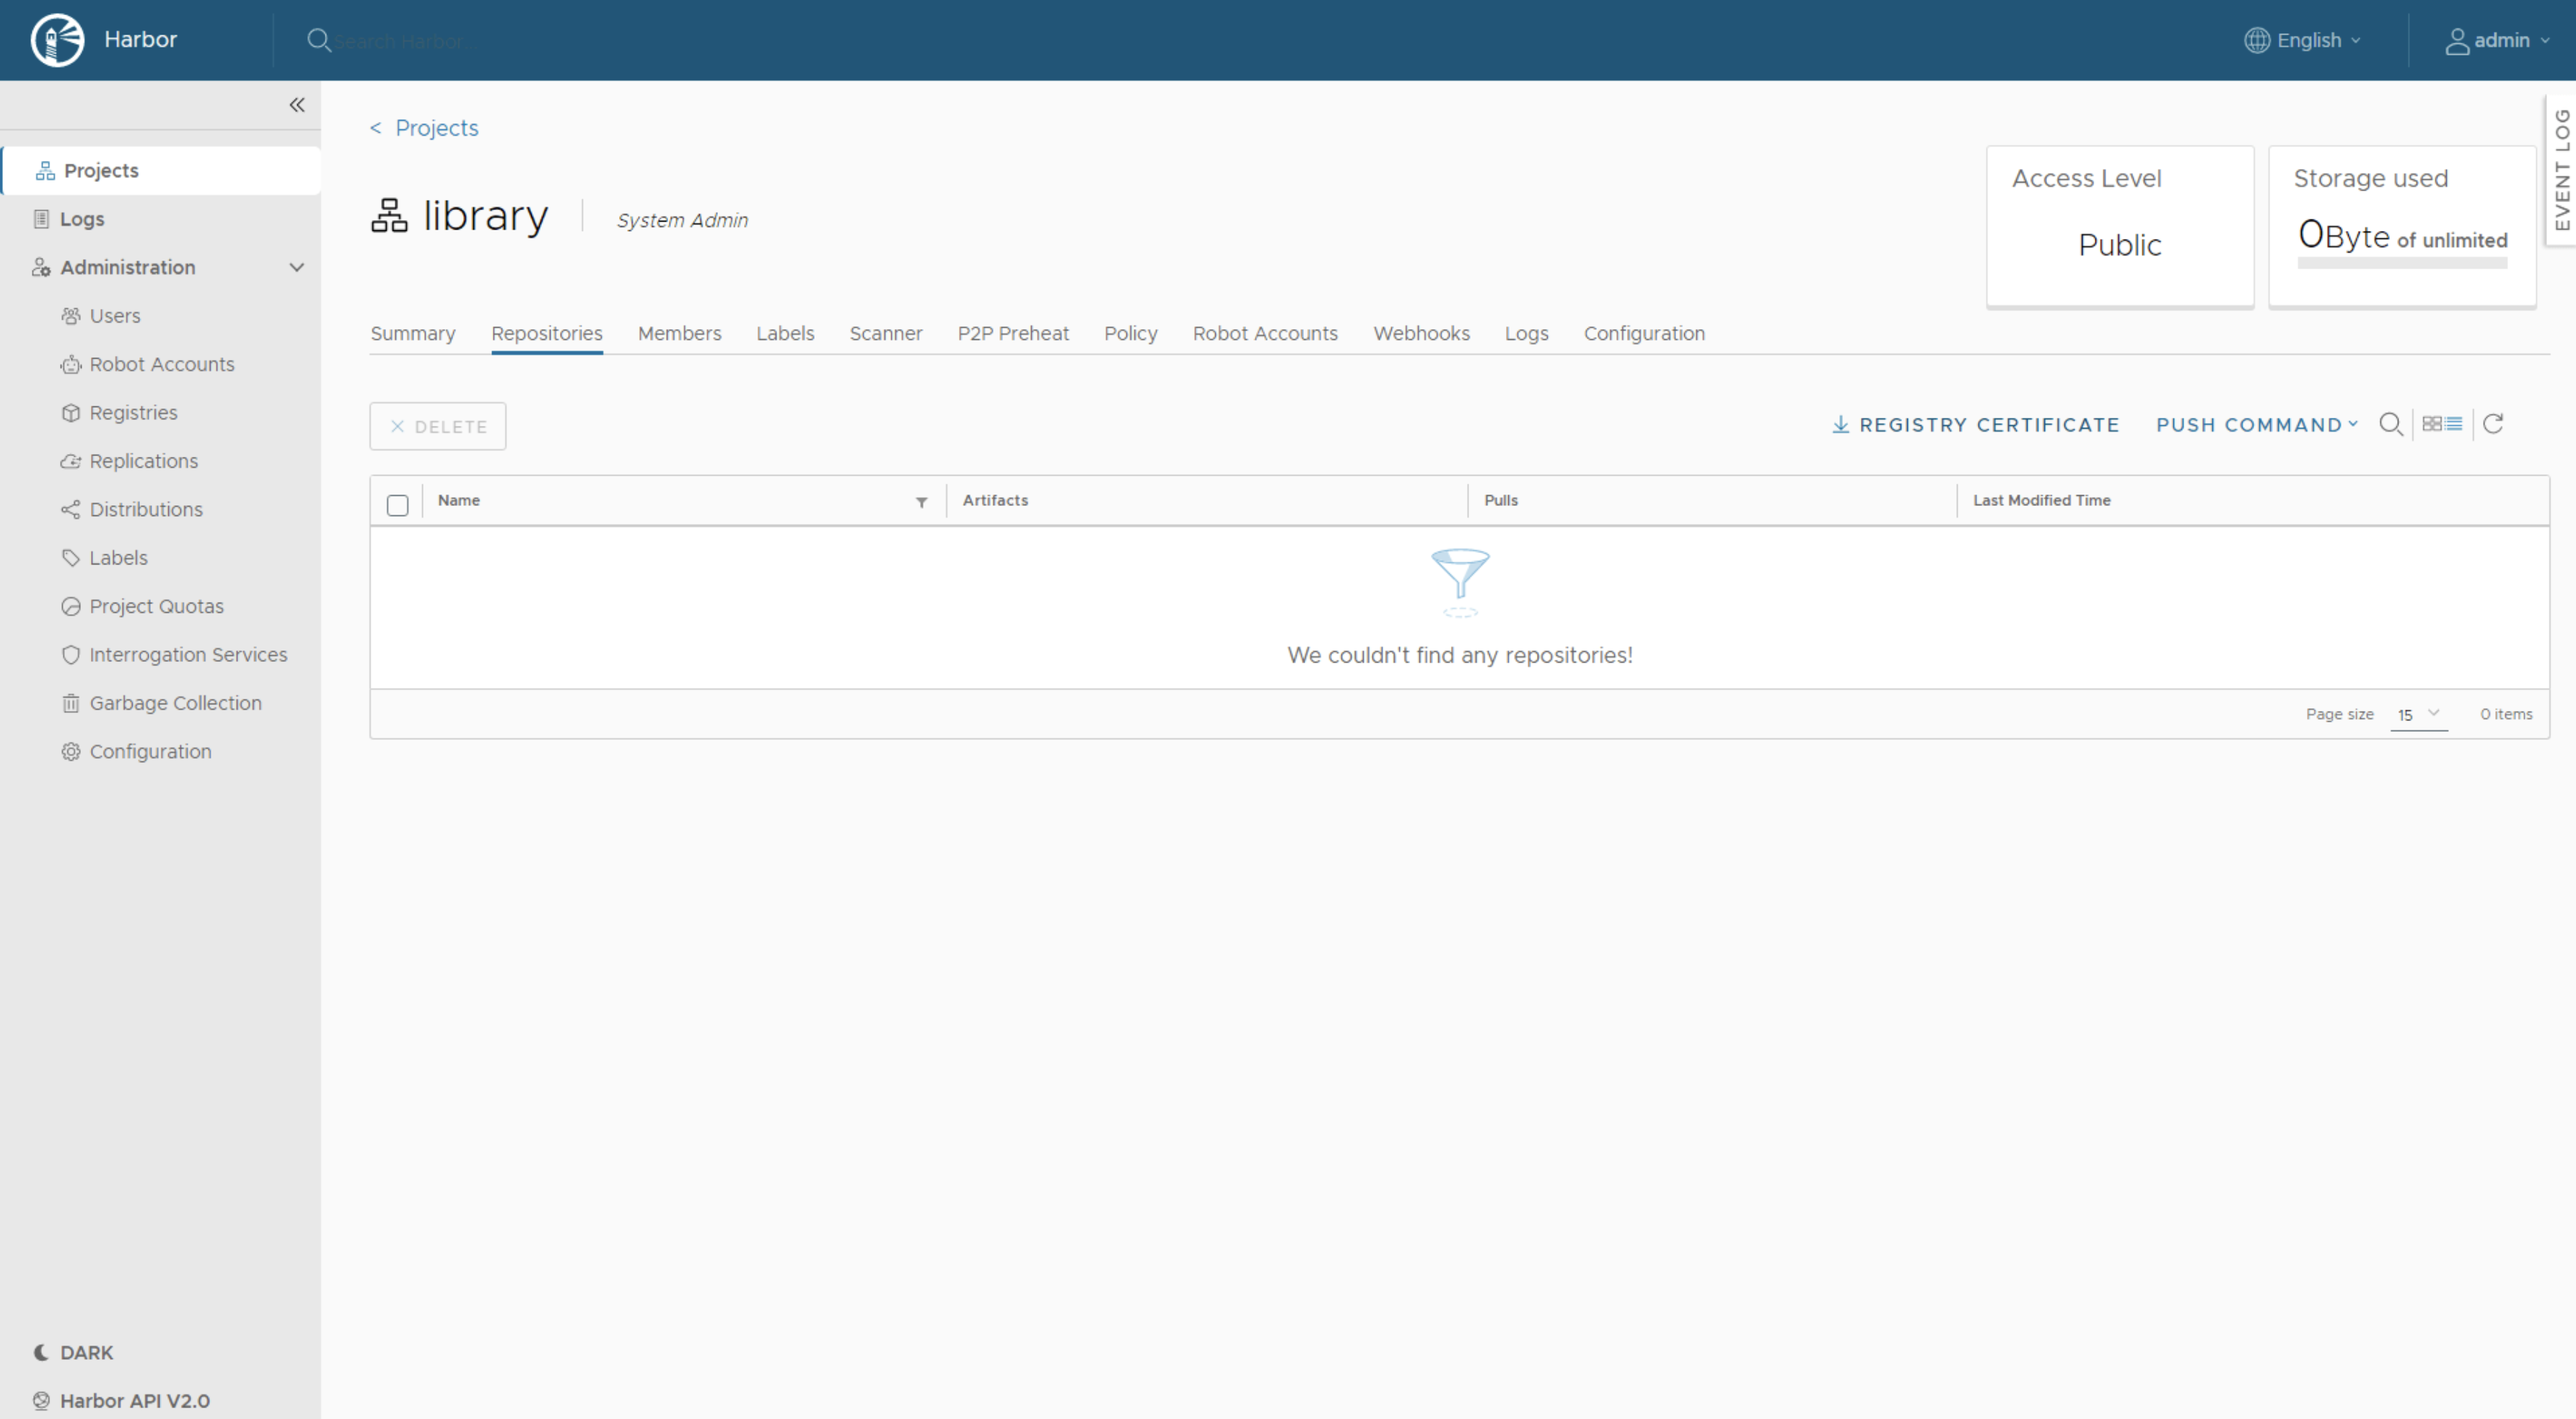
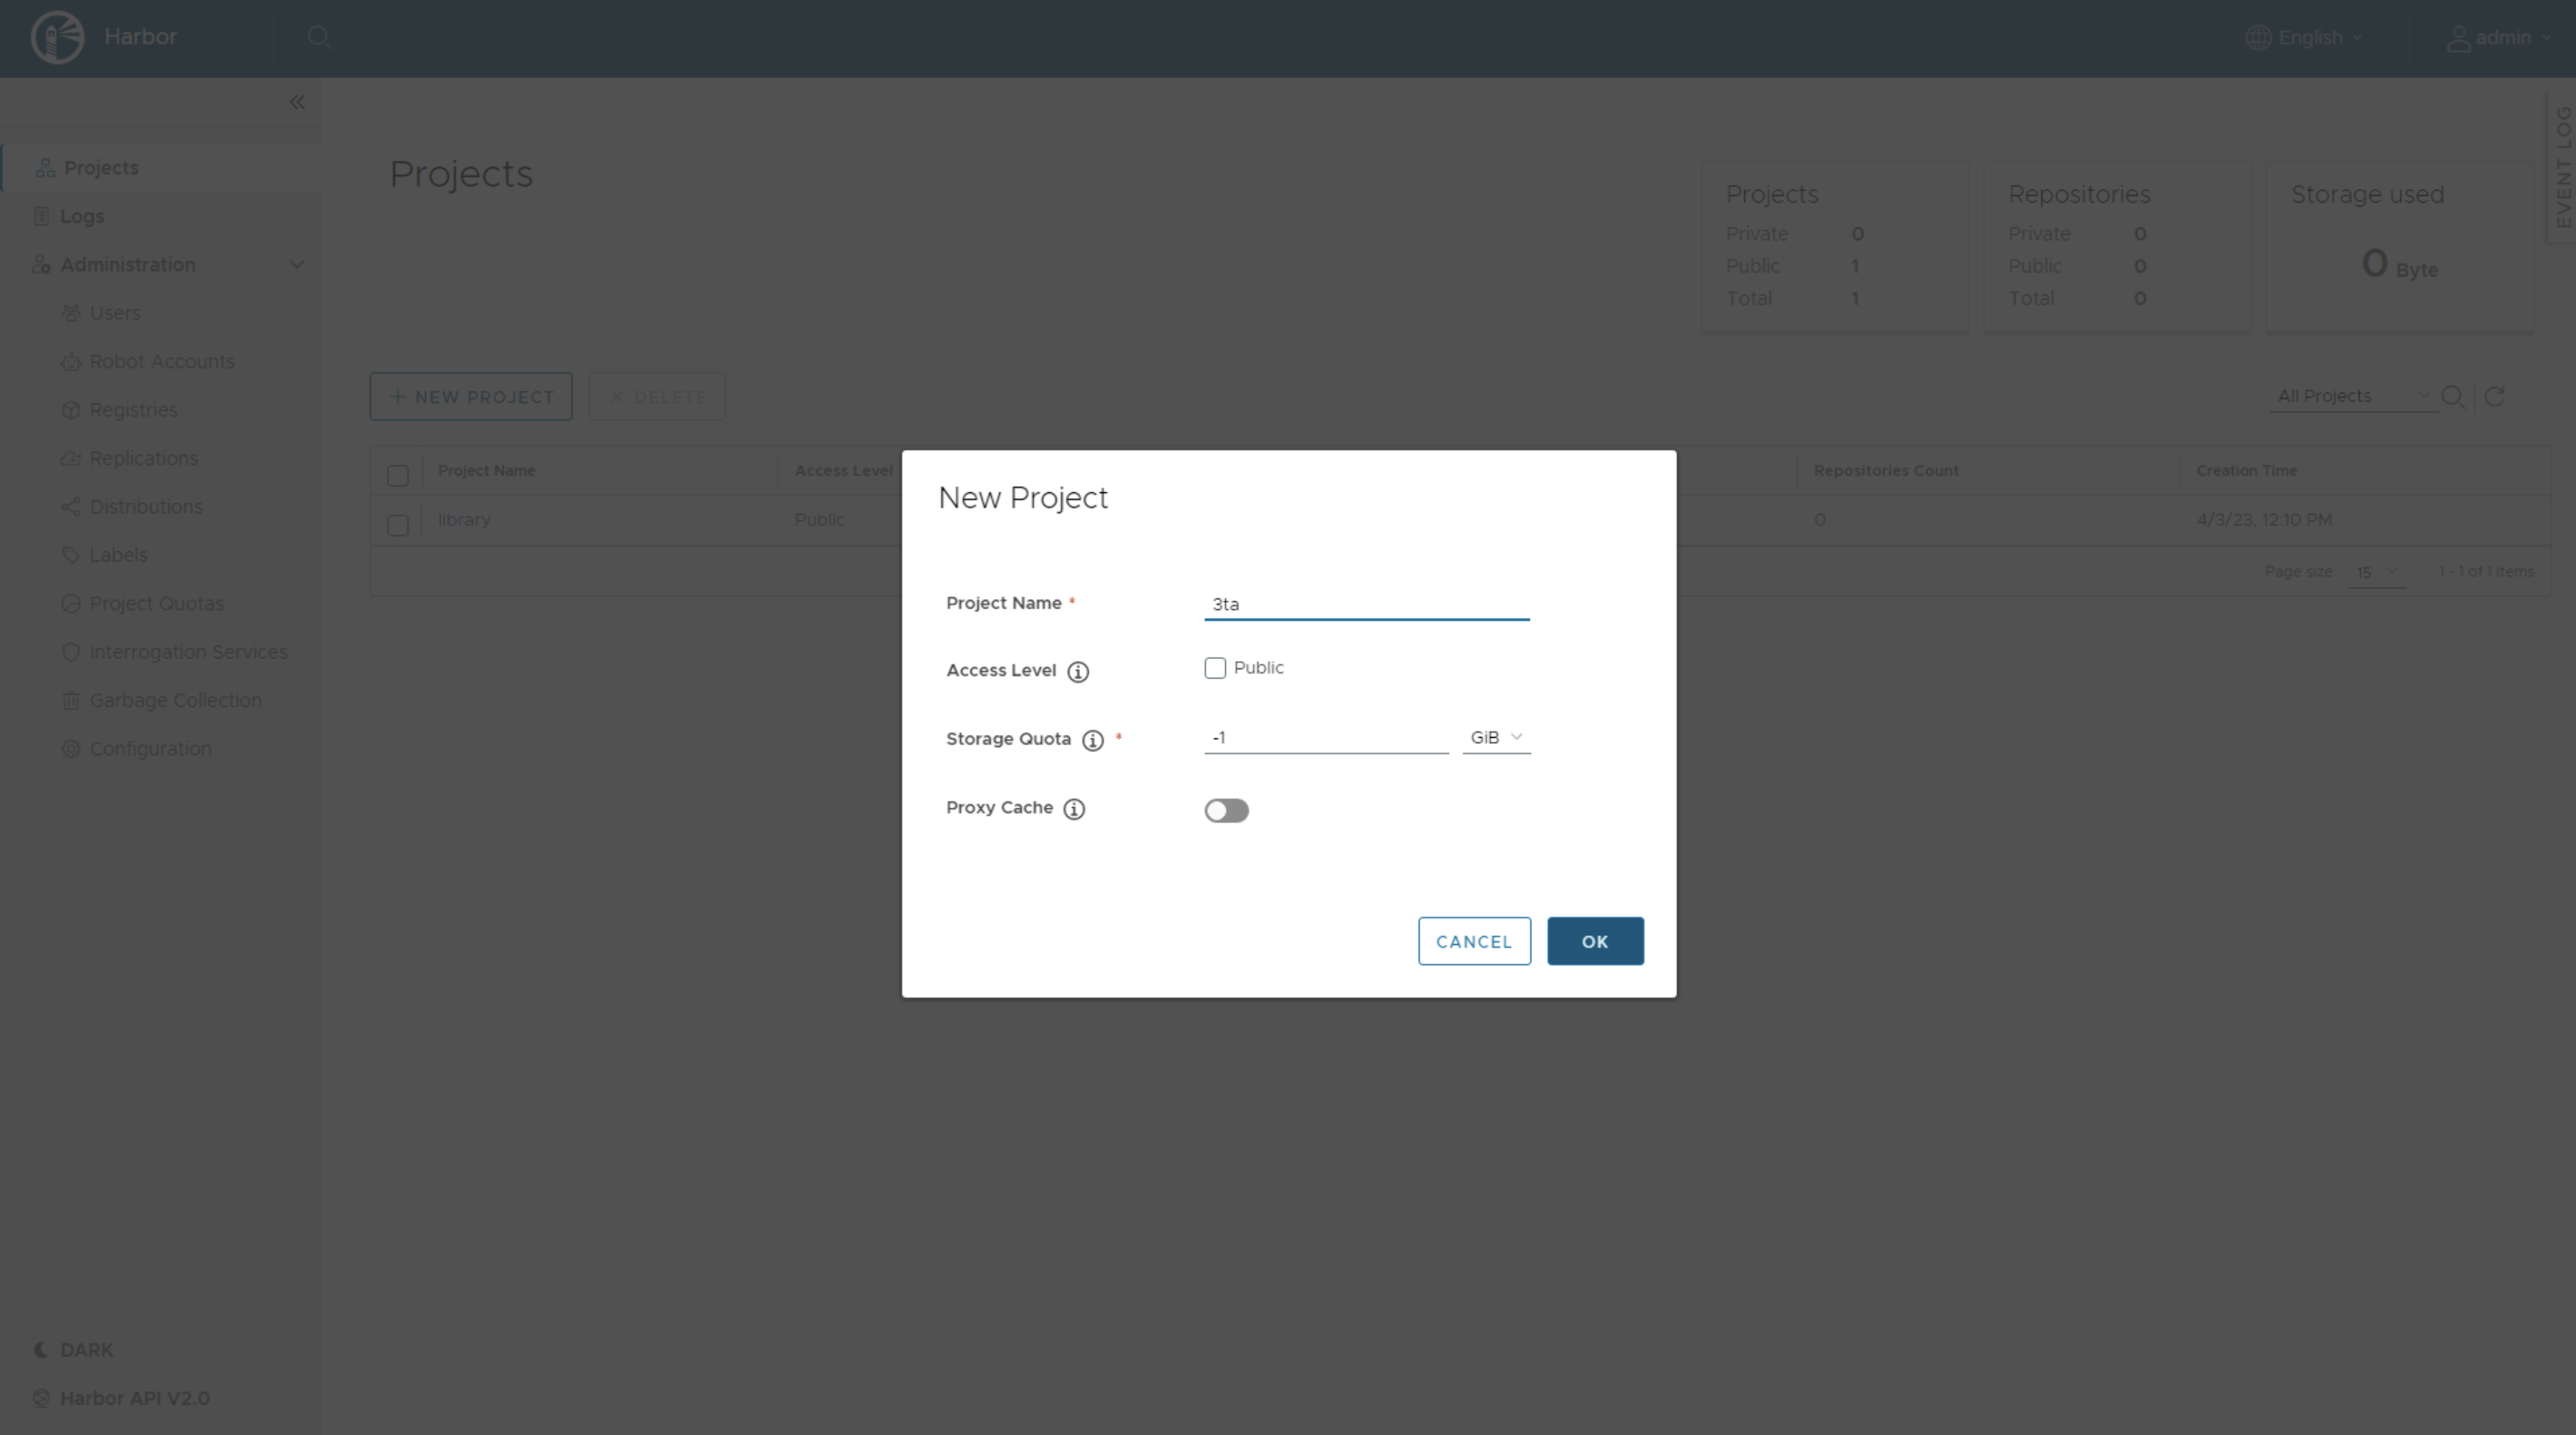
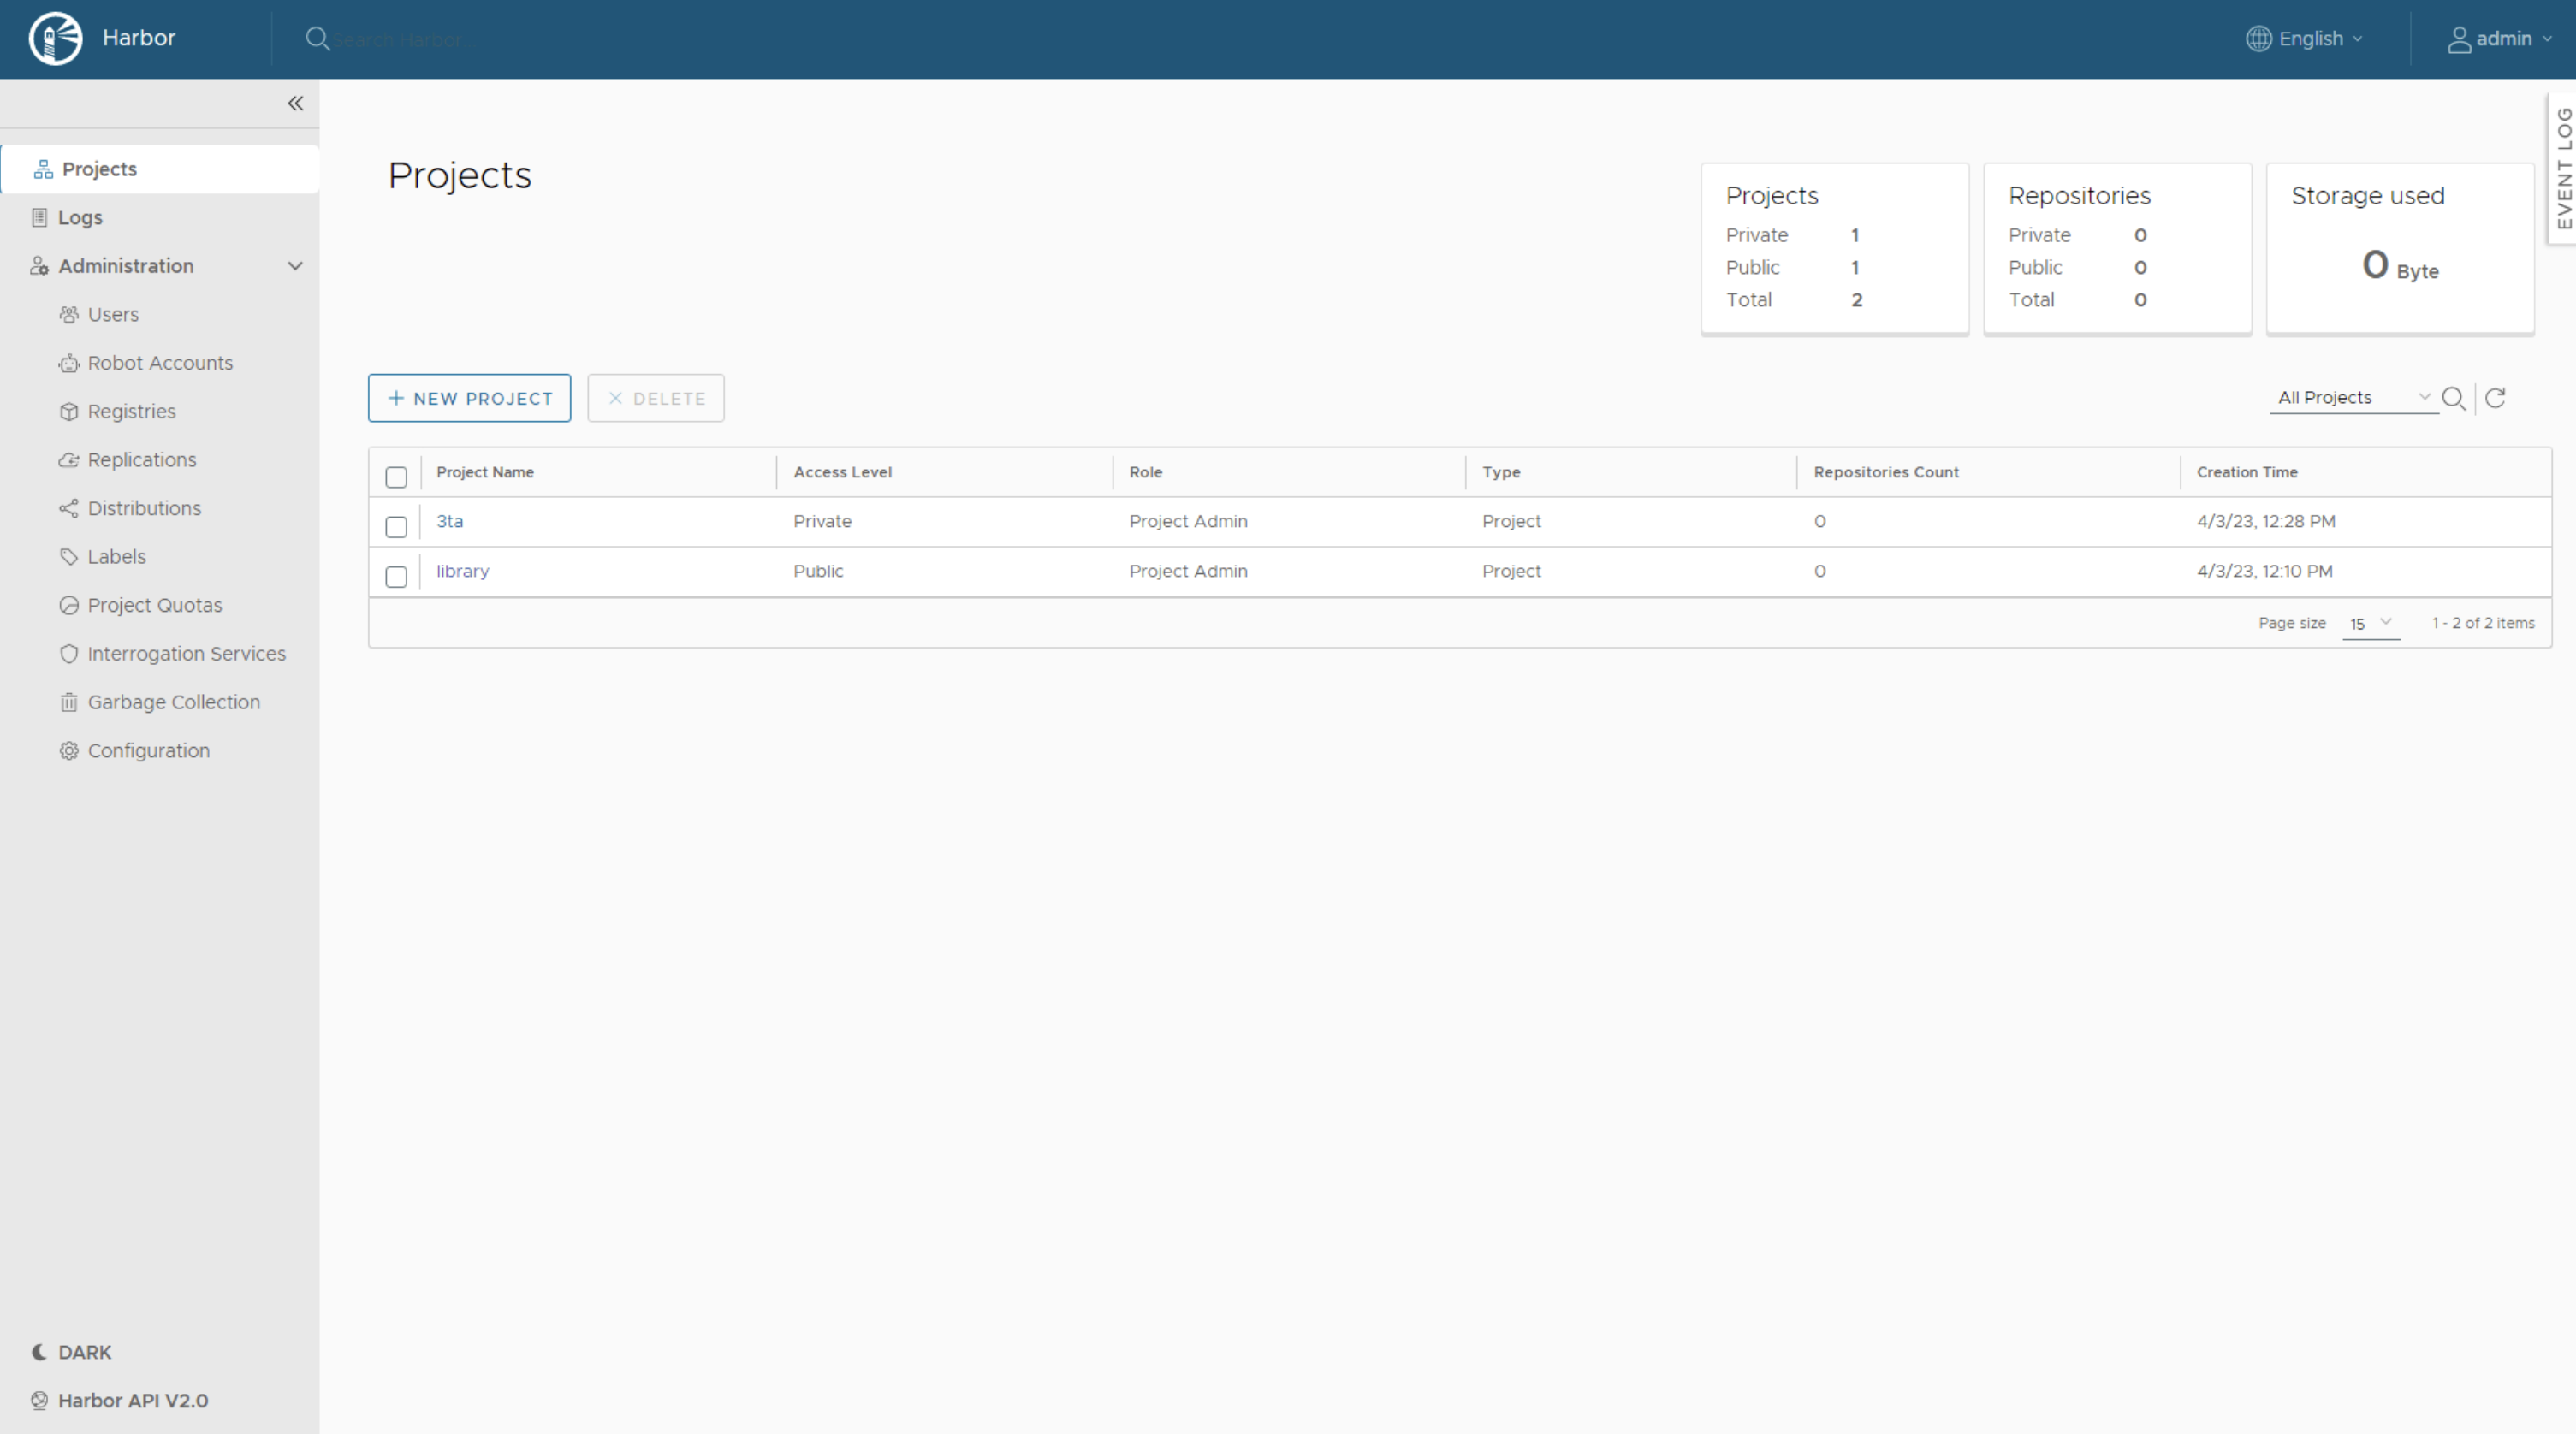
We will now create a new project that will hold our application images. We will use these images in the next episode of Supervisor Series.
In Harbor, go to Projects and click on New Project. Enter 3ta into Project Name field. You could check the Public checkbox to make your repository publicly available. In this demo we will keep the repository private.
Carvel Tools
Carvel provides a set of reliable, single-purpose, composable tools that aid in your application building, configuration, and deployment to Kubernetes, which can be downloaded from http://carvel.dev
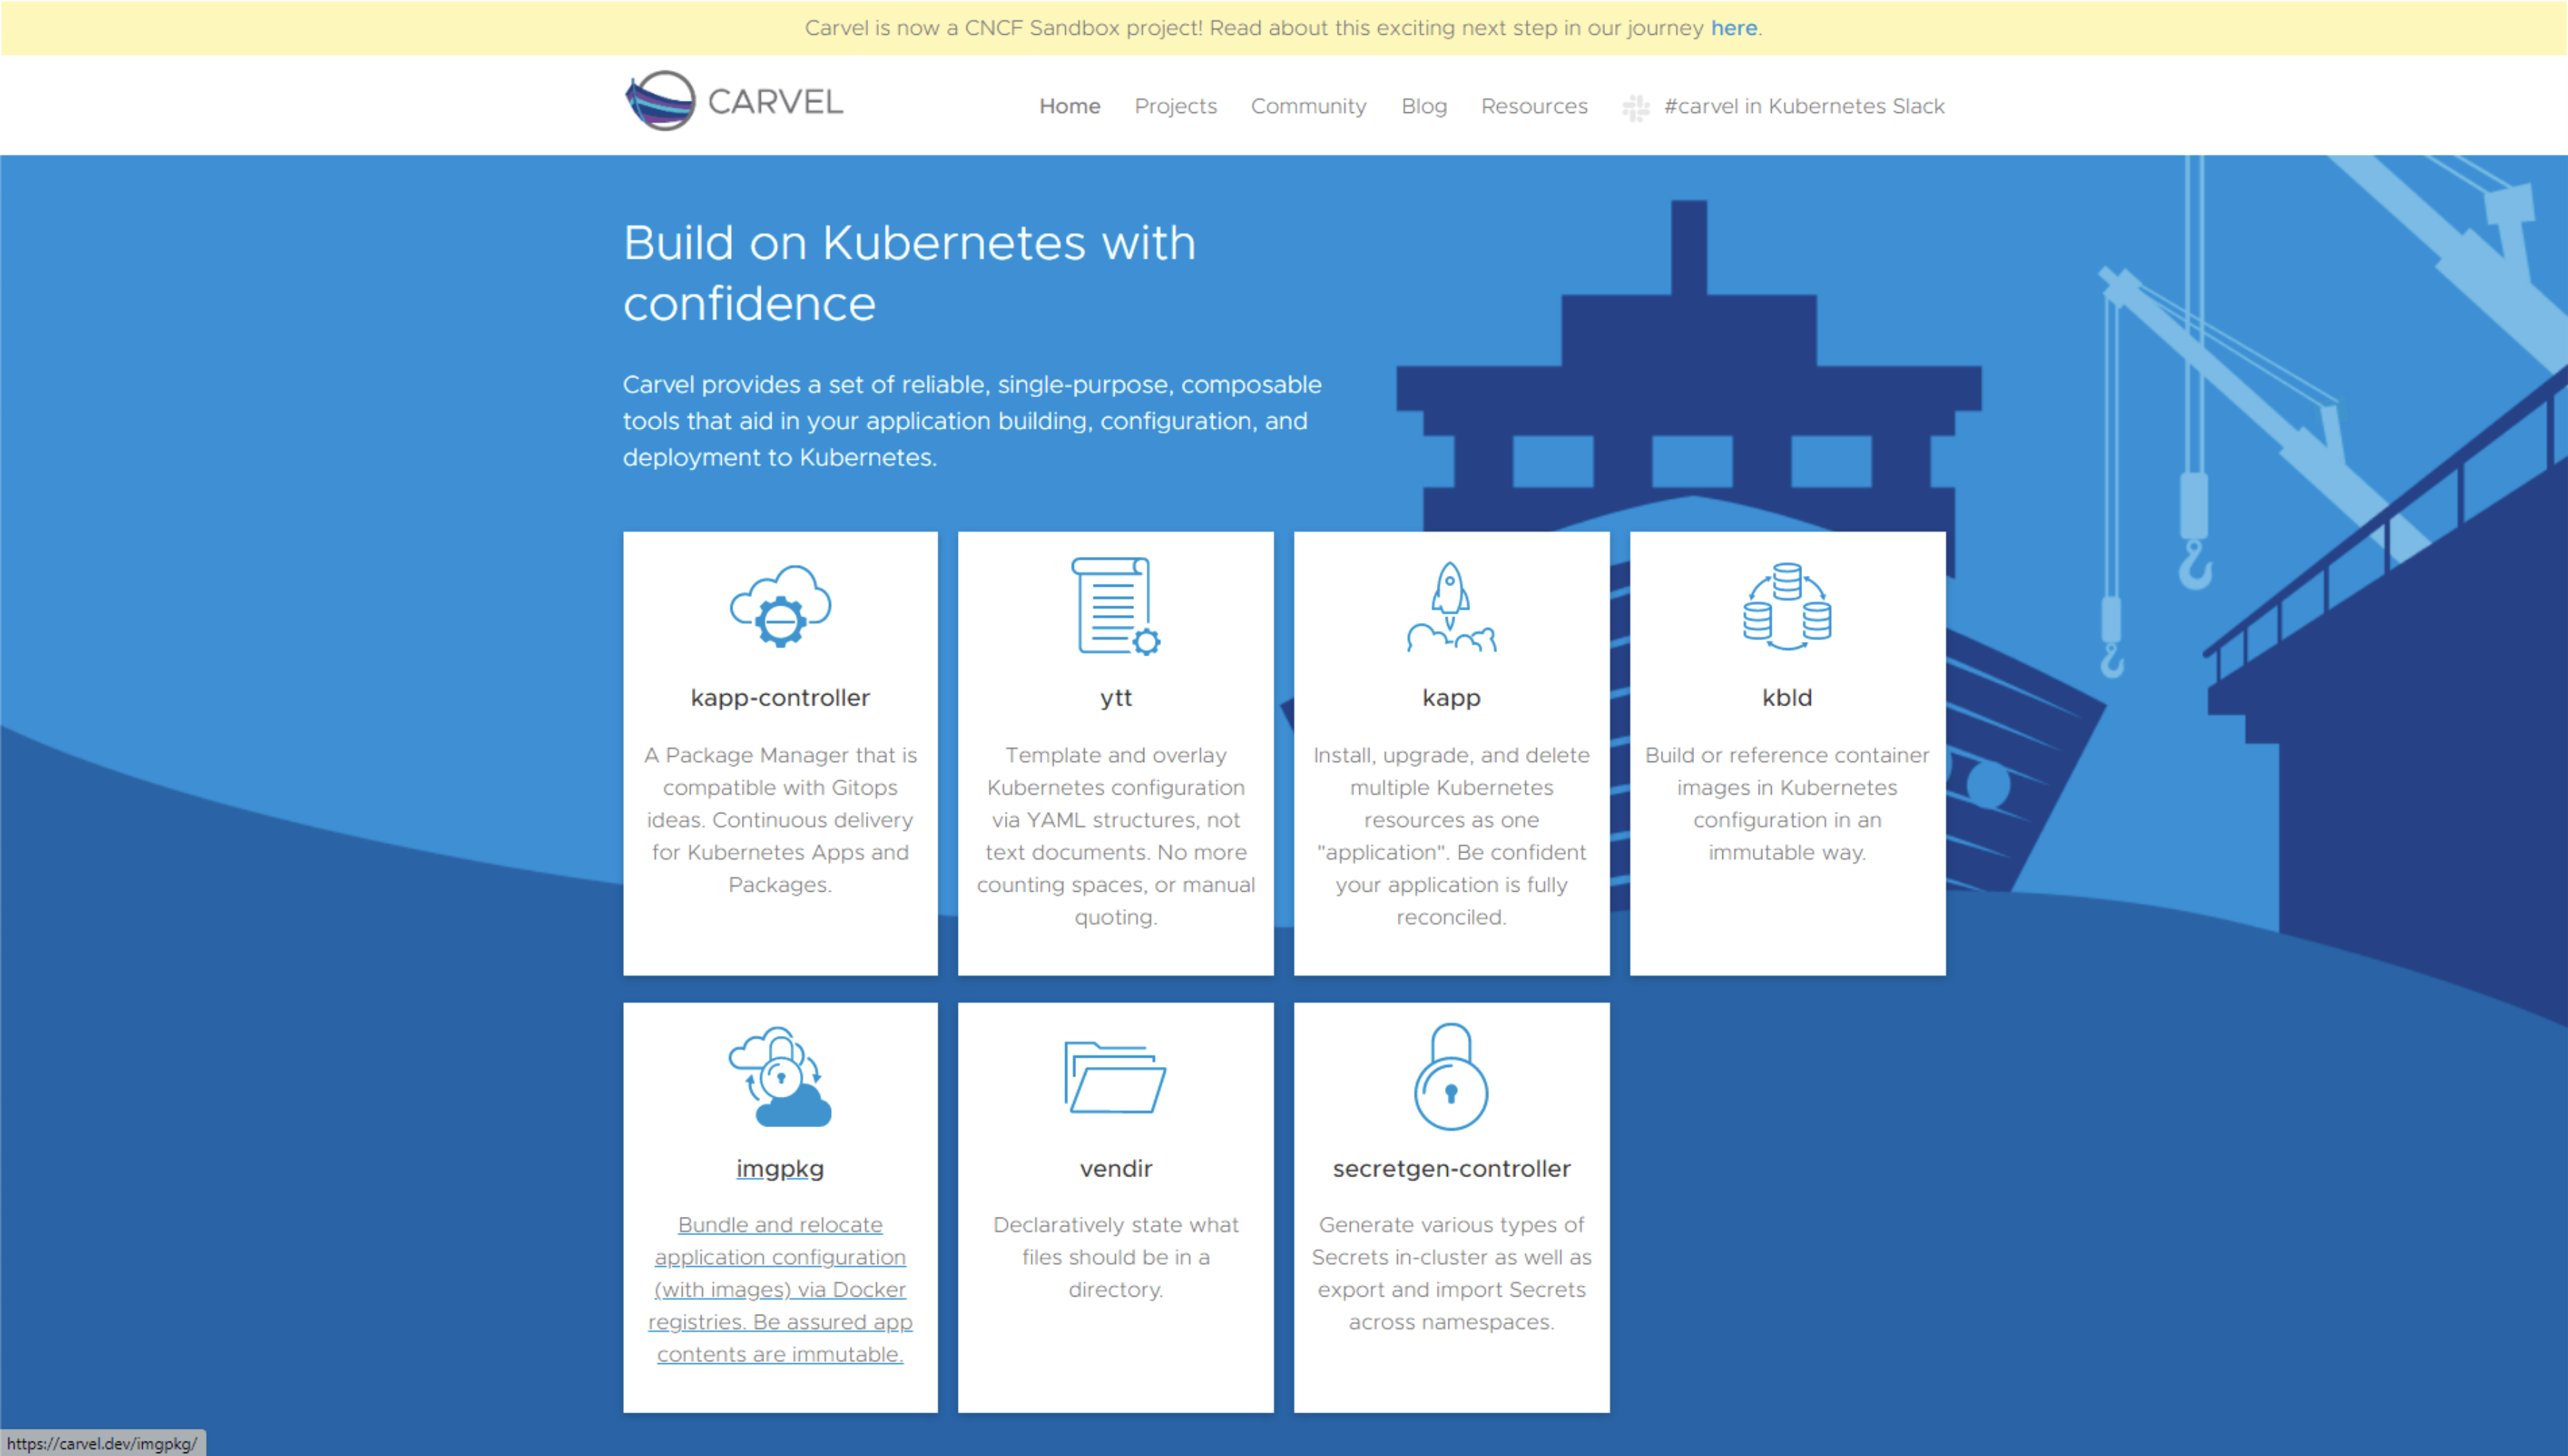
We will use imgpkg to manipulate our images, a tool that packages your Kubernetes configuration and dependent OCI images as one OCI artifact: a bundle.
Follow the installation instructions to install carvel tools on your management machine.
Pushing images to Harbor Image Registry
Login to your management machine where you have installed the Carvel tools. In this demo, we use a Ubuntu VM.
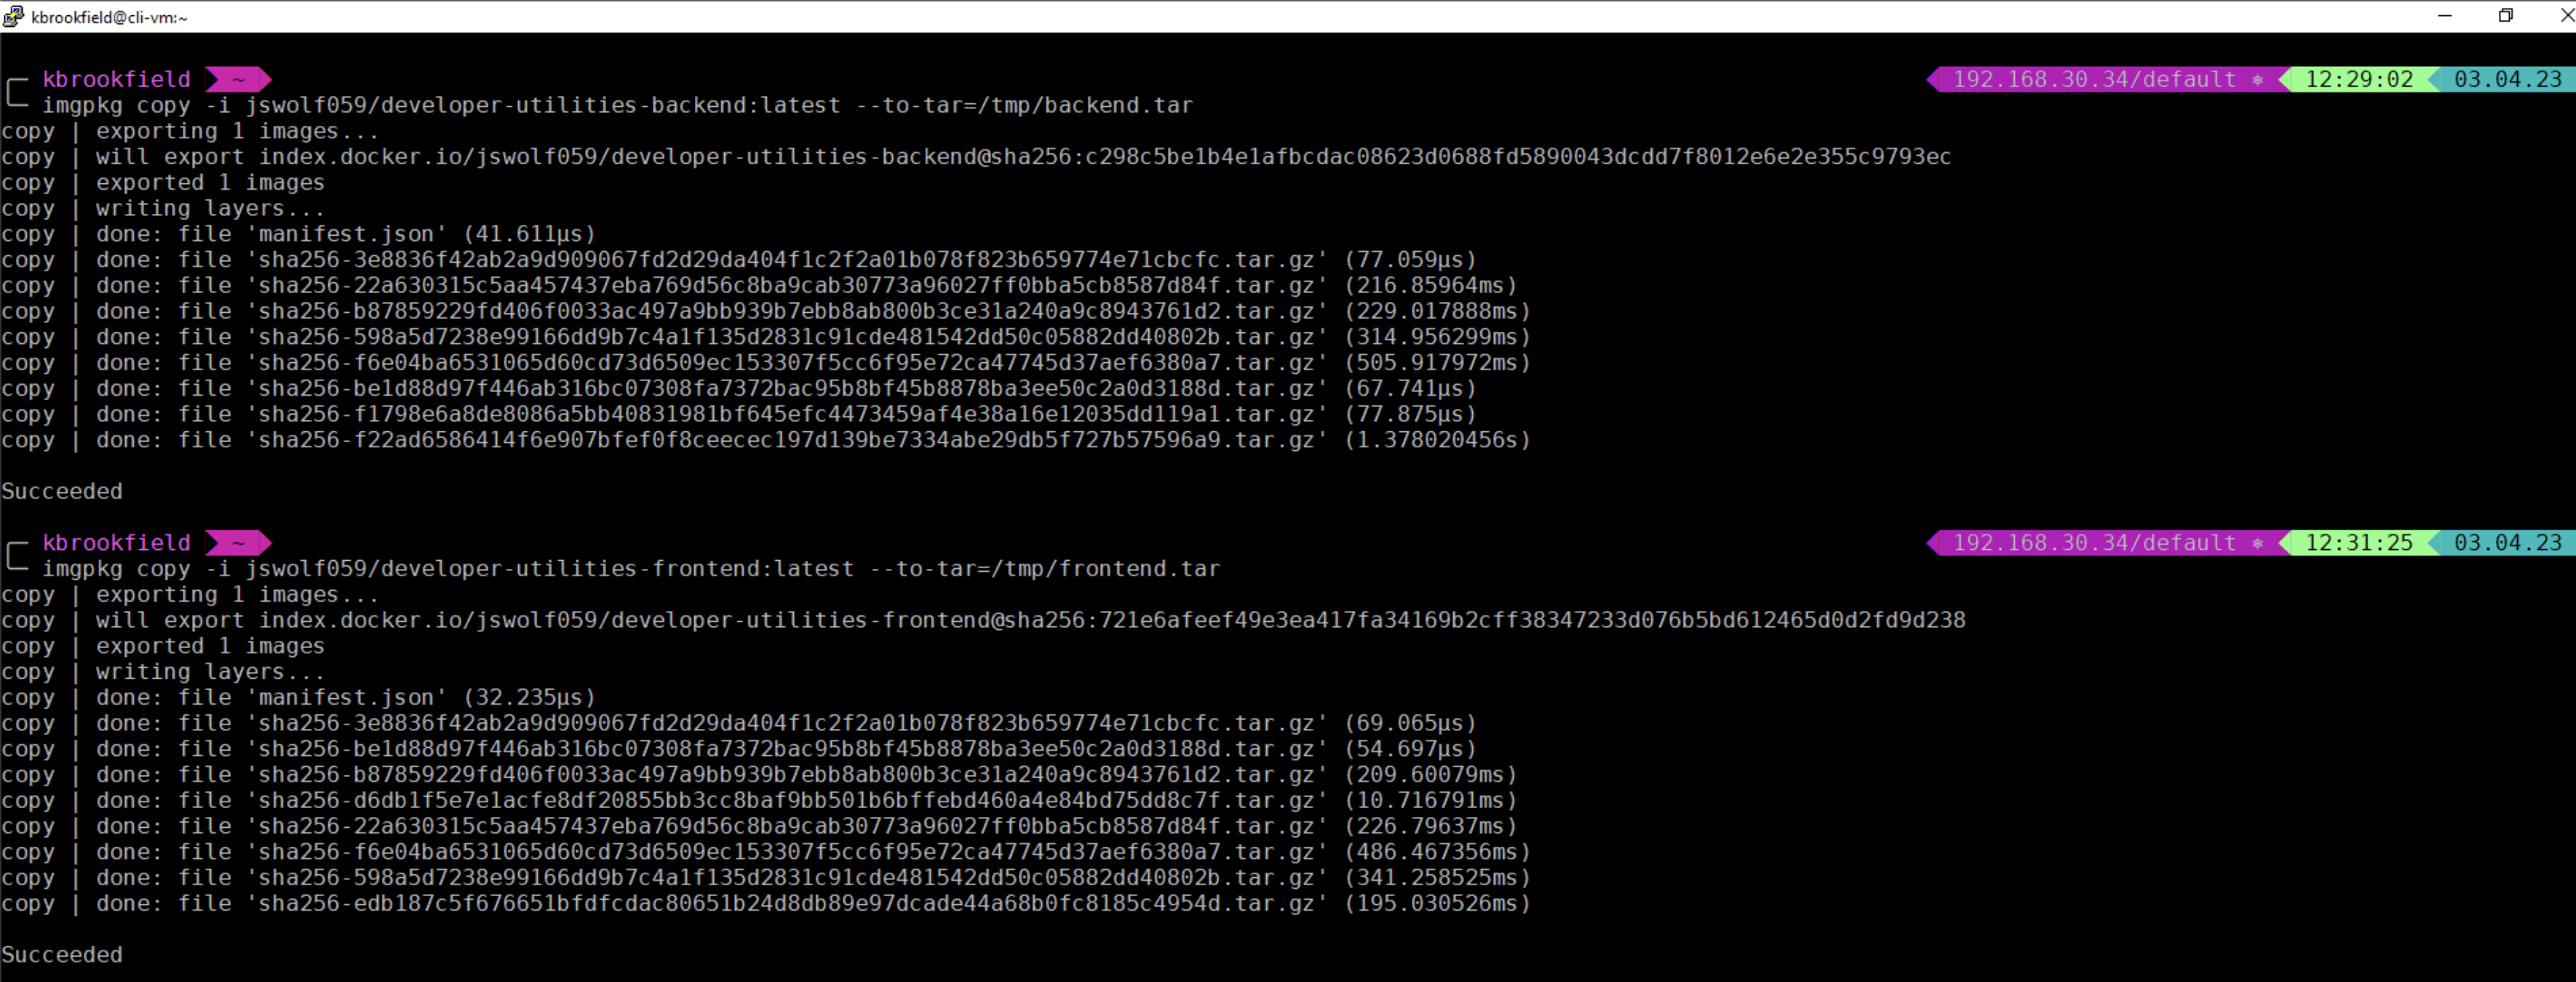
Run the following commands to copy application images into a local tar file:
- imgpkg copy -i jswolf059/developer-utilities-backend:latest --to-tar=/tmp/backend.tar
- imgpkg copy -i jswolf059/developer-utilities-frontend:latest --to-tar=/tmp/frontend.tar
Create a ca.crt file in following path and paste in the registry certificate you have downloaded earlier:
- sudo vi /etc/docker/certs.d/harbor.vmw.lab/ca.crt
Note: if this is your first time connecting to the Harbor instance you may need to login using docker login command:
- docker login harbor.vmw.lab
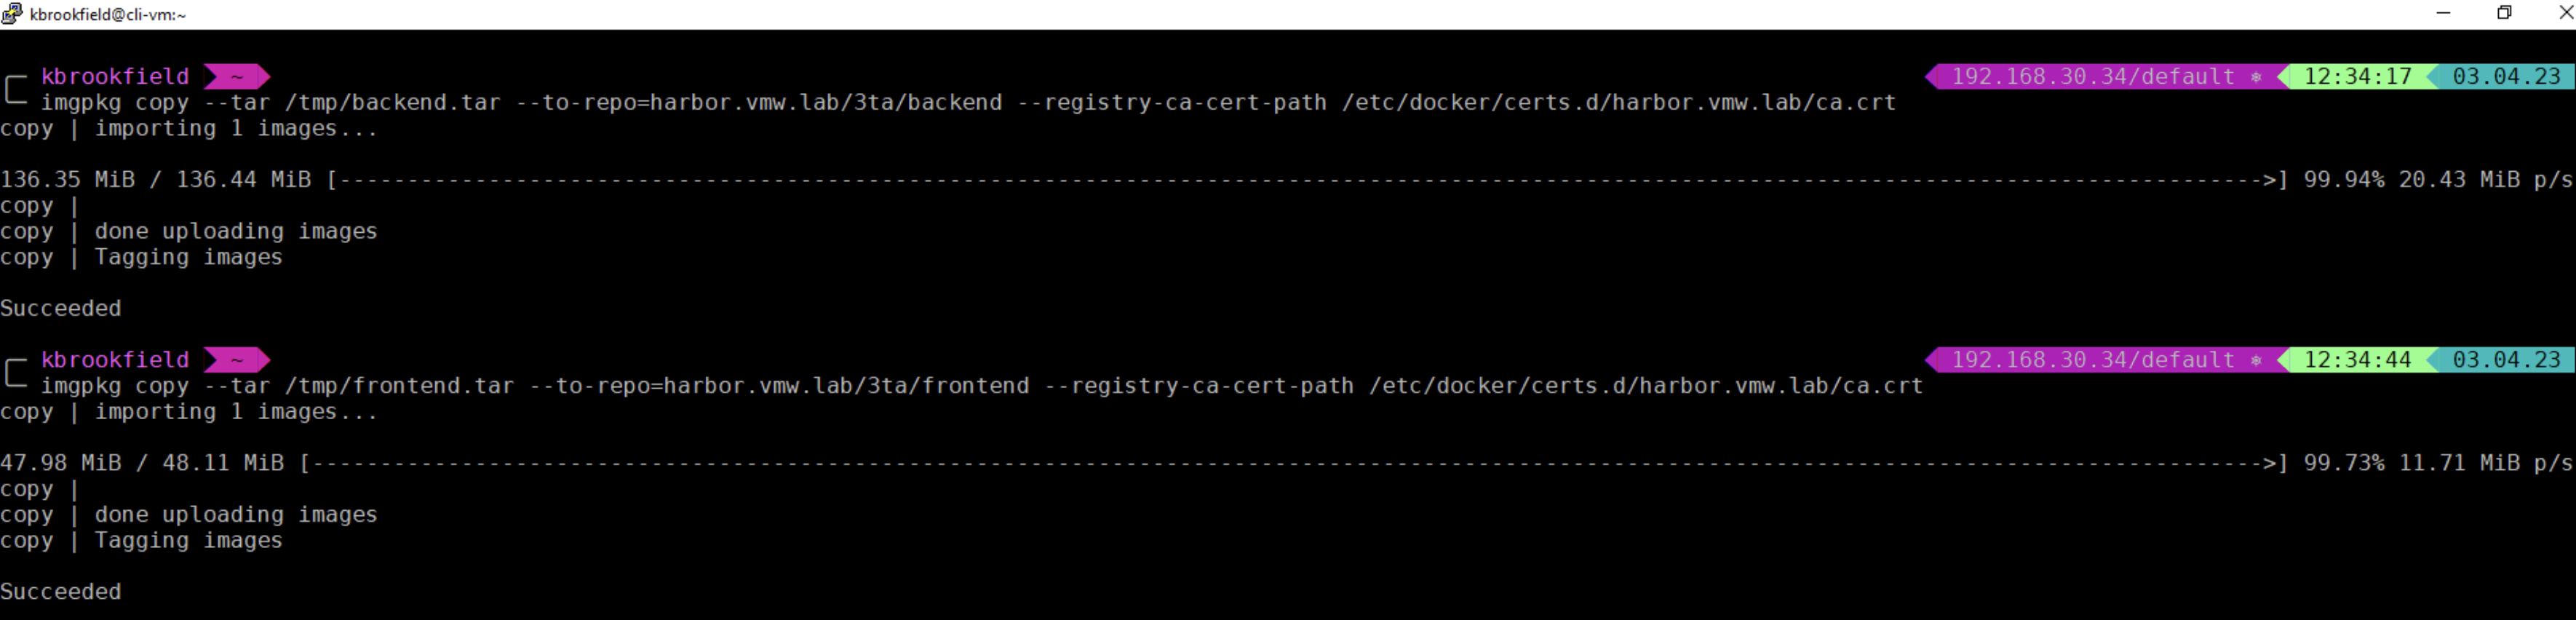
Use imgpkg copy to upload the local tar files to the Harbor image registry:
- imgpkg copy --tar /tmp/backend.tar --to-repo=harbor.vmw.lab/3ta/backend --registry-ca-cert-path /etc/docker/certs.d/harbor.vmw.lab/ca.crt
- imgpkg copy --tar /tmp/frontend.tar --to-repo=harbor.vmw.lab/3ta/frontend --registry-ca-cert-path /etc/docker/certs.d/harbor.vmw.lab/ca.crt
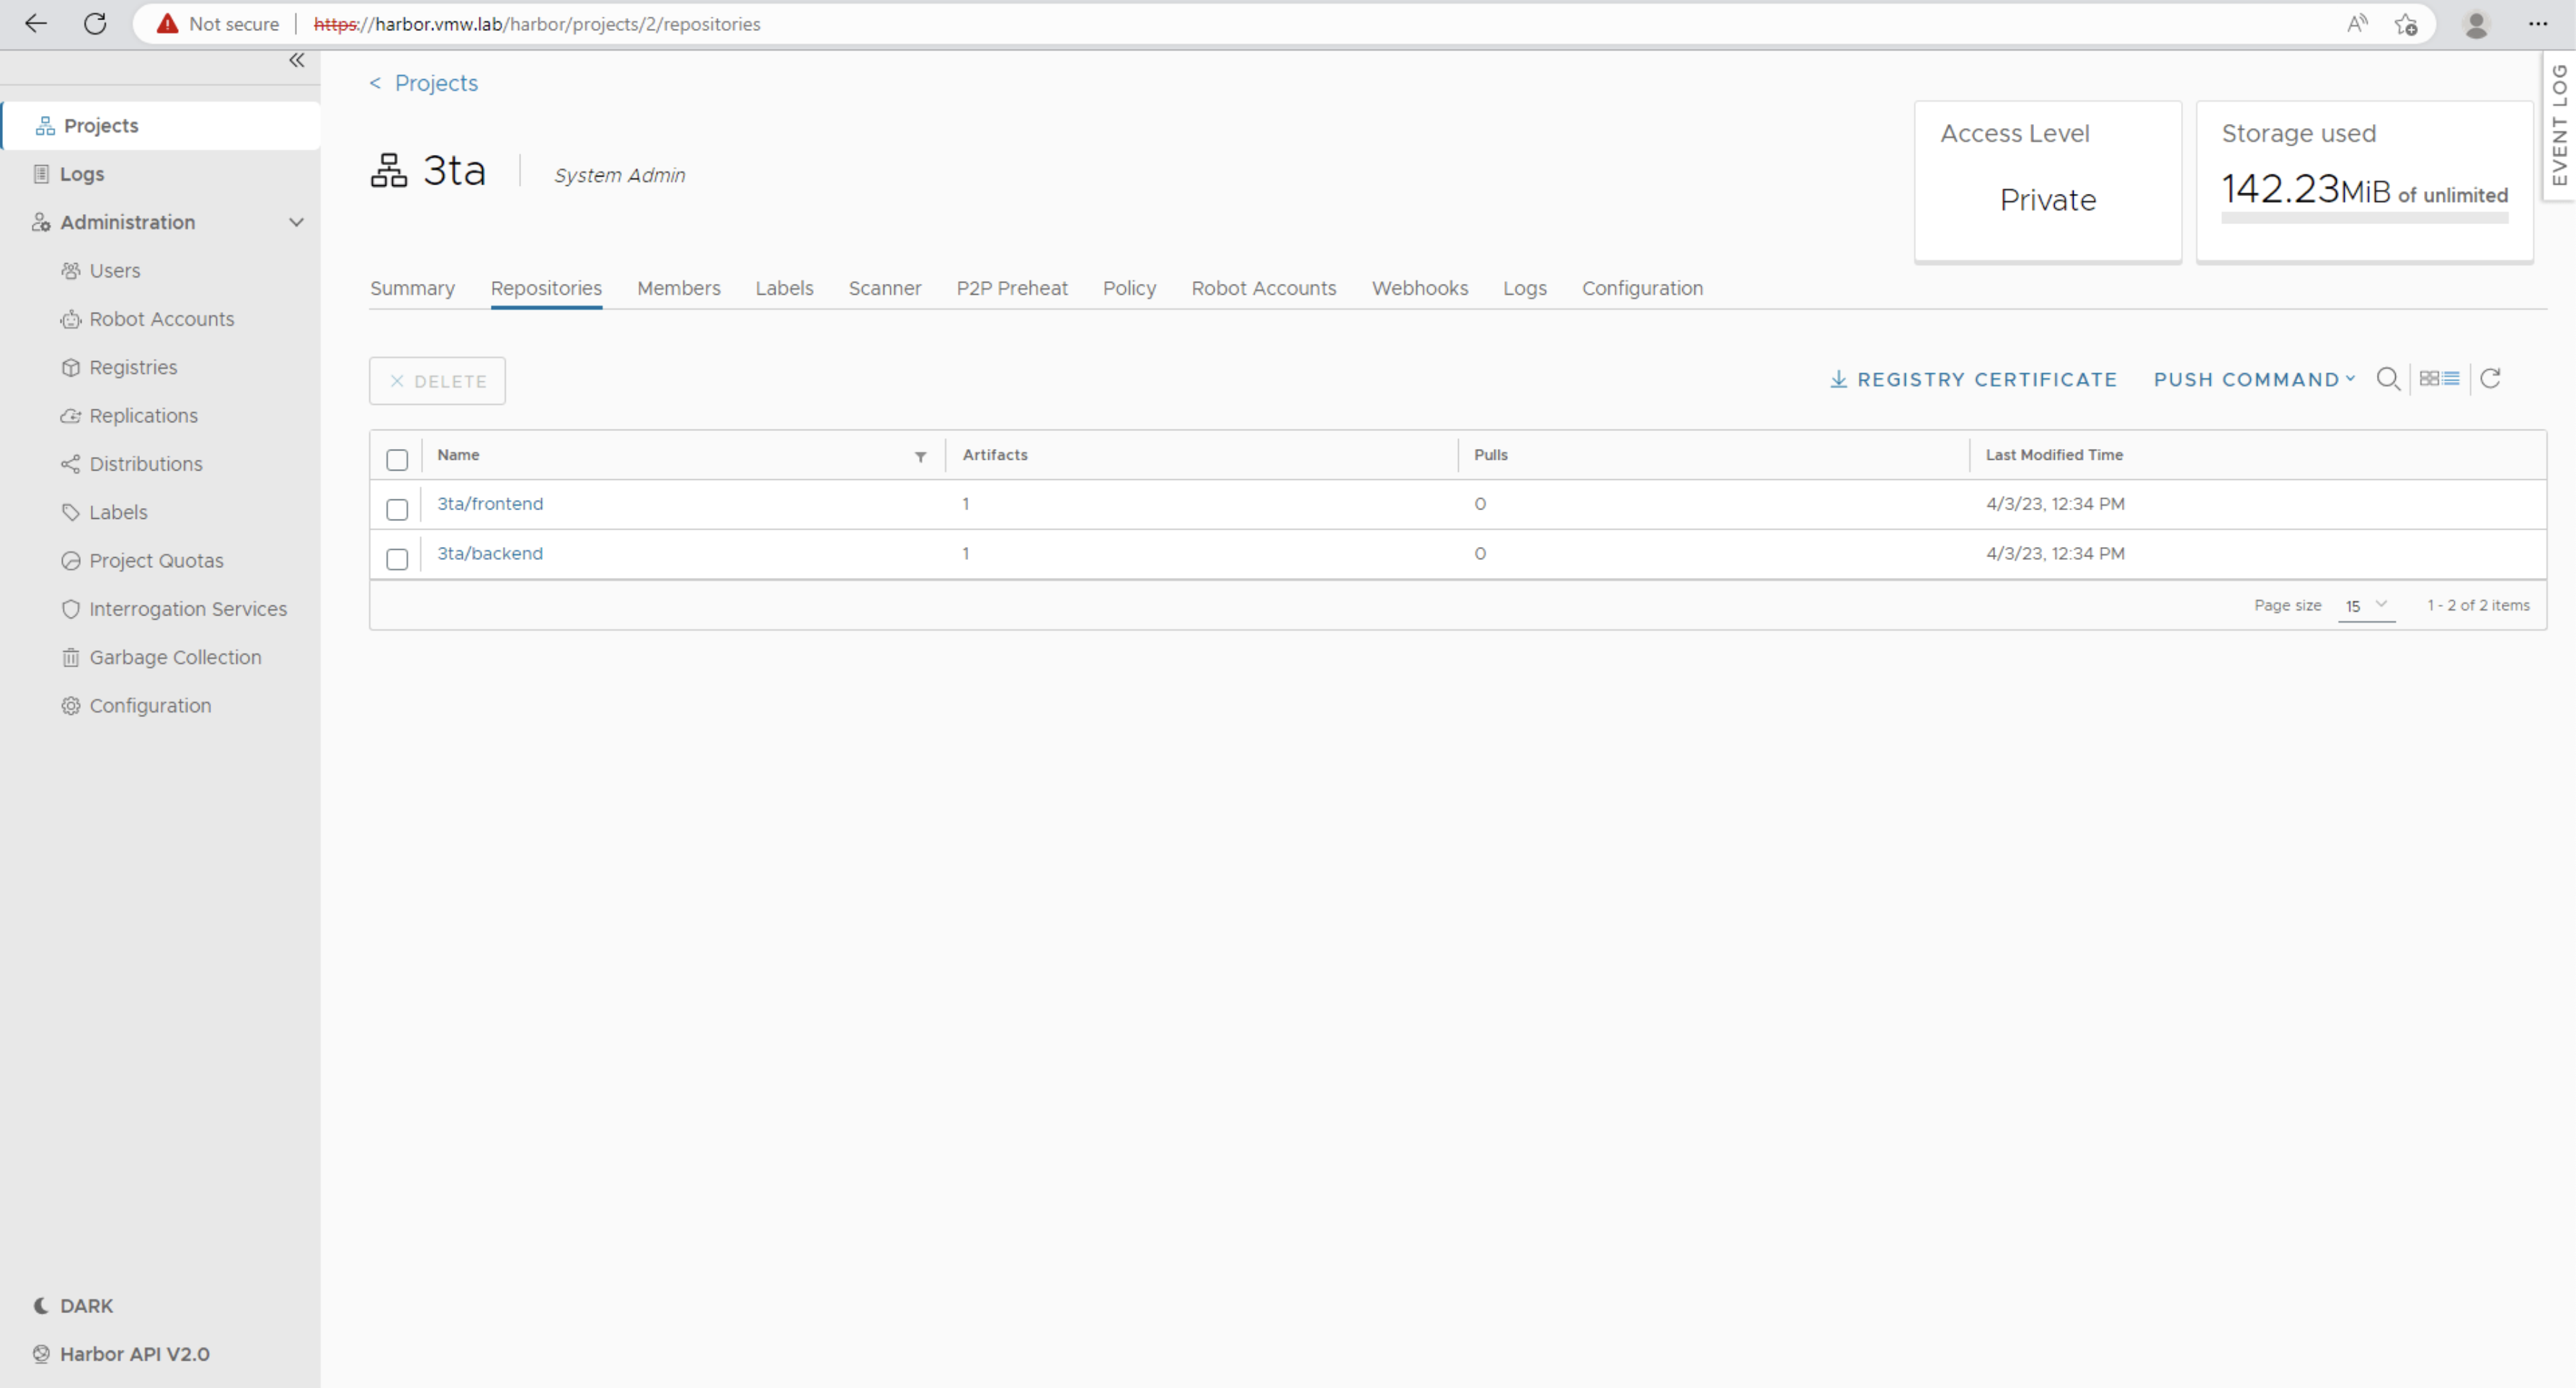
Back in Harbor, verify that both backend and frontend bundles have been added to the 3ta project.
See this episode in action
Before you go
In this episode, we have shown you how you can deploy Contour and Harbor as Supervisor Services. We also uploaded container images to Harbor in preparation for the next episode.
For more episodes visit the Supervisor Series Activity Path.
Subscribe to our VMware vSphere YouTube channel to get notified as soon as we release new episodes.
Thank you and see you soon!