
Supervisor Series: Ep 4. Deploying a 3-Tier Application with Cloud Consumption Interface (CCI)
Self-service is a crucial part of Developer Experience. Platform consumers need to be able to quickly and efficiently access Iaas Services provided by the Supervisor. Cloud Consumption Interface achieves this through a common cloud web portal (UI), API, and CLI.
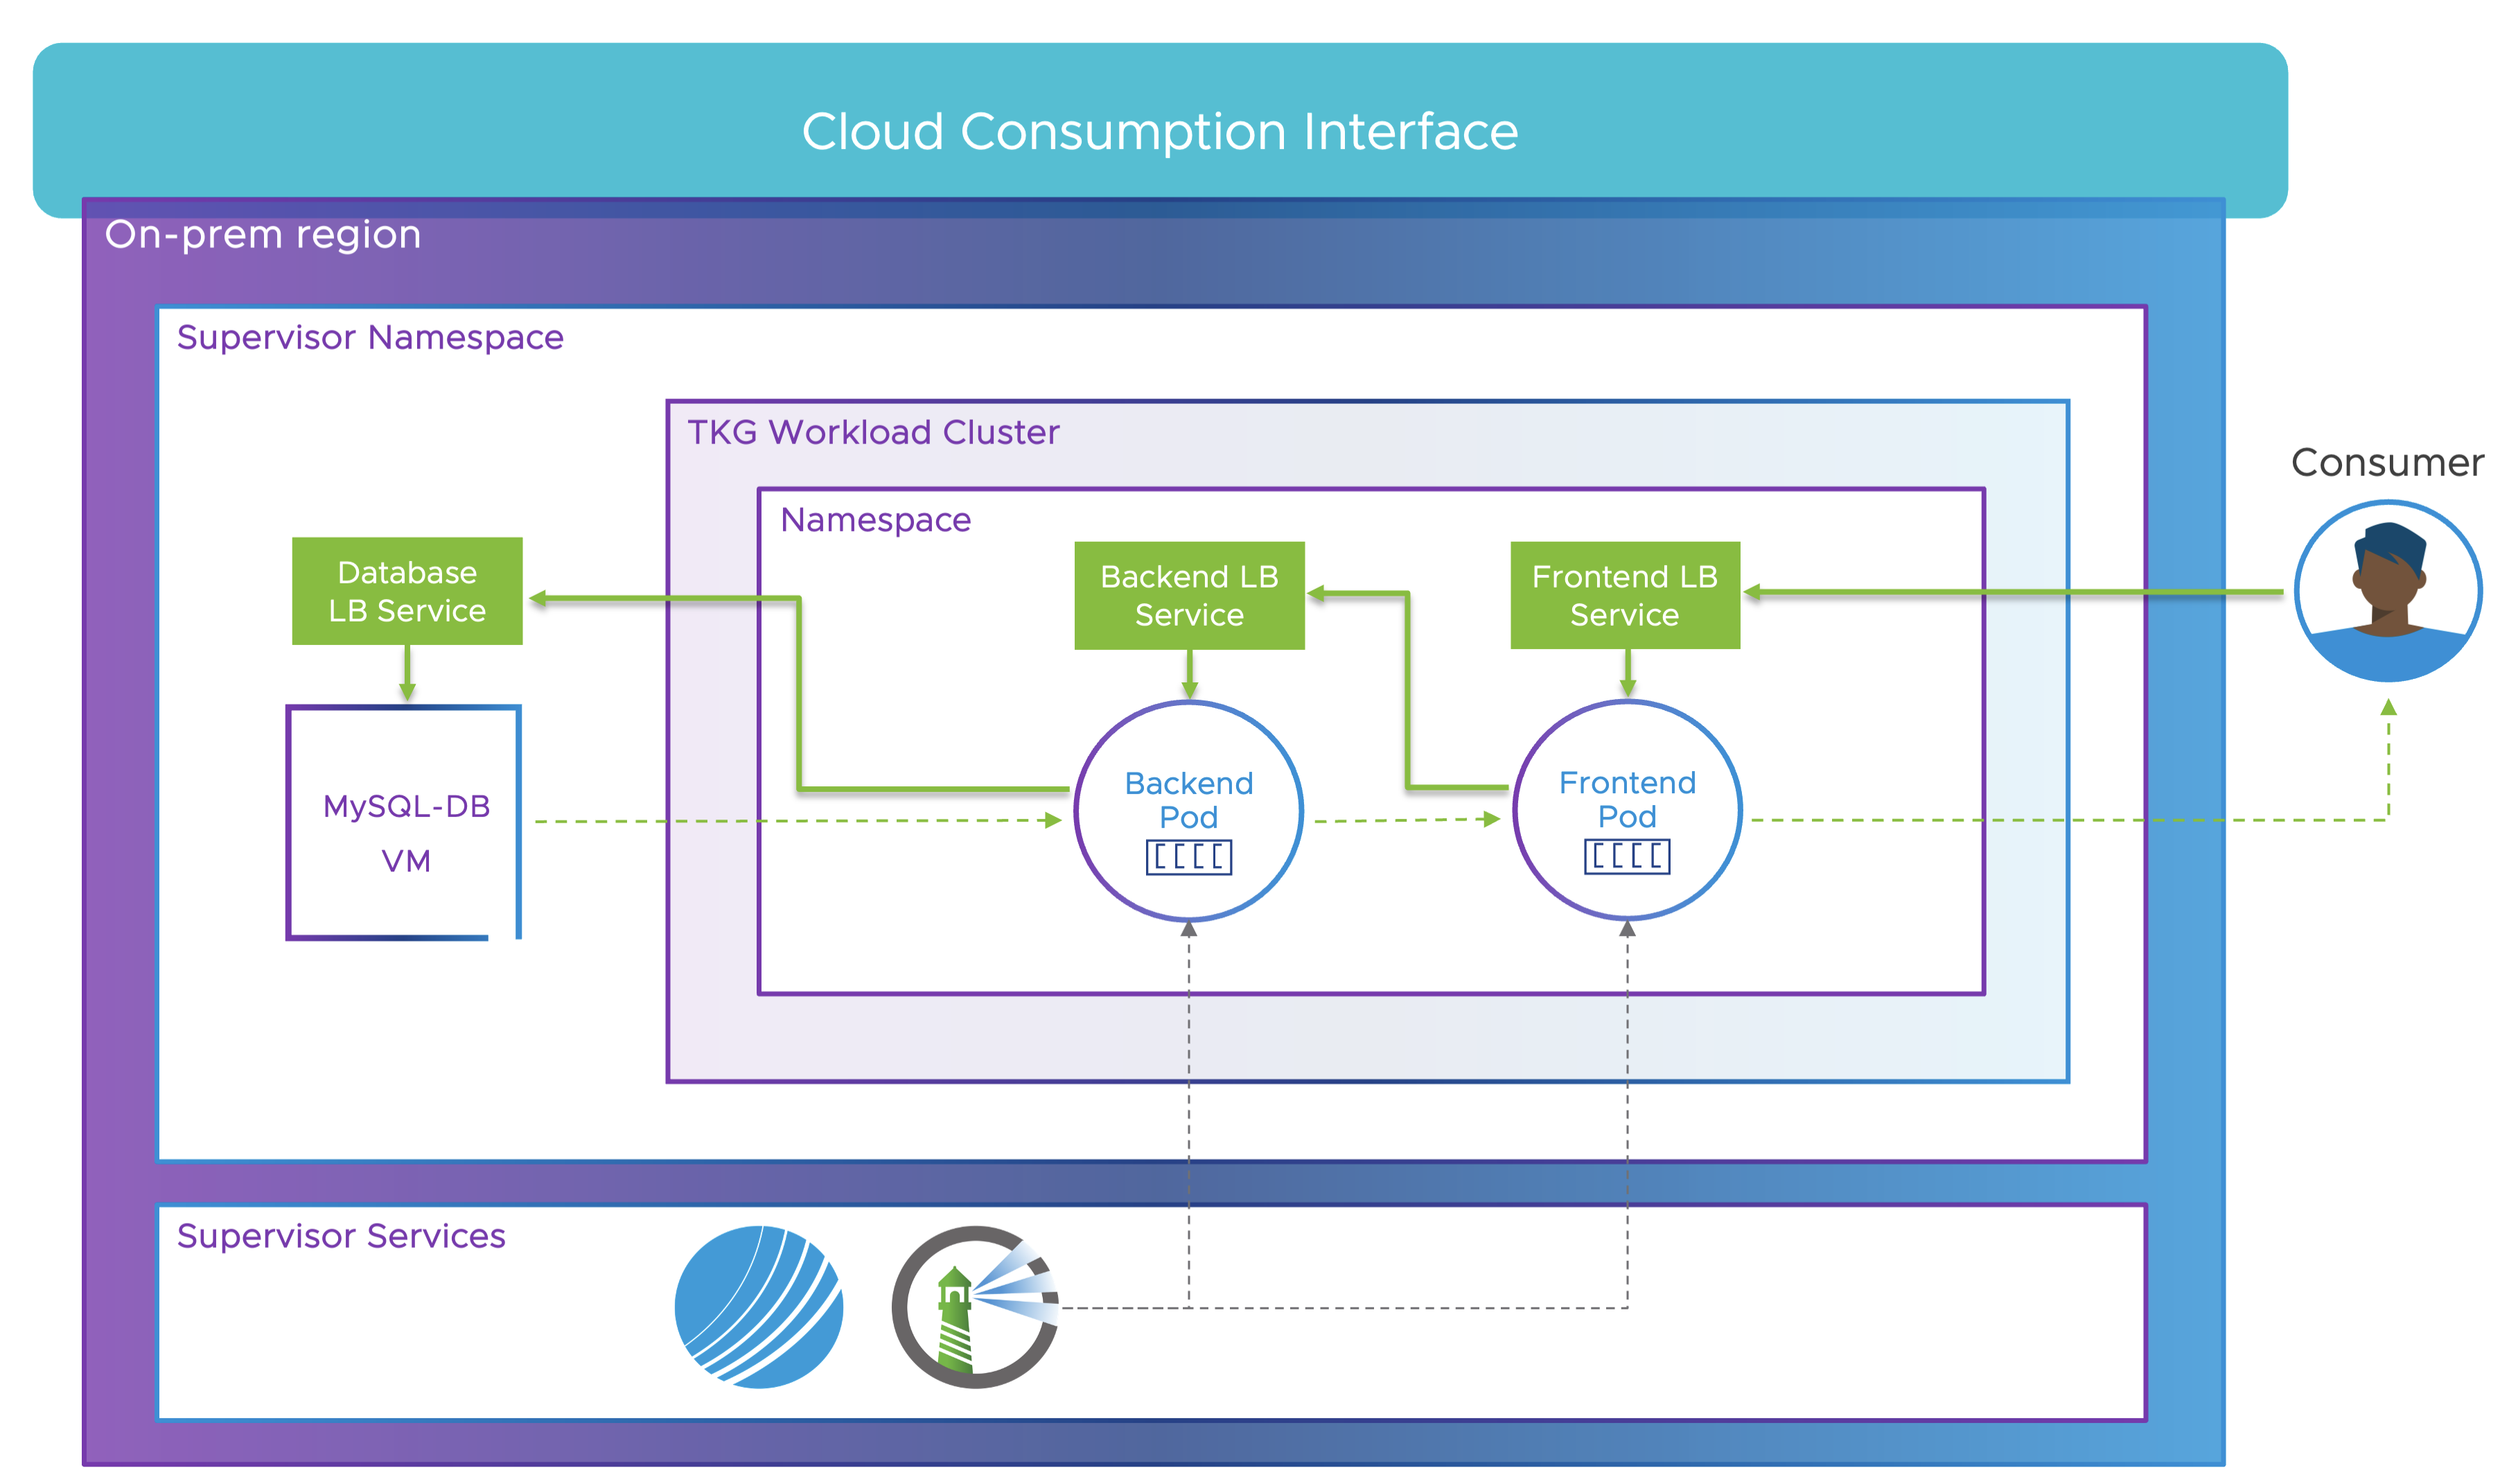
In this episode we will deploy the same application as we did last time, but this time using Cloud Consumption Interface (CCI).
Accessing Cloud Consumption Interface (CCI)
General Availability (GA) of CCI has been formally announced at VMware Explore Las Vegas. As of today, the Initial Access (IA) phase of CCI is open for all vSphere+ customers. This presents an exclusive opportunity for these users to get a firsthand experience of CCI’s powerful offerings and contribute to its refinement through valuable feedback.
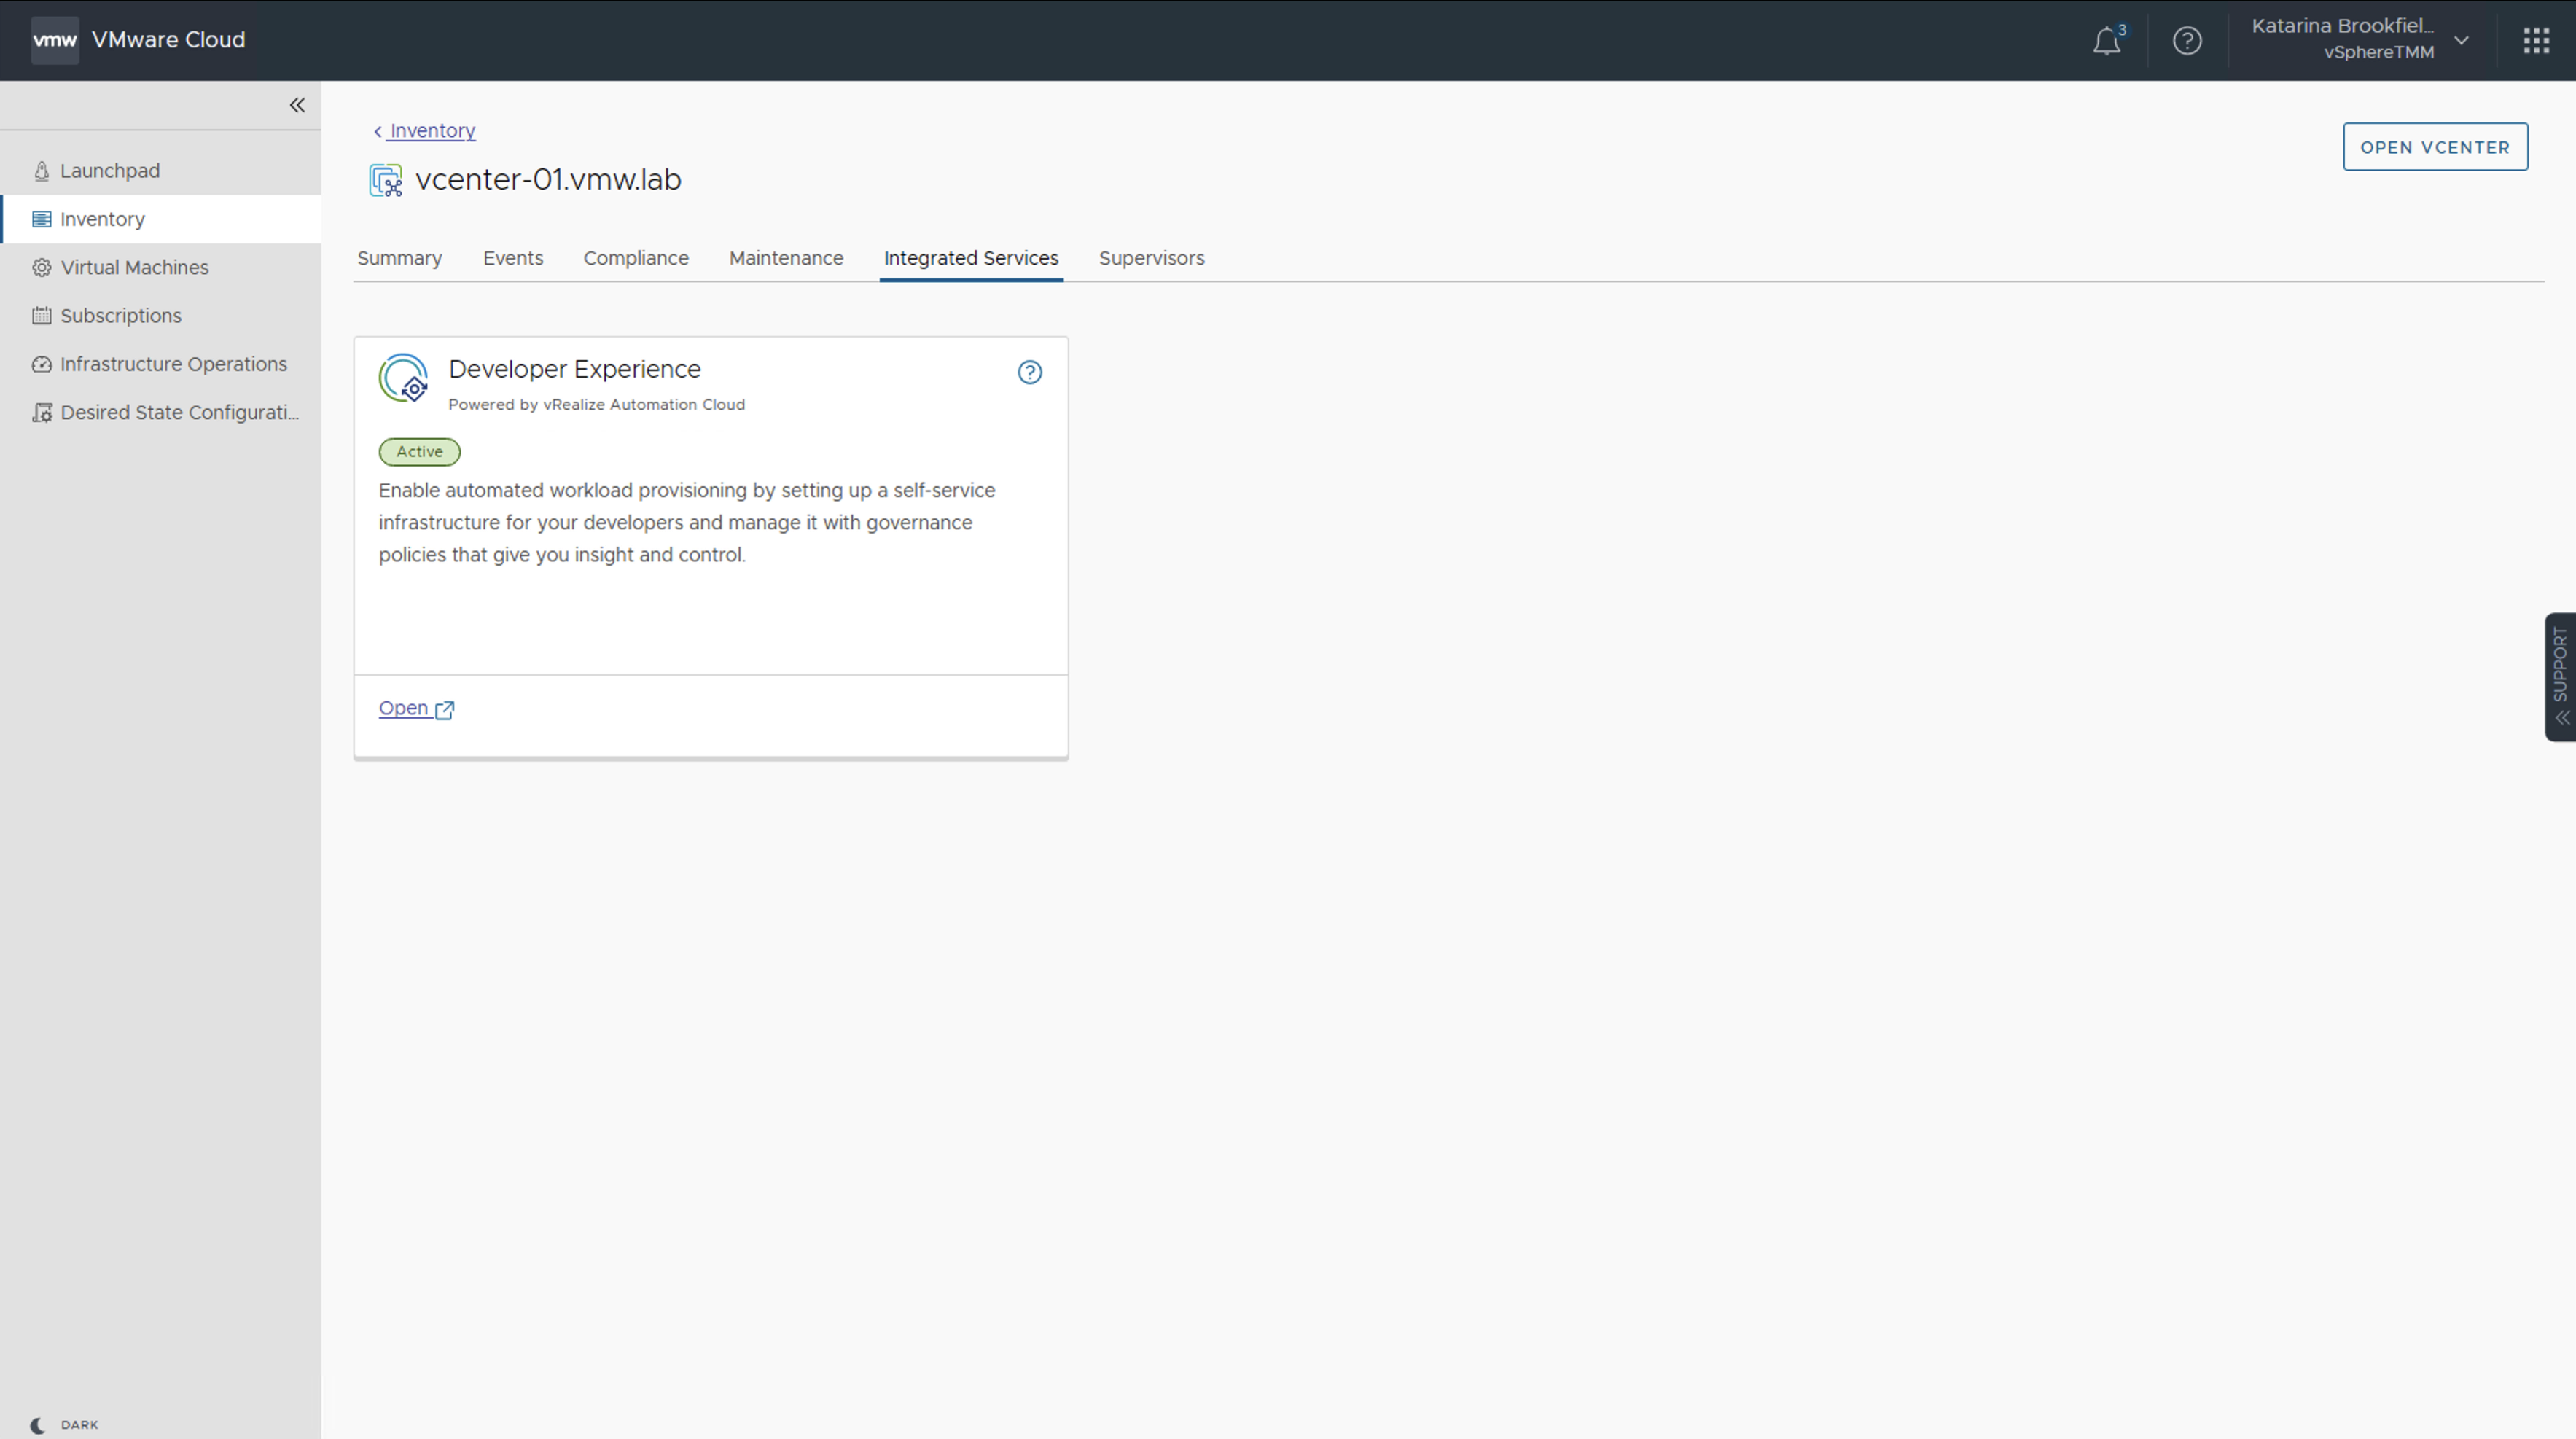
CCI can be accessed from VMware Cloud Services portal, by launching vSphere+ and selecting a vCenter that has Developer Experience enabled.
Note: You can learn more about the Developer Experience enablement in this video.
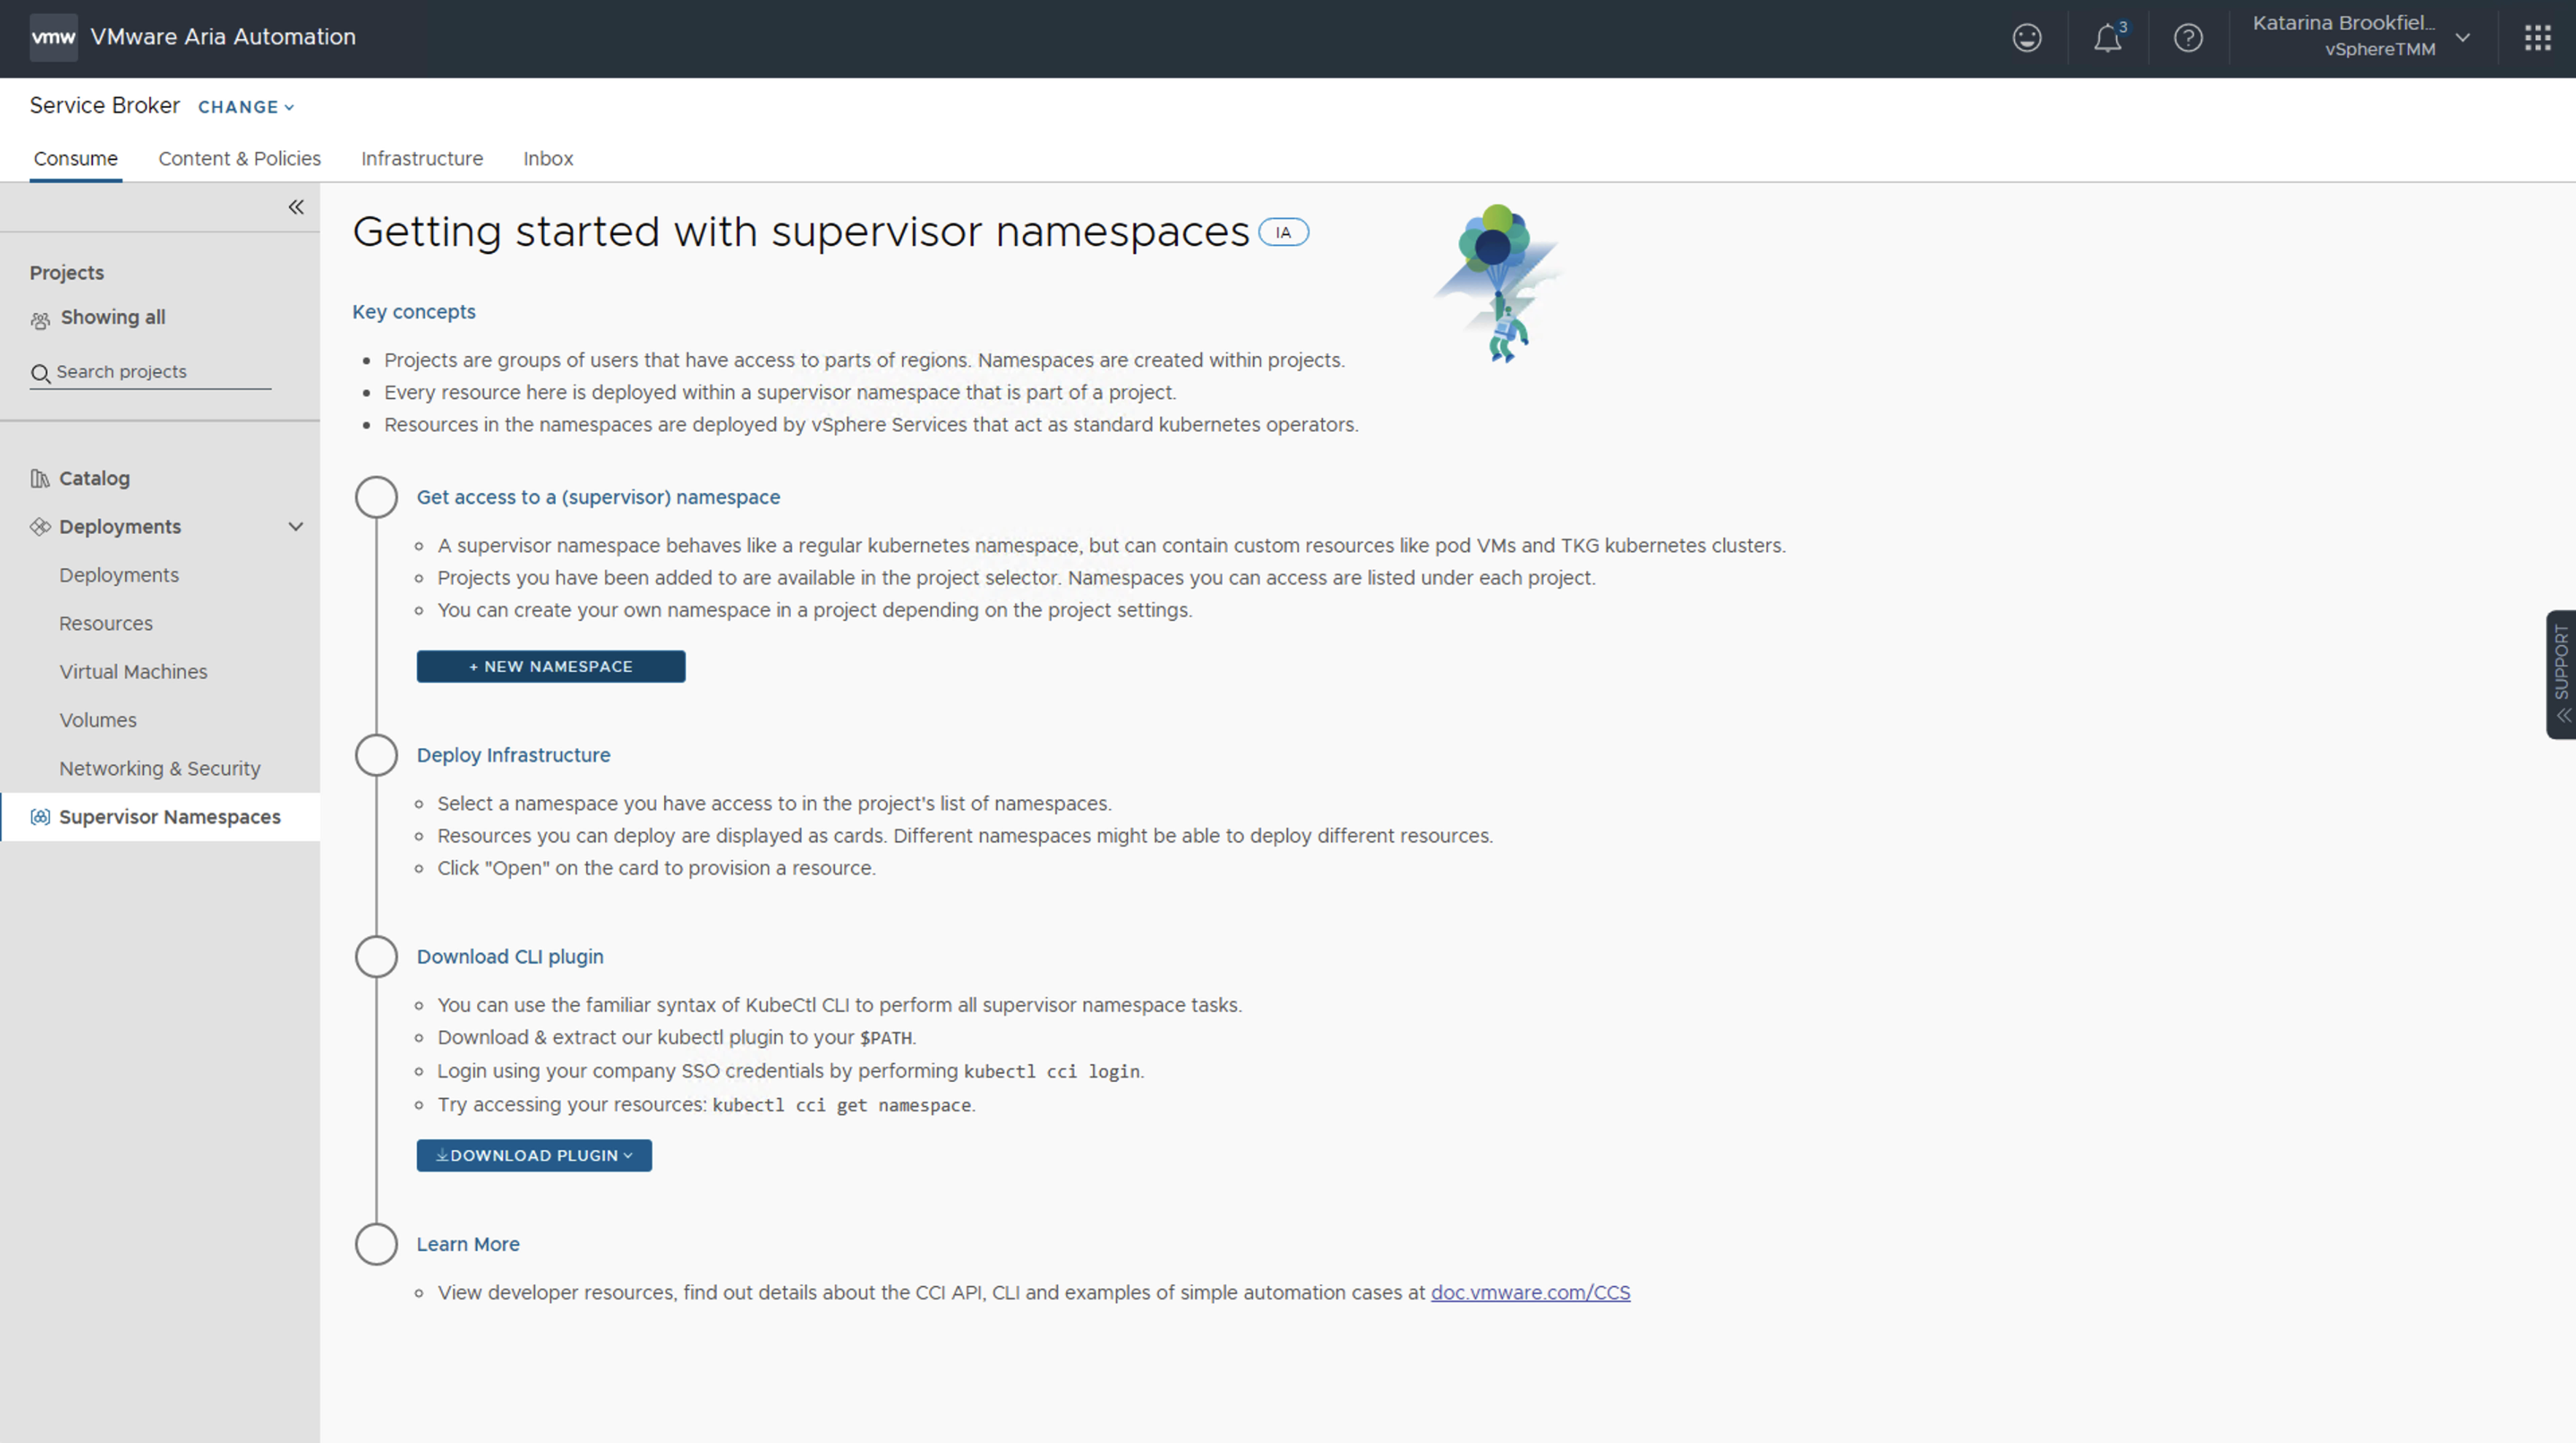
Once logged in, users can browse through Projects they have been assigned to and select the one they want to use. We will deploy the application in the default project.
After clicking on Supervisor Namespaces, we will see a landing page, where we can create new Namespaces and download the kubectl cci plugin which we will need later.
Note: The landing page will be only displayed during the initial setup. To ensure a smooth workflow later on, we recommend downloading the kubectl cci plugin at this point.
Creating a namespace
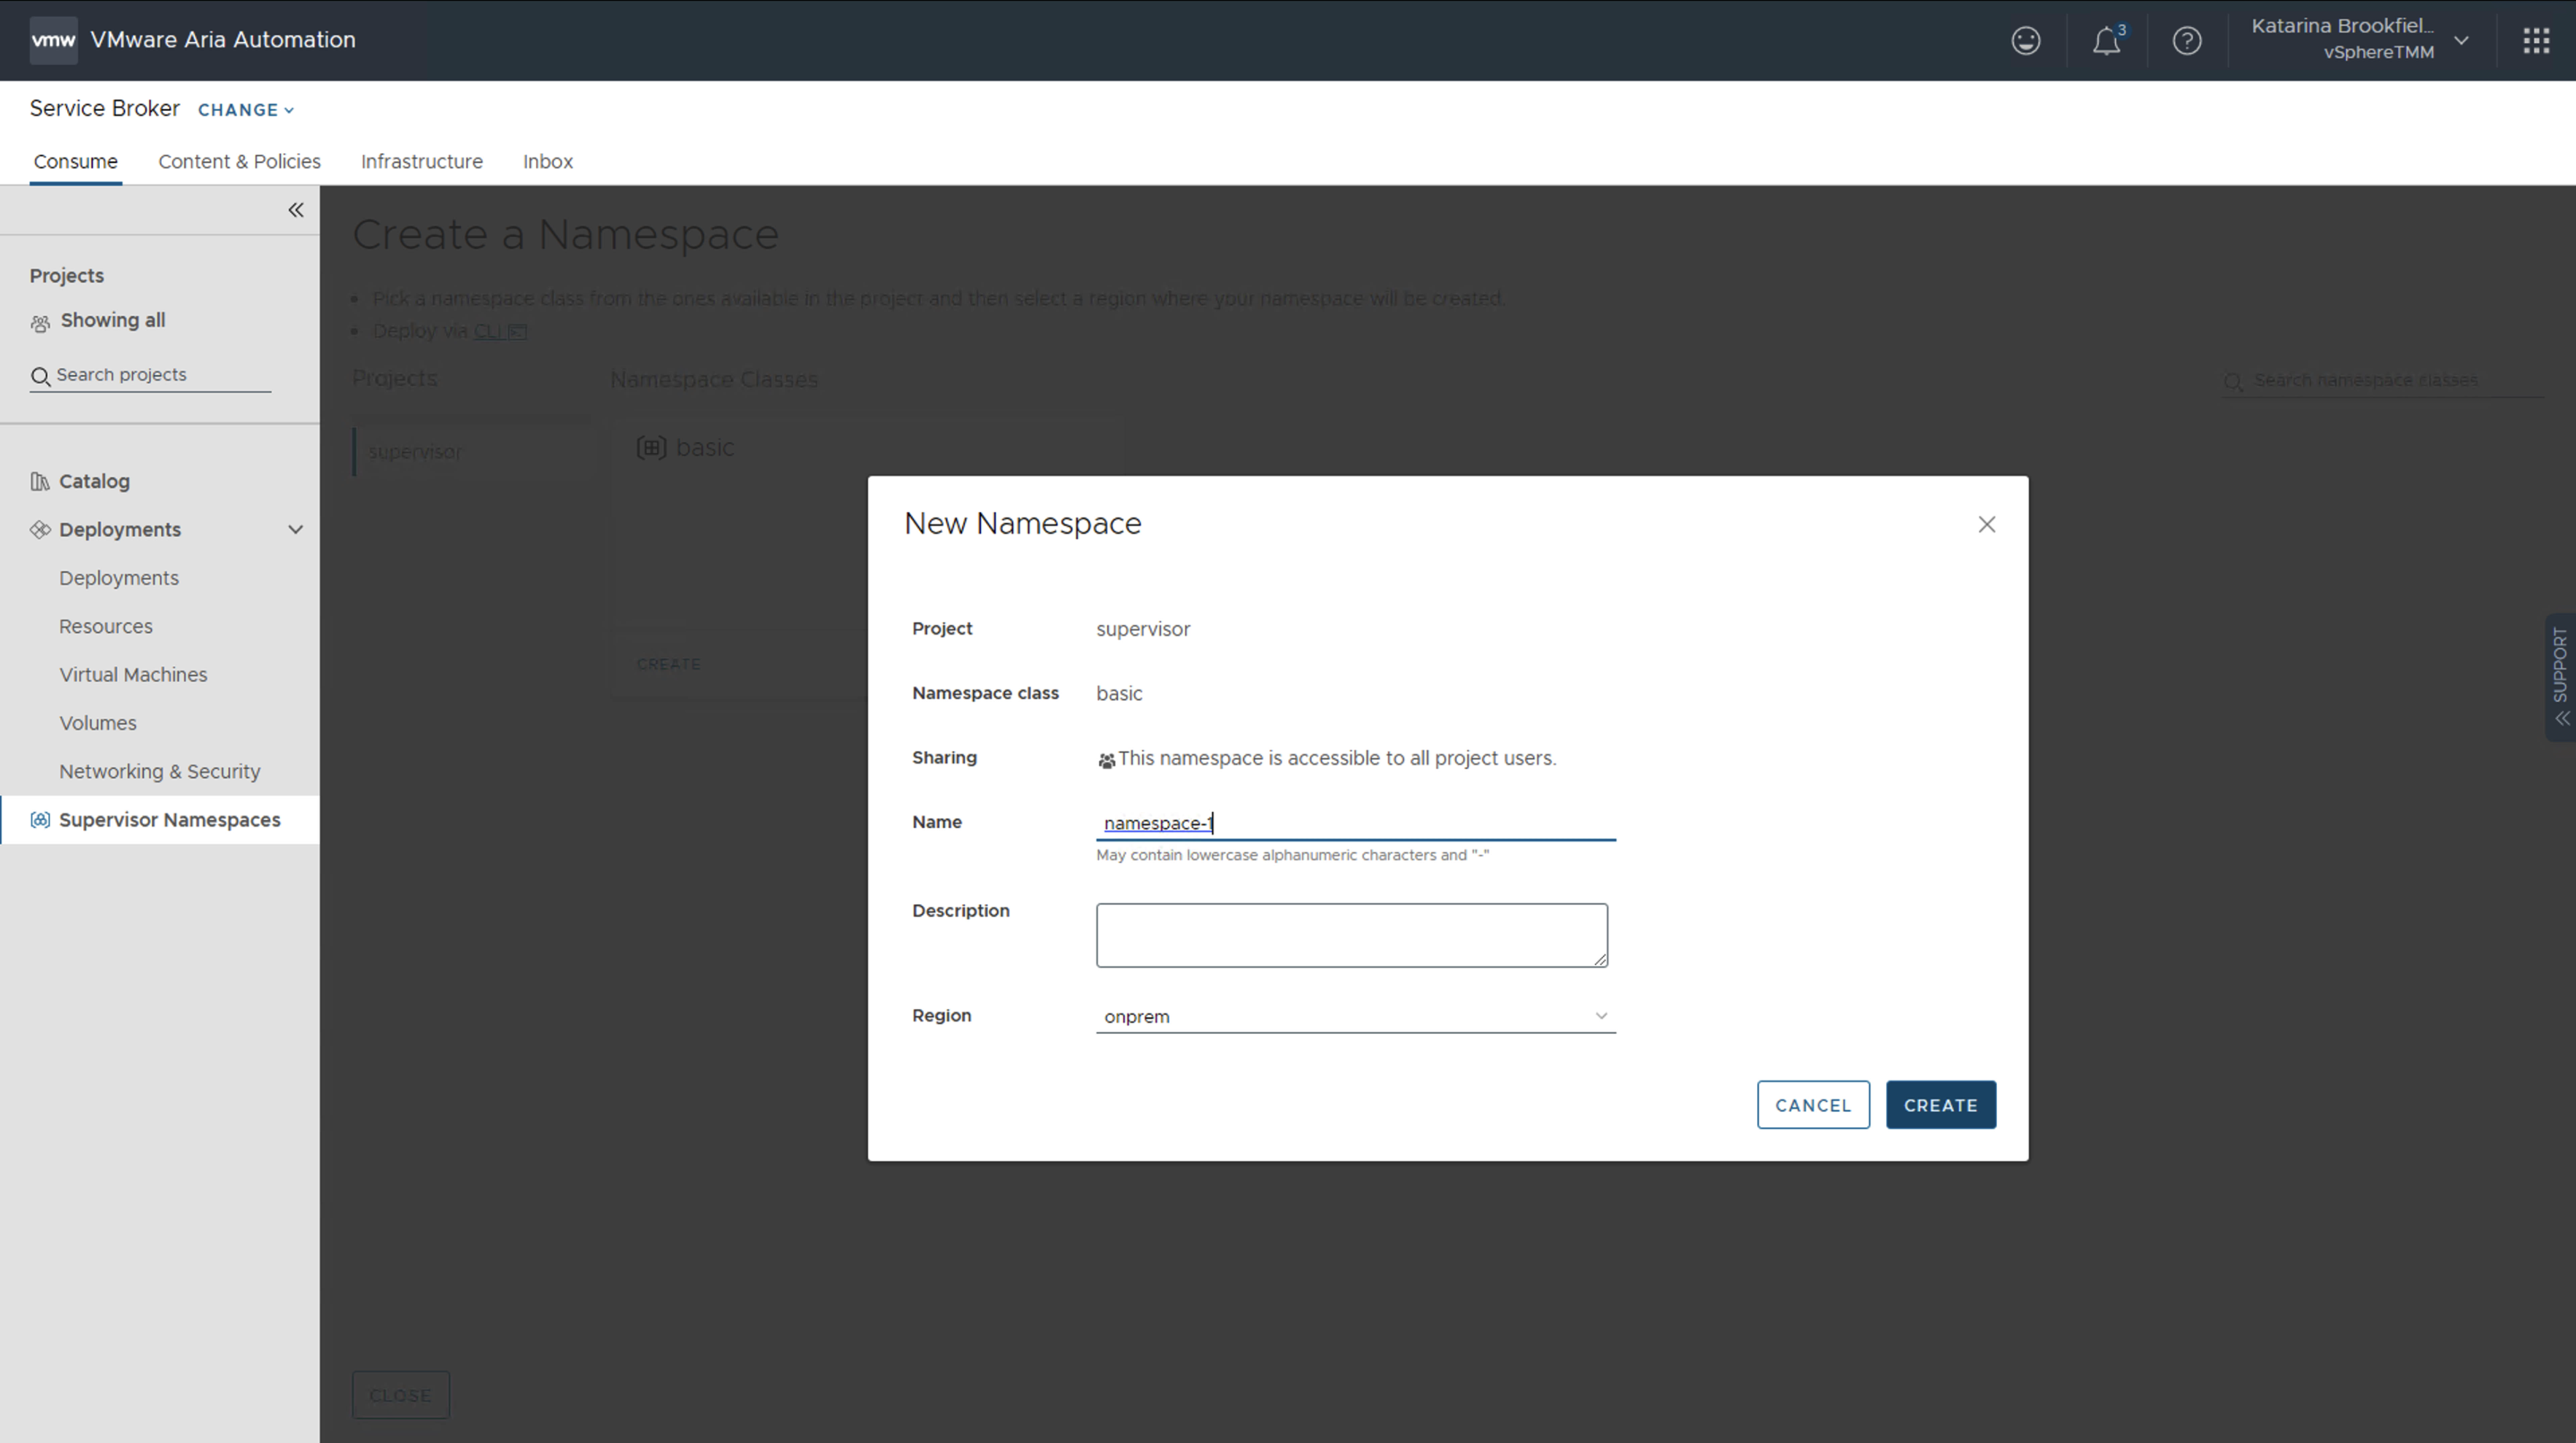
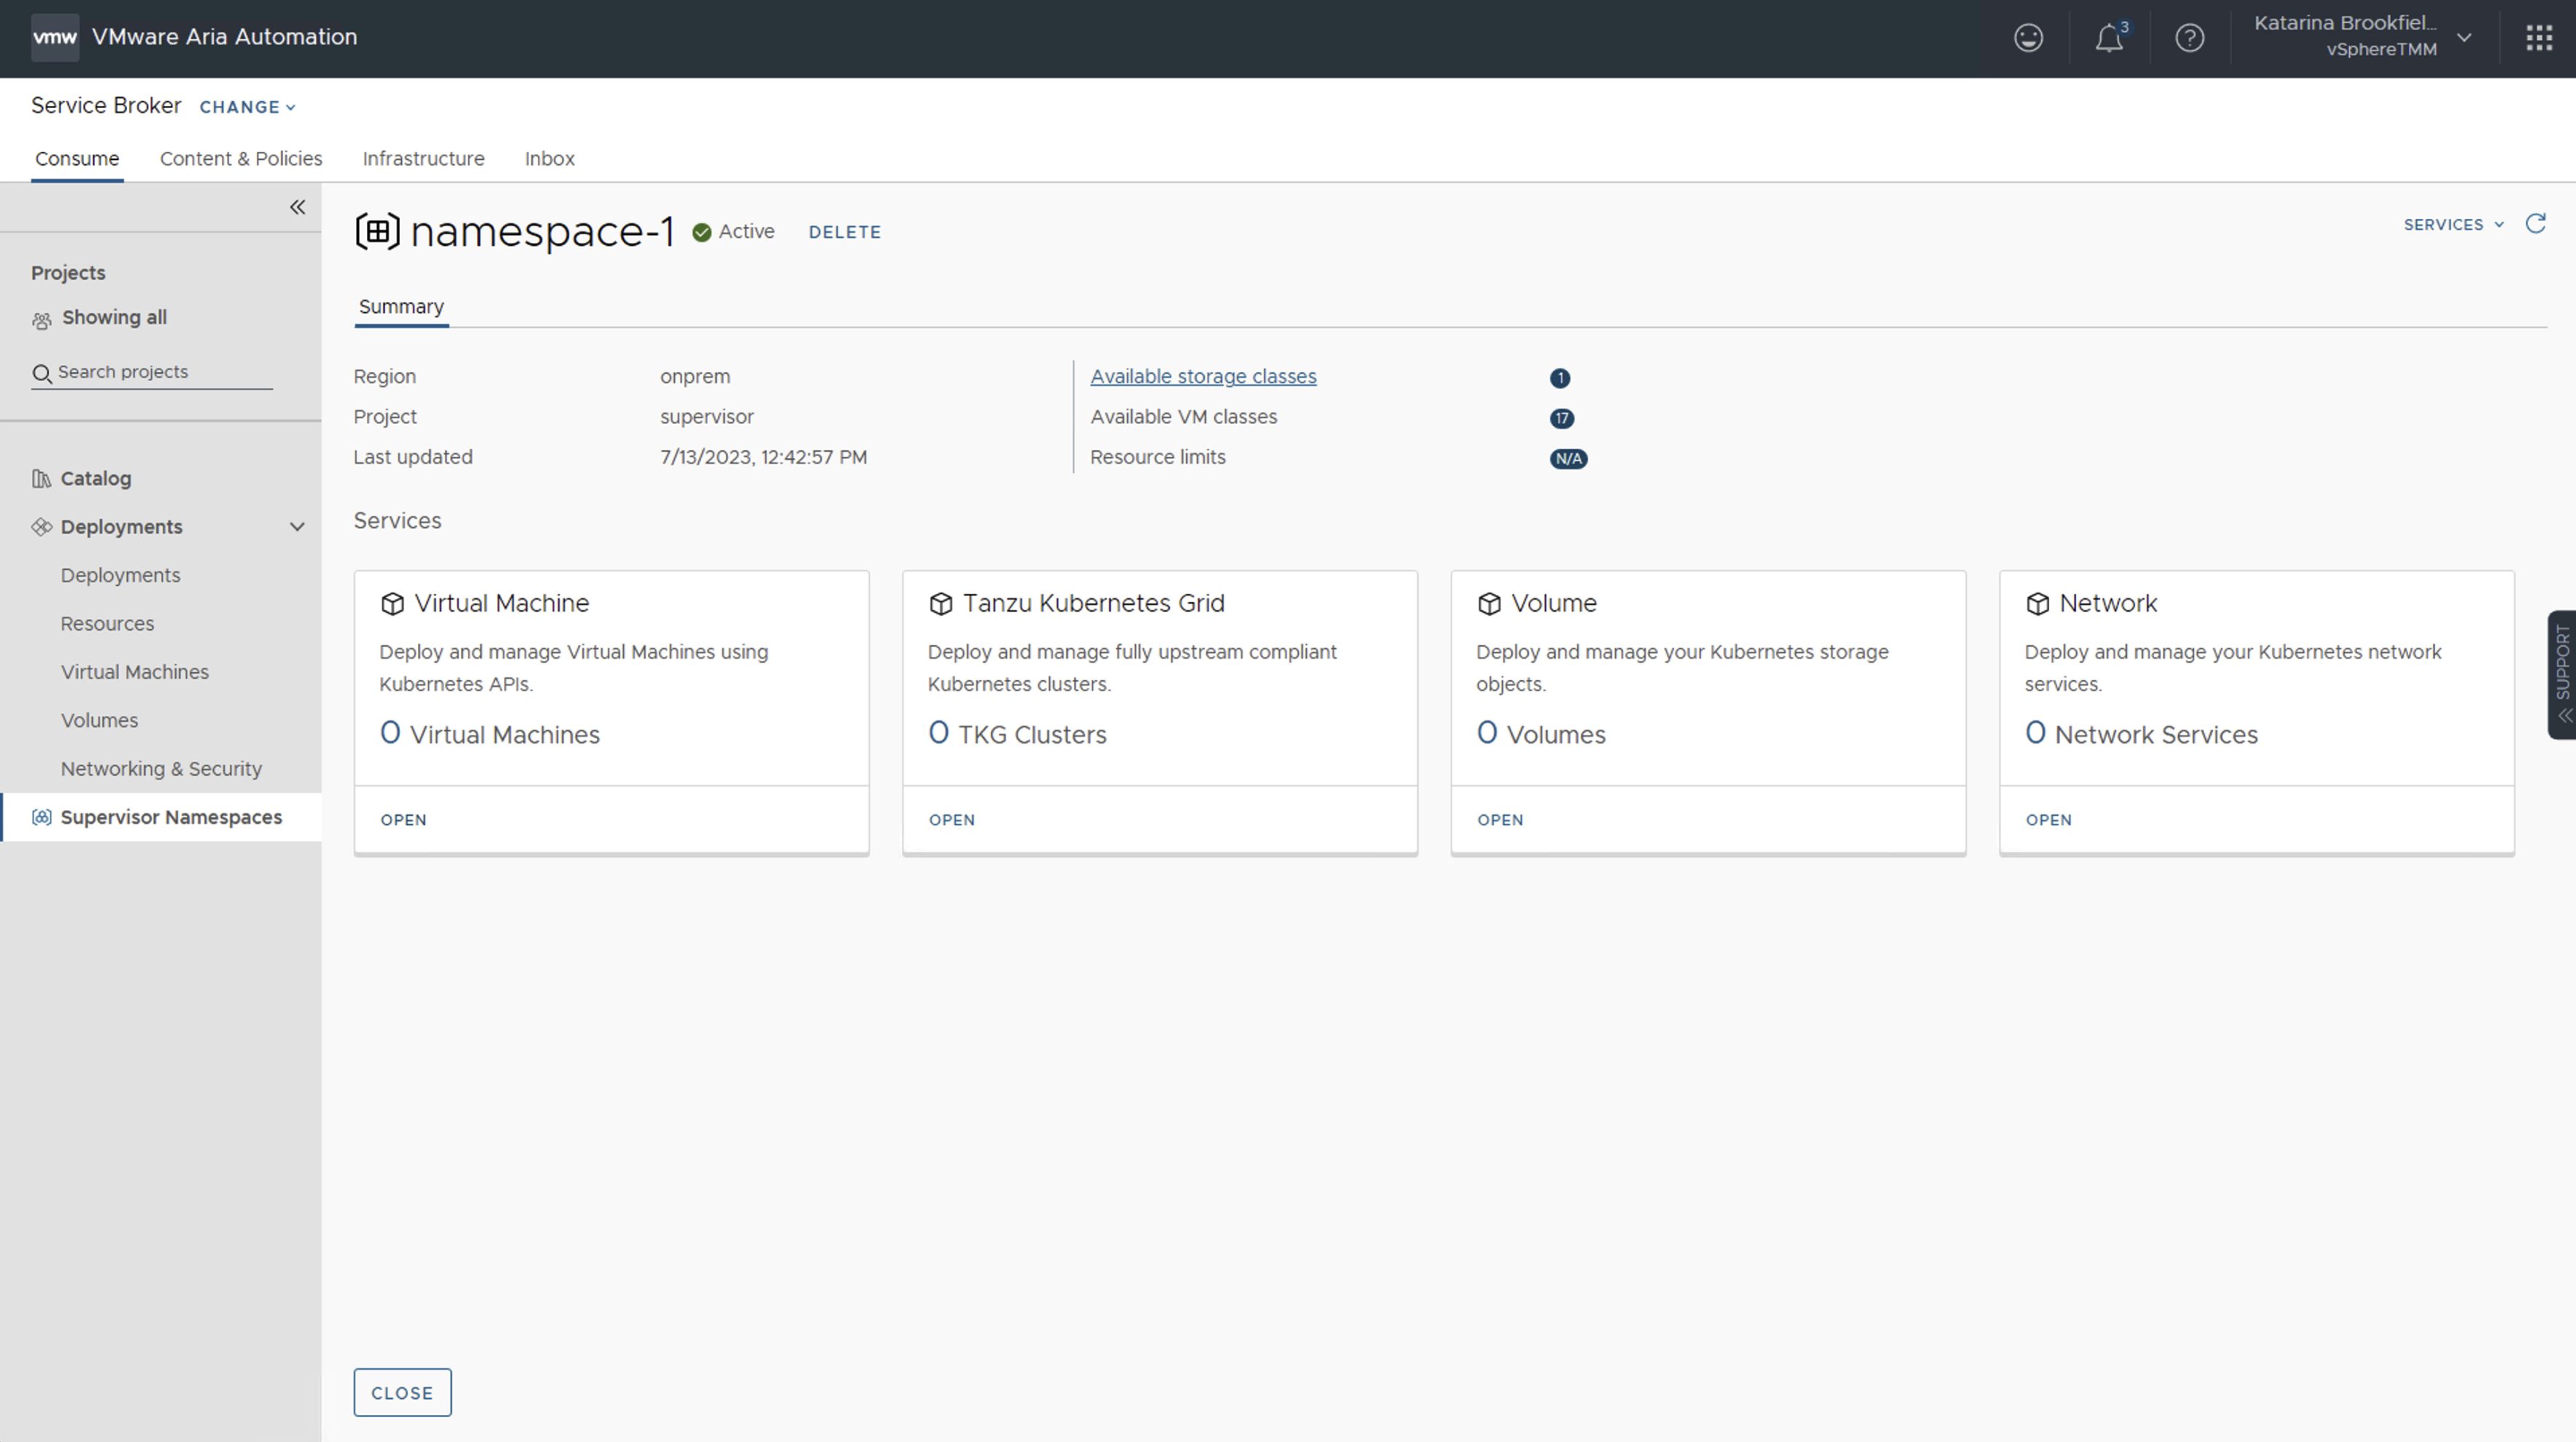
The first thing we need to do is to create a new Supervisor Namespace, called namespace-1. We will select basic Namespace class which is available by default, and select onprem region to specify where we want to create the namespace. Note that Supervisor and vCenter name have been abstracted away in a cloud-like fashion.
Once the namespace is created, we will see all available Services that are available for consumption.
Deploying a VM
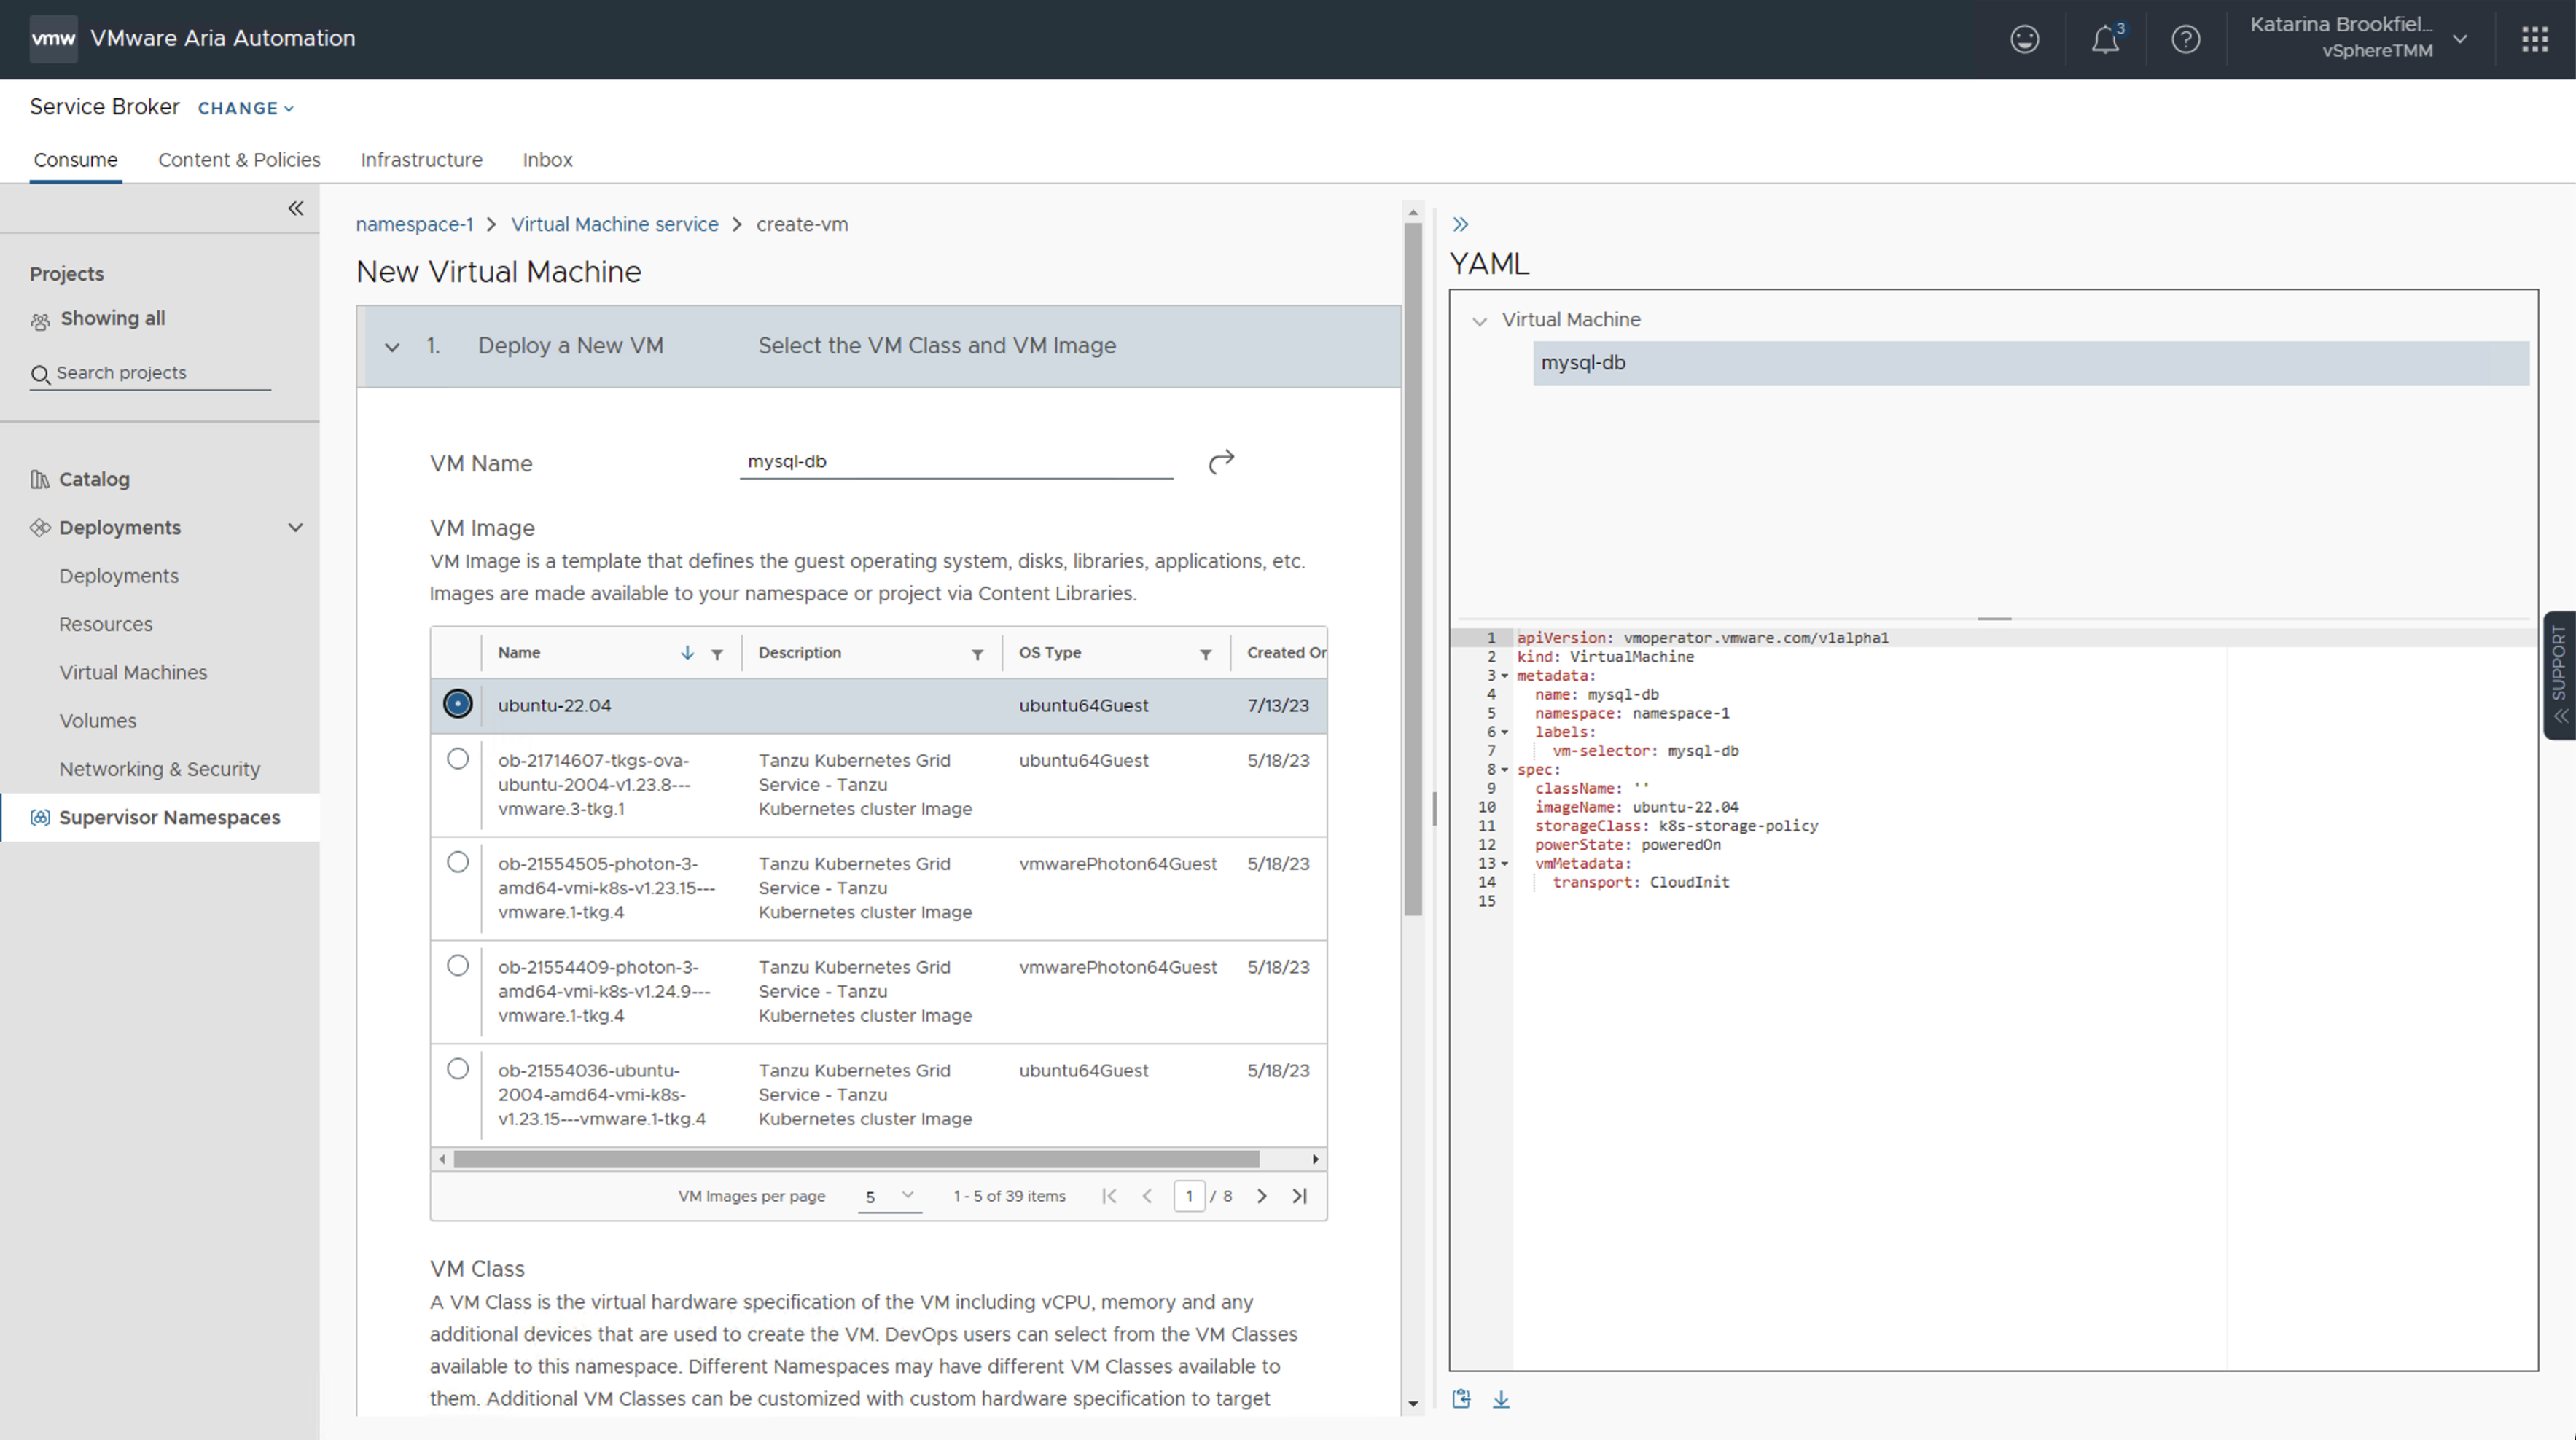
Now that we have a namespace, we will start with deploying a Virtual Machine which will host our MySQL database. We will select a VM name, VM image, and VM class. Notice how the VM YAML manifest is automatically generated for us on the right side of the screen!
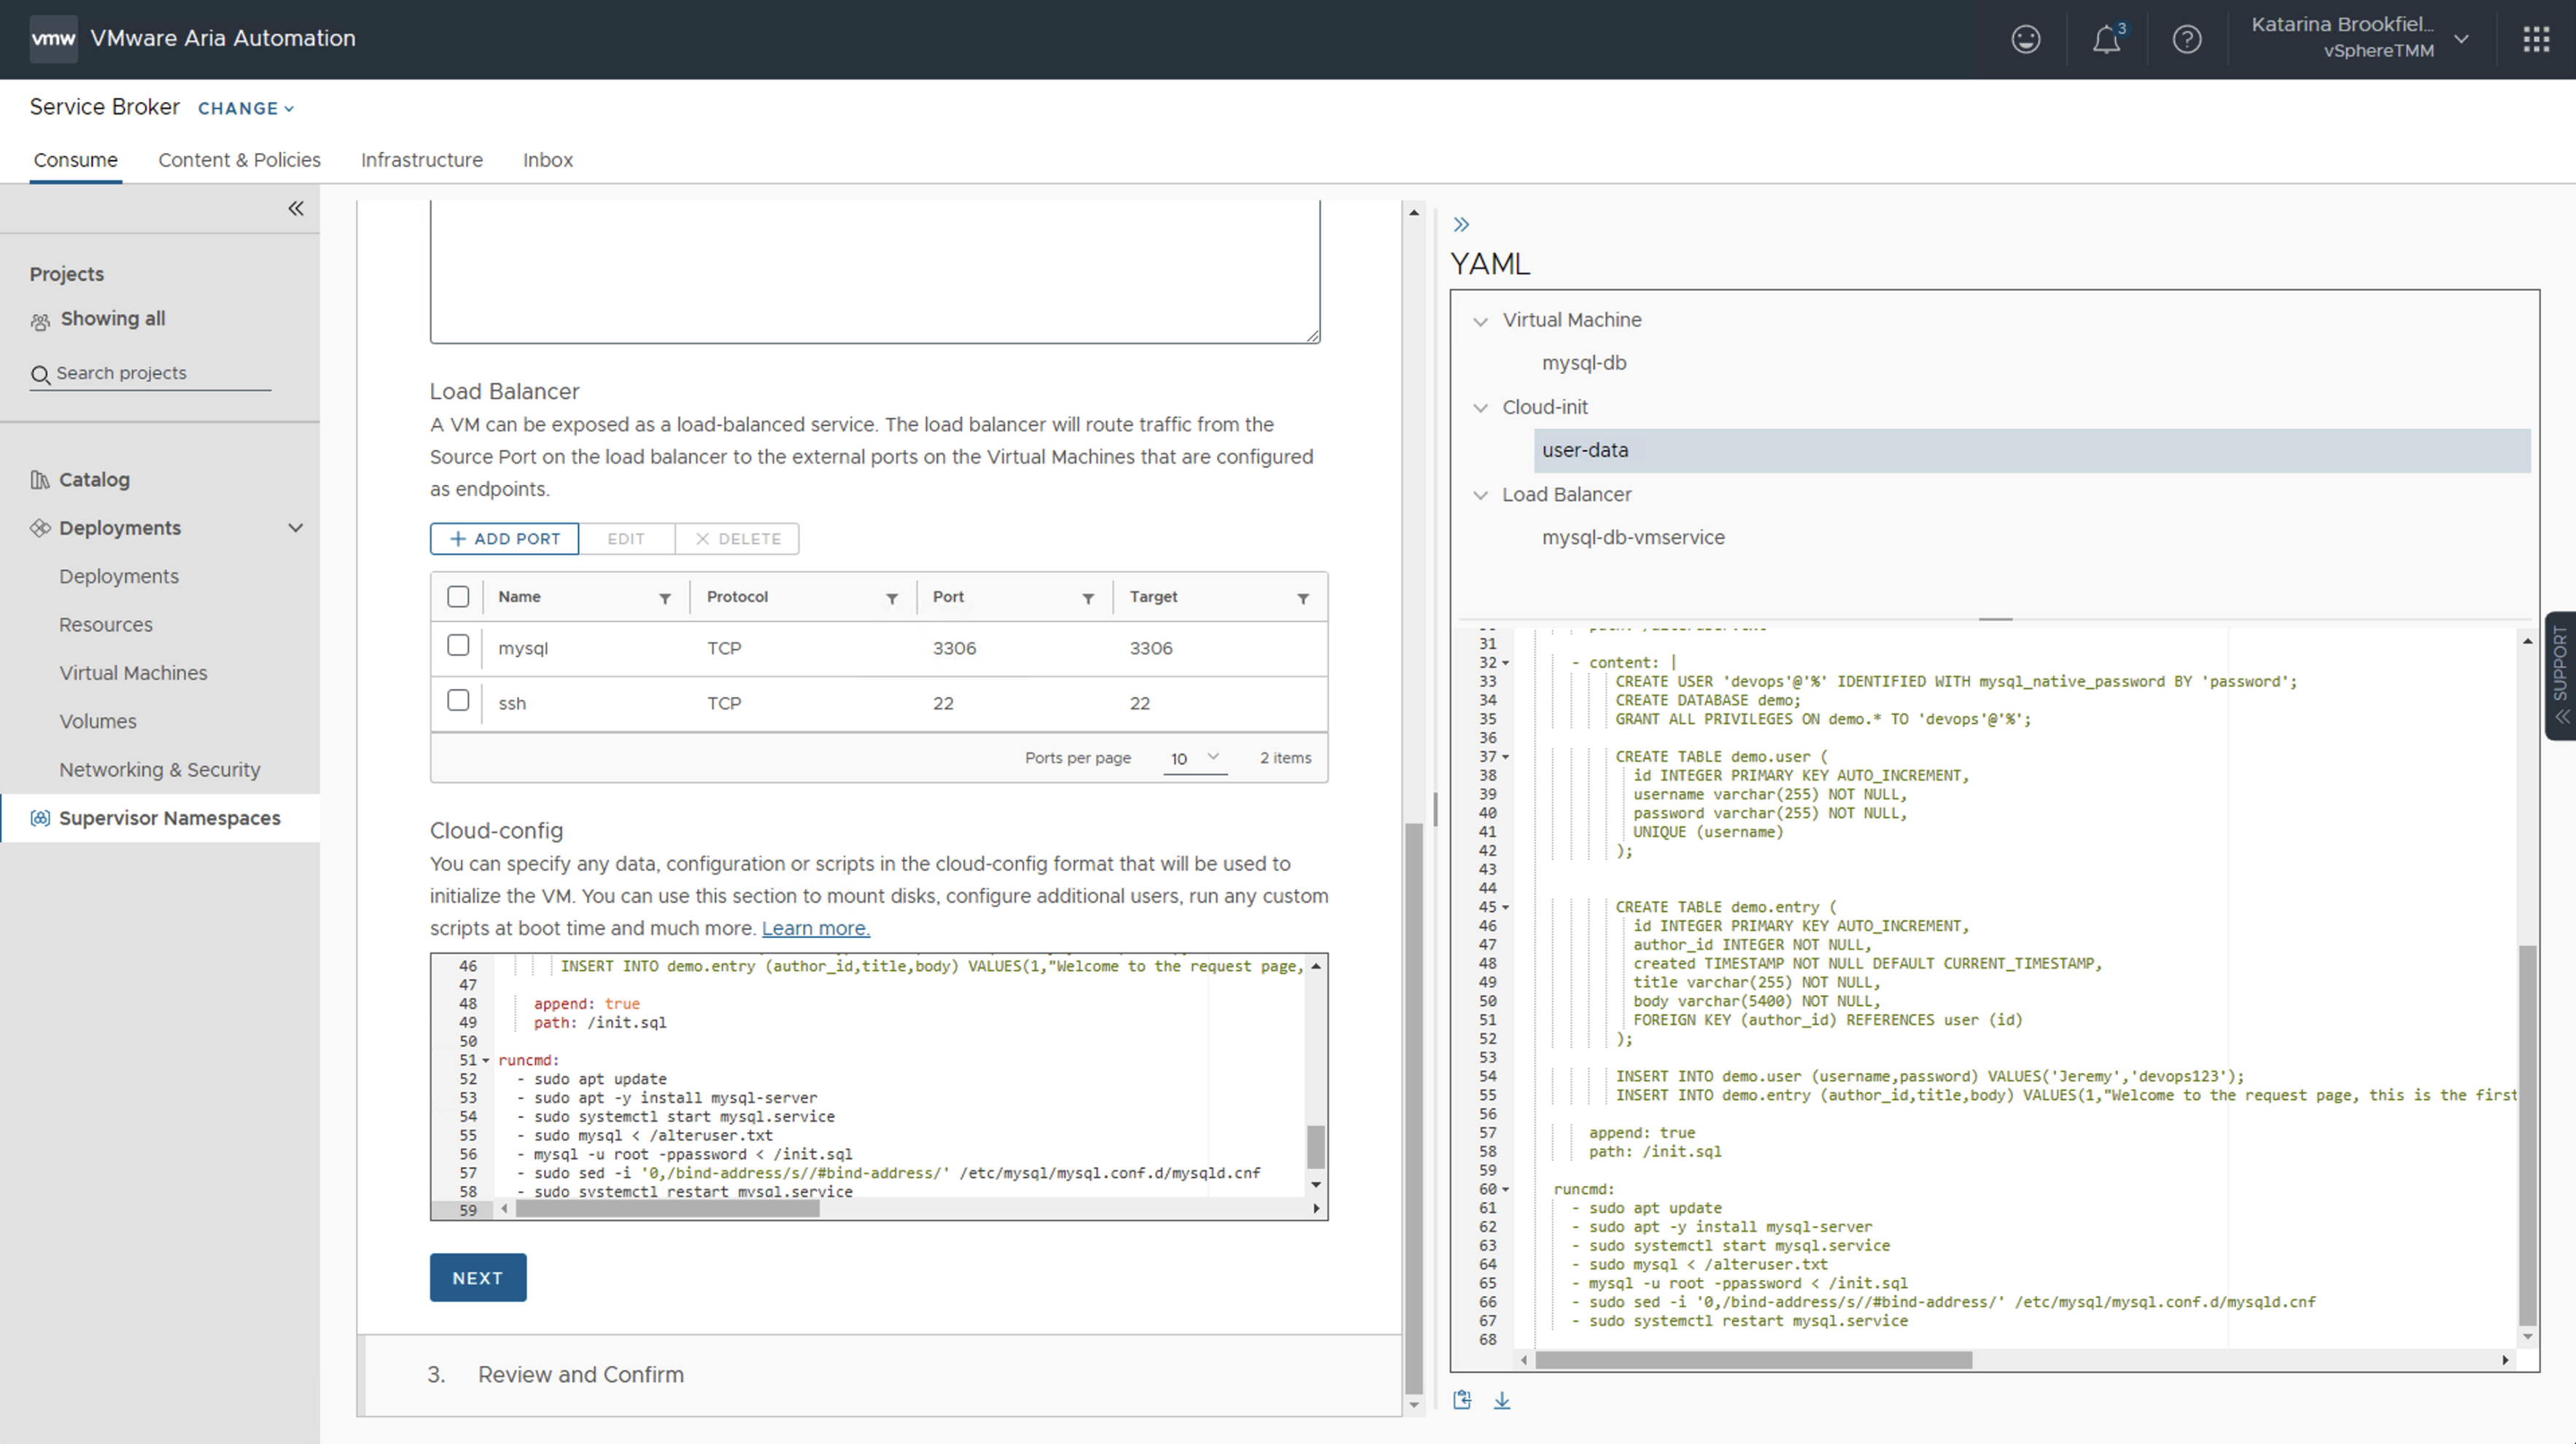
We now have an option to configure some advanced settings, such as SSH keys, Persistent Volumes, and Load Balancer. For our demo we will configure the Load Balancer to expose our VM on required ports - ssh (22) and mysql (3306).
We will also paste in our cloud-config to configure the database using cloud-init. We can just use clear text as the base64 encoding will be done for us.
Before deploying the VM, we also have an option to download the YAML manifest that has been generated.
Deploying a TKG cluster
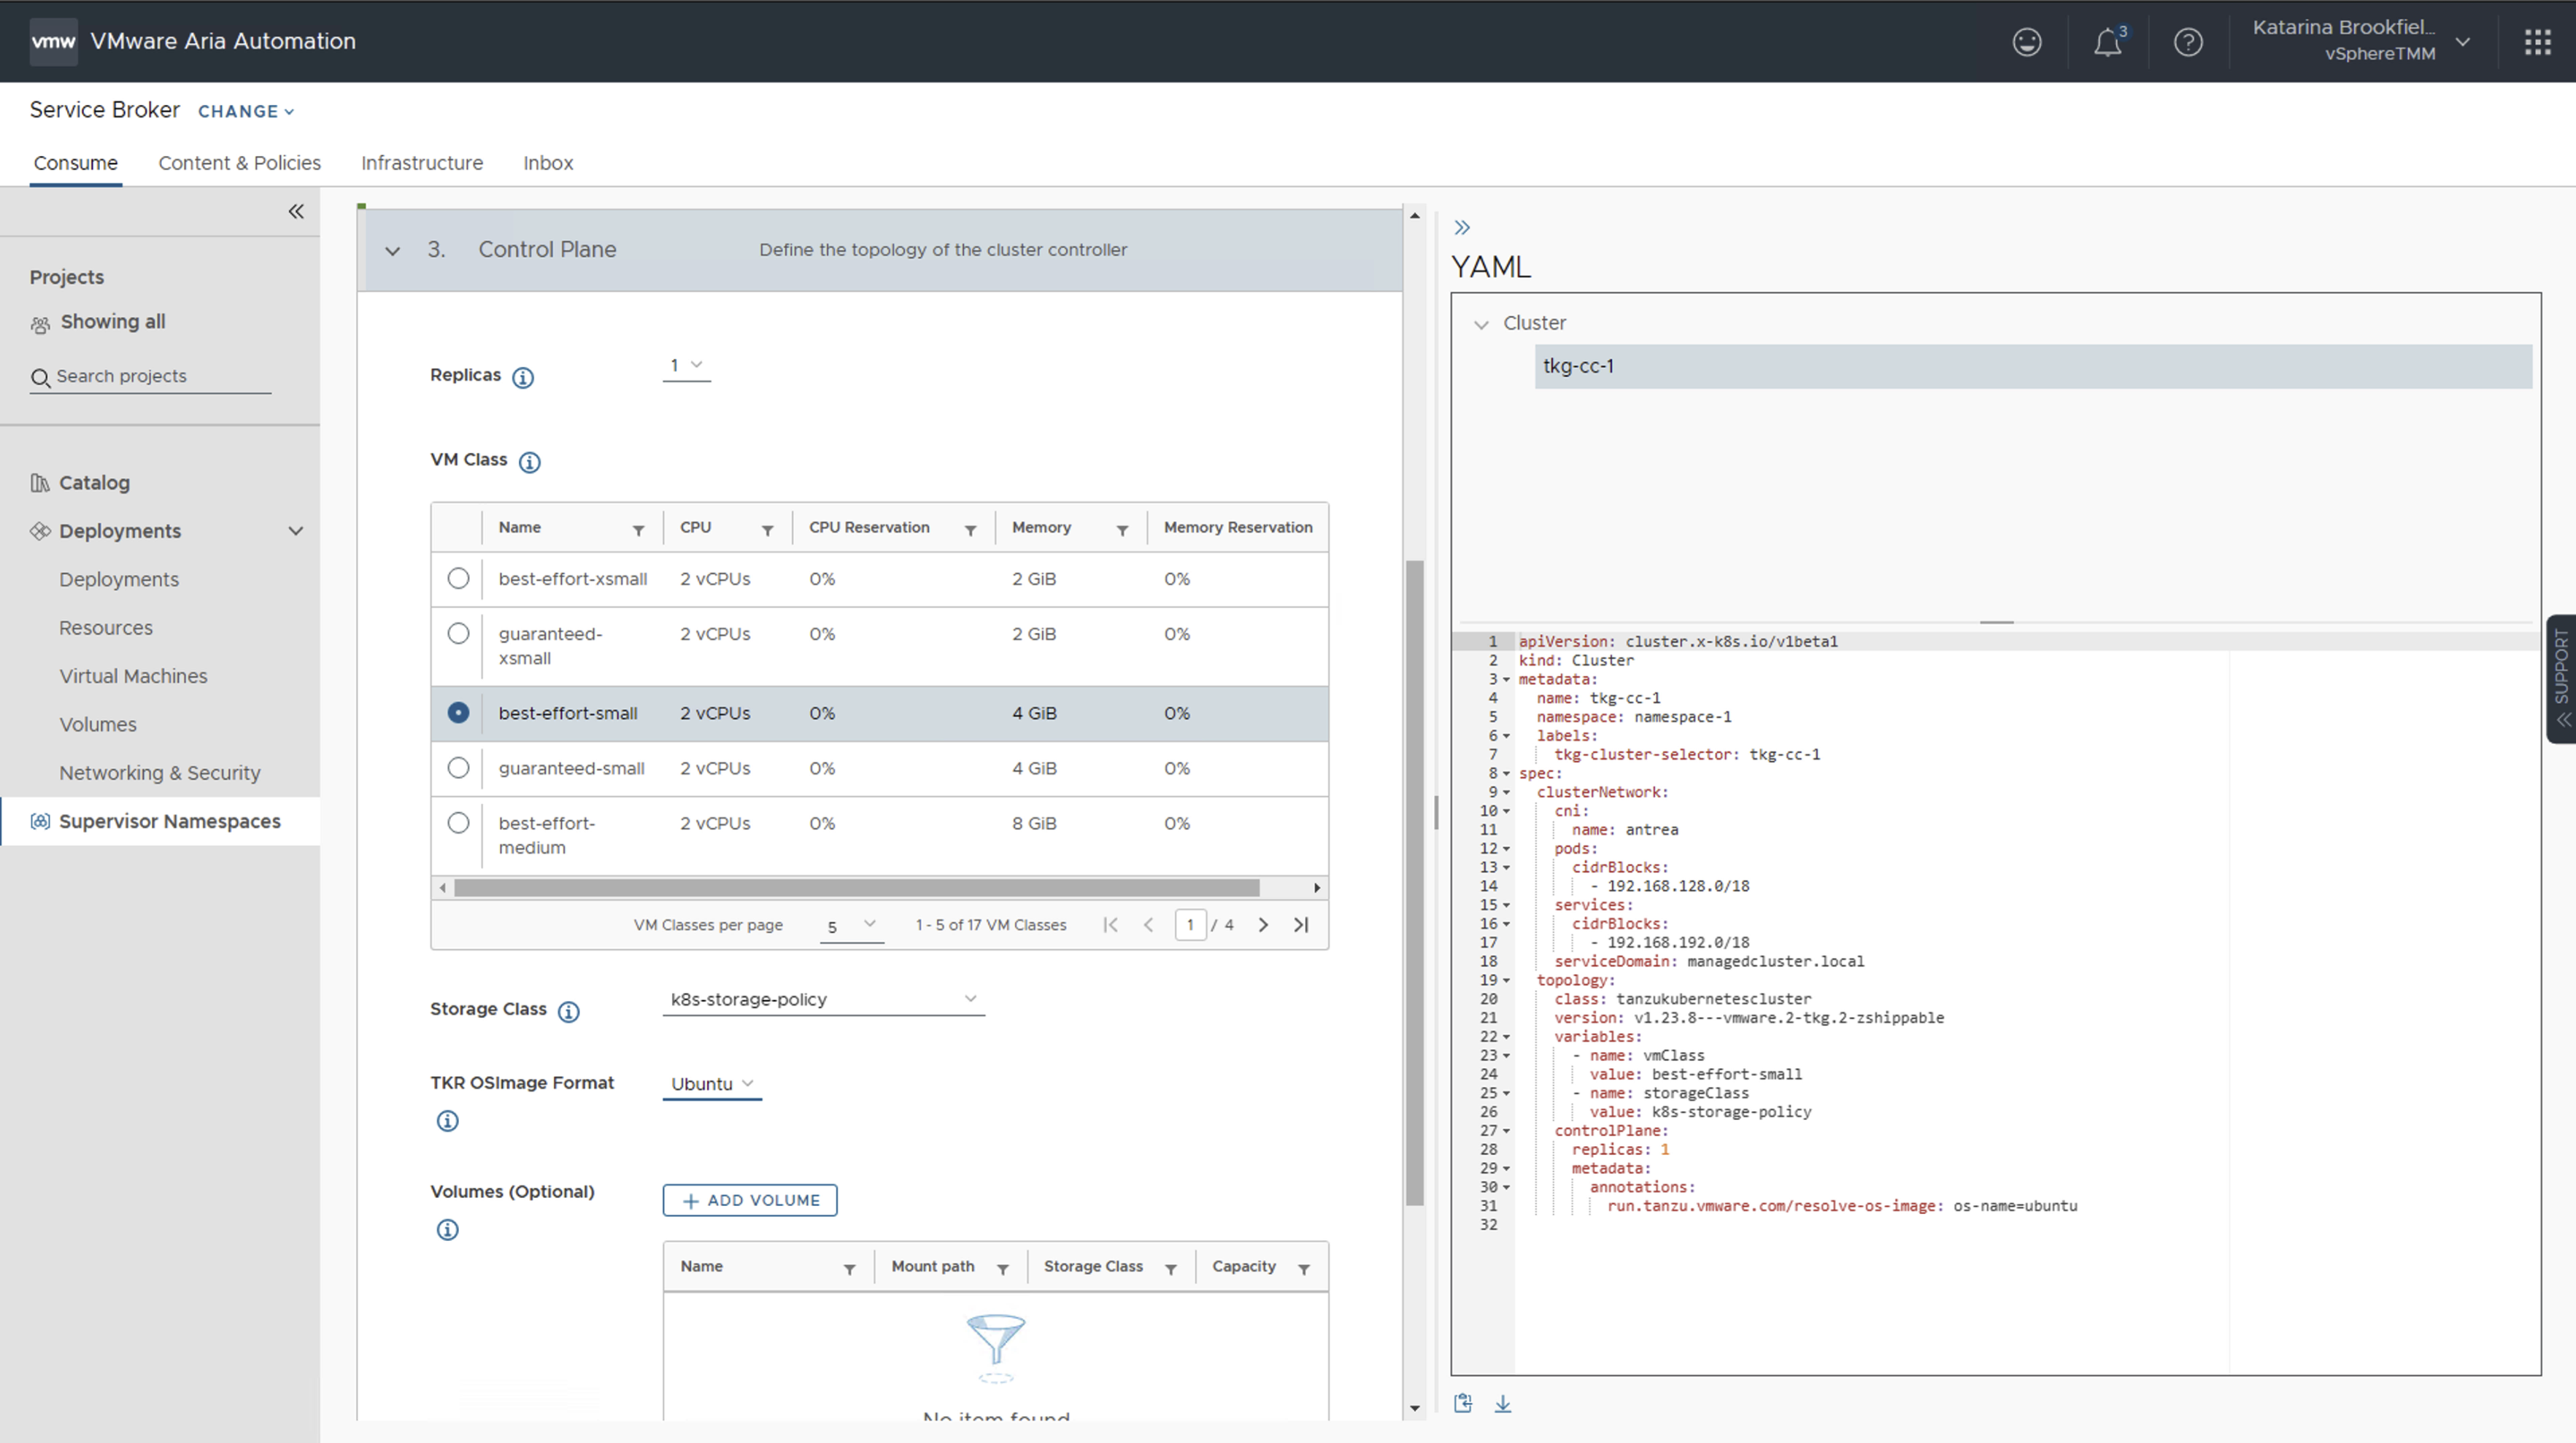
Next we need a TKG cluster. We will click into Tanzu Kubernetes Grid service tile and select ClusterClass API and Custom Configuration options. We will proceed with configuring the cluster with the same values as we've used before. Again, notice how the TKG YAML manifest is automatically generated and updated based on the values we select!
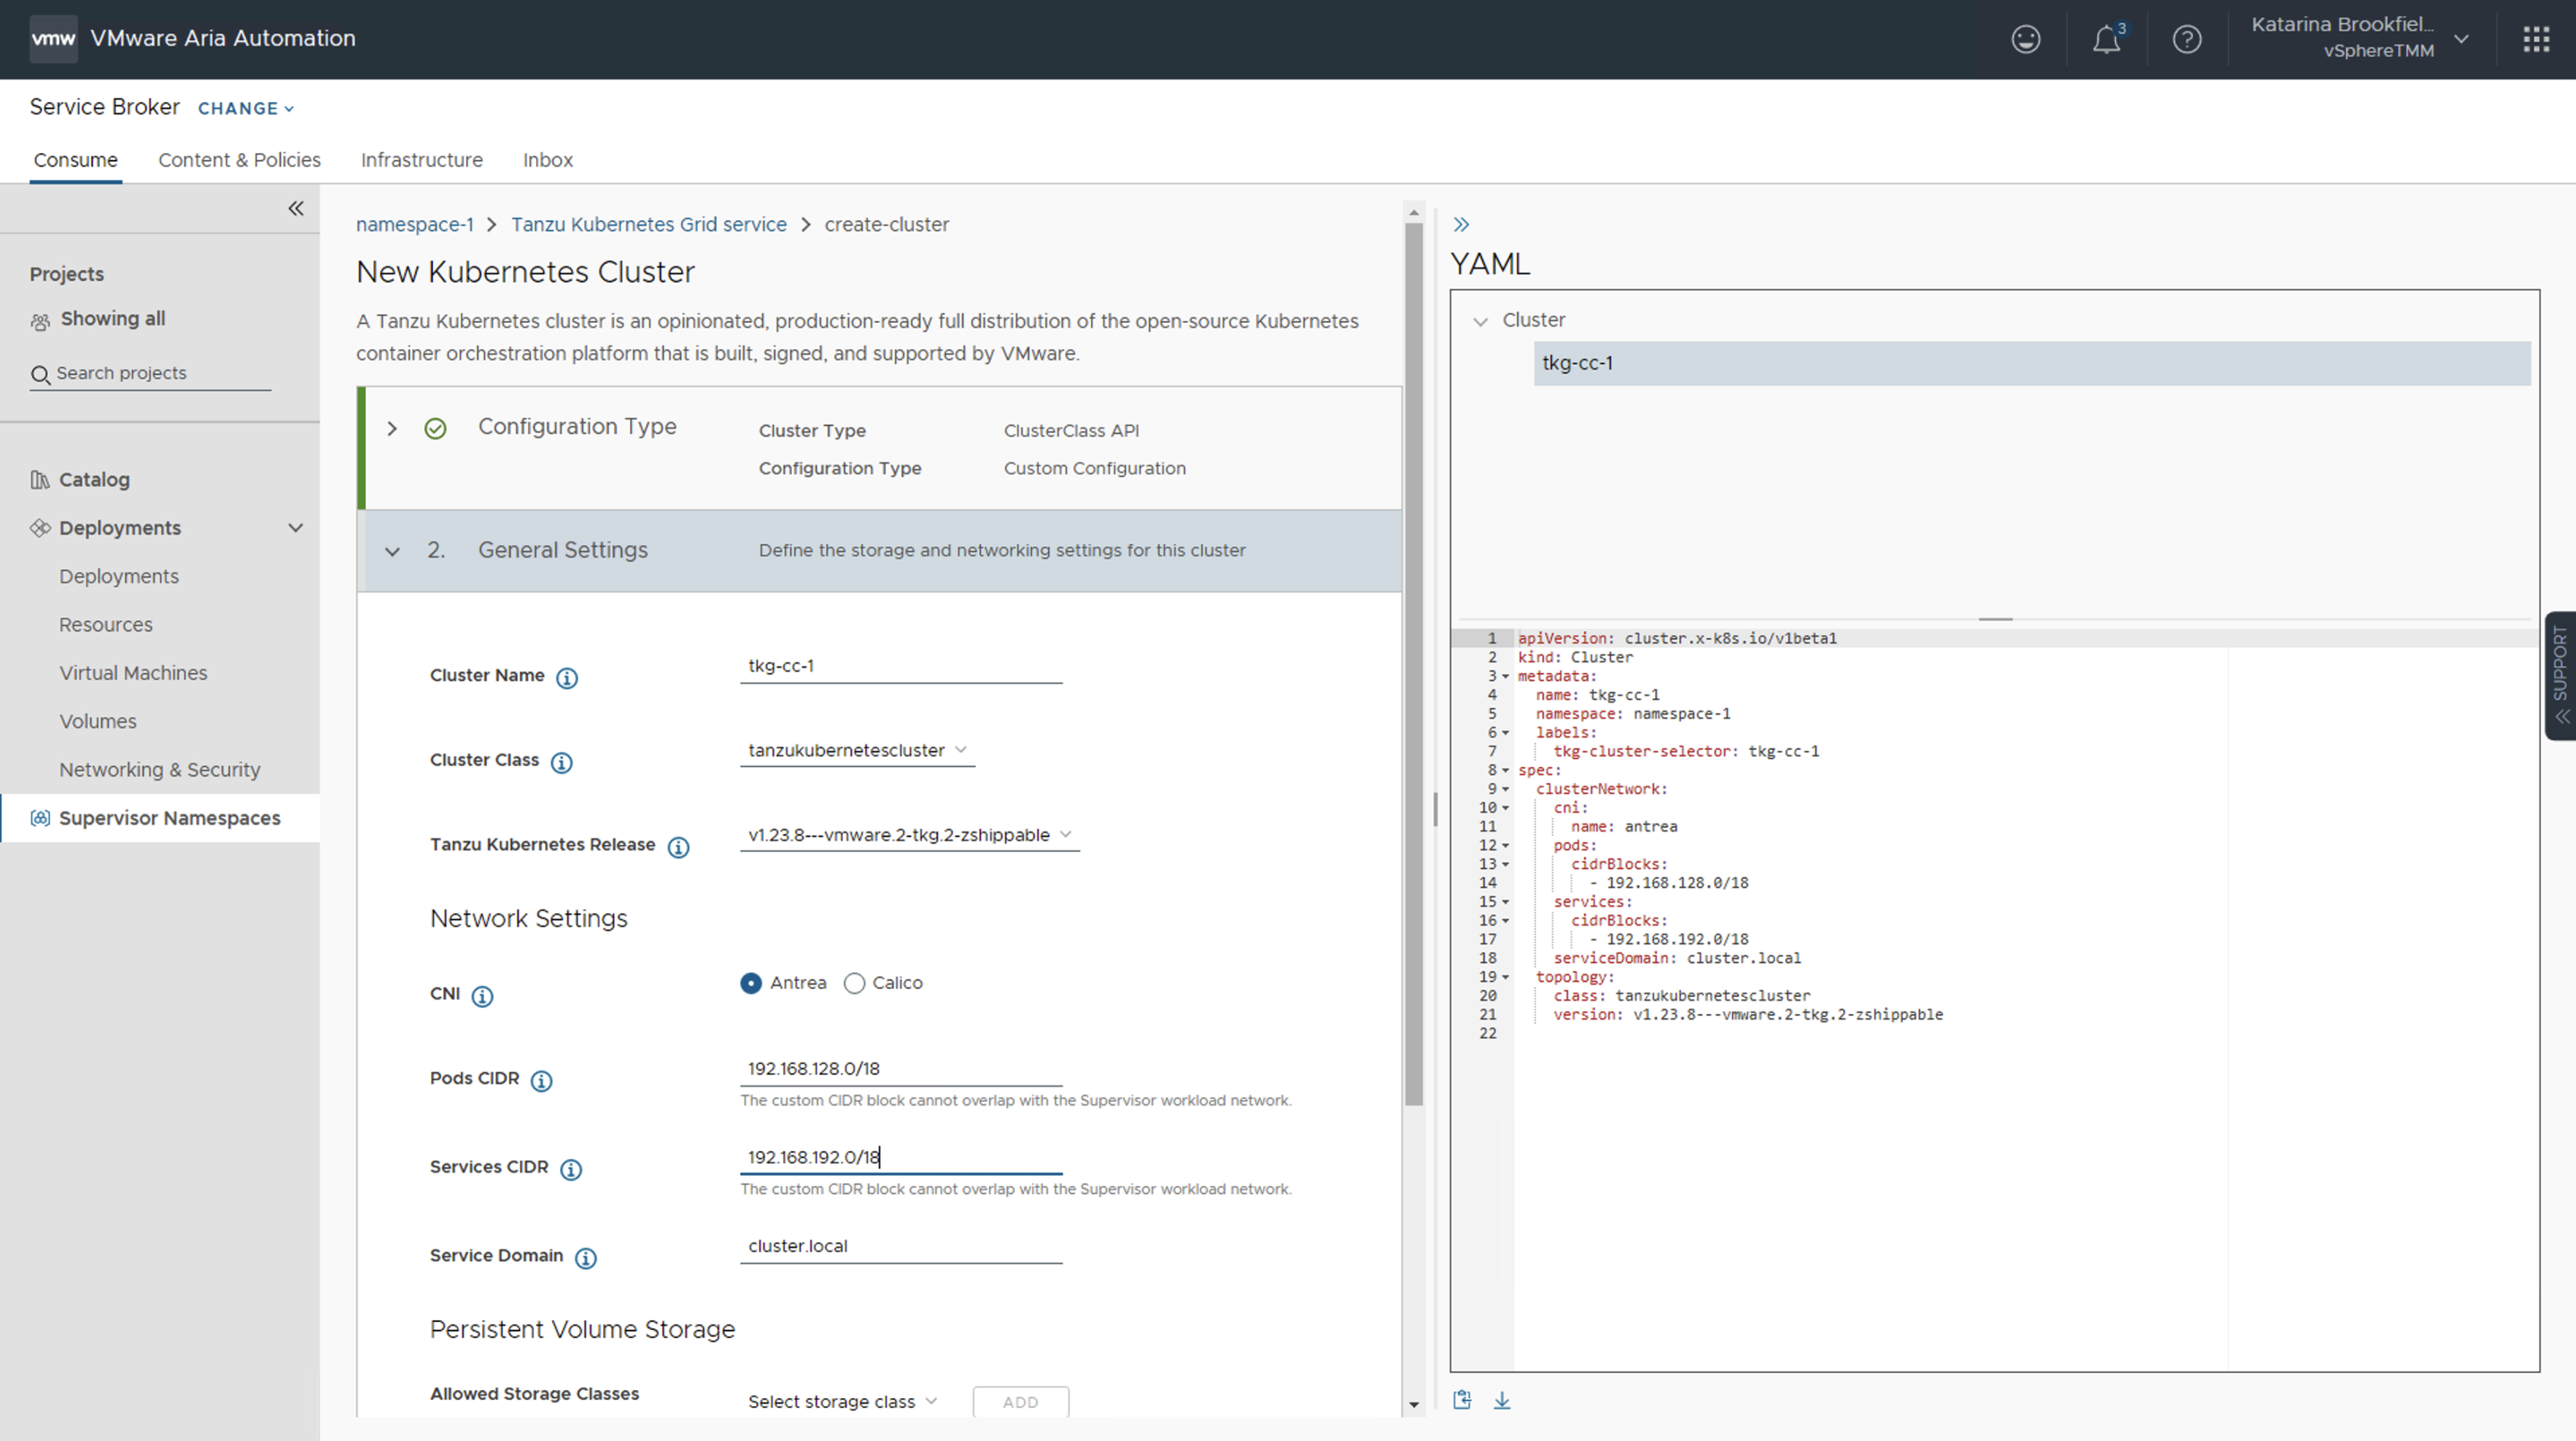
We will configure Control Plane with a single replica and Ubuntu as the OS Image.
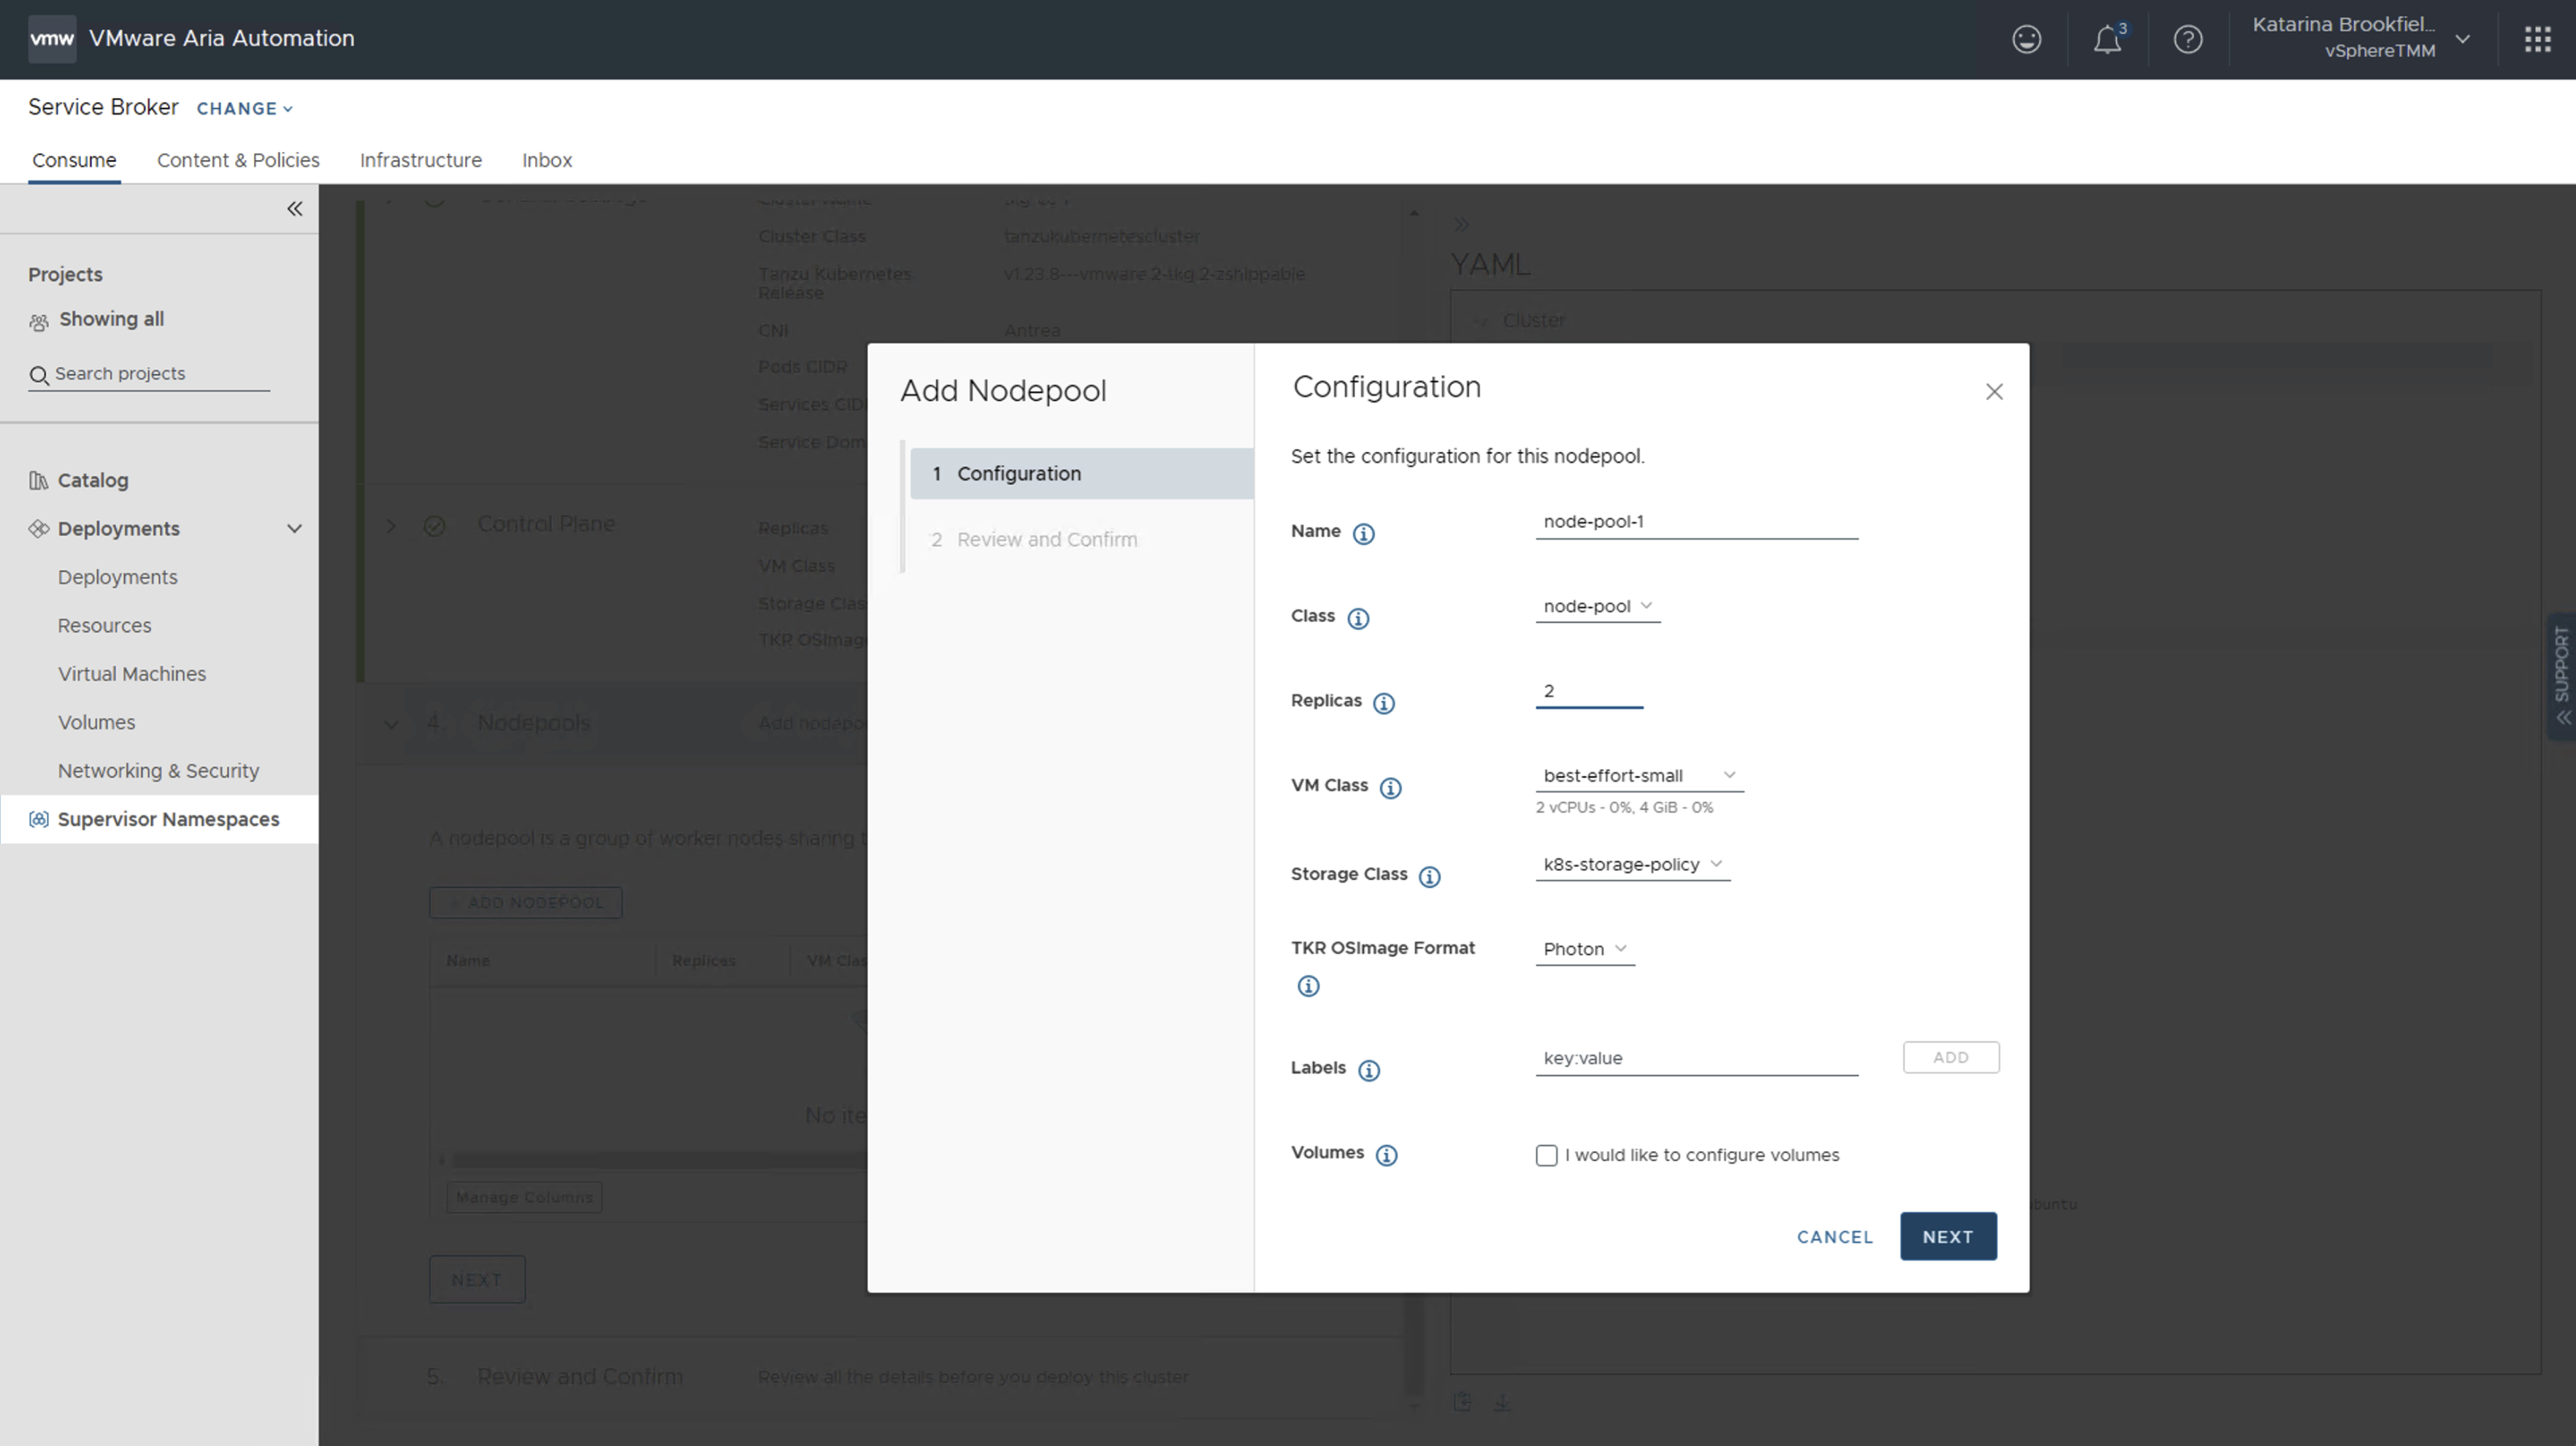
We will create a Nodepool with 2 worker node replicas.
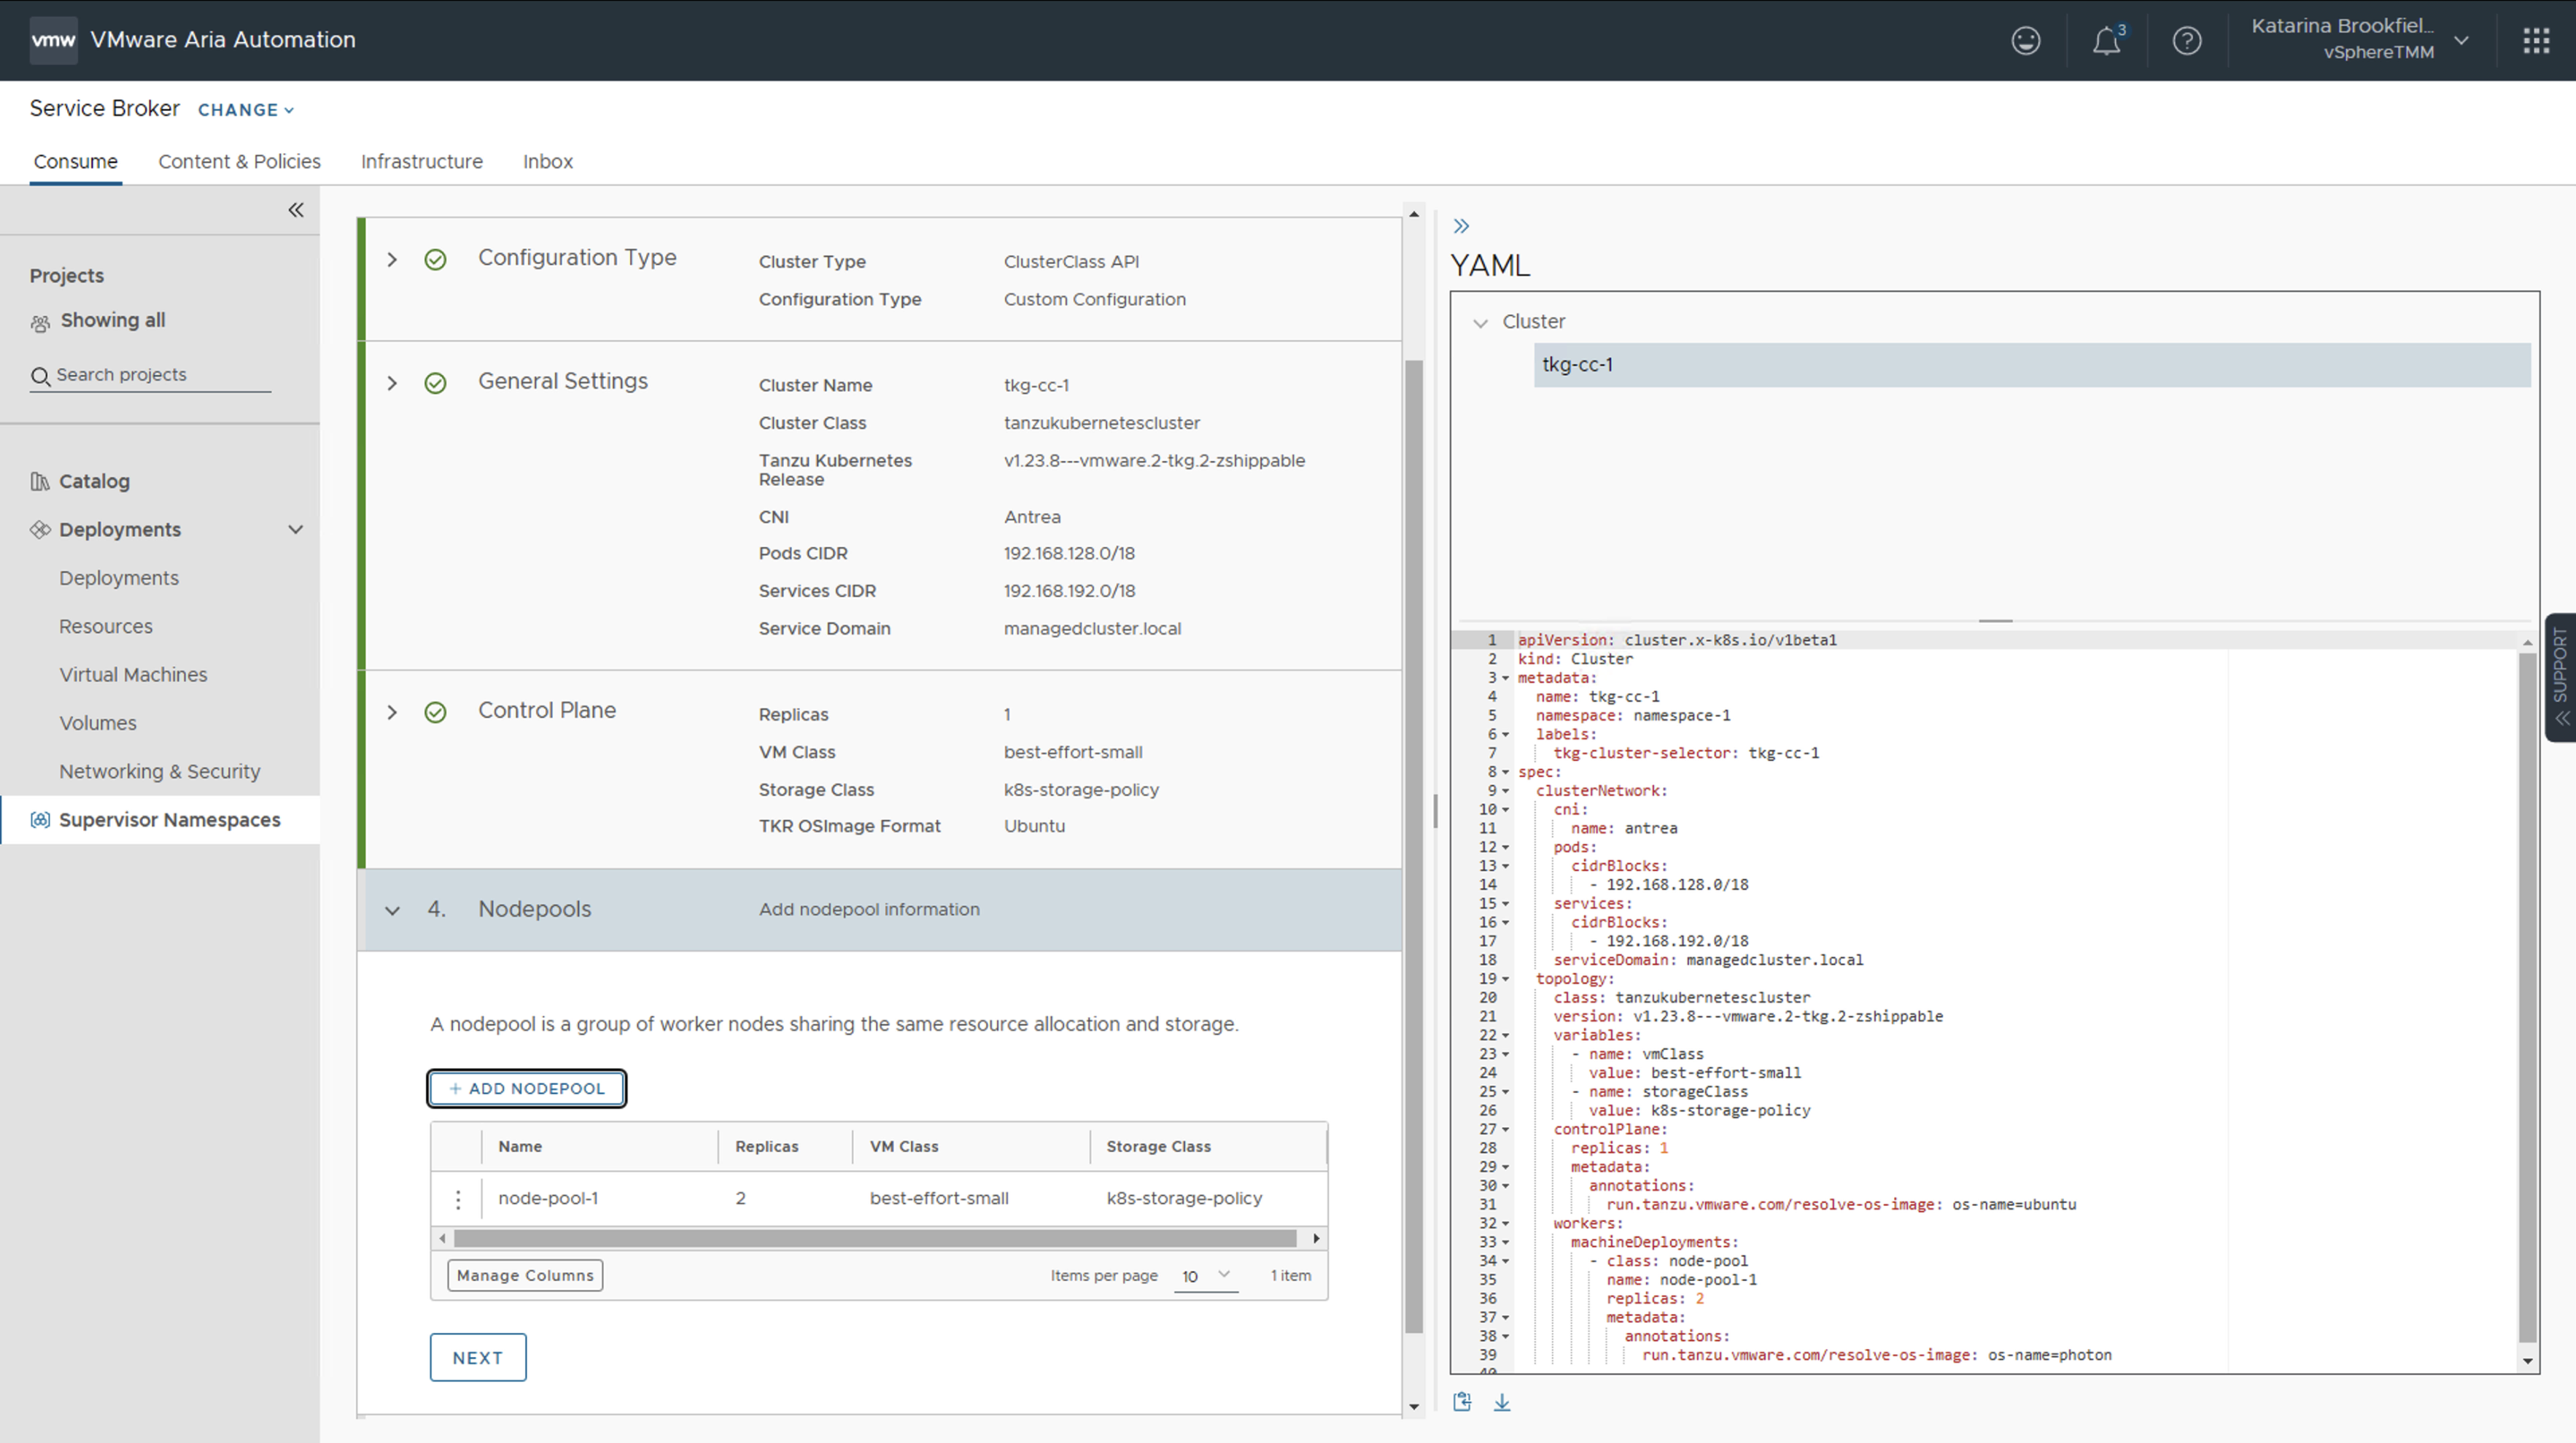
Once we have configured the control plane and worker nodes, we can again download the YAML, and proceed with deployment.
How to generate an API token
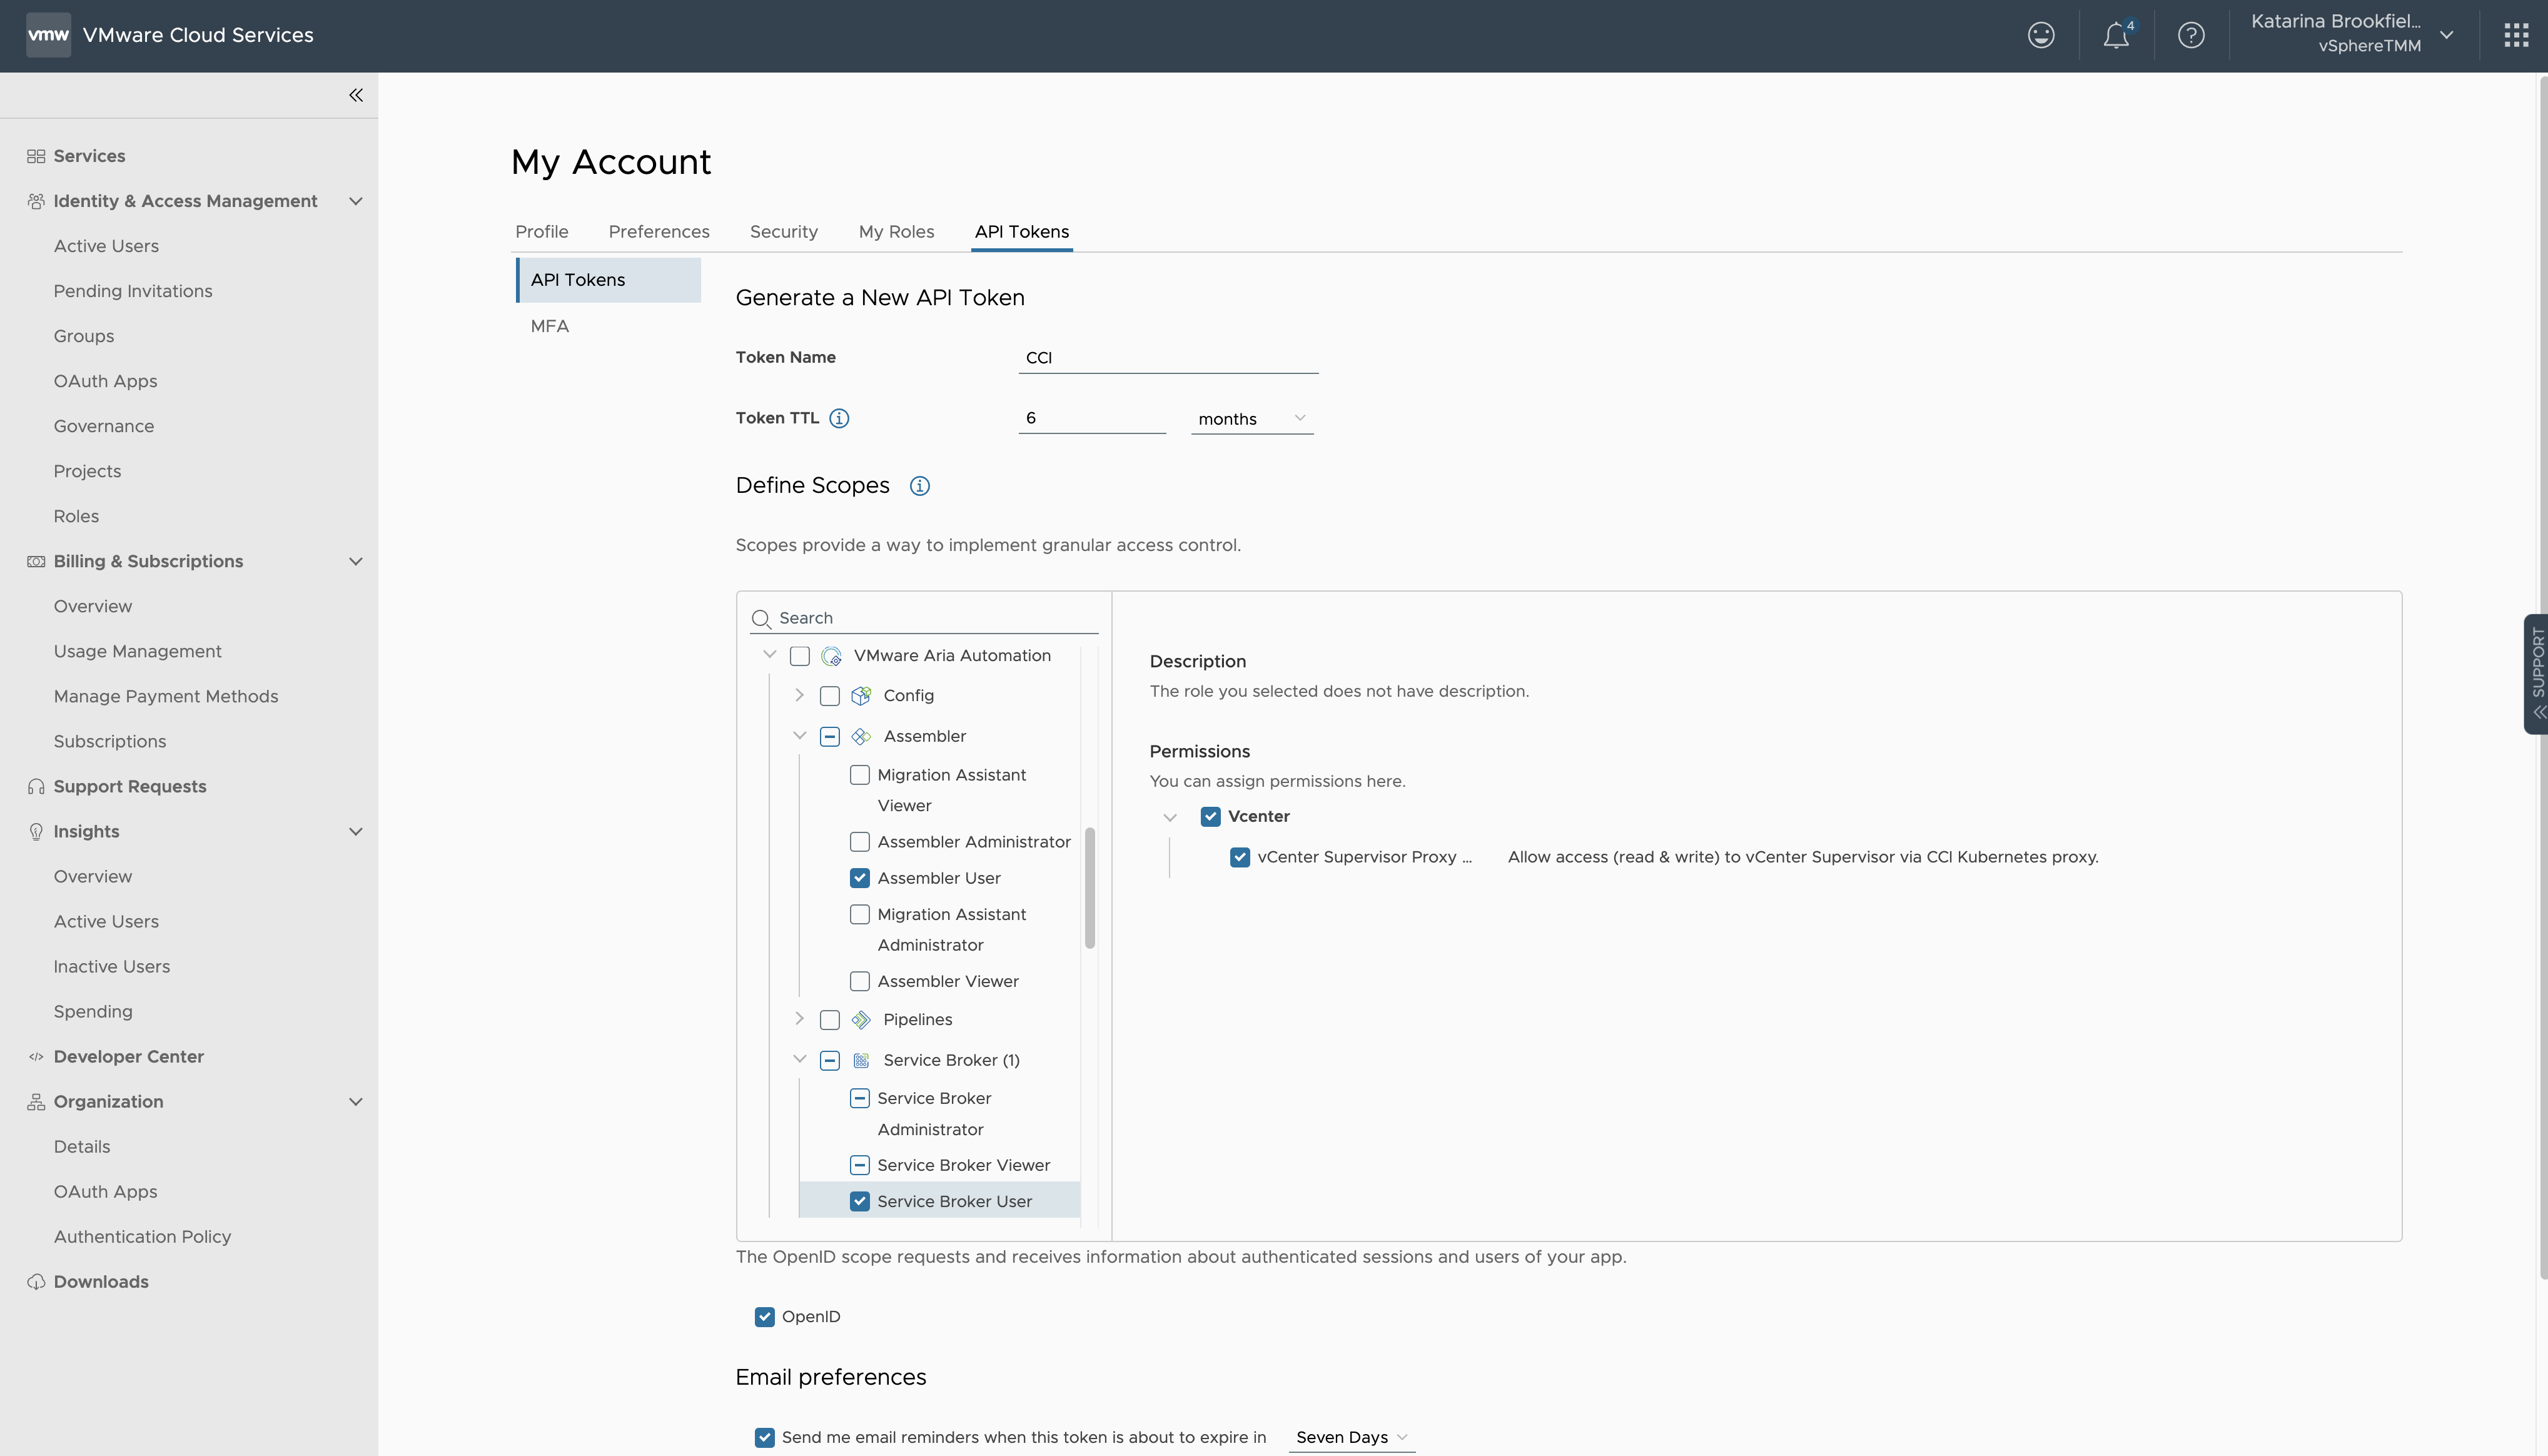
To access CCI we will have to generate an API token. This can be done in VMware Cloud Services, under My Account. Minimum required roles are Assembler User and Service Broker User.
Deploying the application via CLI
To connect to CCI using CLI, we first need to download and configure the kubectl cci plugin on our cli machine.
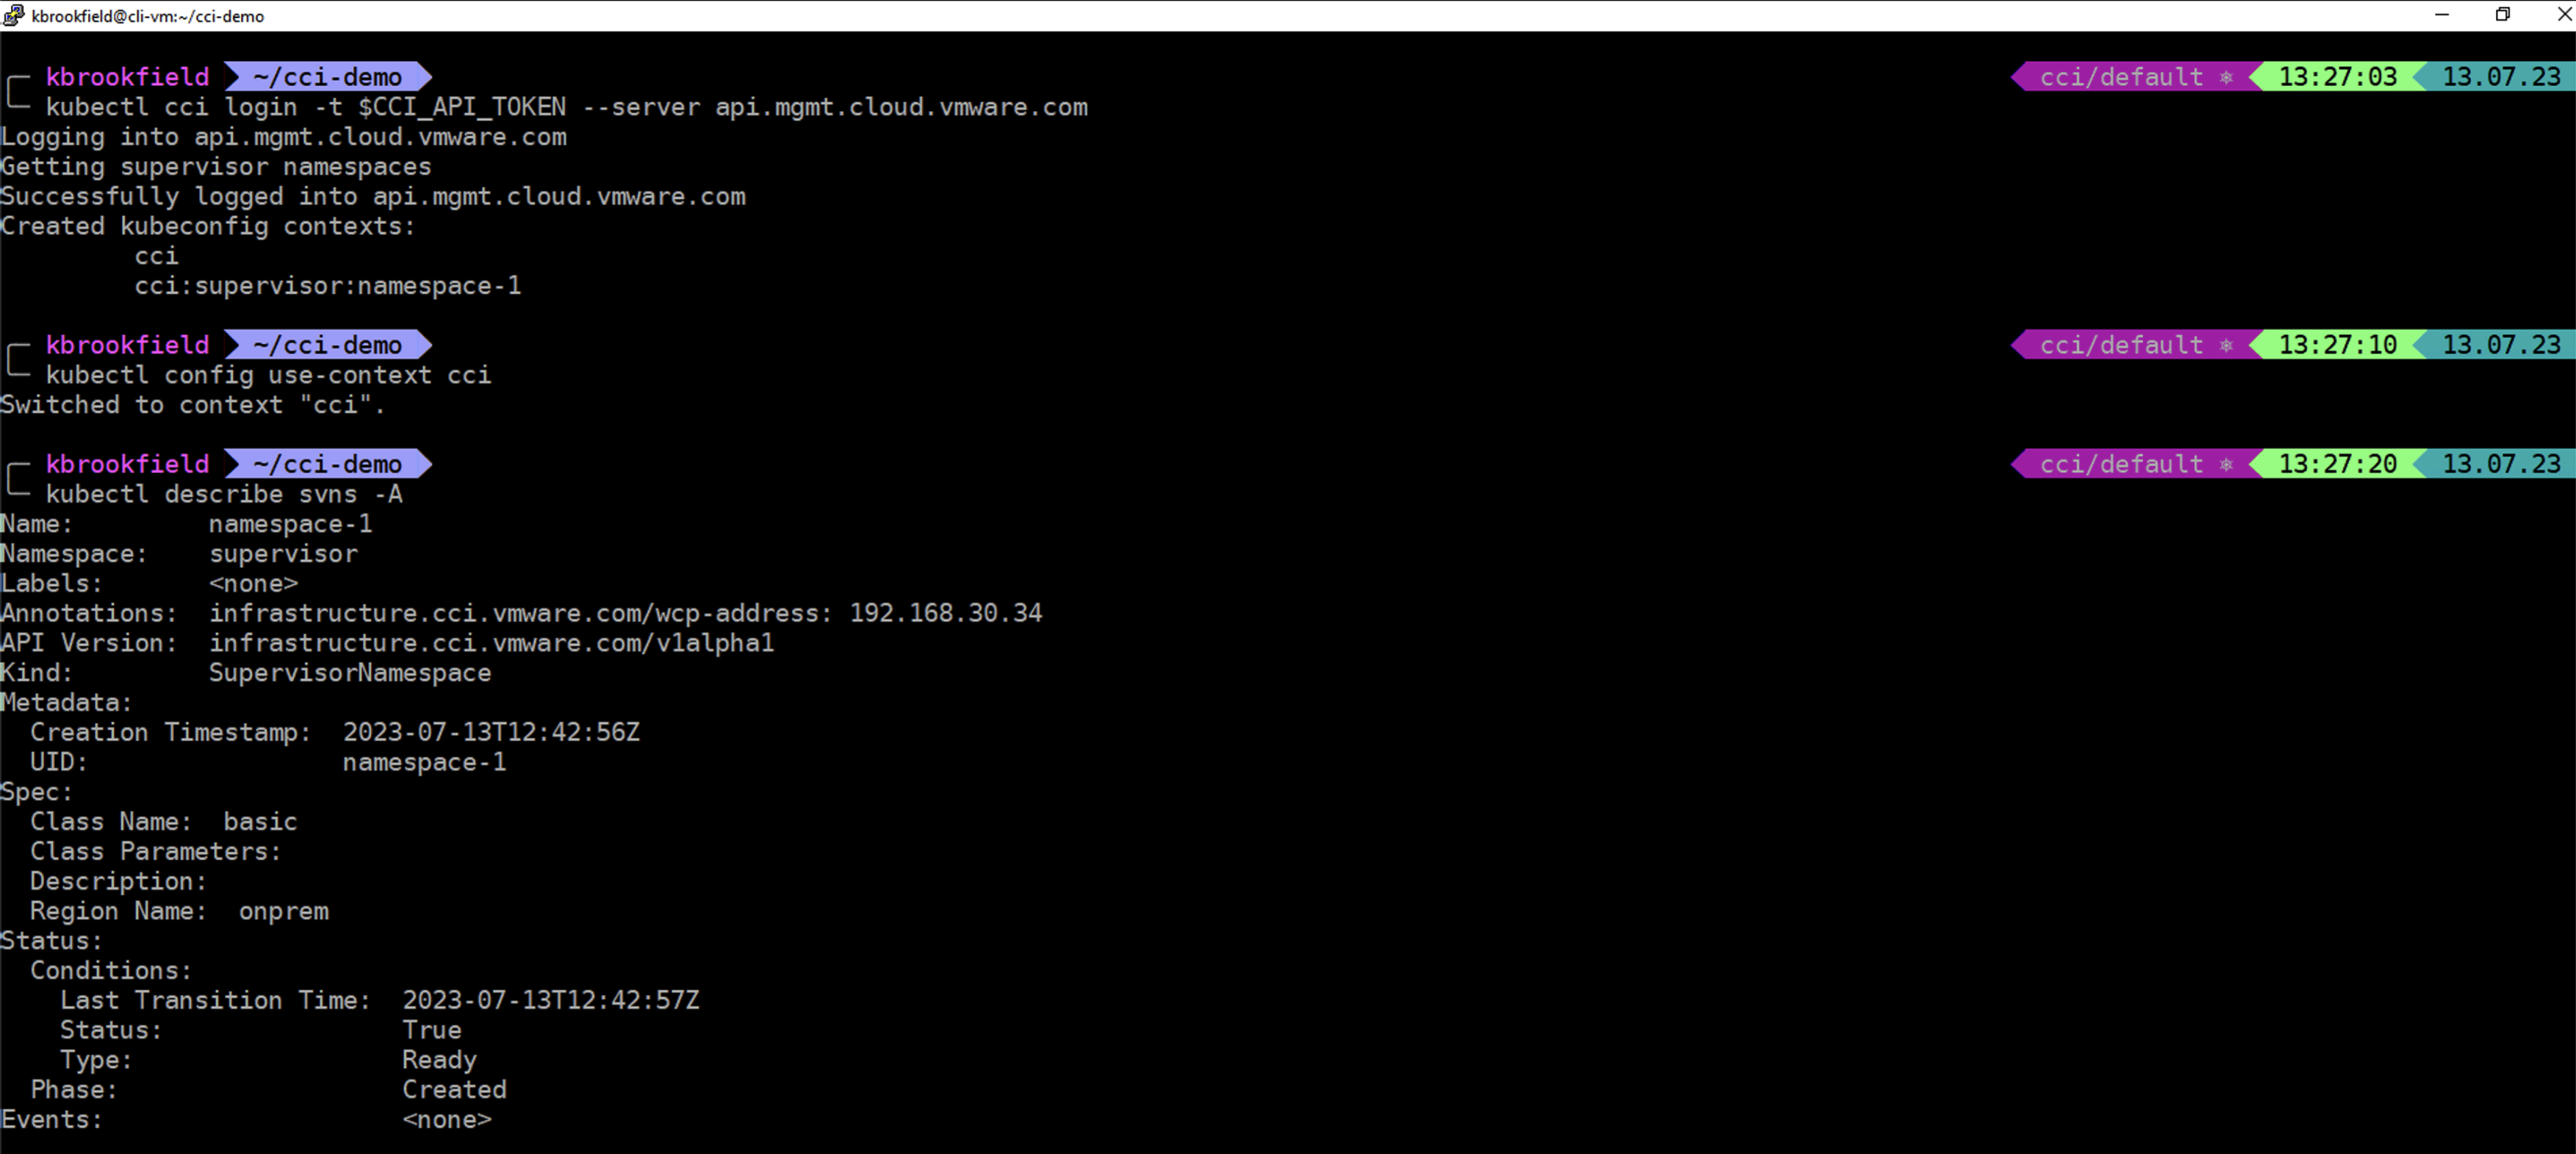
We login to CCI using the API token we have generated earlier by executing the following command:
- kubectl cci login -t token --server api.mgmt.cloud.vmware.com
Once logged in, the first thing we need to do is to obtain the Supervisor IP. To do this, we switch context to cci and describe the supervisor namespace:
- kubectl config use-context cci
- kubectl describe svns -A
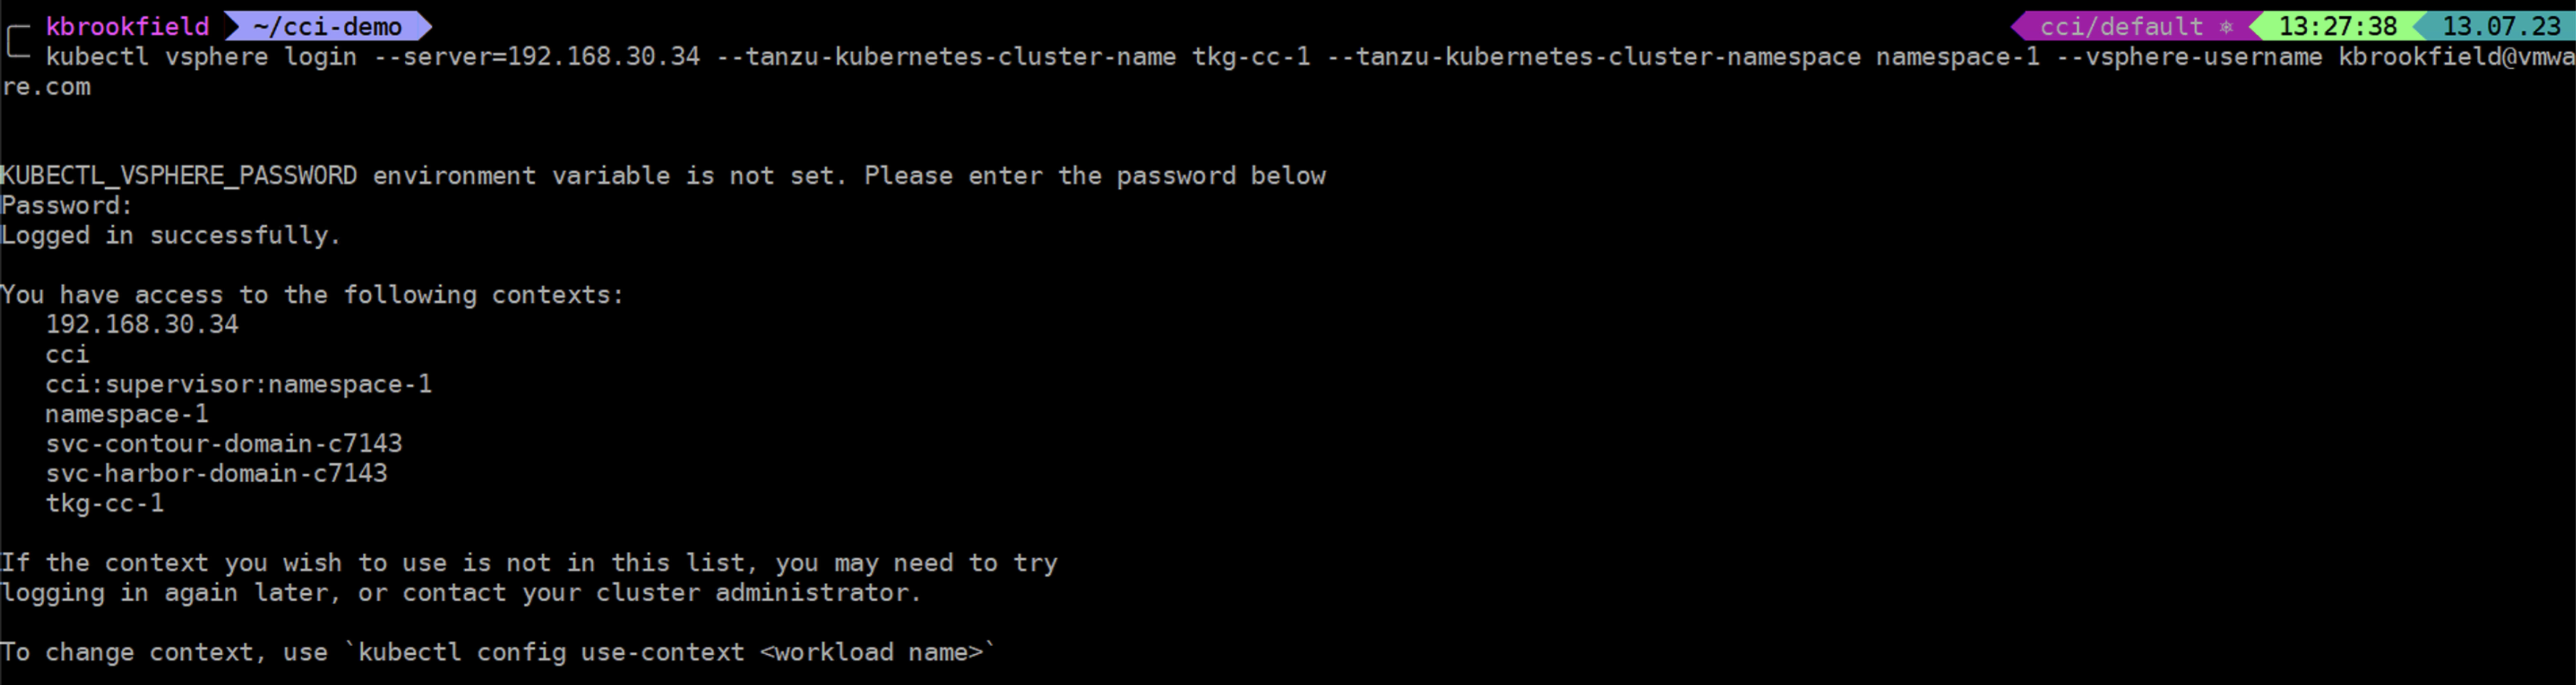
Now we can login to the tkg cluster we deployed earlier, by using the Supervisor IP and following command:
- kubectl vsphere login --server=SupervisorIP --tanzu-kubernetes-cluster-name tkg-cc-1 --tanzu-kubernetes-cluster-namespace namespace-1 --vsphere-username yourusername@domain
Now we can proceed with deploying the application in the same way as we would in any other environment.
Note: If you are interested in detailed steps, feel free to check out the previous episode where we discuss them in detail.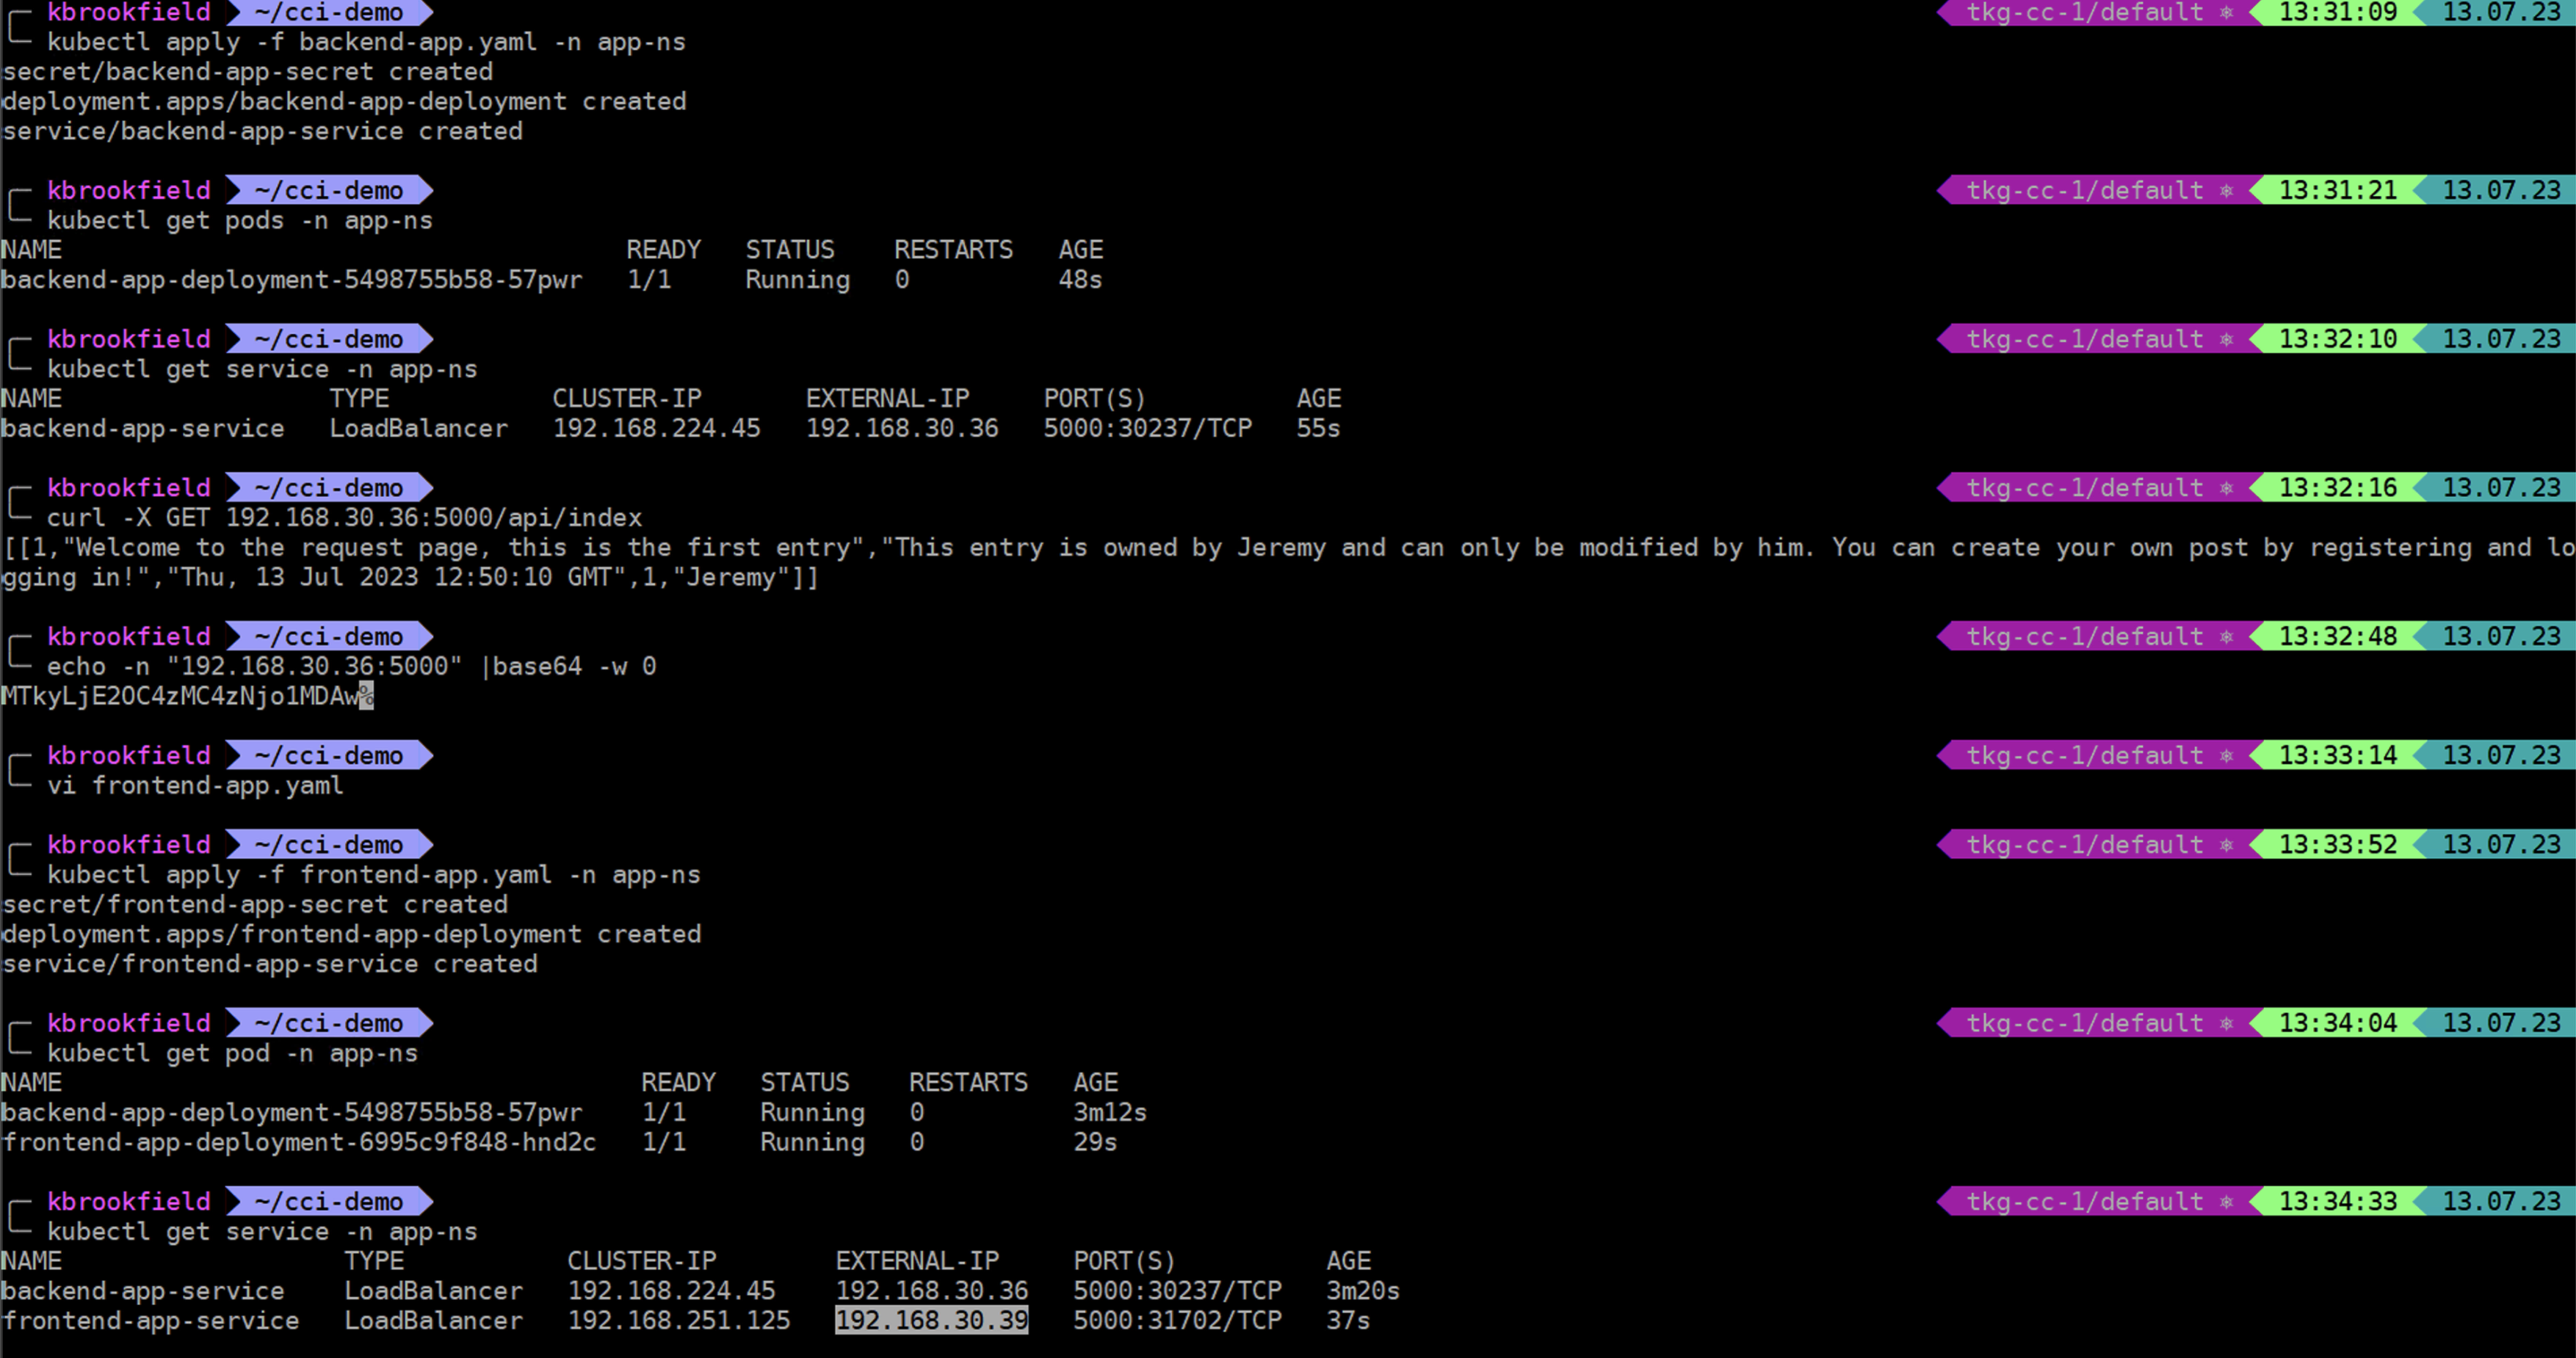
Once we have the External IP of the Frontend service, we can open it in a browser to make sure our application loads correctly. 
See this episode in action
Before you go
In this episode, we have shown you how you can deploy a 3-tier application on a Supervisor, using Cloud Consumption Interface.
For more episodes visit the Supervisor Series Activity Path.
Subscribe to our VMware vSphere YouTube channel to get notified as soon as we release new episodes.
Thank you and see you soon!